Once you have created the client’s profile in SCRAM 24/7, you should add the Remote Breath Activity and complete the device assignment.
Starting on the client’s Activities tab:
- Select the +Add a New Activity button.
- Select the Remote Breath Activity from the Activity dropdown menu on the “Add an Activity” page.
|
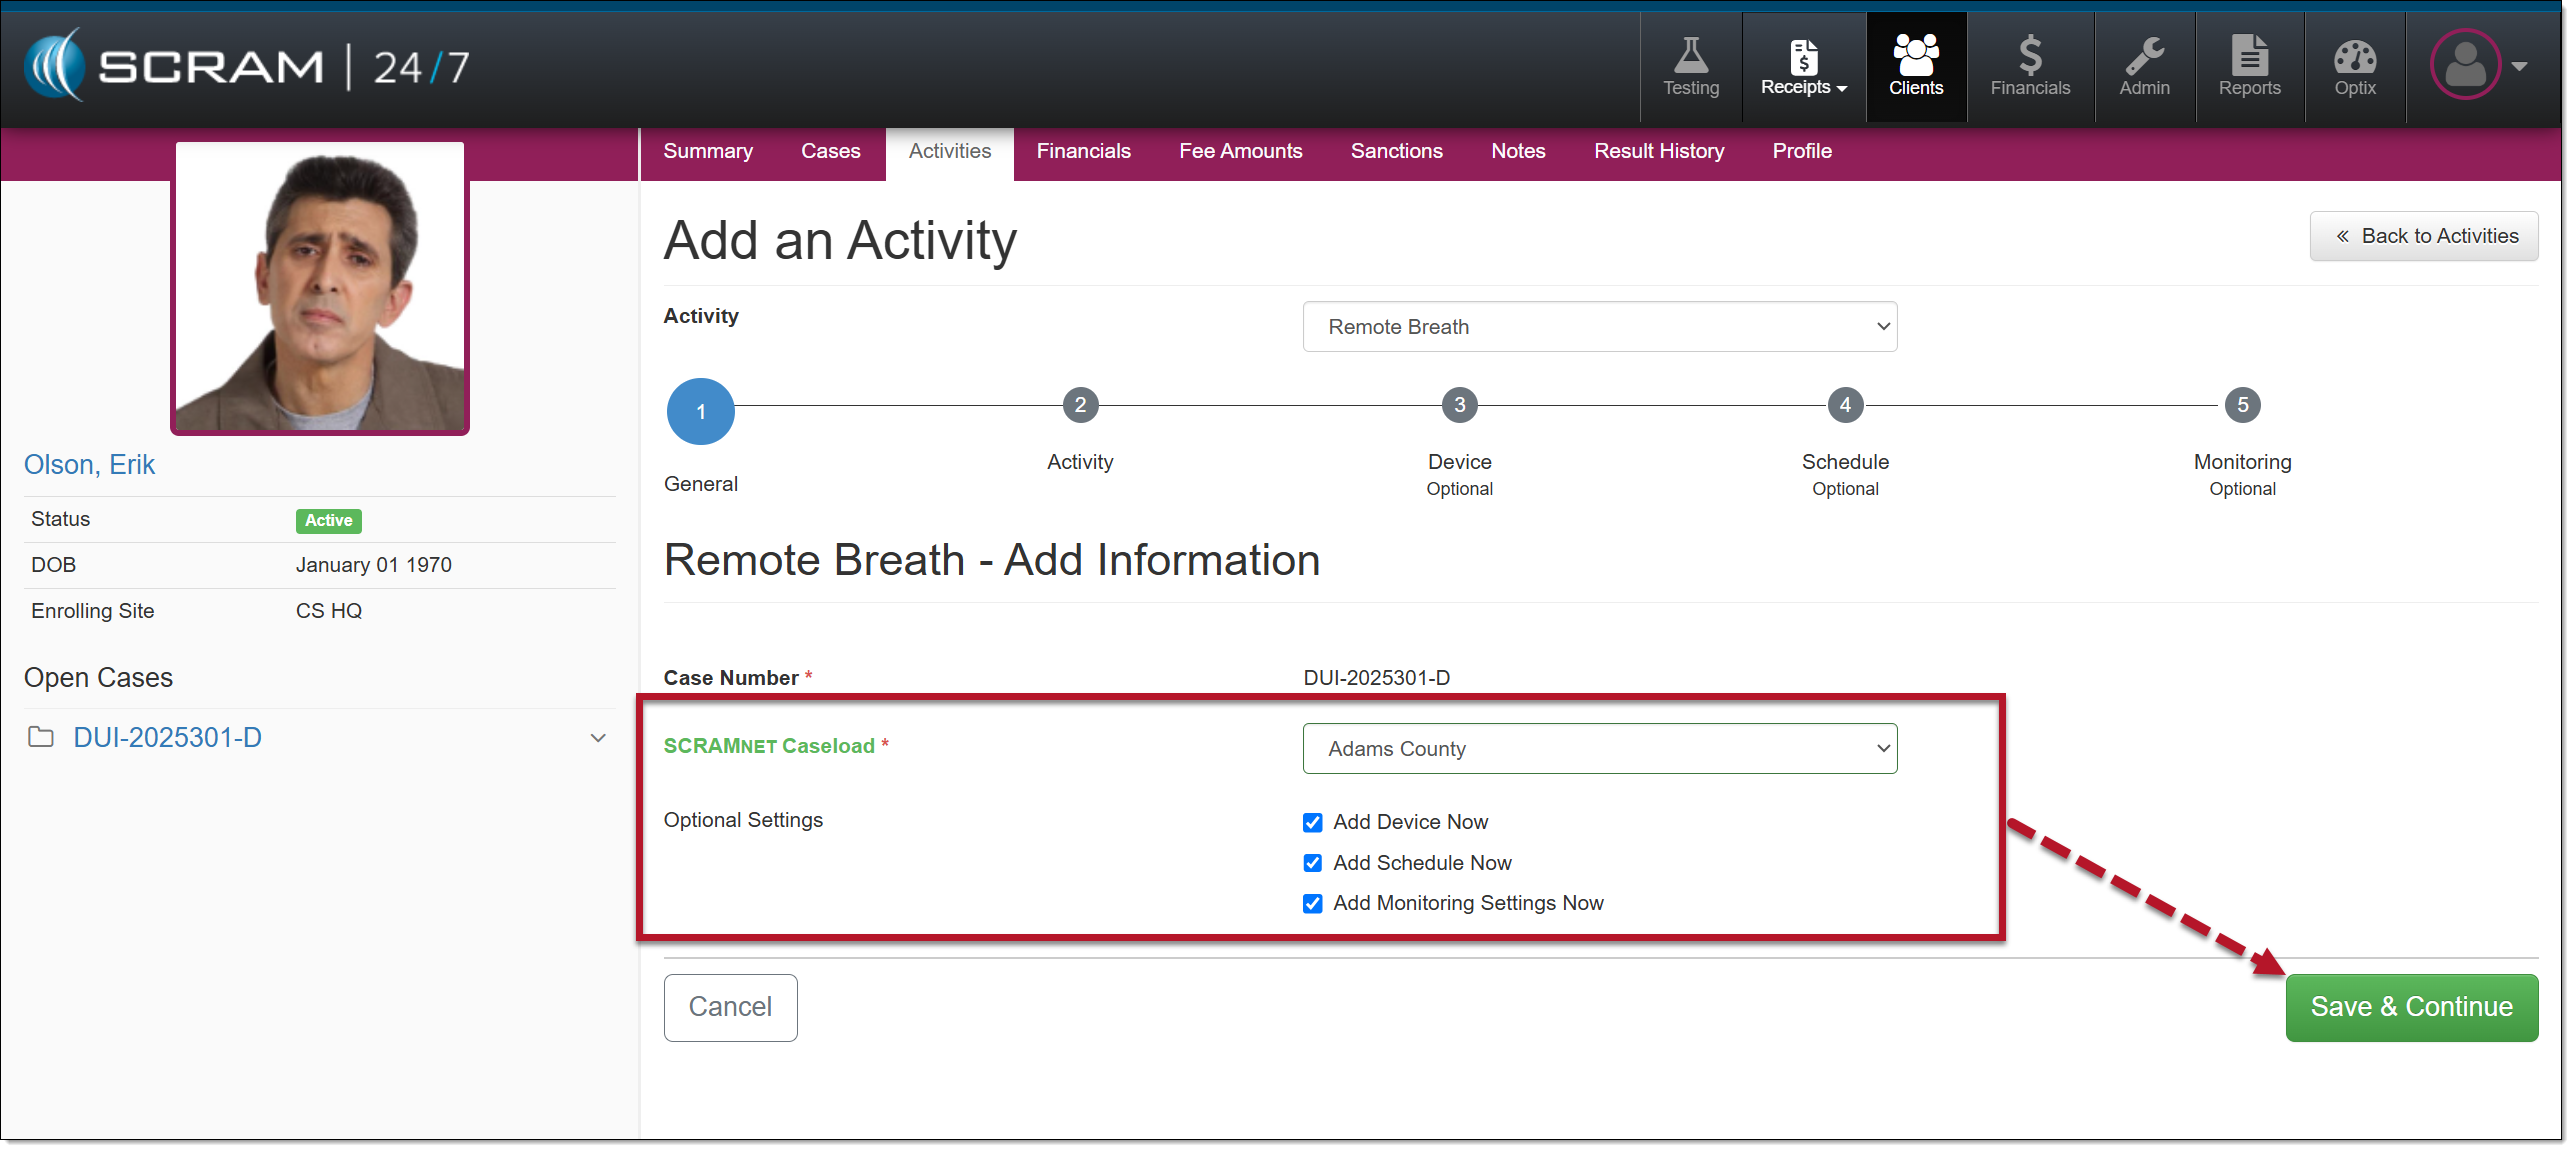
Step One – General Set Up
- Select the “SCRAMNET Caseload” from the dropdown menu.
- After making your caseload selection, in the “Optional Settings,” select the checkbox next to each option to add it to the workflow, or leave it unchecked if you will add the information later.
- Select the Save & Continue button.
Add Remote Breath Activity Step One
|
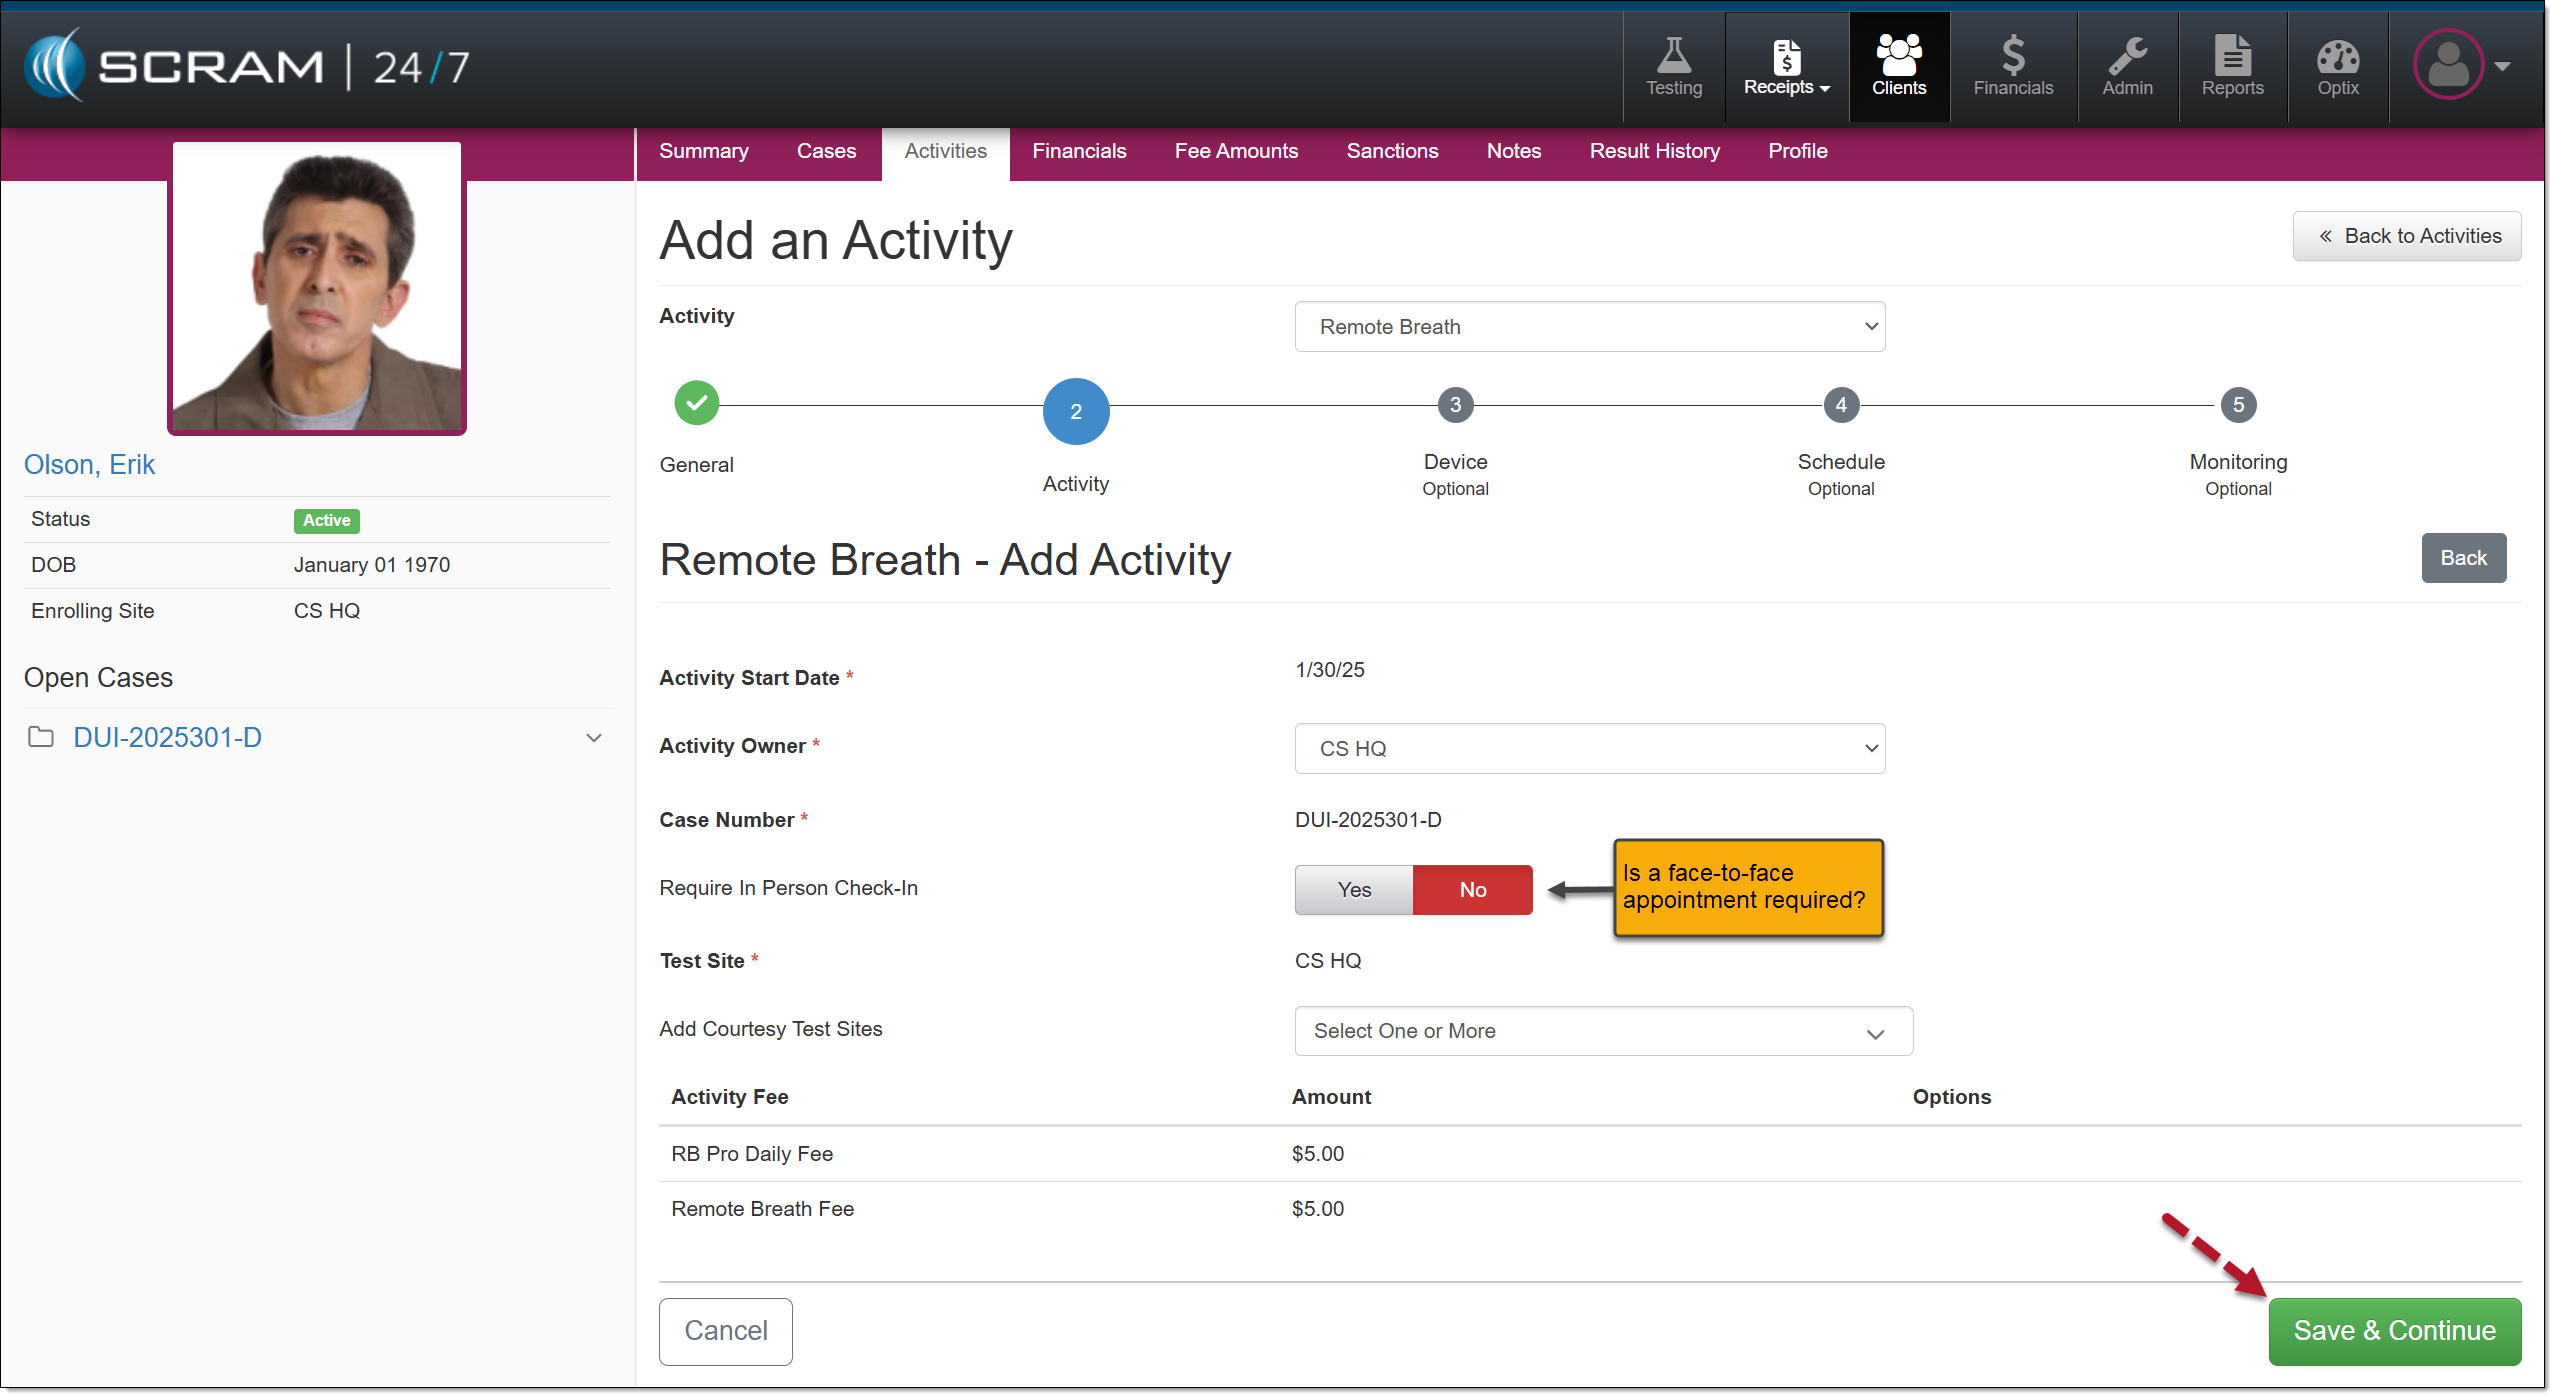
Step Two – Activity Set Up
- Add the Activity details.
- The “Required In-Person Check-In” option establishes whether you would like to schedule a recurring face-to-face appointment with the client. When this option is set to “Yes,” you will enter the appointment details.
- Once saved, the appointment is visible on the client’s Activity Calendar on the Summary page and will populate on the Testing Dashboard on the appointment date.
- Verify or adjust the Activity fees for the client.
- After making your selections, select the Save & Continue button.
Remote Breath Add Activity
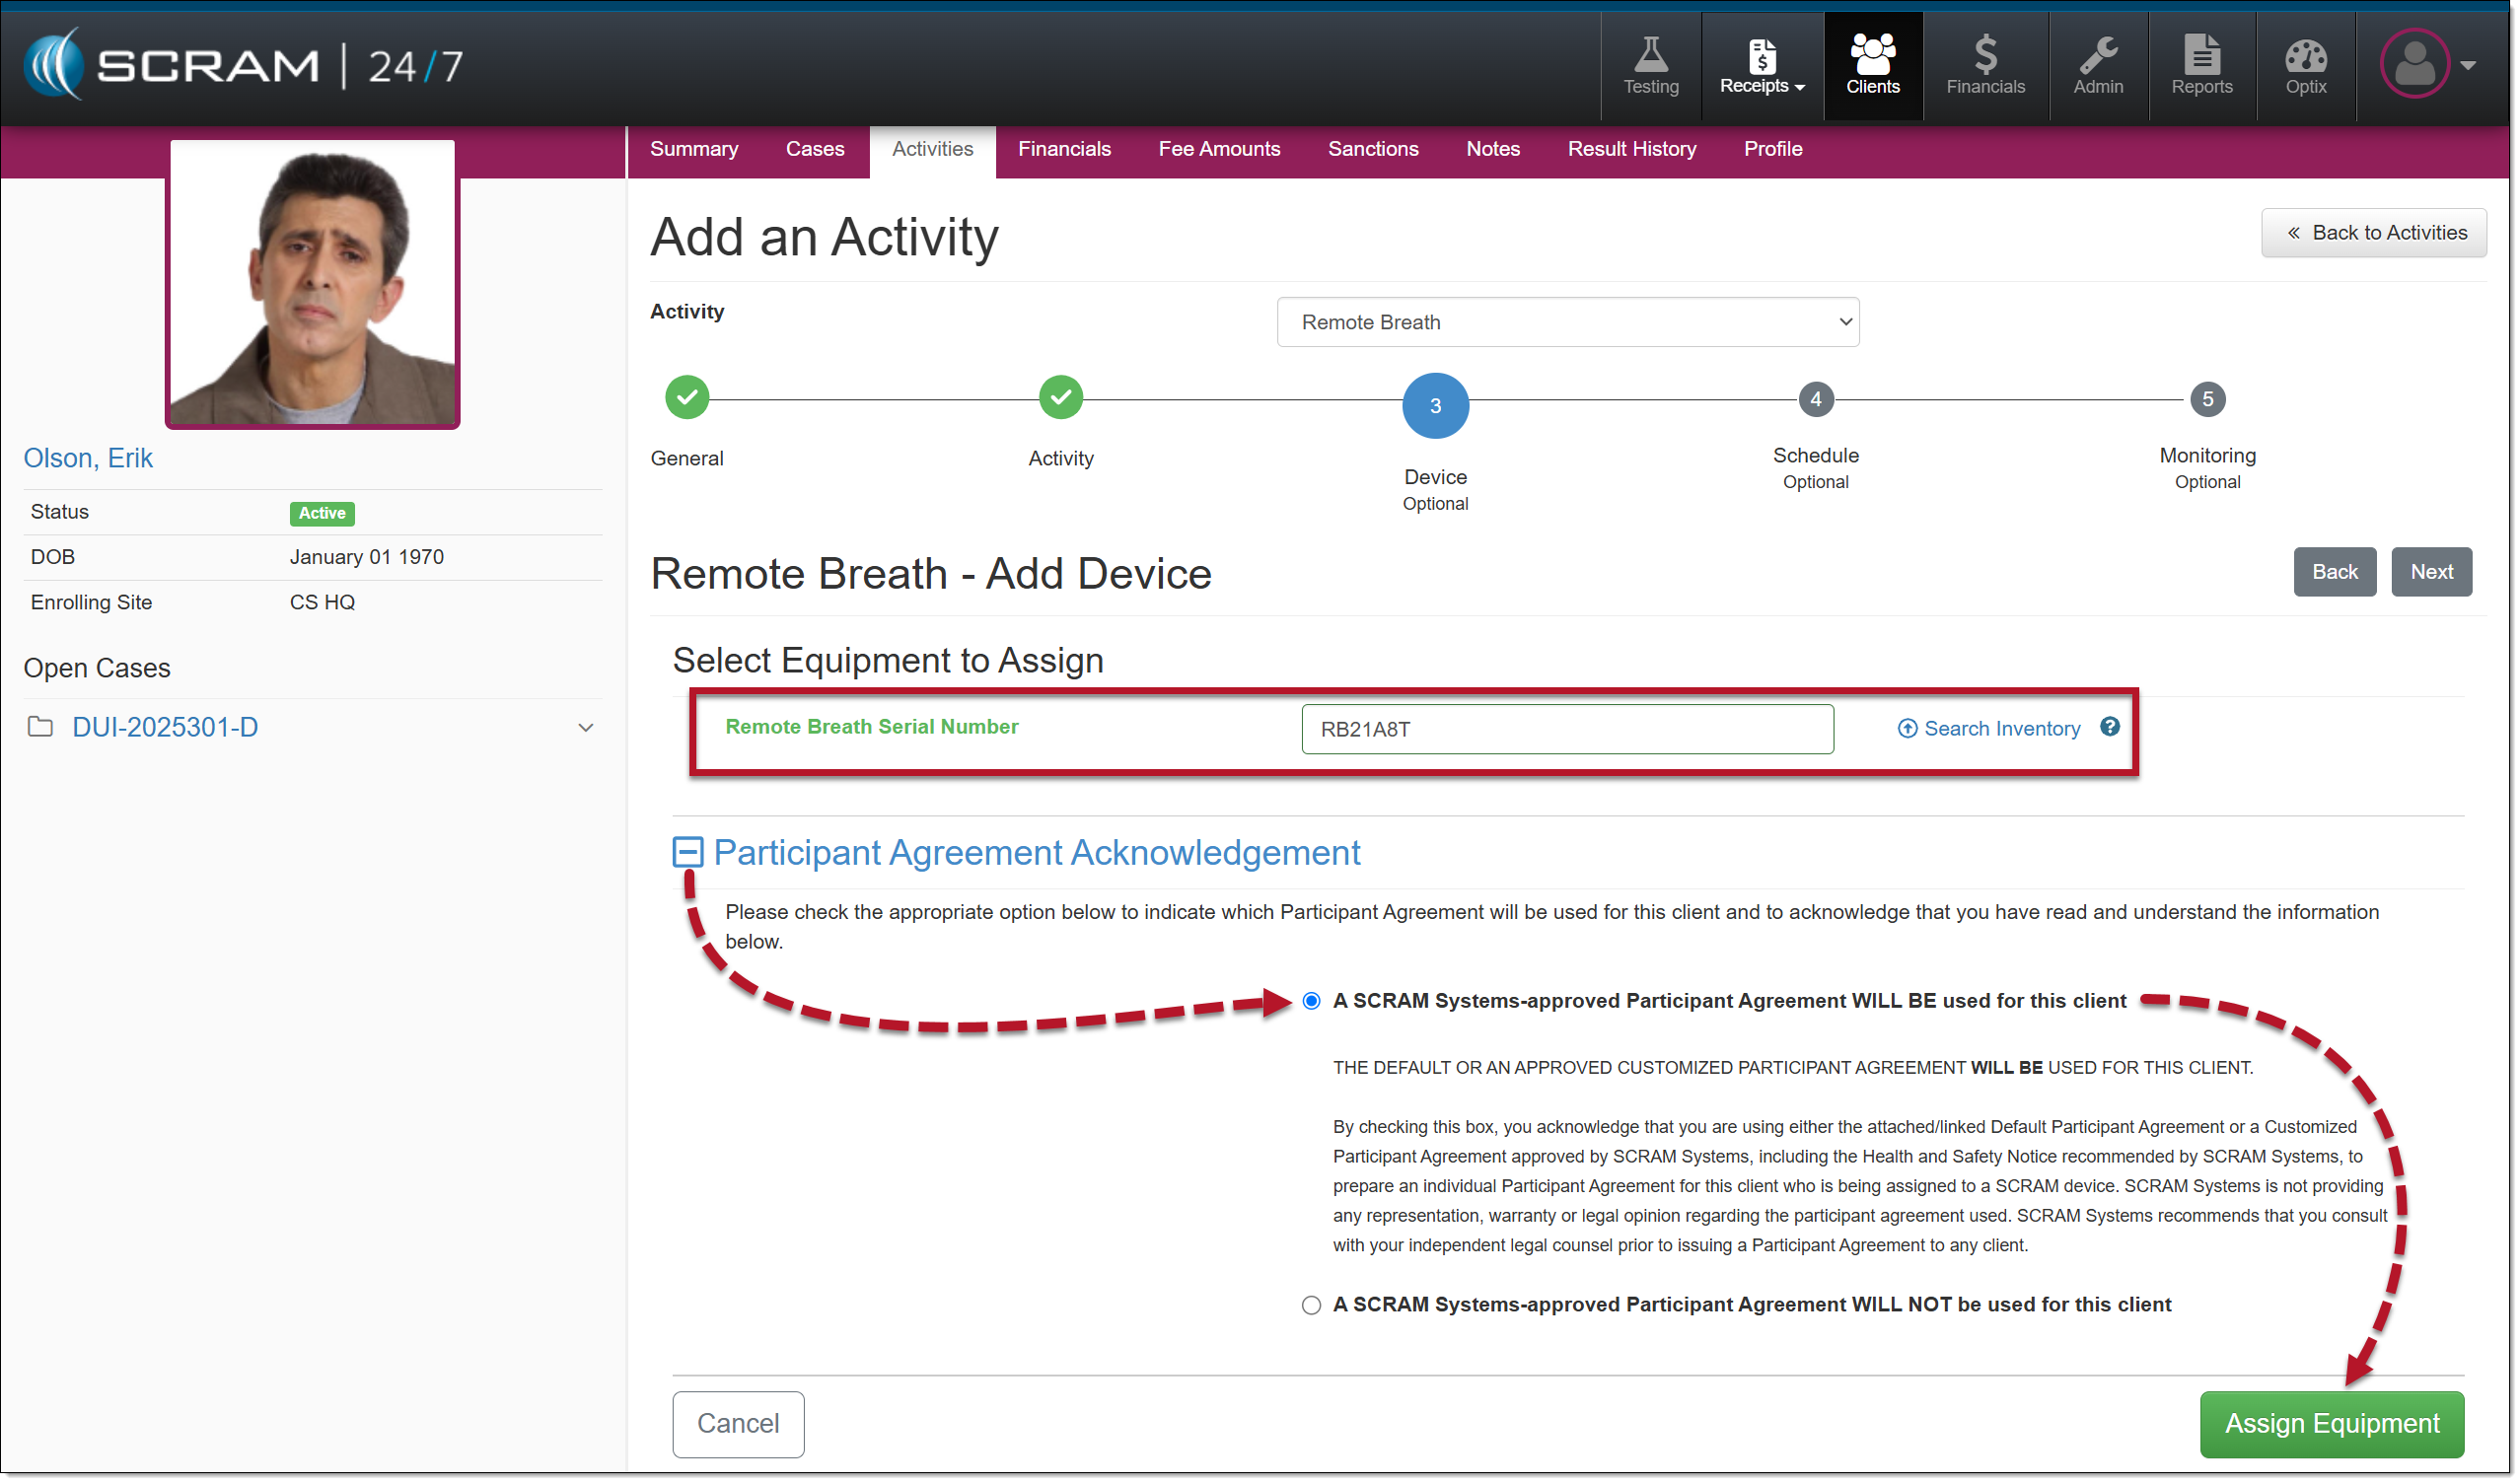
Step Three – Device Set Up
- Now, you may enter the device’s serial number and select the appropriate Participant Agreement Acknowledgement option.
- Once complete, select the Assign Equipment button.
Remote Breath – Add Device
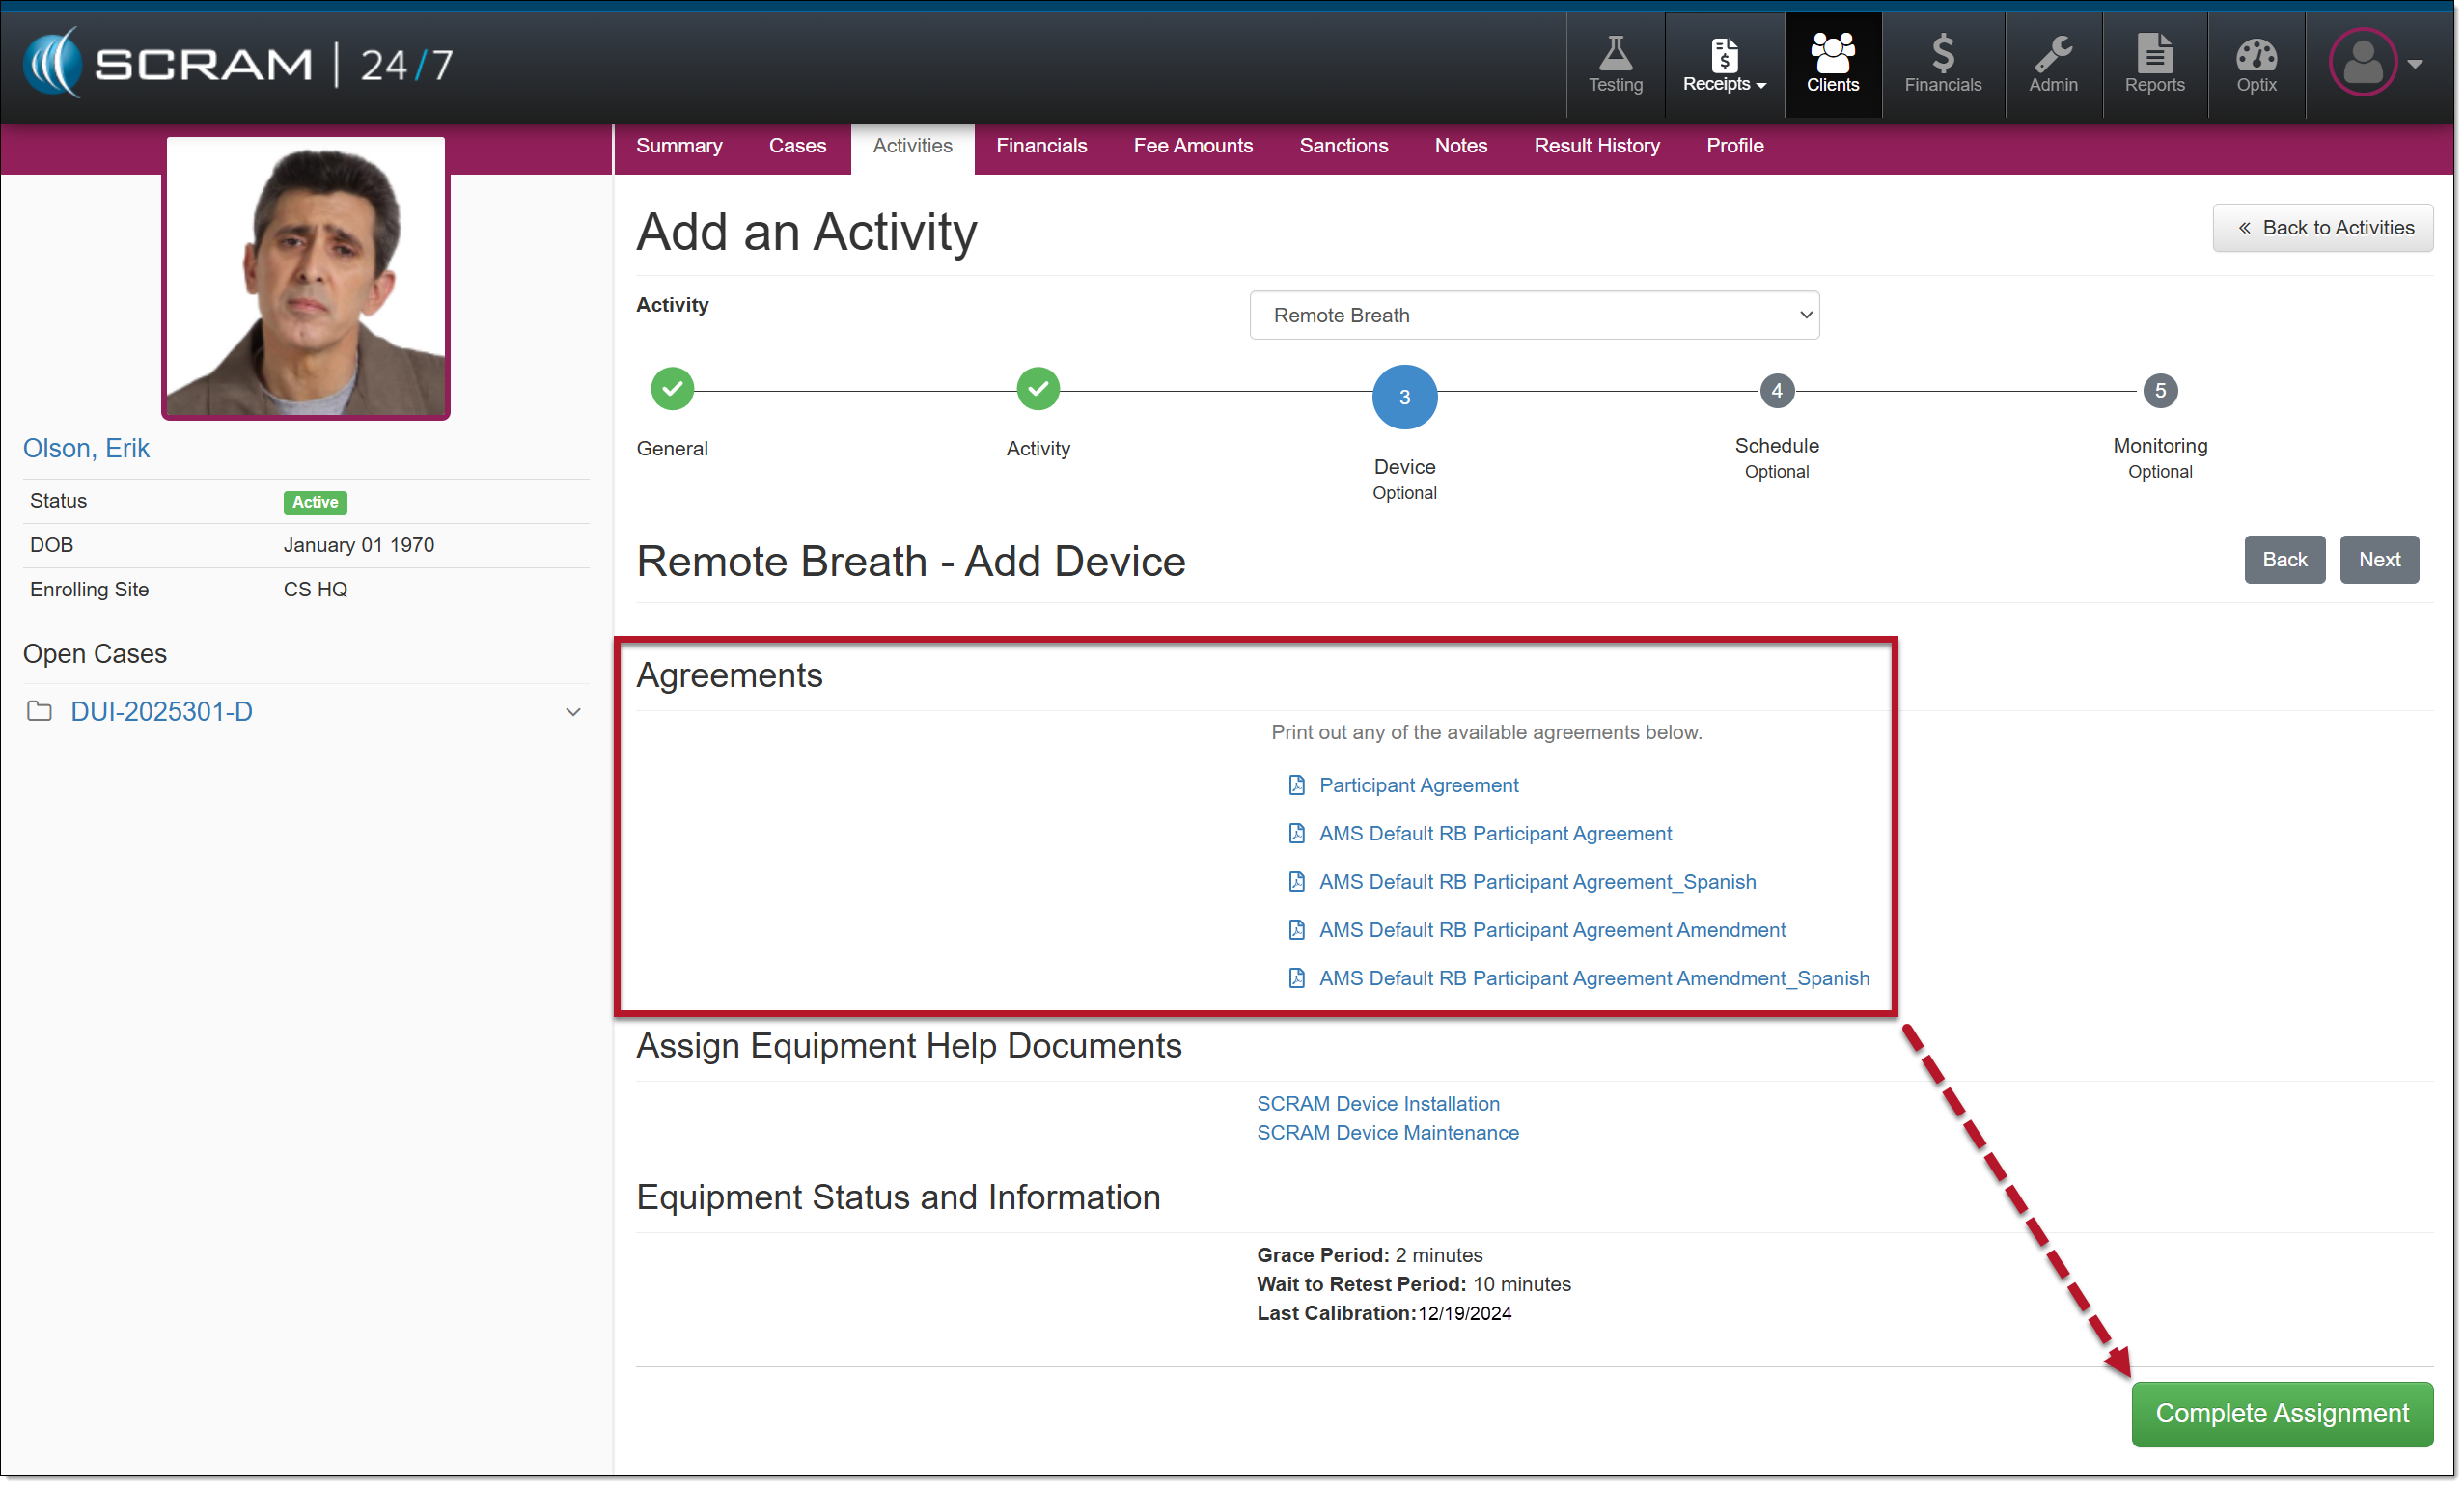
- Access and print the Participant Agreement form for the client to sign. In addition, you may access the SCRAM Device Installation help documentation.
- Next, select the Complete Assignment button.
Participant Agreement hyperlink
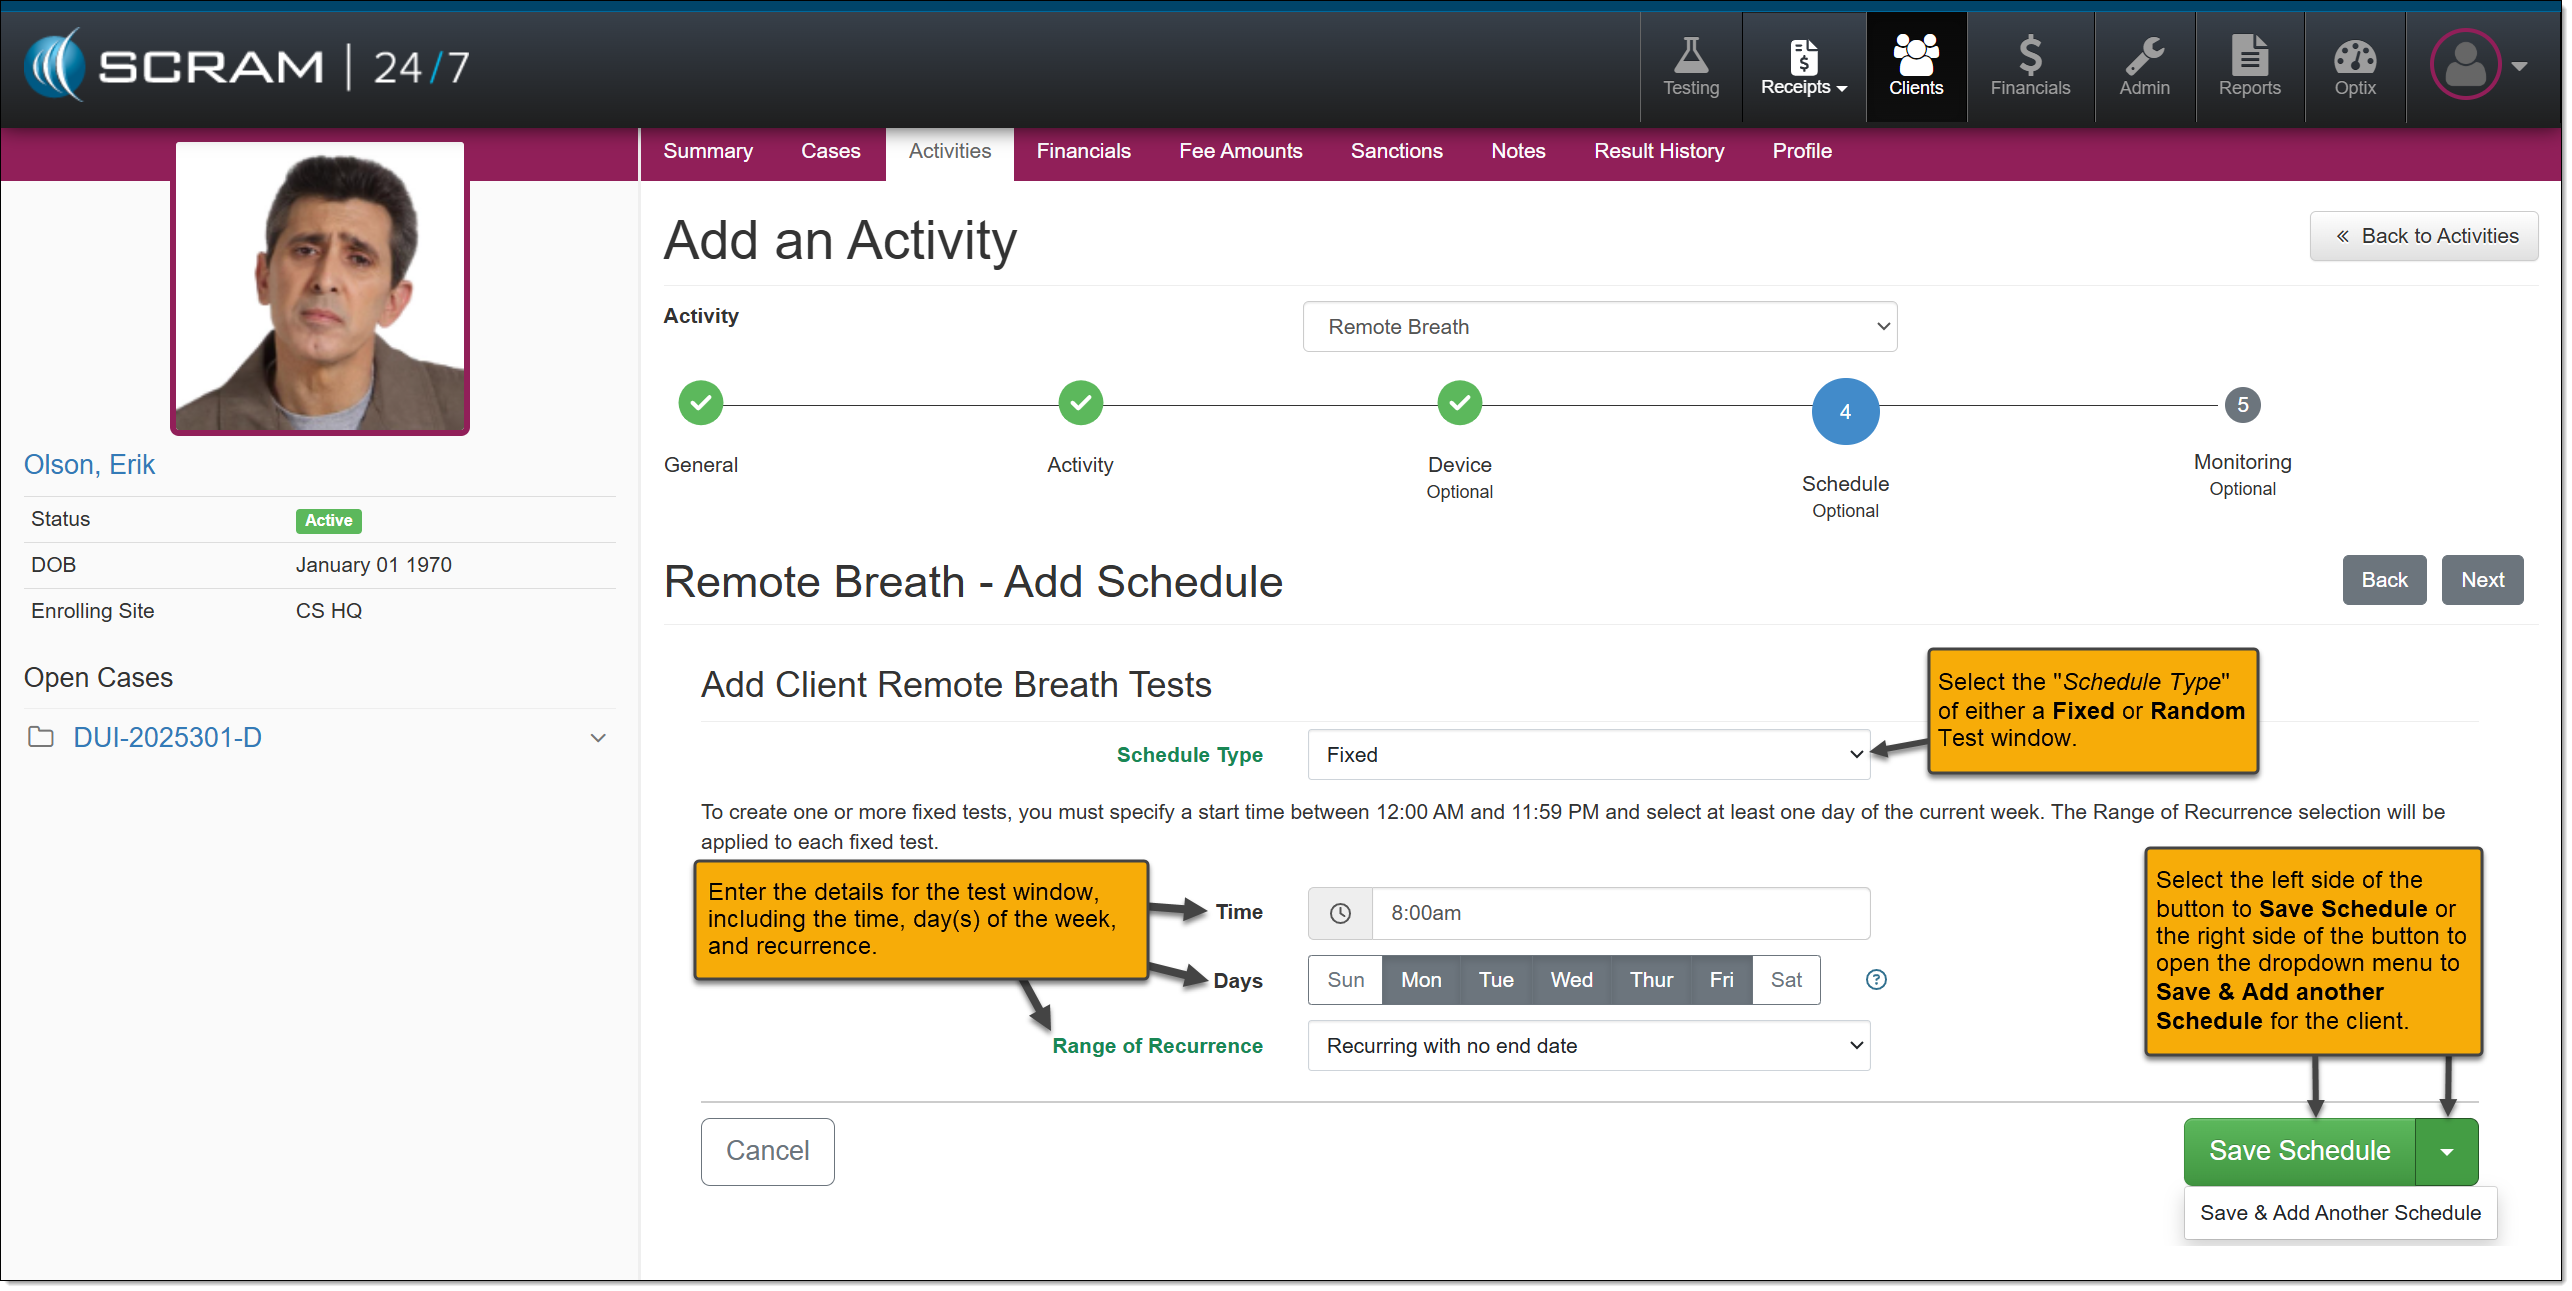
Step Four – Breath Testing Schedule Set Up
You may enter the client’s breath testing schedule in the Schedule step.
- Select a Fixed or Random breath test window from the “Schedule Type” dropdown menu.
- Enter the:
- Test Time.
- Select each day(s) of the week to schedule the test.
- And the Range of Recurrence from the dropdown menu.
- Select the left side of the Save Schedule button to save the information and continue to the next section, or the right side of the “Save Schedule” button and select the Save & Add Another Schedule to the client’s breath testing schedule.
Breath Test Schedule
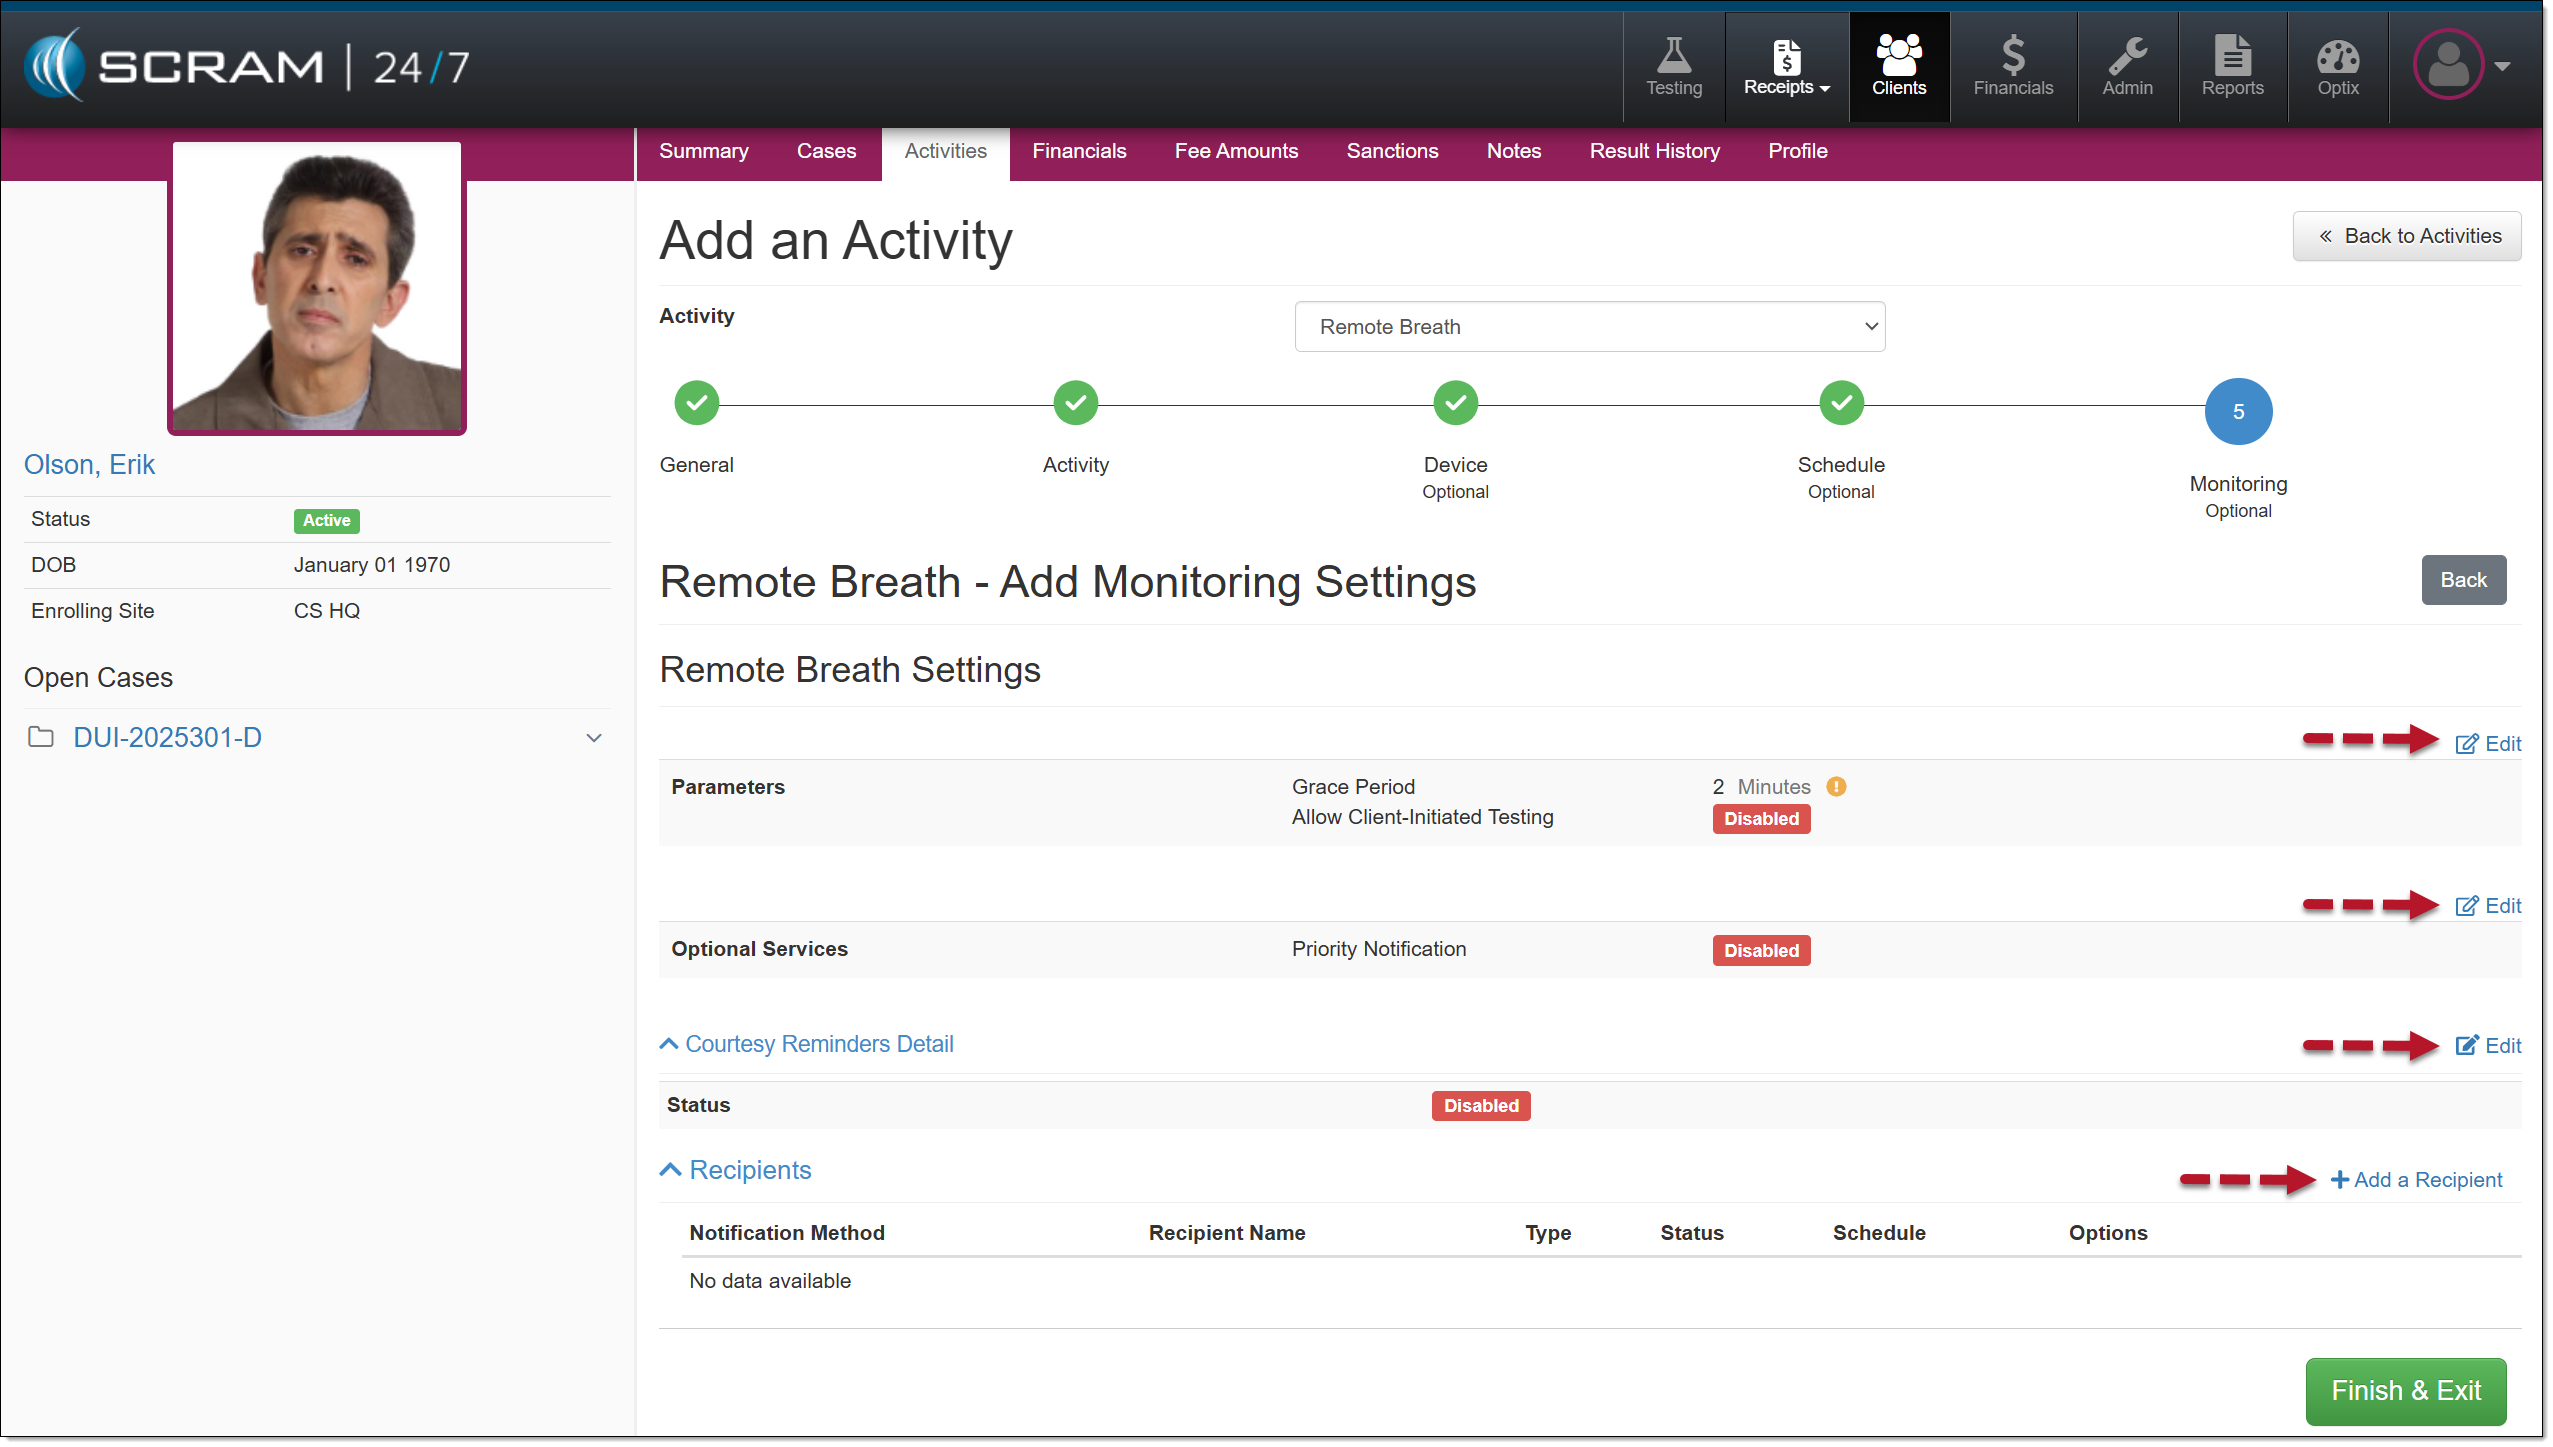
Step Five – Monitoring Set Up
On the Monitoring step, you may edit the Remote Breath settings for the client. This includes the Grace Period, Priority Notification, Courtesy Reminders, and non-SCRAM user Recipient notifications.
- Select the Edit or the +Add a Recipient hyperlink next to each option to edit each field.
Default Remote Breath – Add Monitoring Settings
- Remote Breath Settings:
- Adjust the client’s “Grace Period.” The “Grace Period” is the amount of time the client has to provide the breath sample after the device prompts them to do so.
- Enable Client-Initiated (voluntary) Testing. These voluntary tests do not replace a “scheduled breath test.”
- Select the Save Changes button after editing the Remote Breath Settings.

Remote Breath Settings
- Optional Services:
- Enable Priority Notification. Once enabled, notifications are sent to SCRAM users via email or text within 15 minutes of the alert or event received in SCRAMNET. These users are managed in SCRAMNET on the Caseload’s Monitoring page.
- Select the Save Changes button once Priority Notification is Enabled.

Priority Notification
| For step-by-step instructions on Priority Notification management, visit the Enabling Priority Notification for a Caseload help article. |
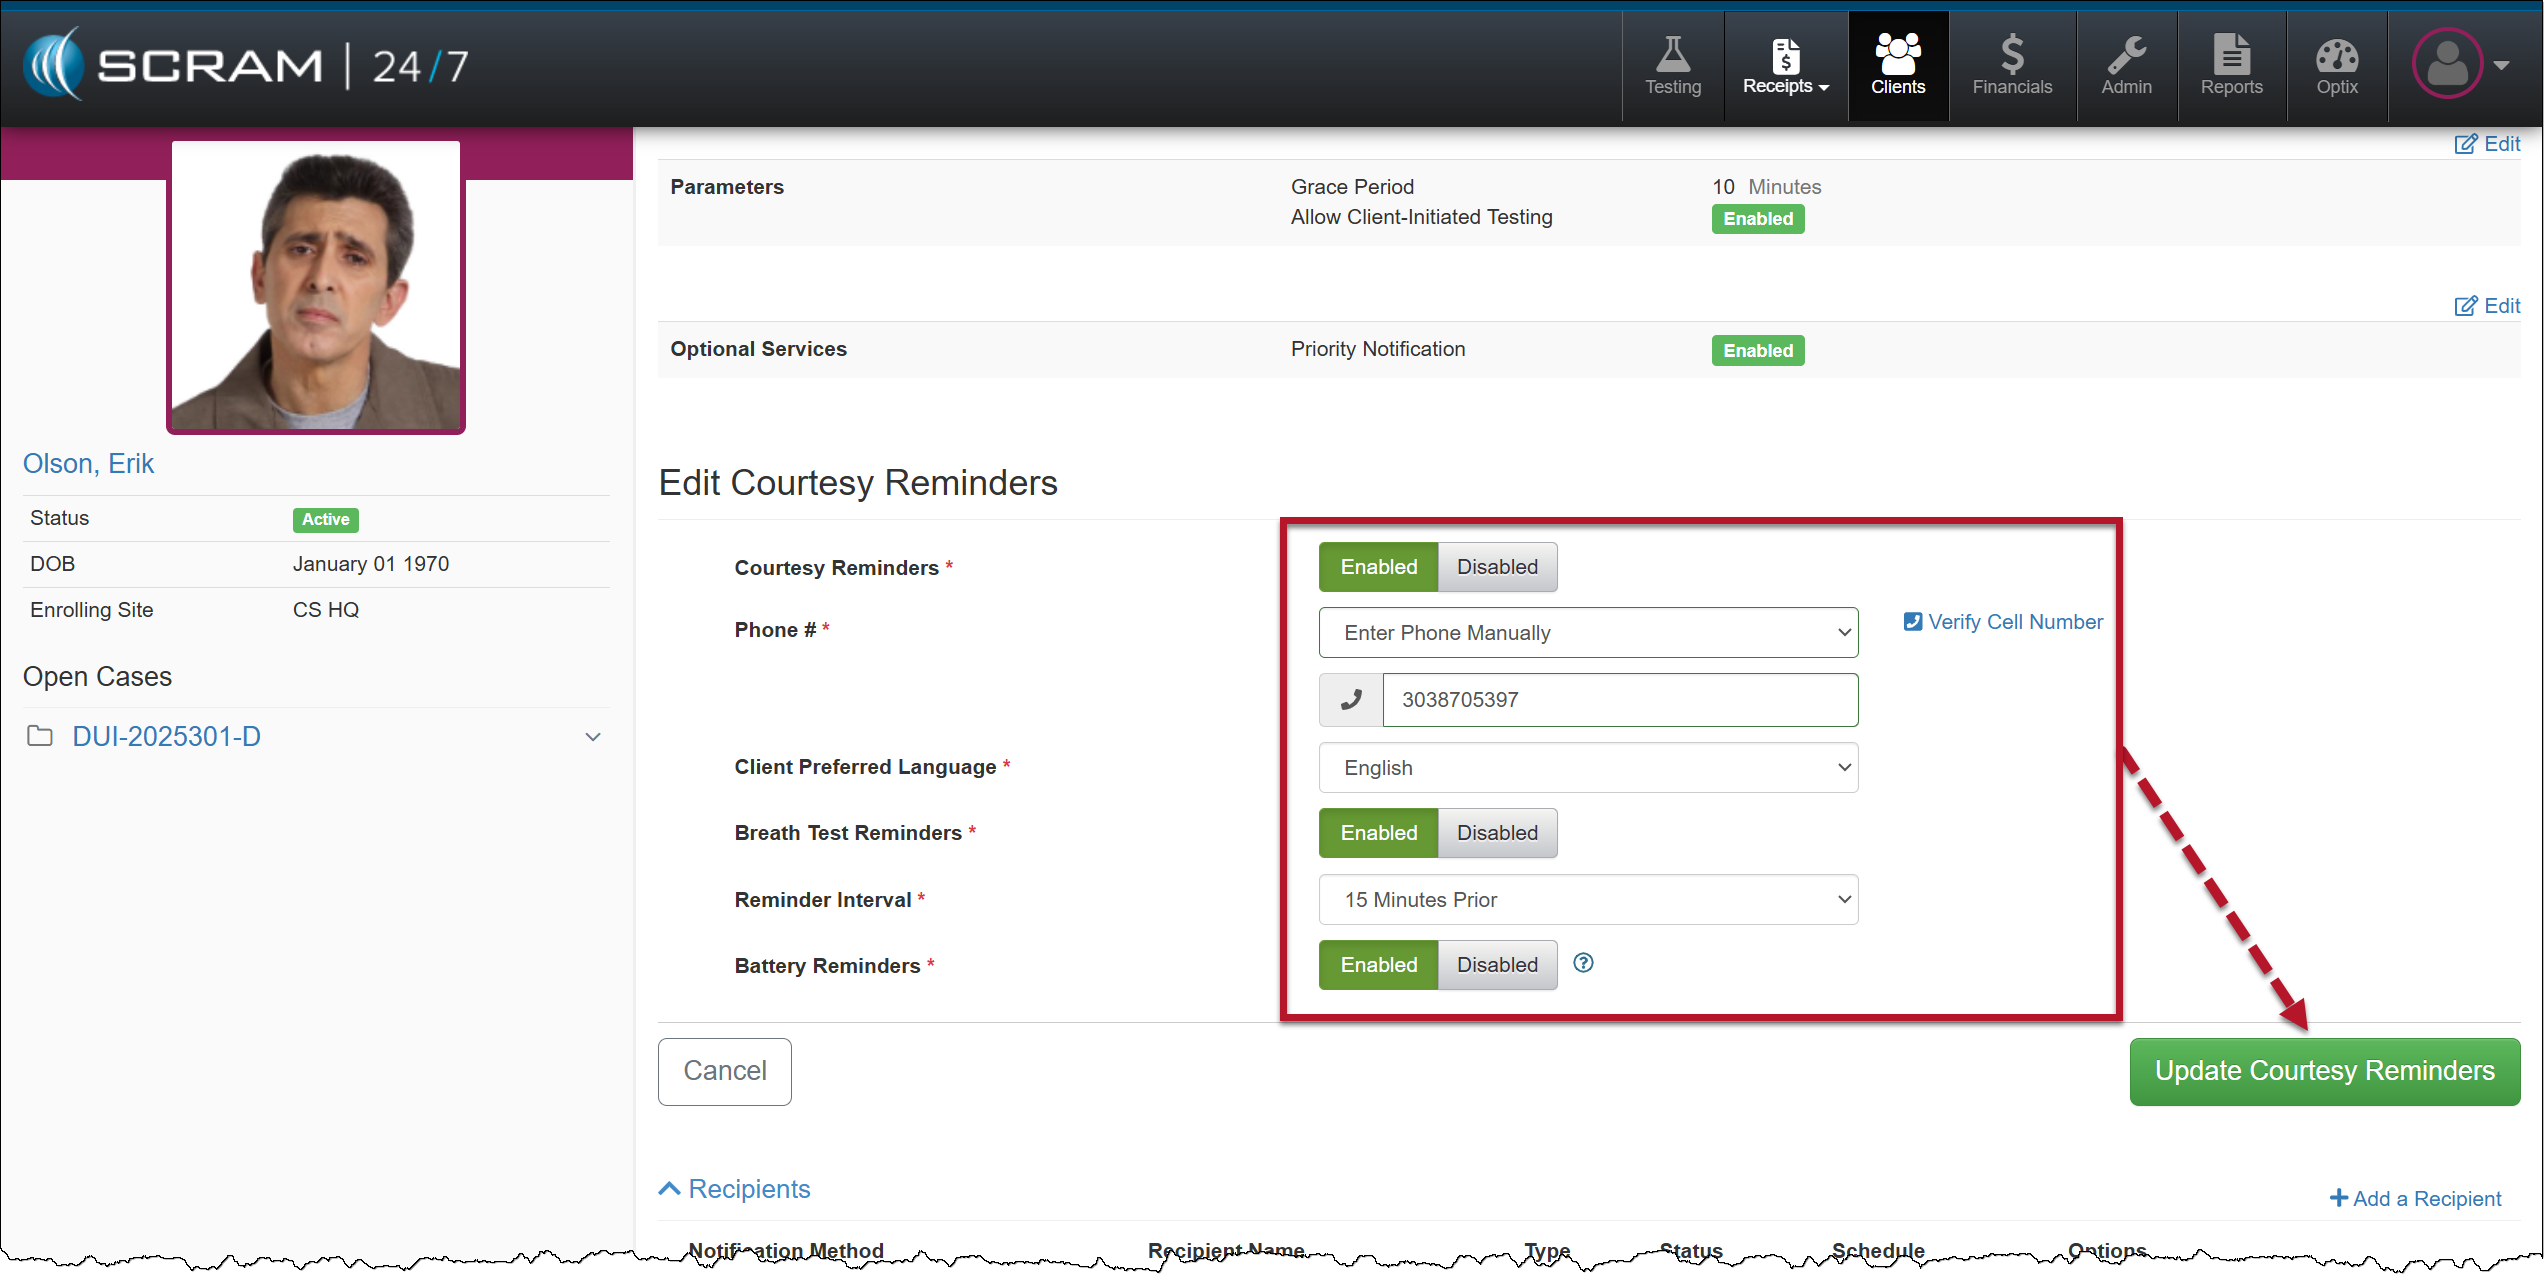
- Courtesy Reminders Detail:
- Toggle the Disabled button to Enabled.
- Once enabled, select the Enter Phone Manually option from the Phone # dropdown menu and enter the client’s cell phone number.
- If needed, verify the client’s cell number is entered correctly by selecting the Verify Cell Number hyperlink.
- Select the Client Preferred Language: English or Spanish.
- Enable the Breath Test Reminder and select when the client will receive a text message.
- At Test Time.
- 15 Minutes Prior to the scheduled test.
- 30 Minutes Prior to the scheduled test.
- Enable the Battery Reminder option.
- Select the Update Courtesy Reminders button.
Courtesy Reminders
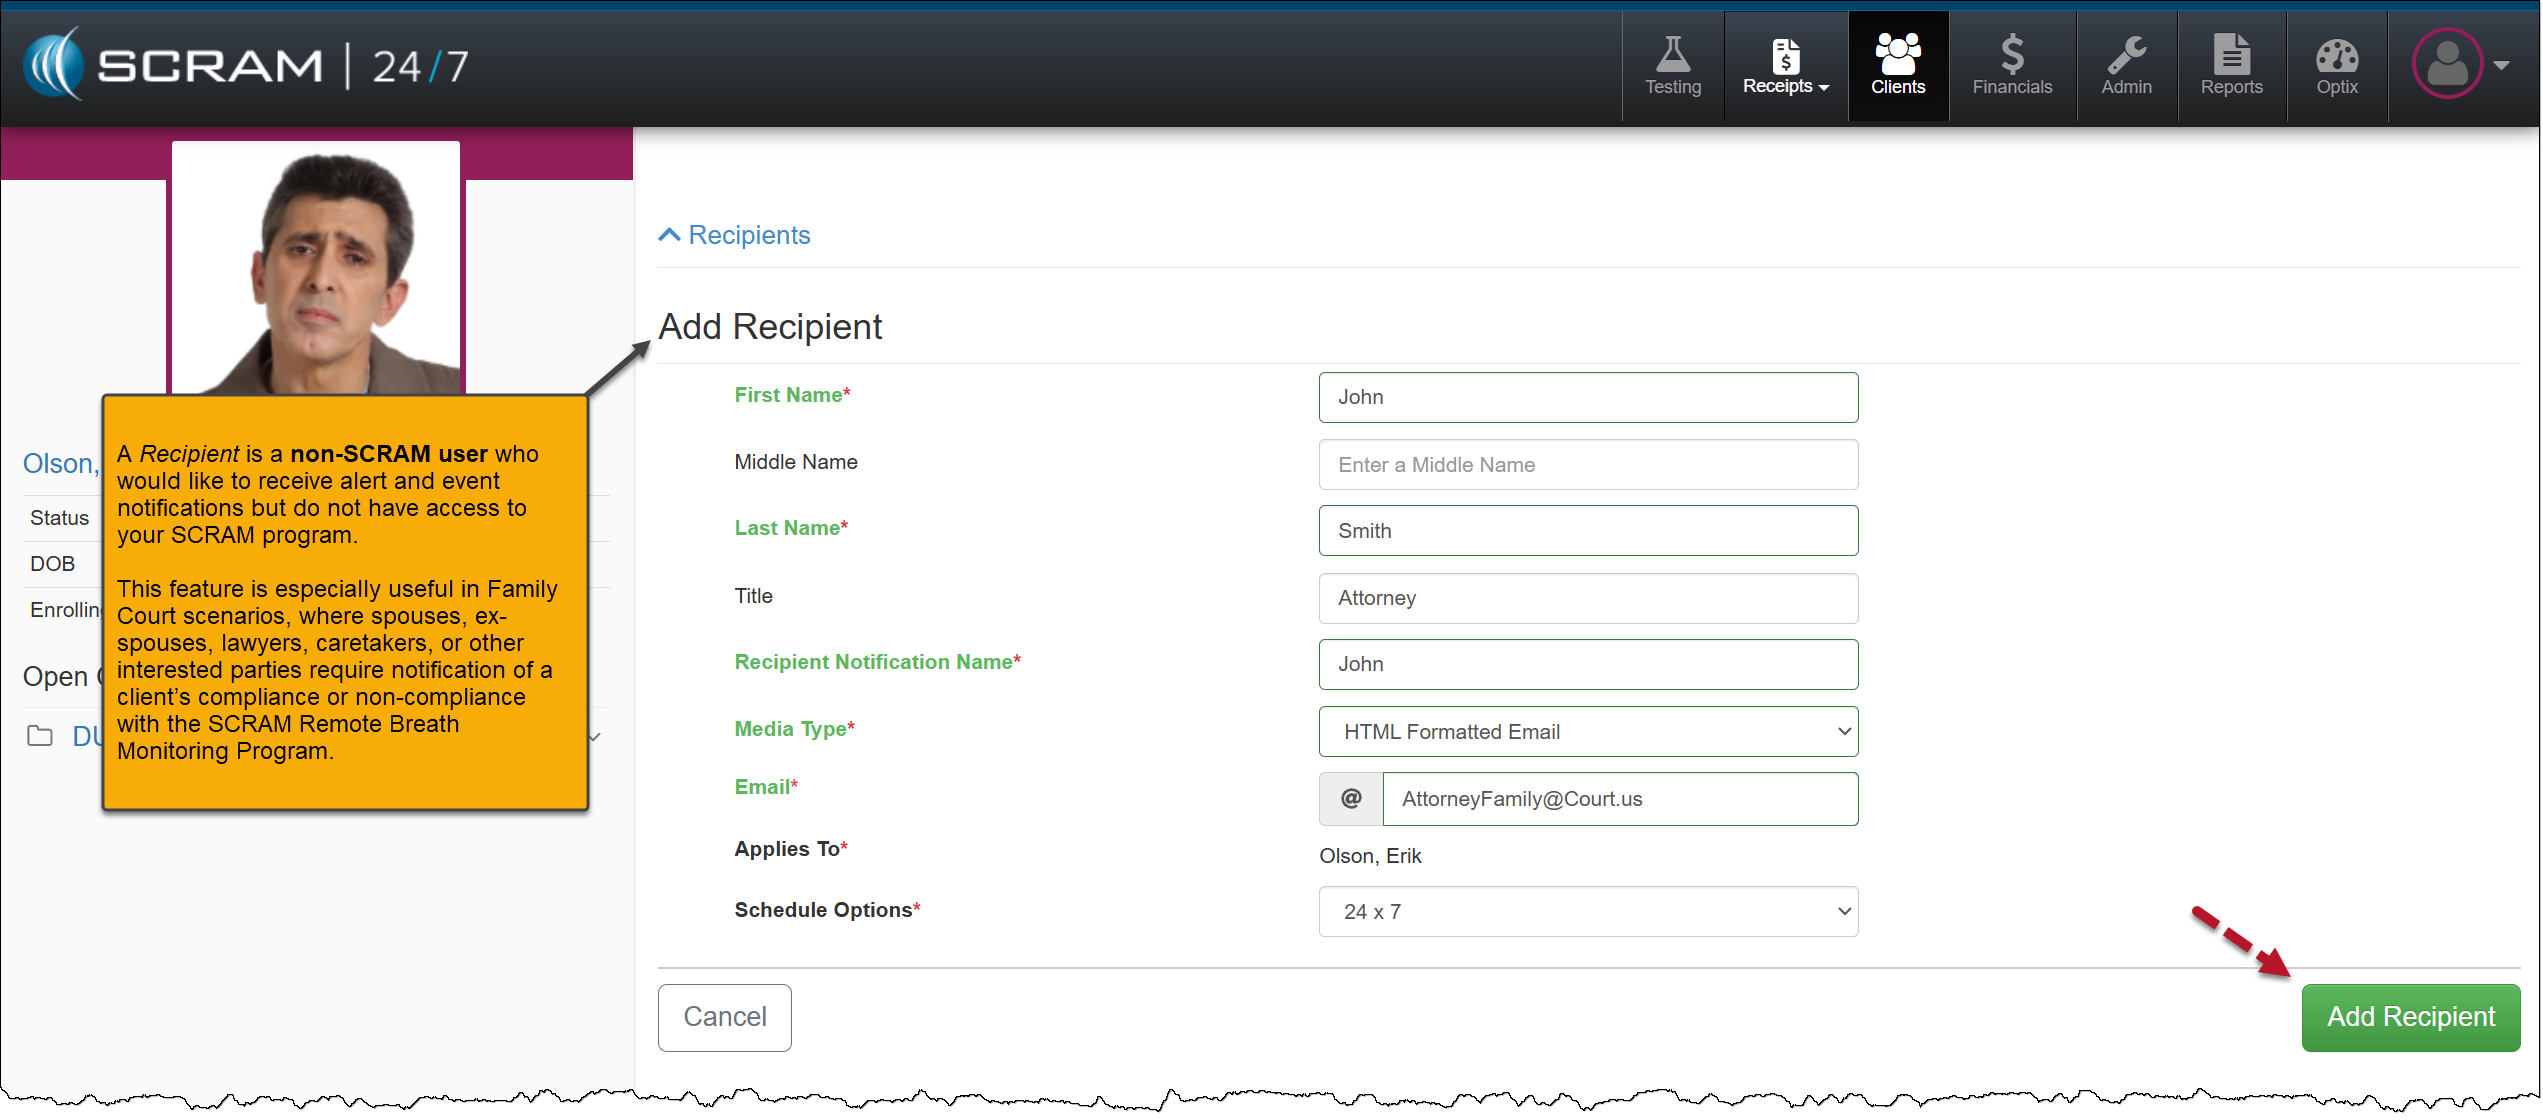
- Recipients:
-
- A Recipient is a non-SCRAM user who would like to receive alert and event notifications but do not have access to your SCRAM program.
- This feature is especially useful in Family Court scenarios, where spouses, ex-spouses, lawyers, caretakers, or other interested parties require notification of a client’s compliance or non-compliance with the SCRAM Remote Breath Monitoring Program.
-
- Enter the non-SCRAM user contact information and then select the Add Recipient button.
Add non-SCRAM user Recipient
Once the Recipient’s information has been saved, they will receive an email or text, depending on the media type selected, to validate the delivery method.
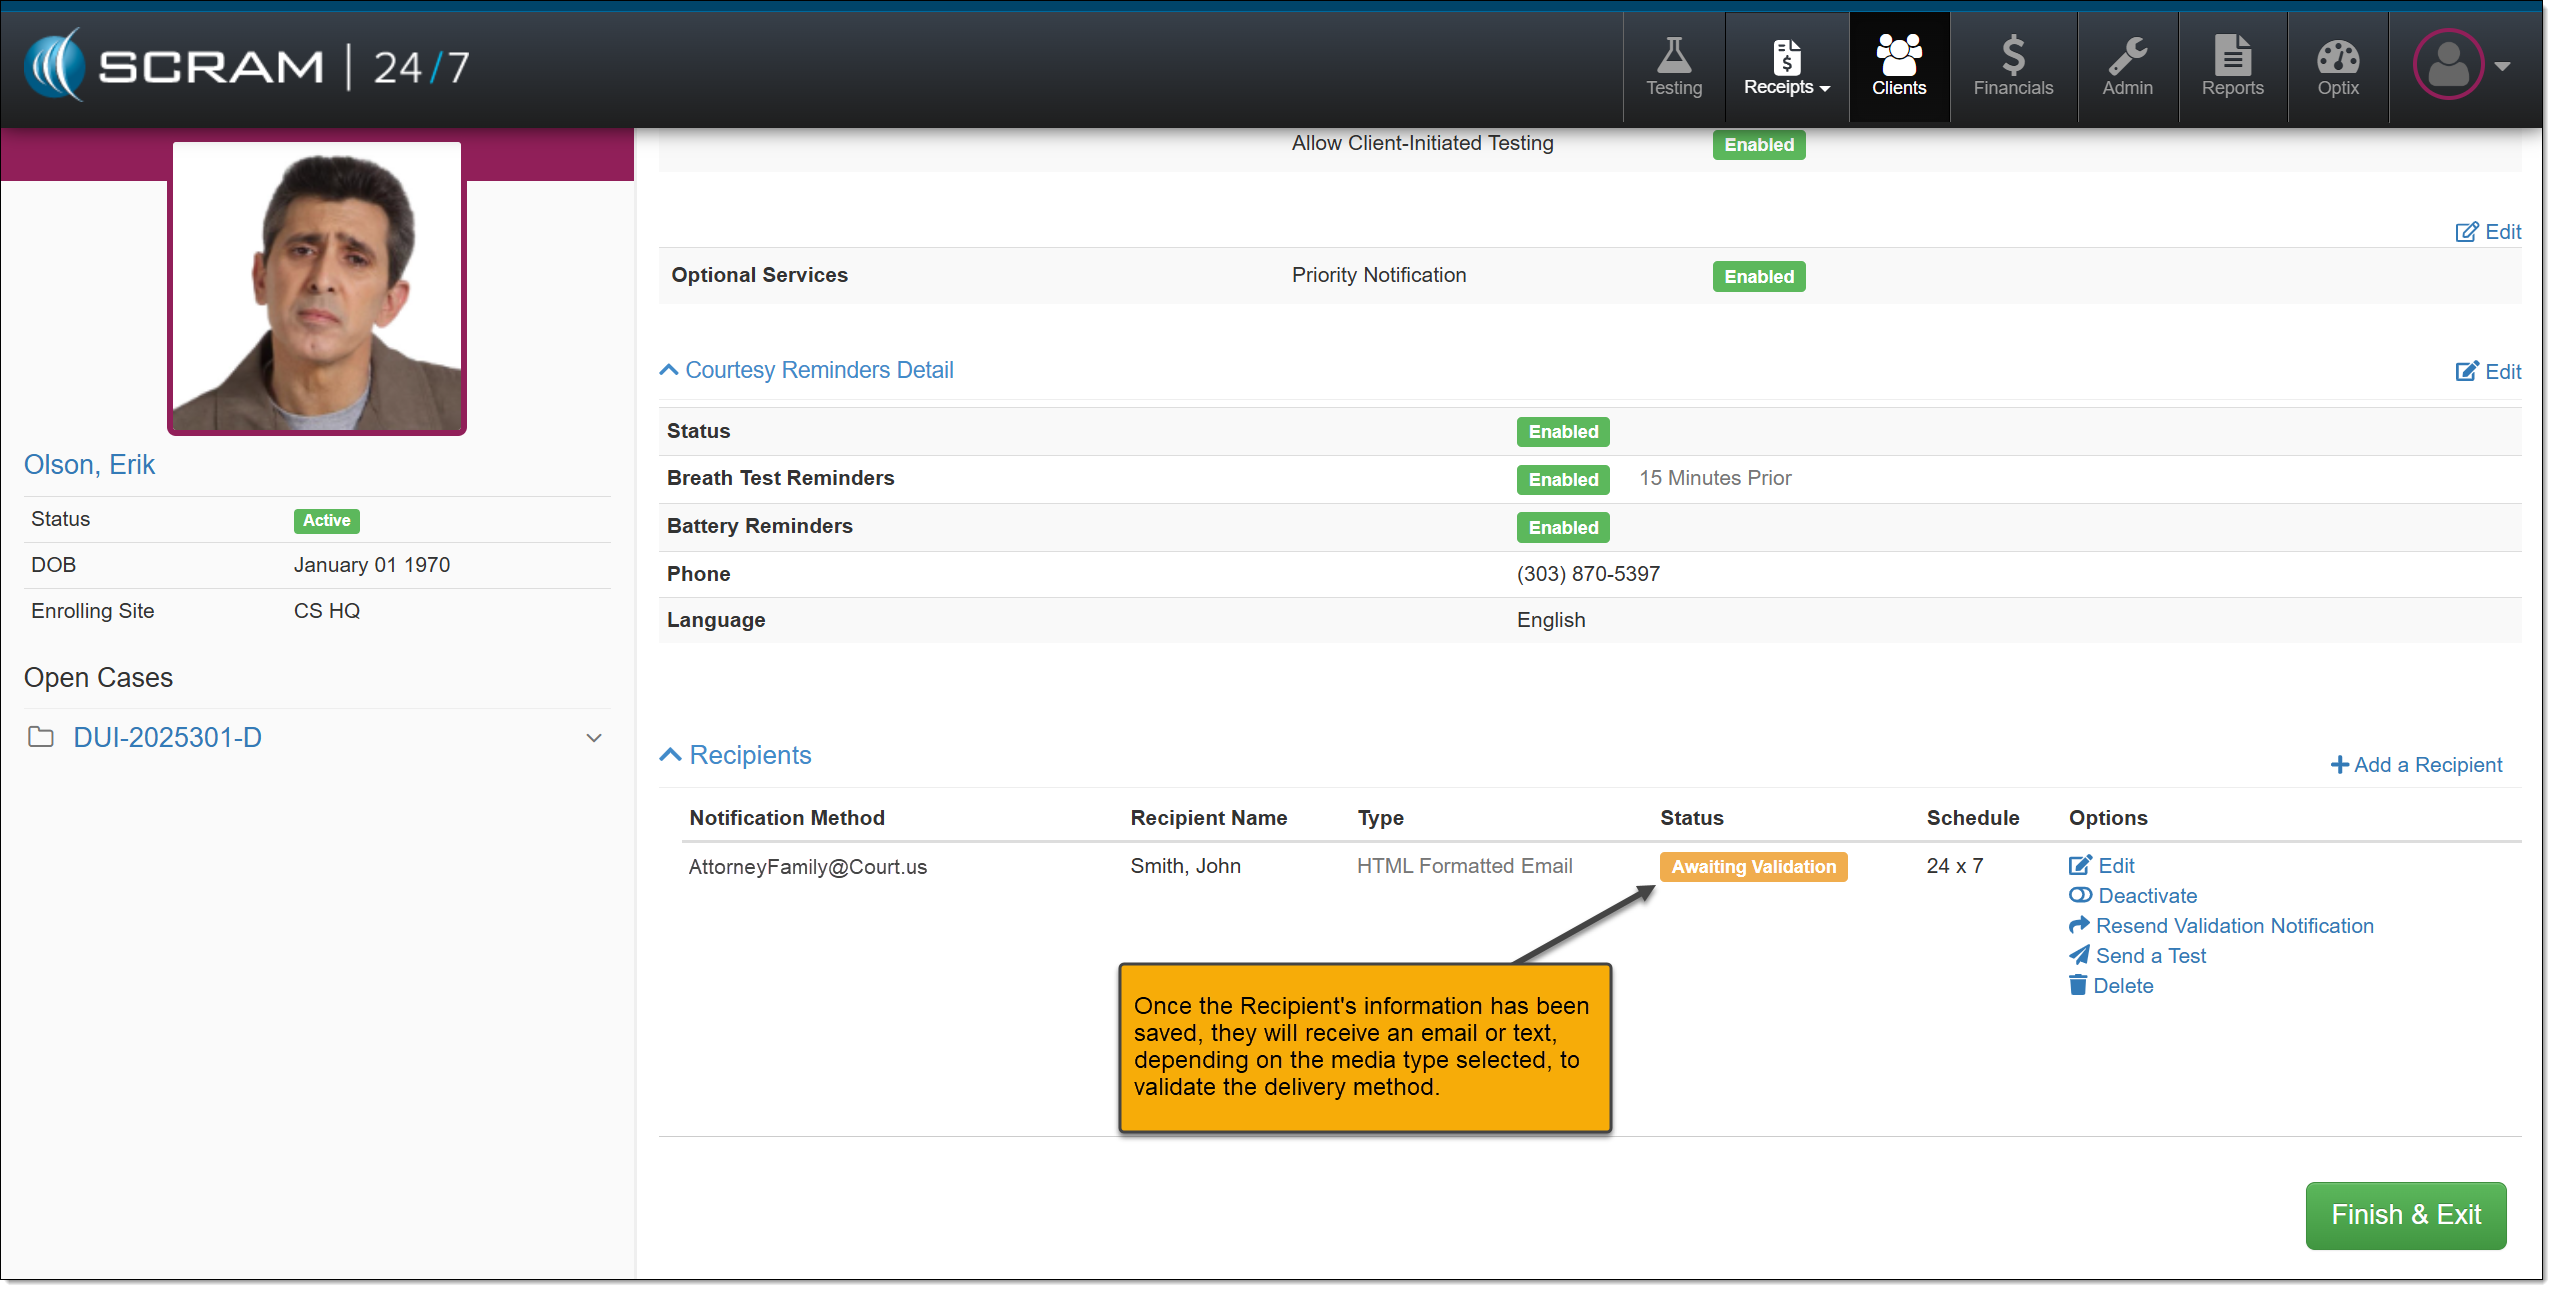
Recipient Awaiting Validation
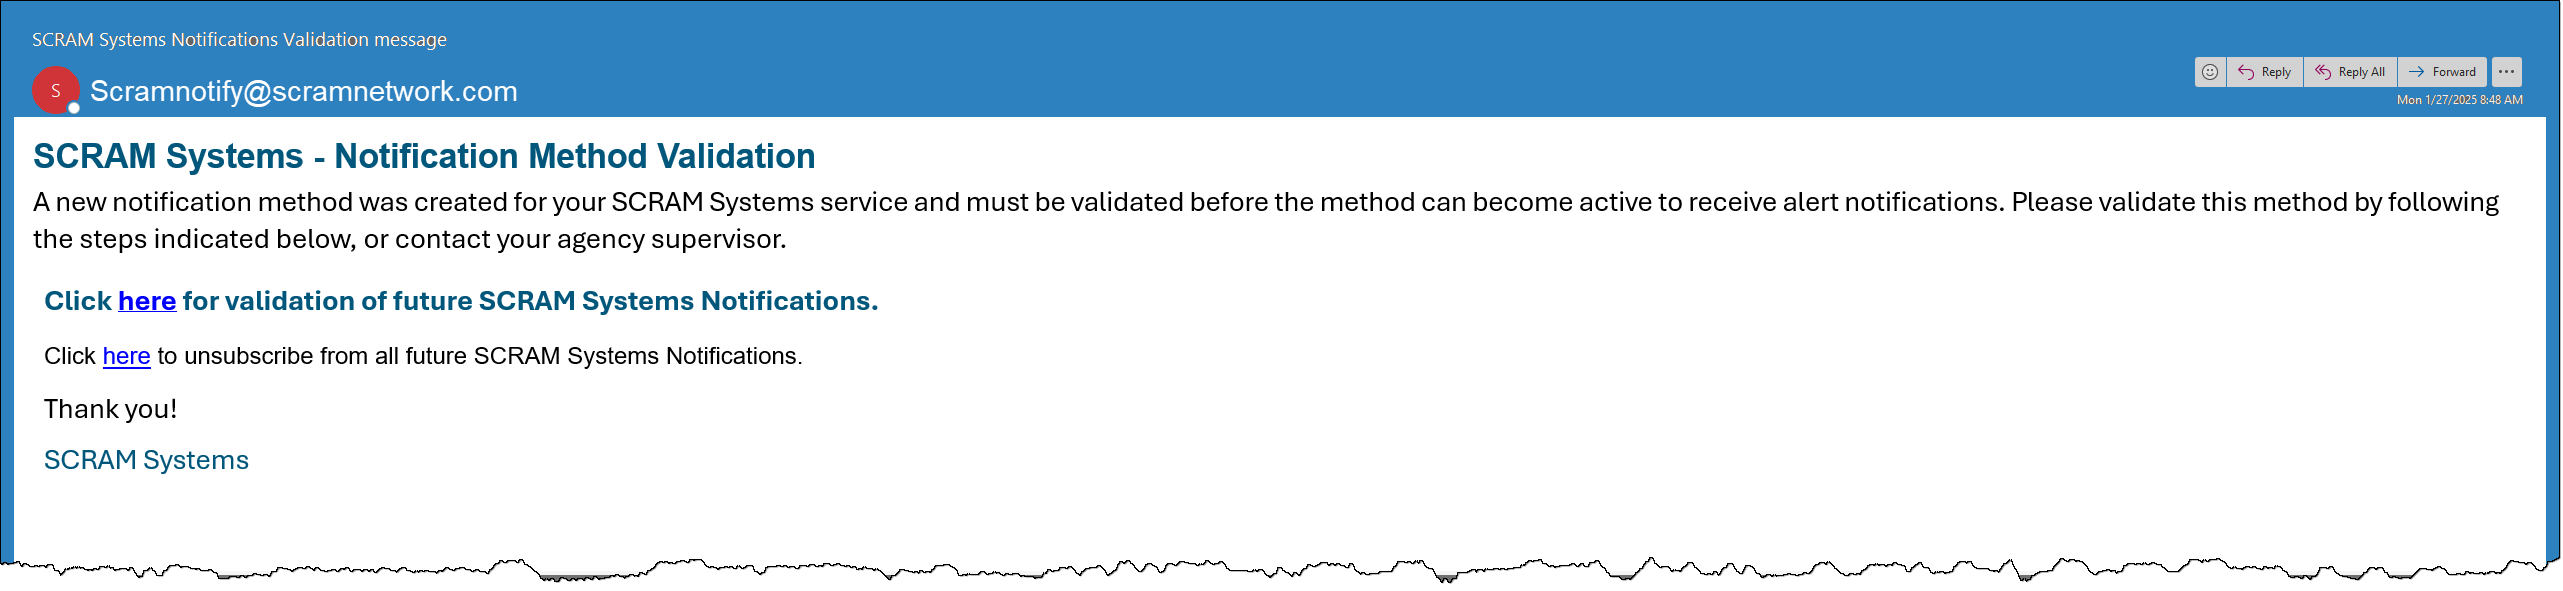
Non-SCRAM User Recipient Email Validation Example
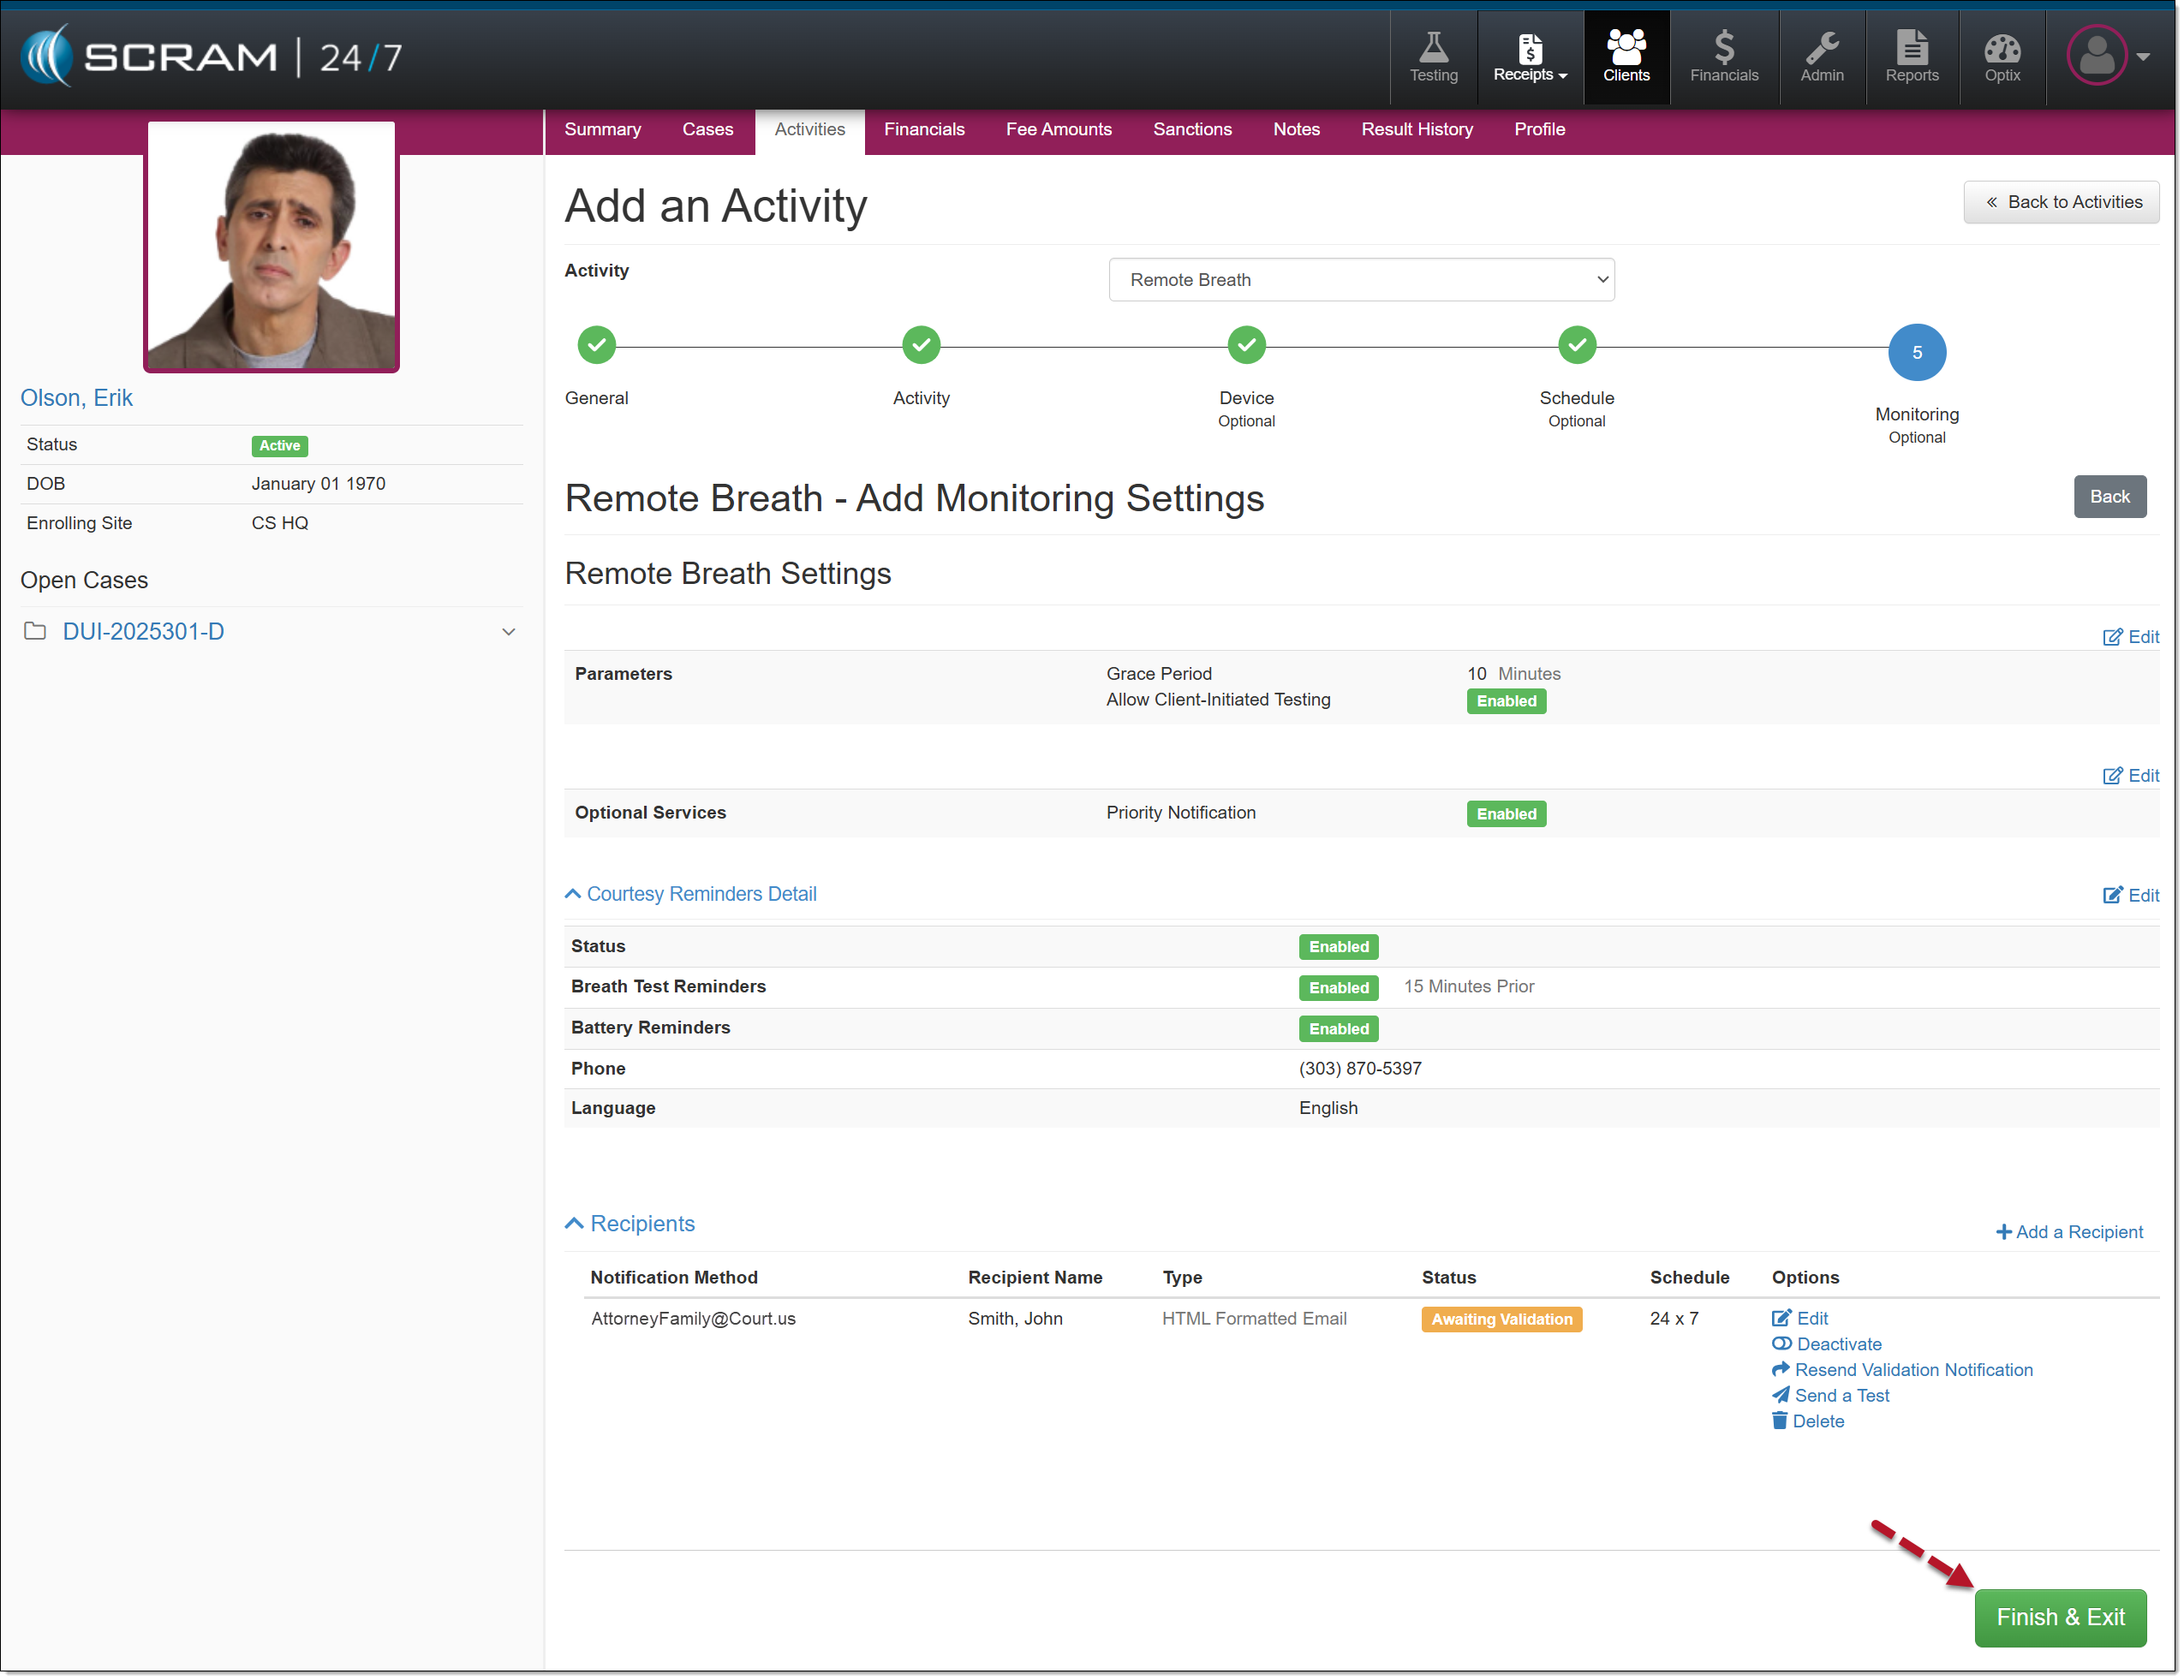
- Select the Finish & Exit to complete the Adding an Activity process.
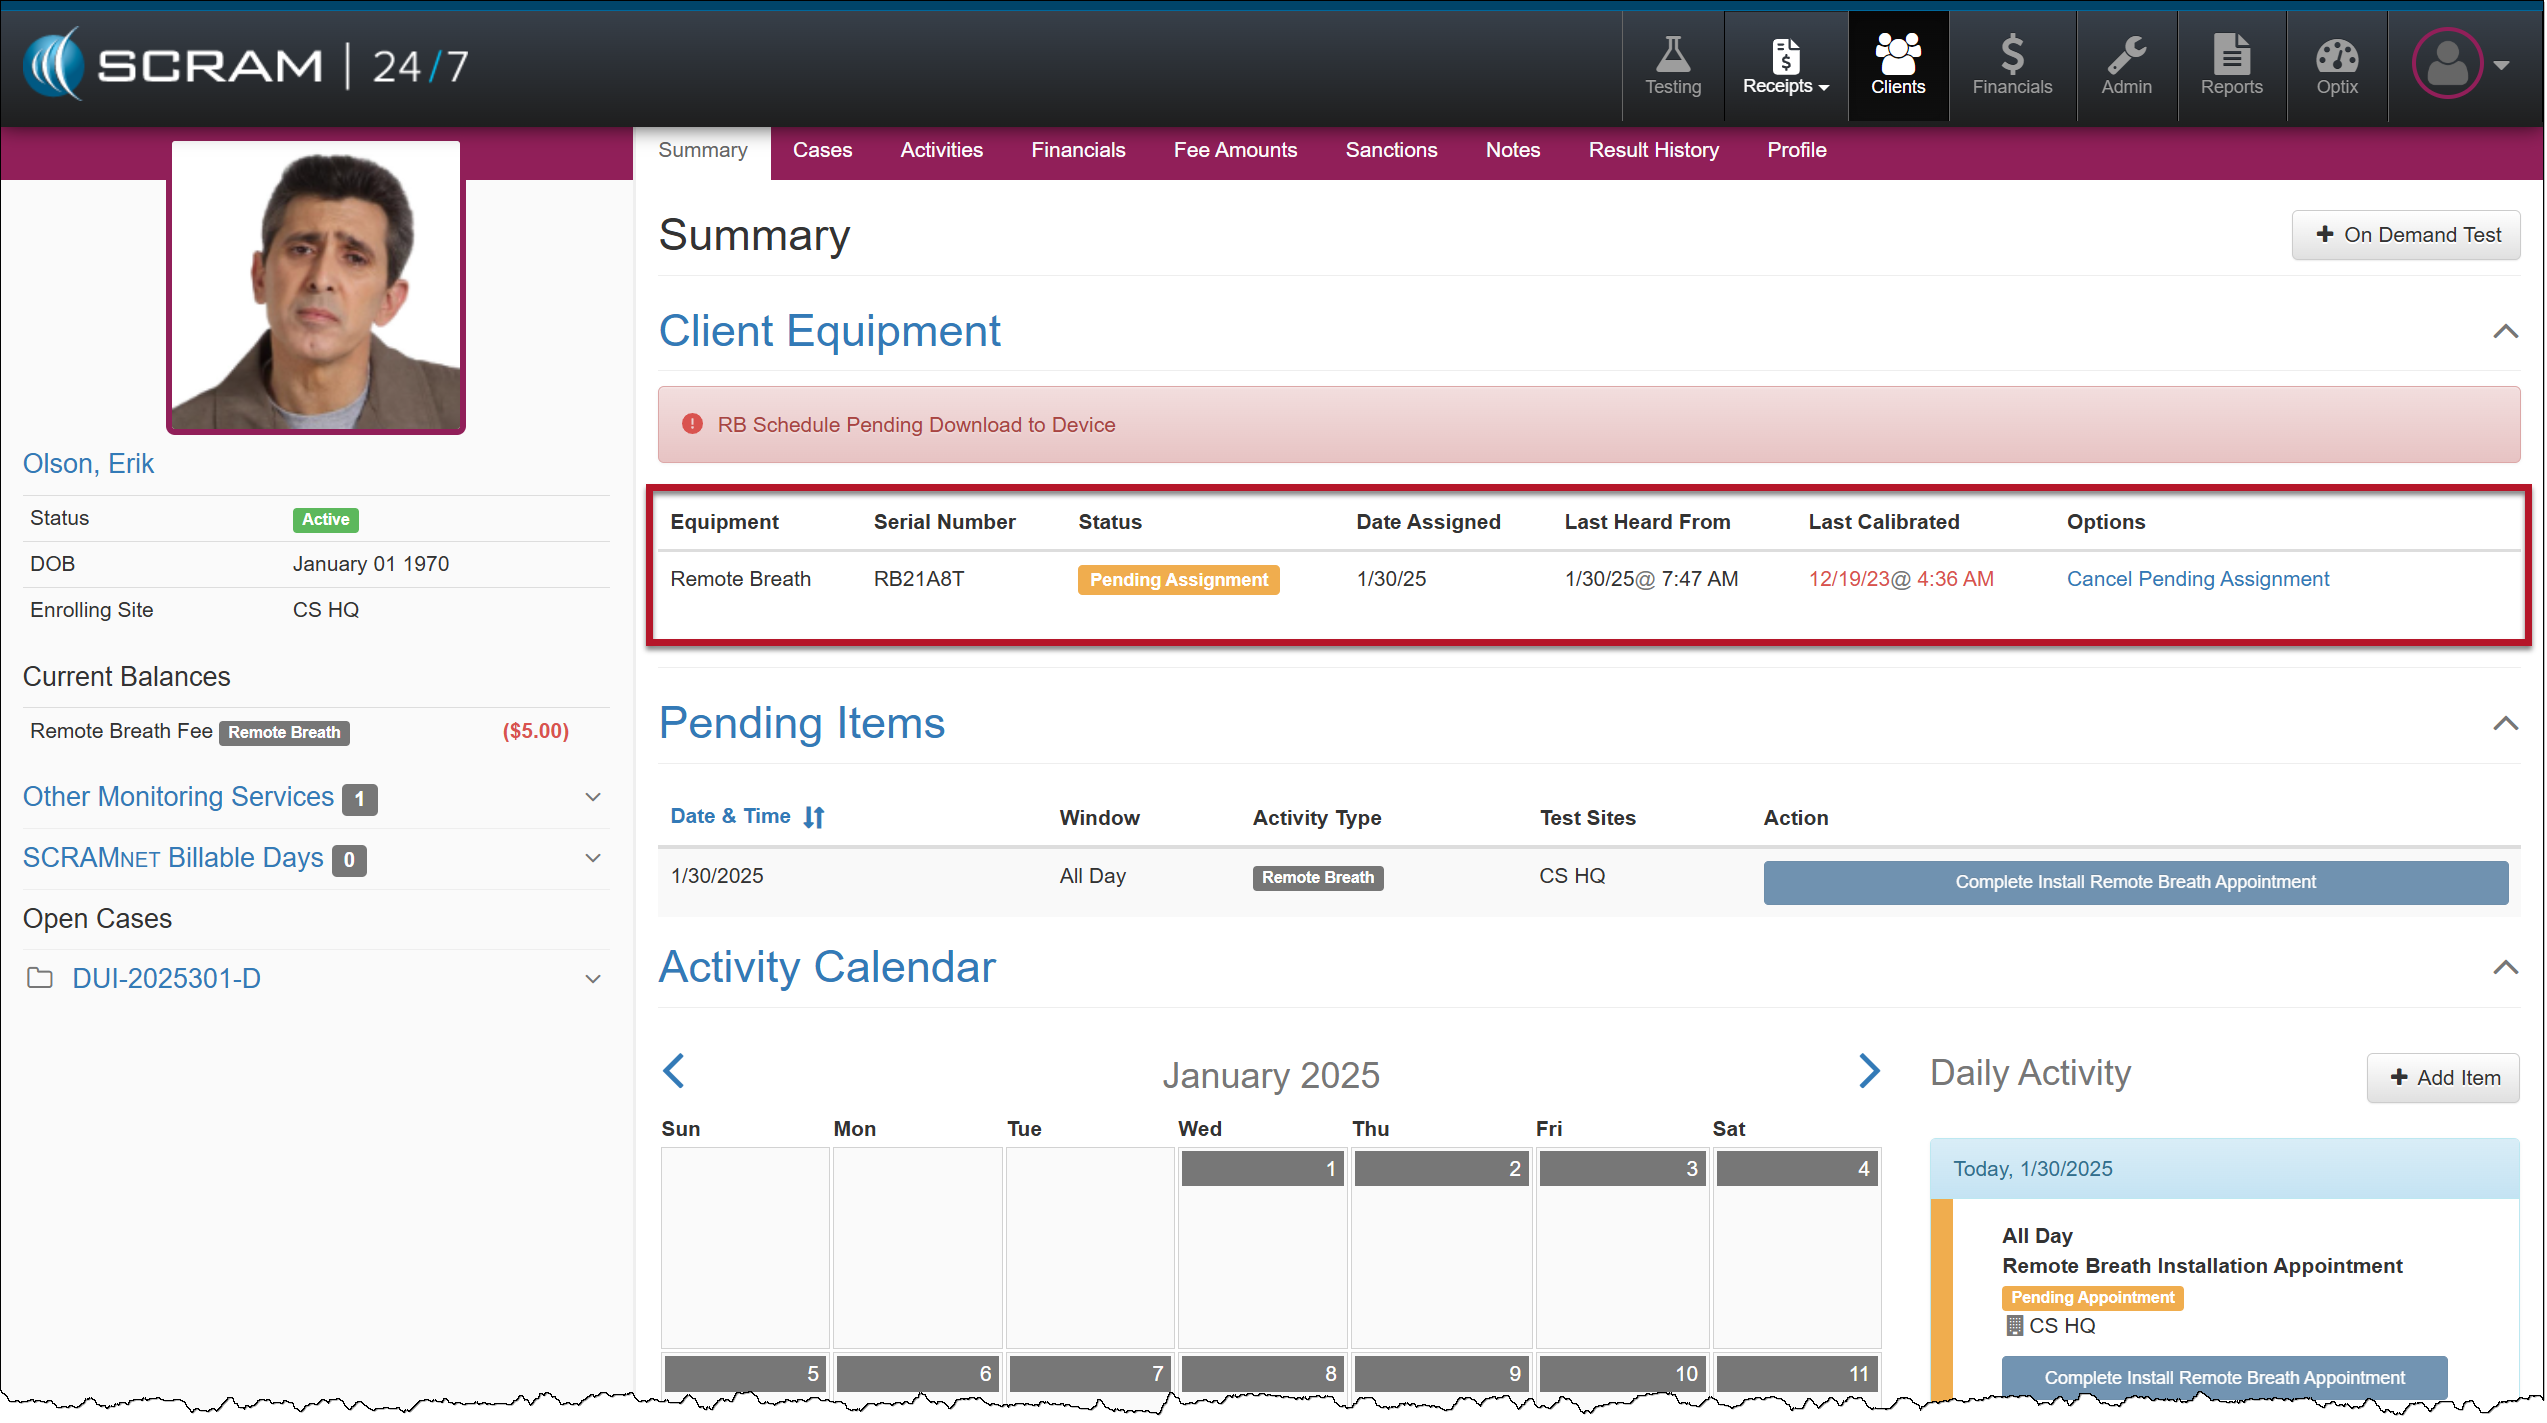
The Client Equipment section on the client’s Summary page displays the equipment in a “Pending Assignment” status.
Client’s Summary Page – Equipment Pending Assignment
Once the assignment process is complete, the Client Equipment section will reflect the assigned equipment status.
| For step-by-step instructions on completing the device enrollment, visit the “Assignment and Client Enrollment” section of the SCRAM Remote Breath Pro Client Assignment and Enrollment Help article. |