Purpose
Use this quick sheet to assign and manage a Mouth Swab Client.
Procedures for Tester
Assign Mouth Swab as an Activity
- Log in to SCRAM 24/7.
- The user’s Testing page appears.
- Select the Client’s Name.
- Navigate to Client’s Activities tab.
- Add an Activity for the Client.
- Select Mouth Swab as the Activity.
- Select the Desired Check-In method.
- Complete corresponding fields.
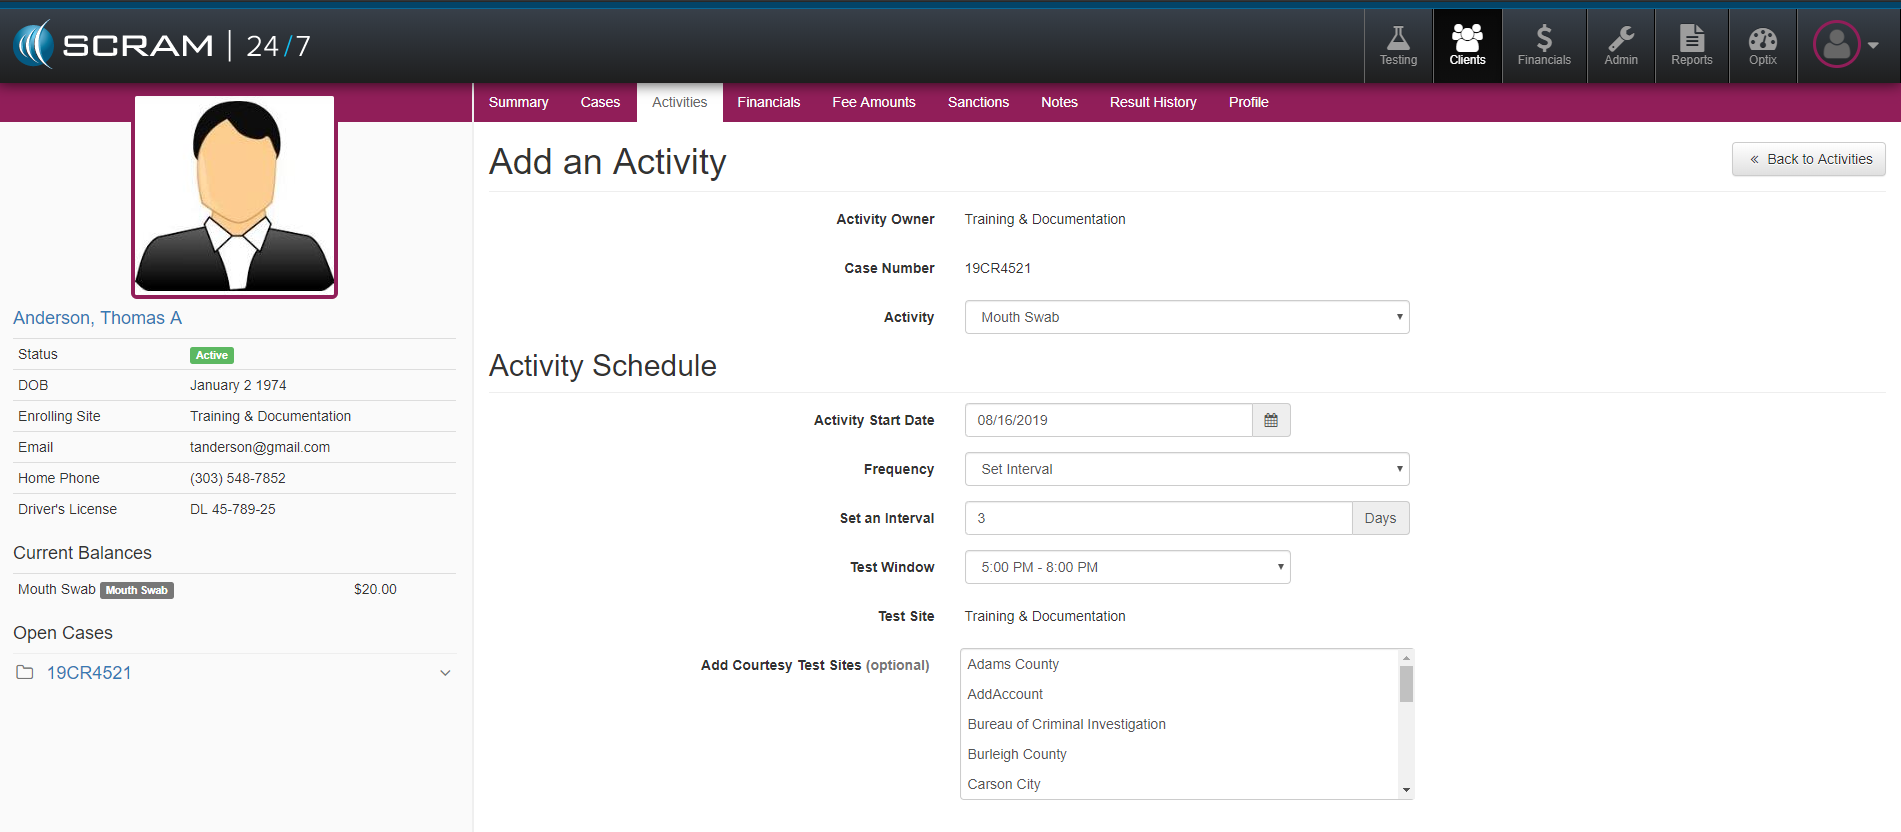
- Add Mouth Swab as an Activity.
Record Mouth Swab Appointment
- Log in to SCRAM 24/7.
- The user’s Testing page appears.
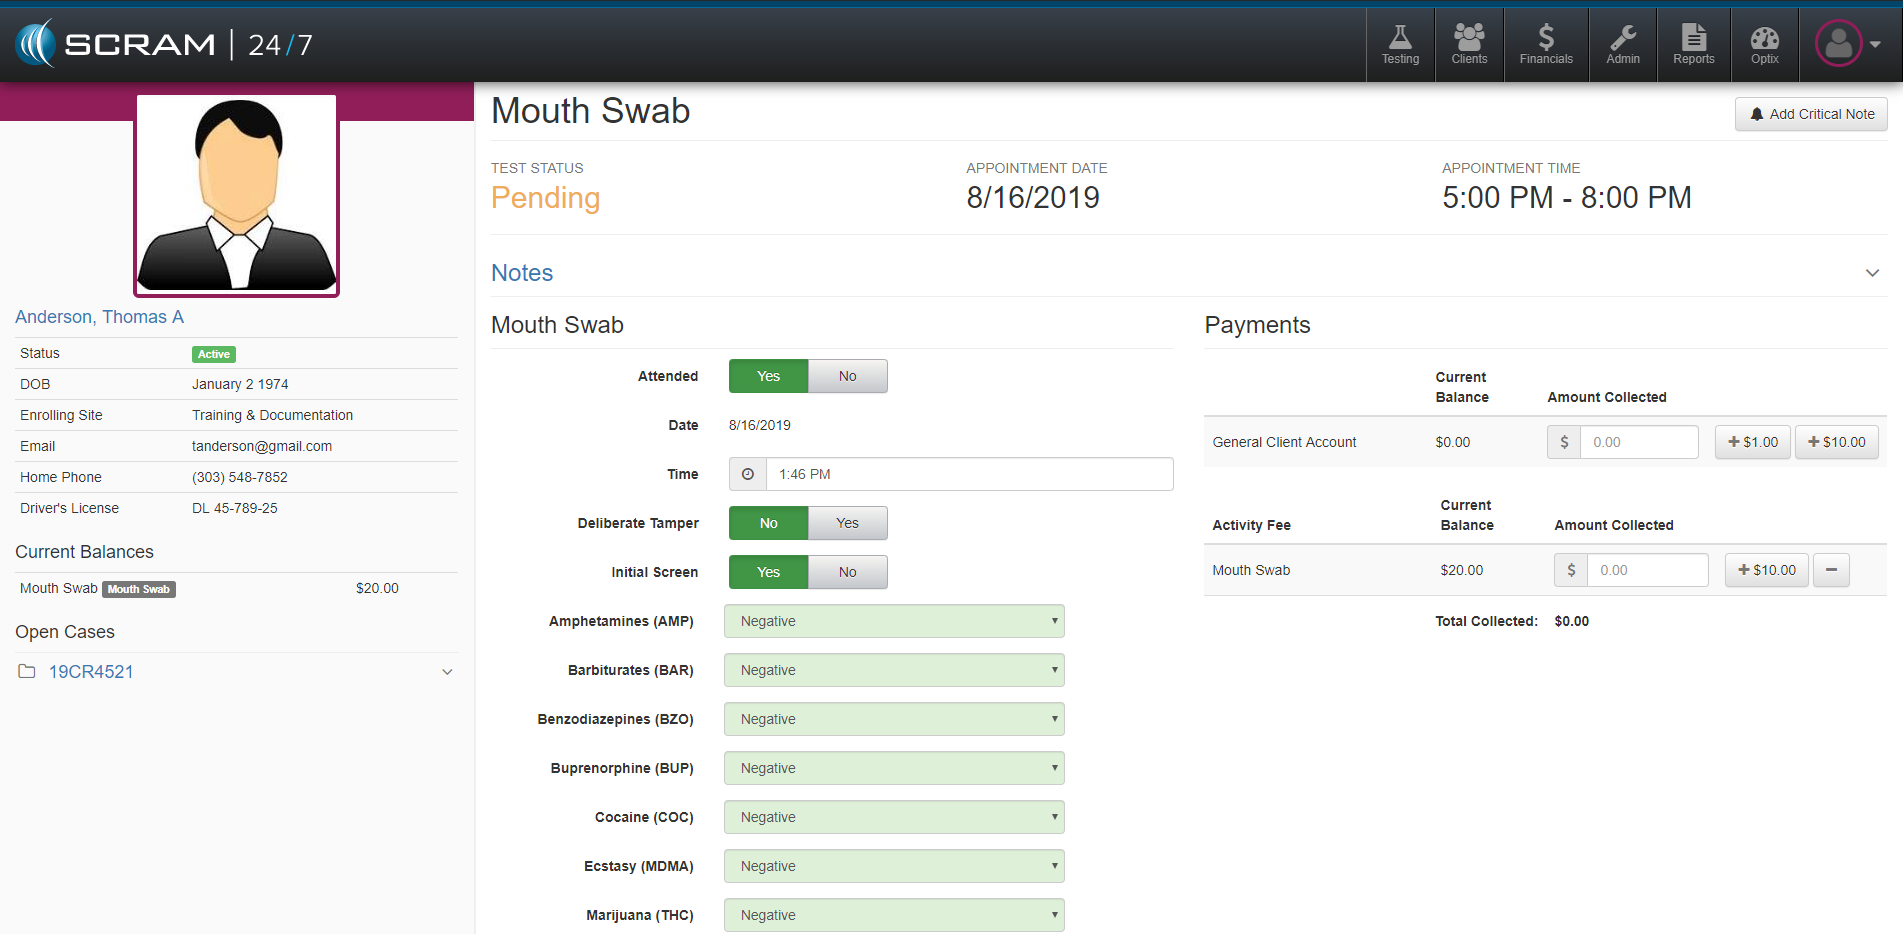
- Locate the specific Mouth Swab appointment and click the Record Mouth Swab Appointment button.
- The Mouth Swab Test page appears.
- If the Client did not Attend the Appointment.
- Click the “Attended” No button.
- Click the applicable “Excused Absence” button.
- Reschedule the appointment.
- Click the Save button.
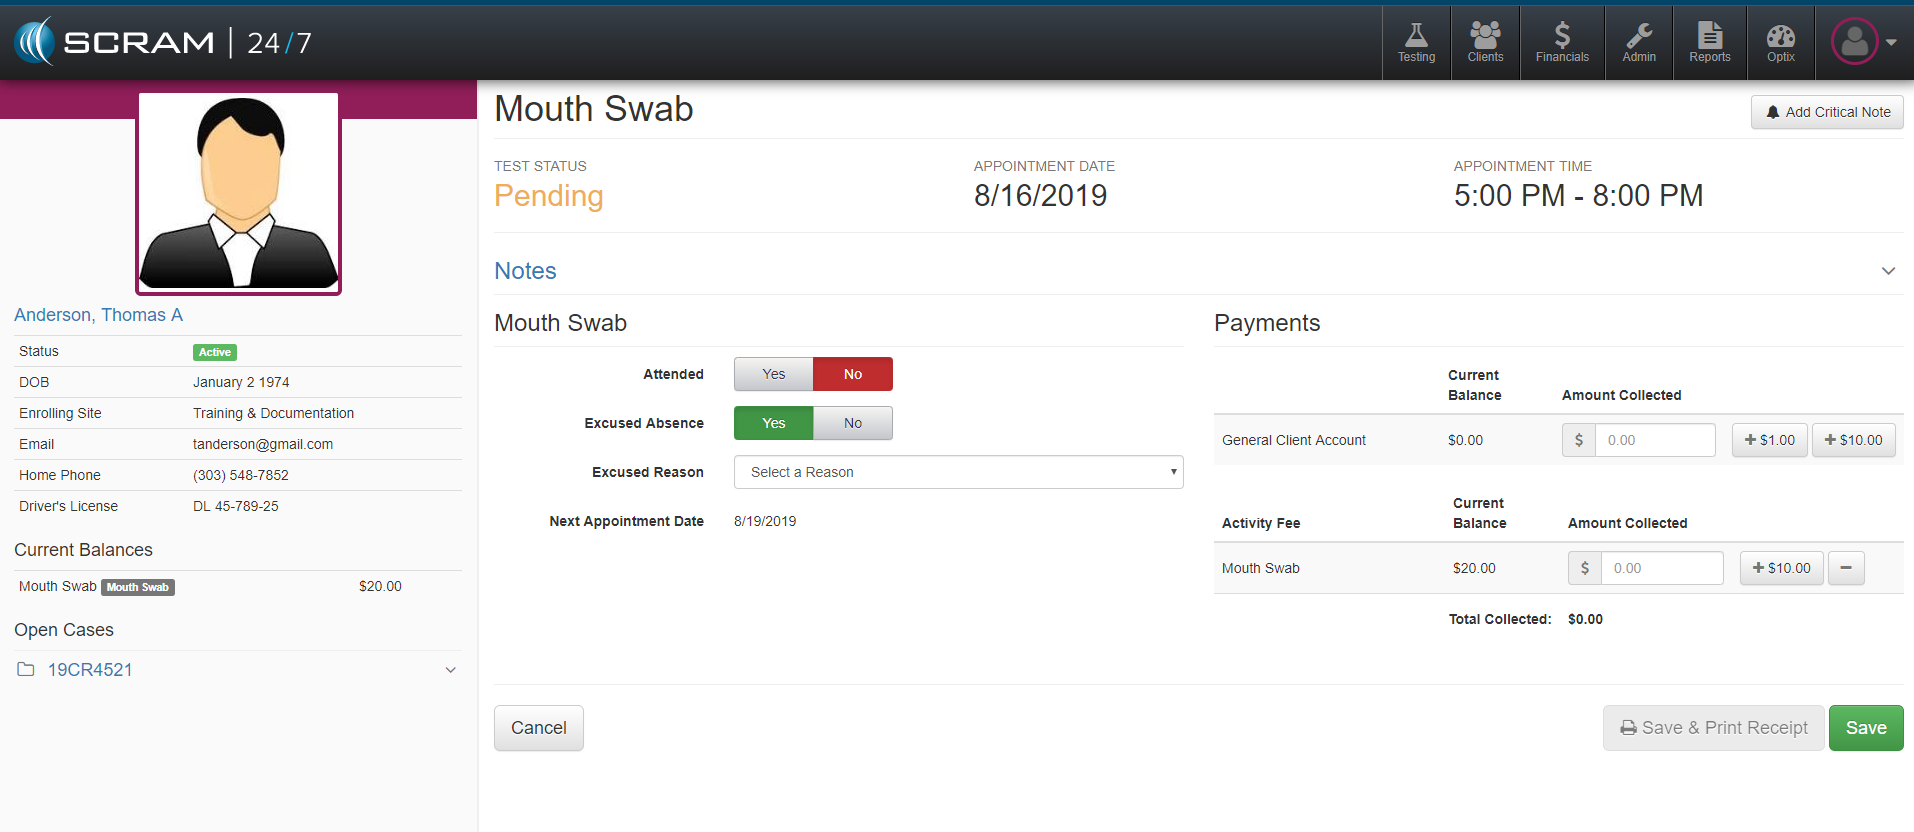
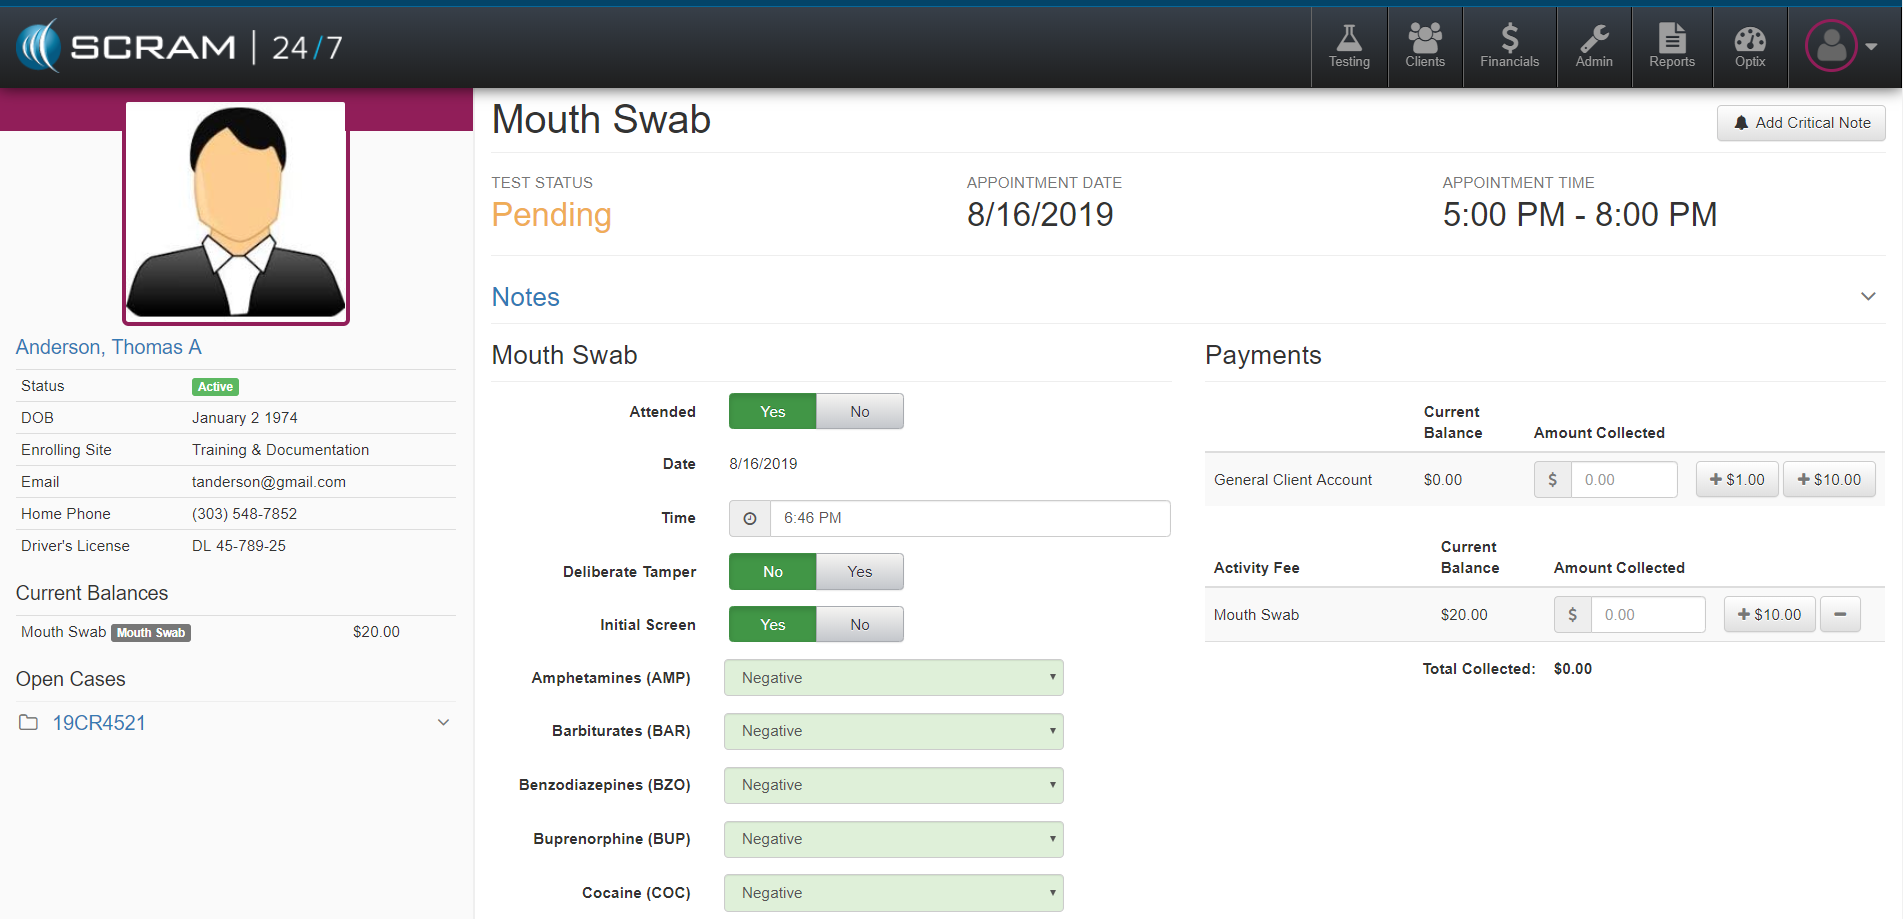
- If the Client Attended the Appointment.
- Add a note. (Optional)
- Click the arrow on right side to expand Notes section.
- Enter note in field.
- Click the Add Note button.
- The note will appear to the left of the “Notes” field.
- If the Client “Attended” the appointment, click the Yes button.
- If the Client did not “Deliberate Tamper” with the sample, click the No button.
- If an Initial Screen was done, click the “Initial Screen” Yes button.
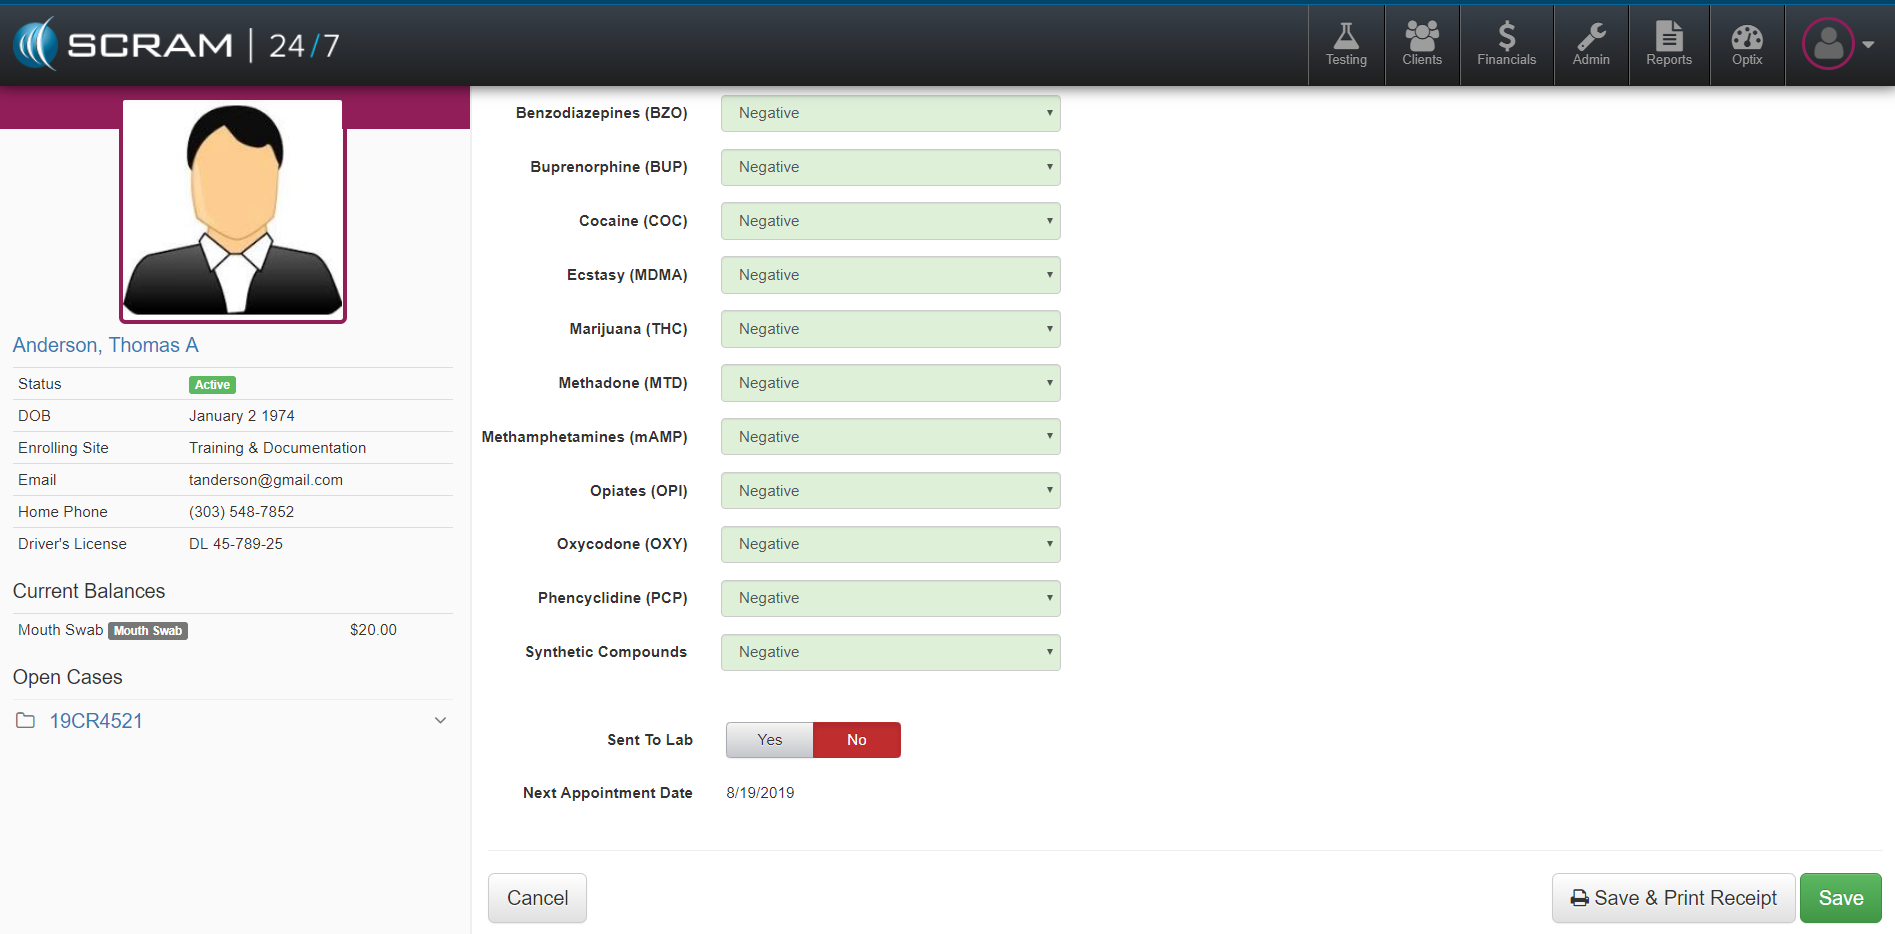
- Record the Results.
- If the sample is being sent to the lab, click the “Sent to Lab” Yes button.
- Enter the UA ID number.
- Confirm the next appointment.
- Note:The next appointment will default to the interval that was selected while assigning the activity
- If the Client elects to make a payment, click the + button until the proper amount is entered.
- Click the Save button.
- Add a note. (Optional)
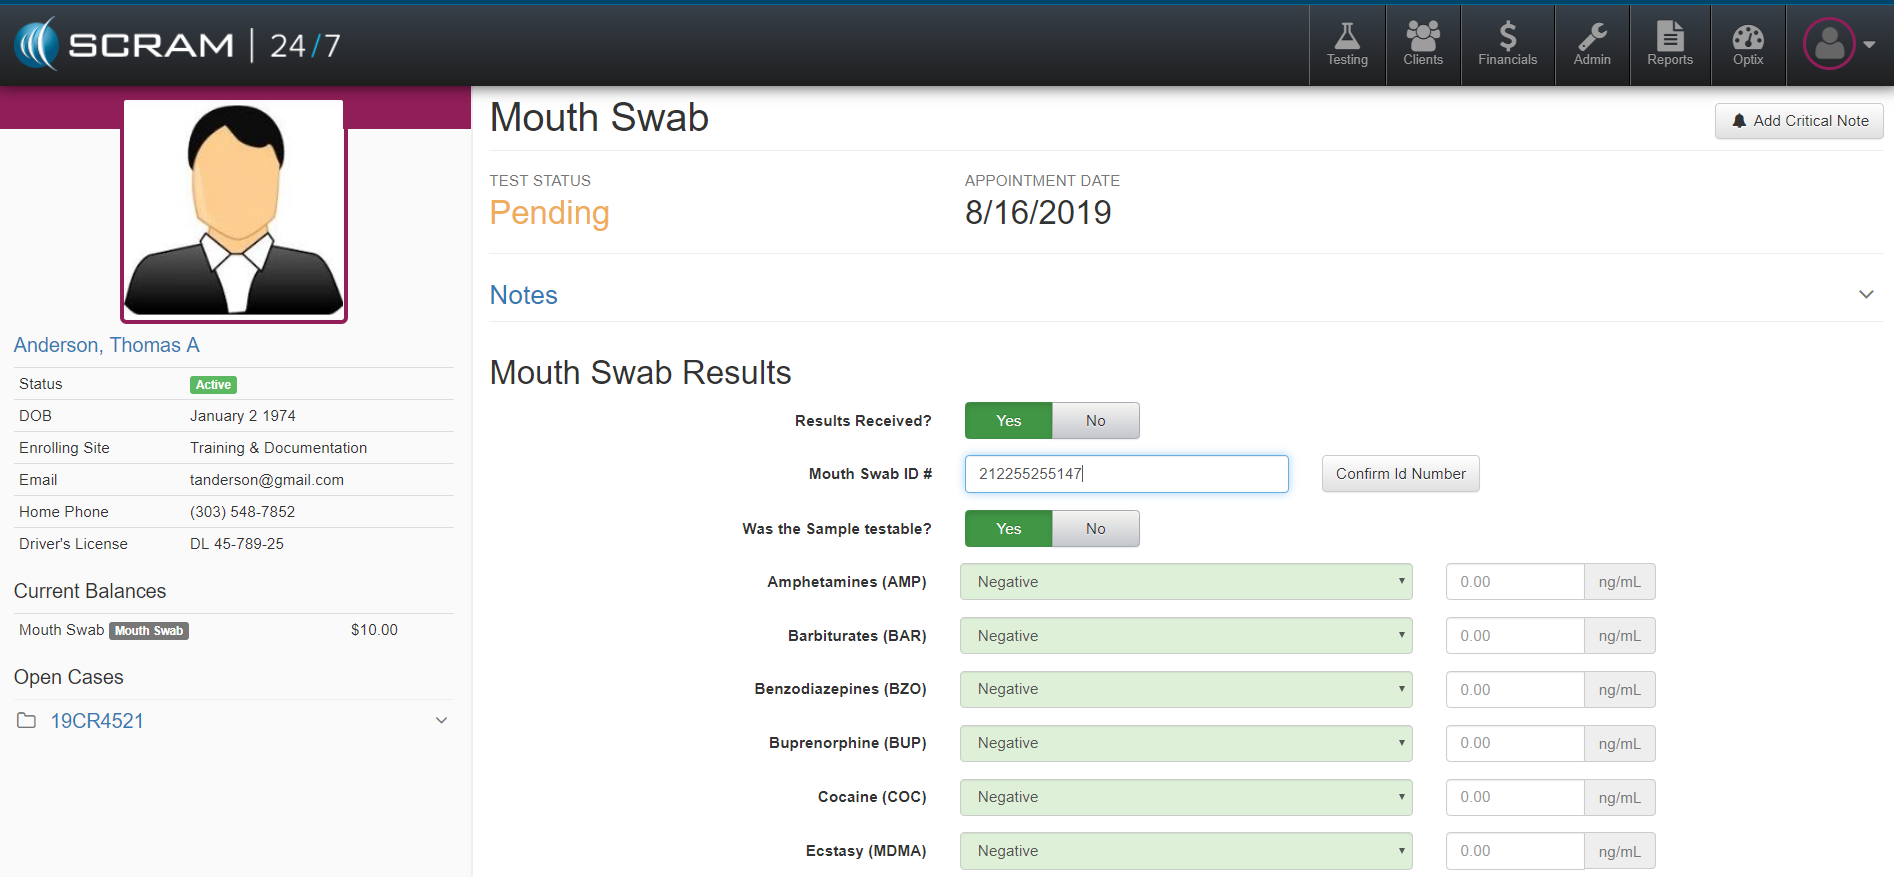
Record Mouth Swab Results
- Log in to SCRAM 24×7.
- Select the client.
- The client’s Summary page appears.
- Click the Record Mouth Swab Results button.
- Enter the Mouth Swab Test Id number.
- Click the Verify Id Number button.
- If the sample was testable, click the Yes button.
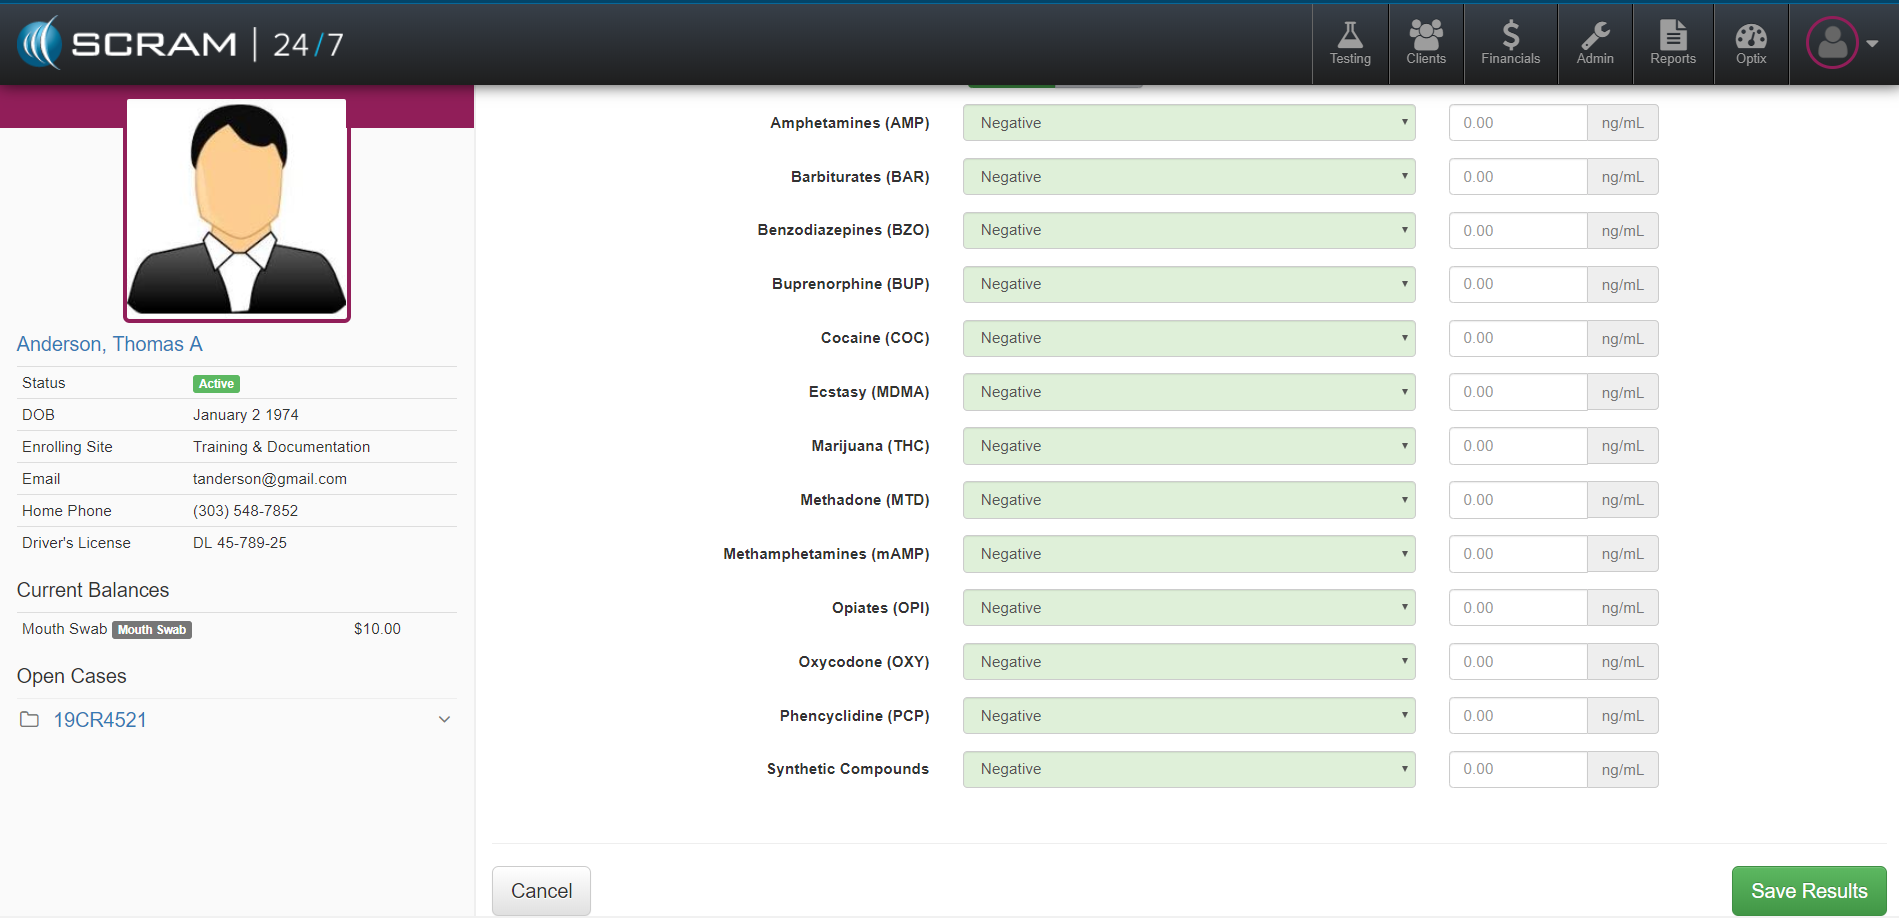
- Record Results.
- Enter ng/ml. (Optional)
- Click Save Results.