
Payment Mapping:
For the bulk upload feature to work, each agency will need to create or upload a template that will allow the appropriate incoming data to be assigned to the appropriate 24/7 data fields.
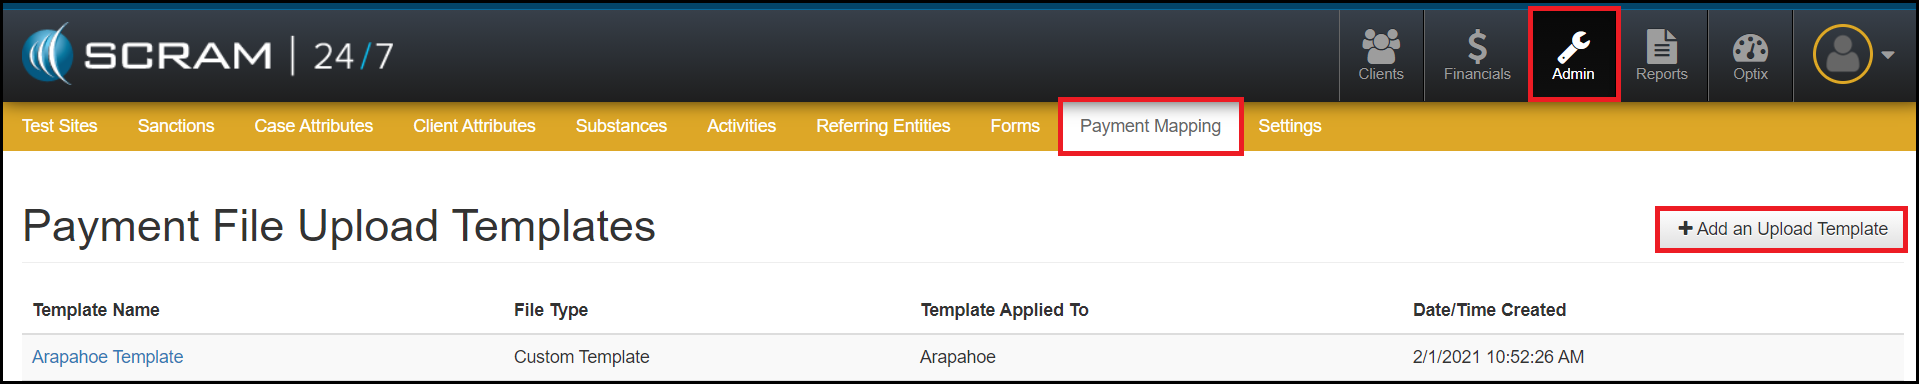
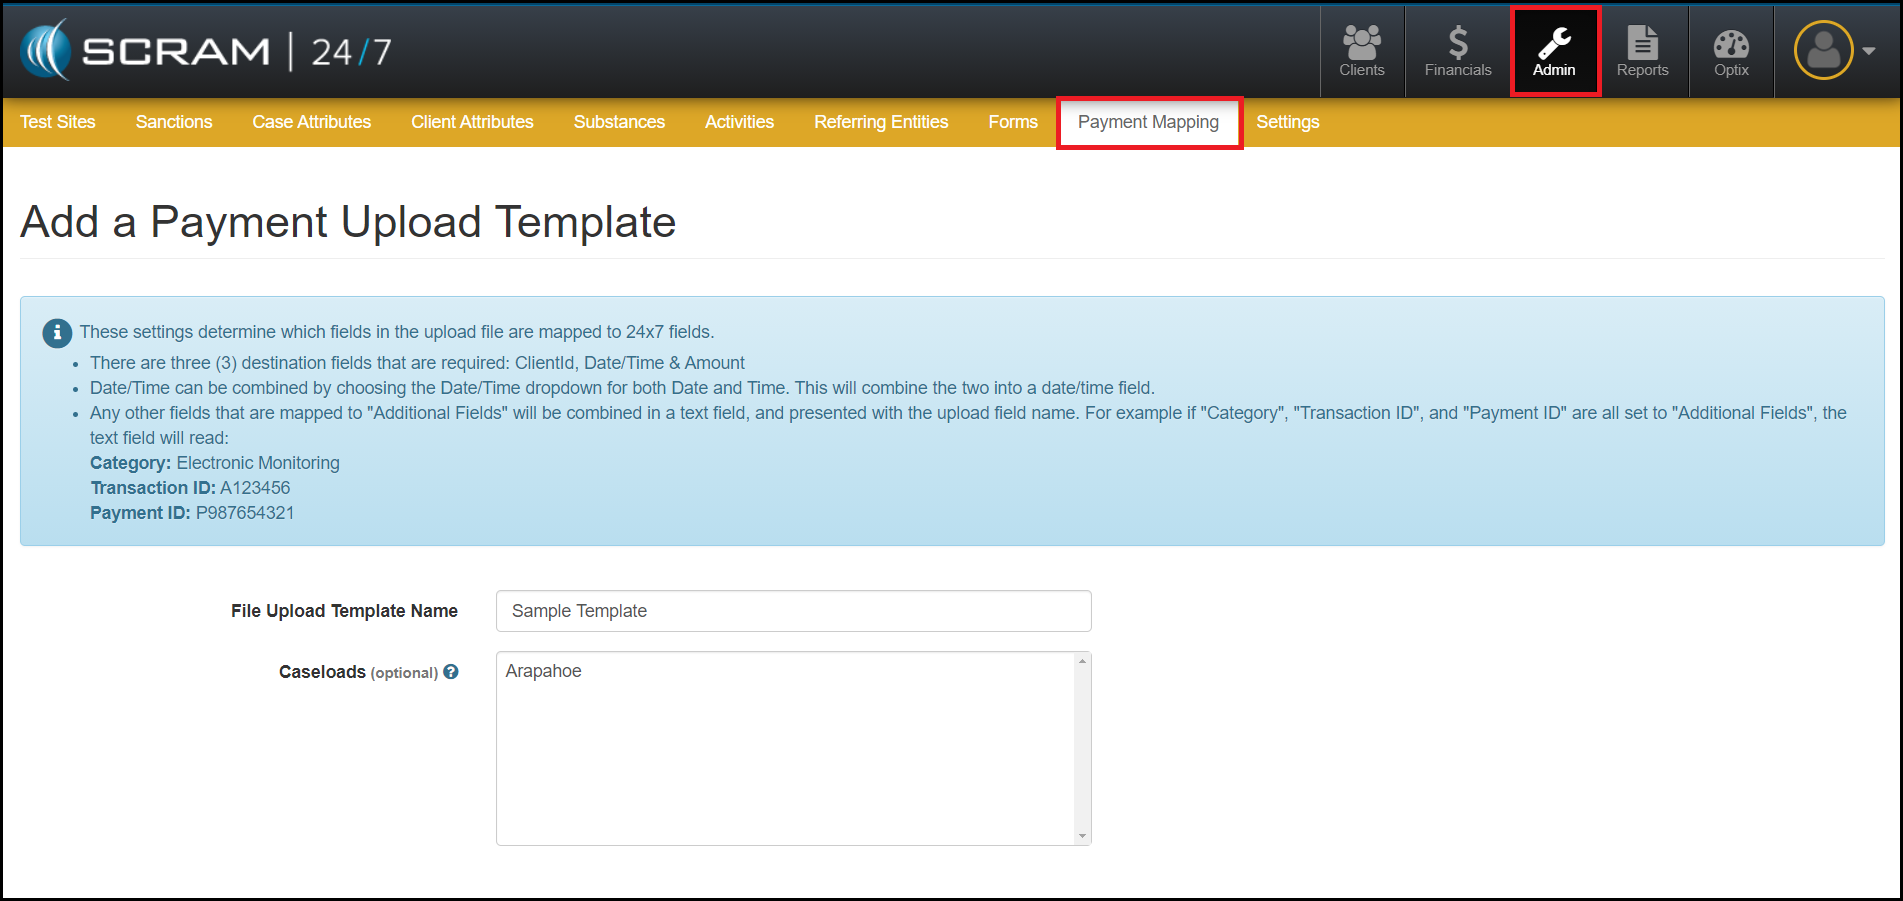
- To begin, navigate to the Admin facility within the SCRAM 24/7 software and select the Payment Mapping tab.
- Next, select the Add an Upload Template button.
Manually Create a Template:
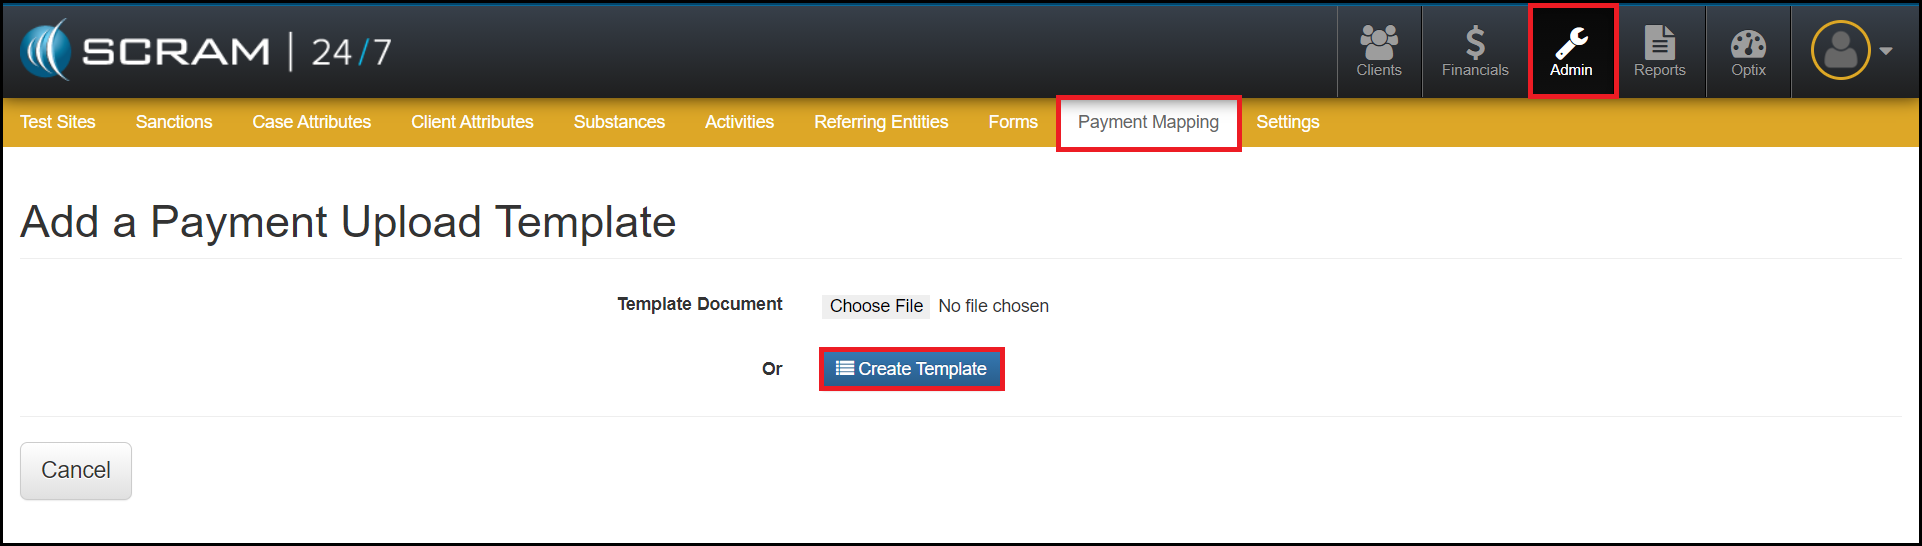
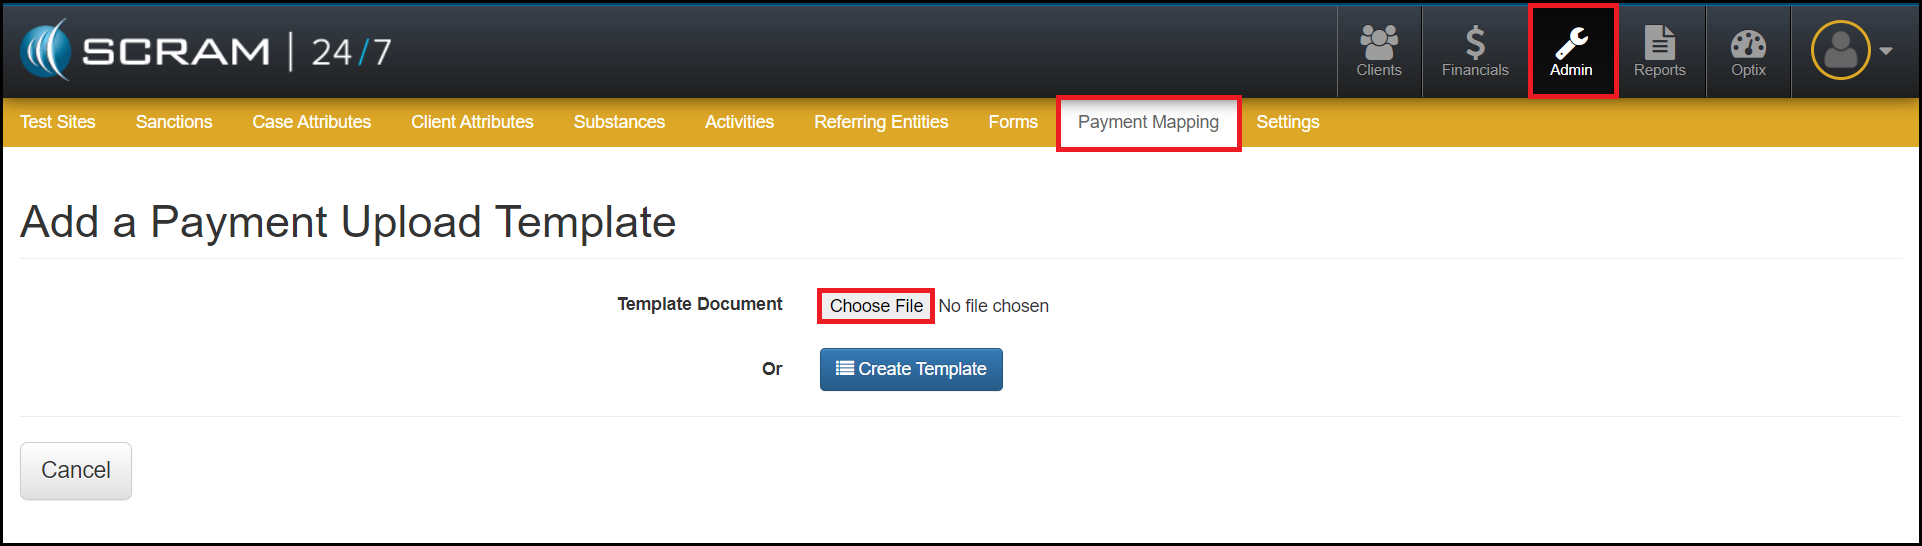
- To create a manual template, select the blue Create Template Begin by entering the title fields exactly as they appear in the template.
Note: If the title fields do not match exactly, the upload will not work.

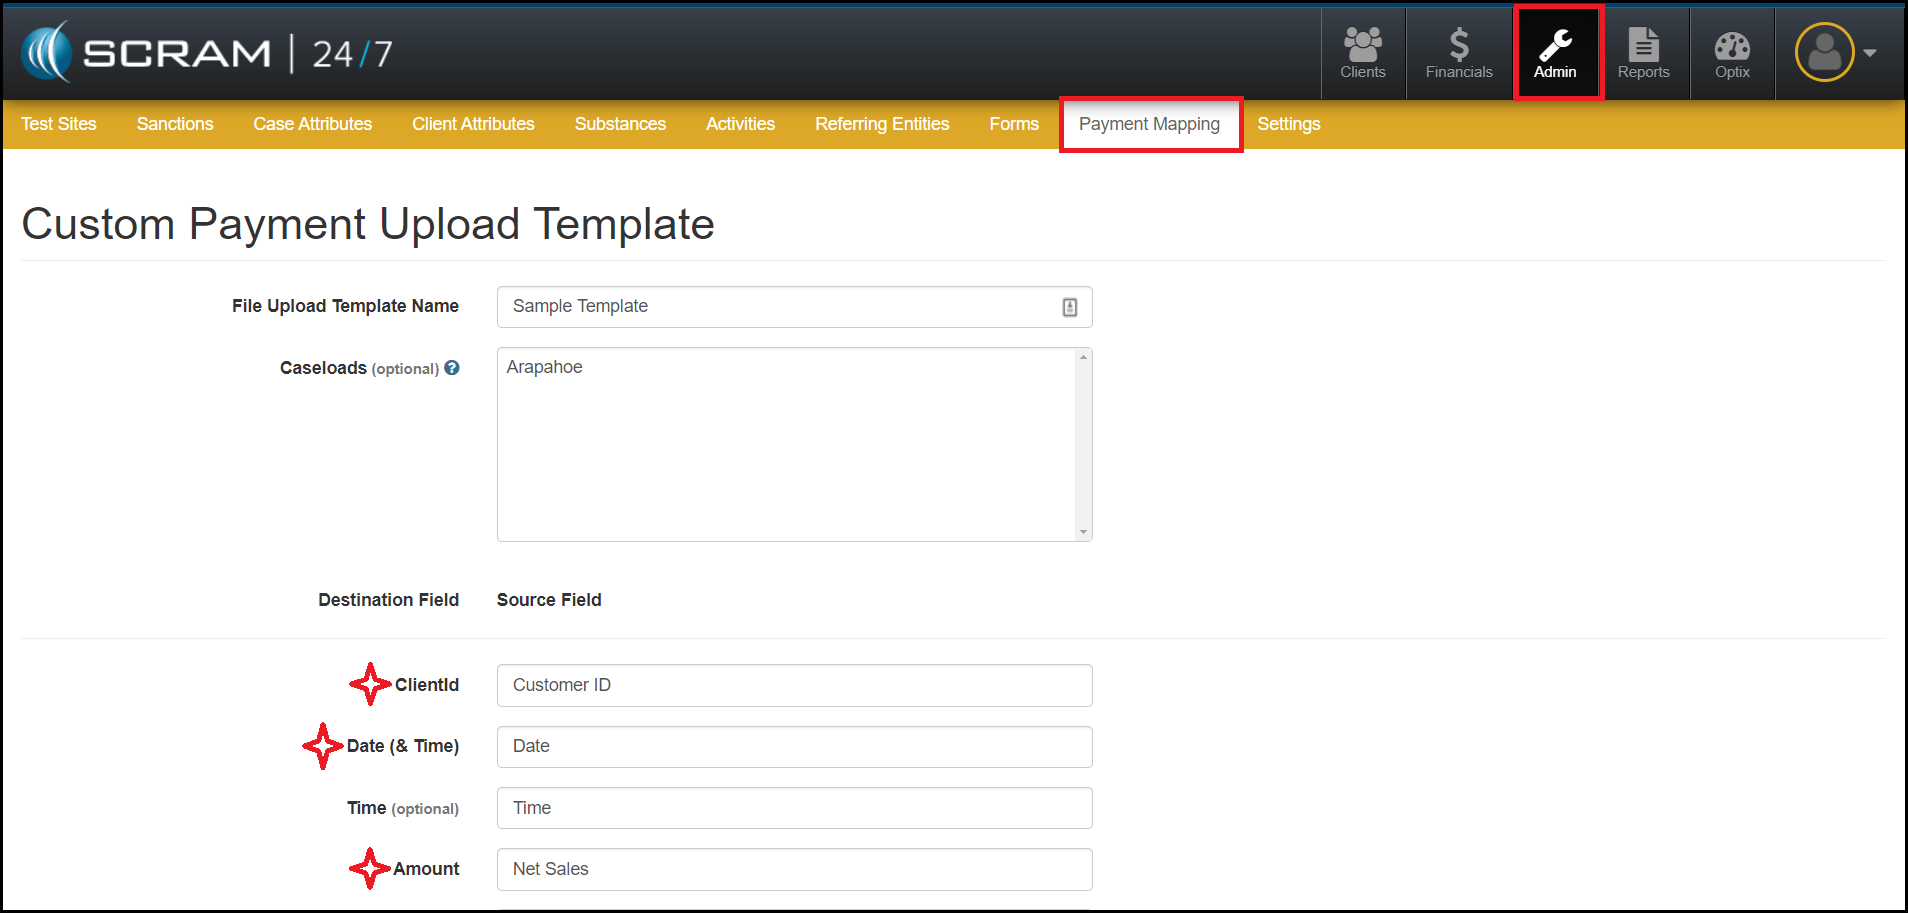
- There are three required fields that need to be matched to the template.
- Client Id
- Date (& Time)
- Amount
- Matching Additional Fields:
- Any other fields that are mapped to “Additional Fields” will be combined in a text field and presented with the upload field name. For example, if “Category”, “Transaction ID”, and “Payment ID” are all set to “Additional Fields”, the text field would read:
Category: Electronic Monitoring
Transaction ID: A123456
Payment ID: P987654321
-
- Additional fields are optional fields but provide additional information when troubleshooting any issues. We recommend that you map to the client’s name.
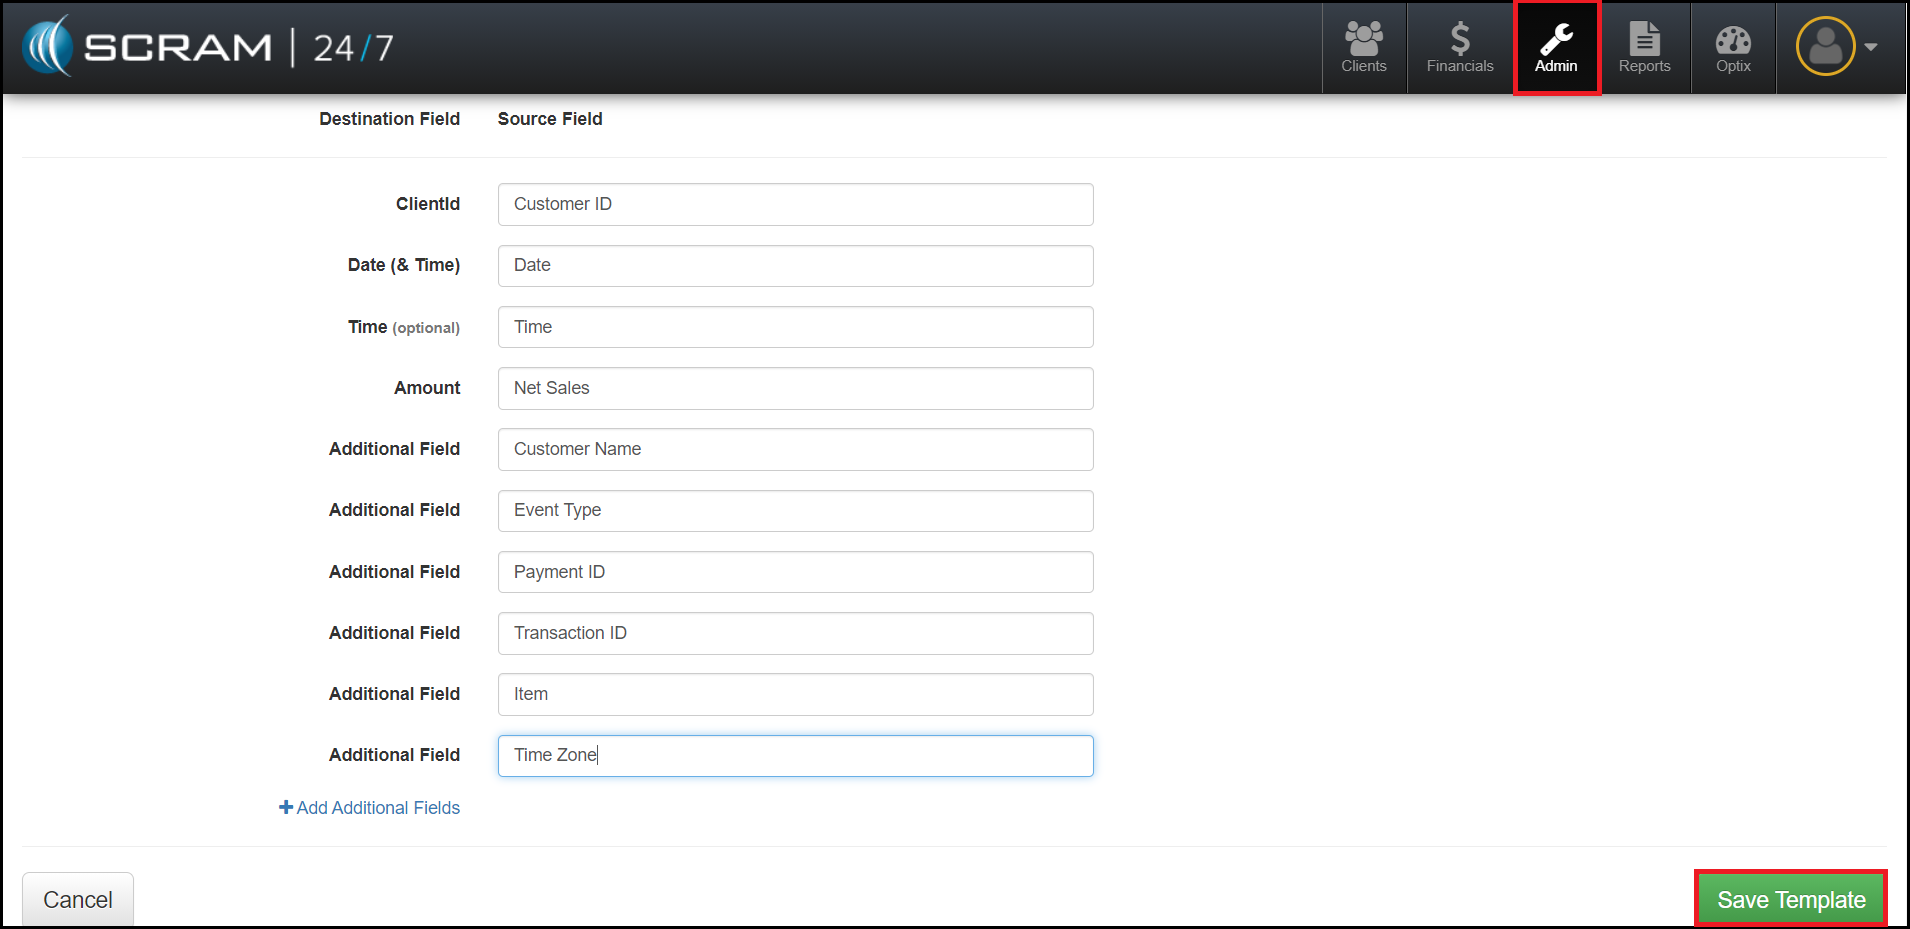
- Once the Destination and Source fields are matched, select the Save Template button.
Upload a Template:
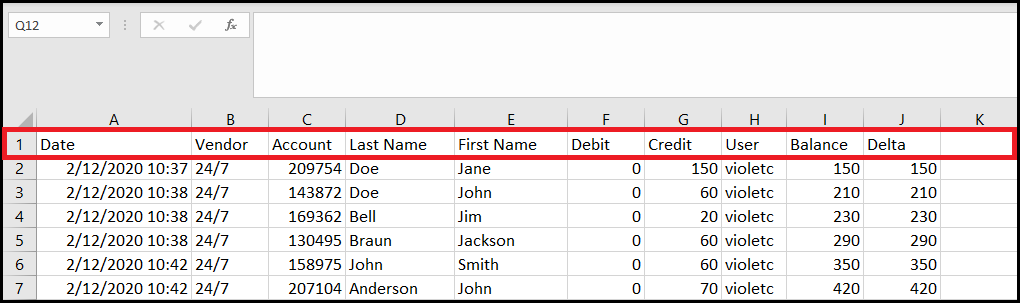
Prior to uploading a template, you must first make sure that the CSV file is in the correct format. You will want to make sure that the first row contains the names of the Source fields. Below are examples correct and incorrect formats.
Incorrect Format:
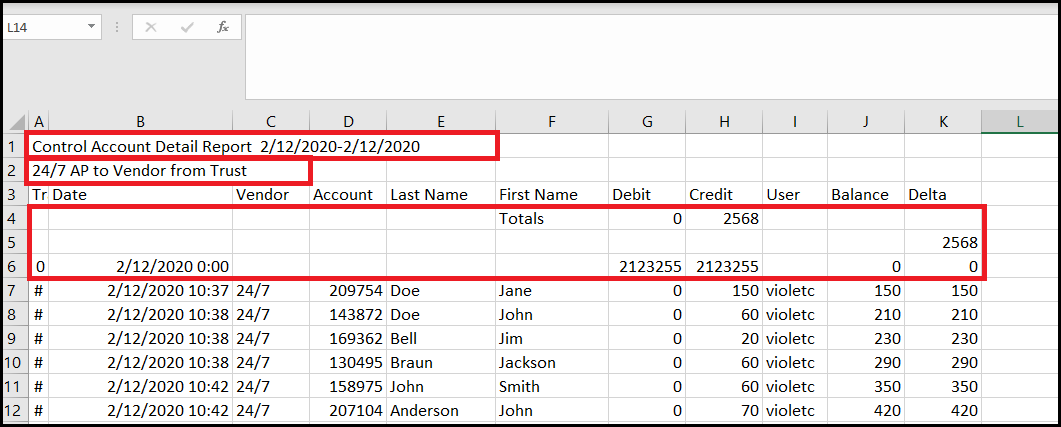
In order to make this template compatible with SCRAM 24/7, the areas in red would need to be removed so that the column (Source) names appear in the first row.
Correct Format:
- To upload a Template, select the +Add an Upload Template button.
- Select the Choose File button.
- Attach the file.
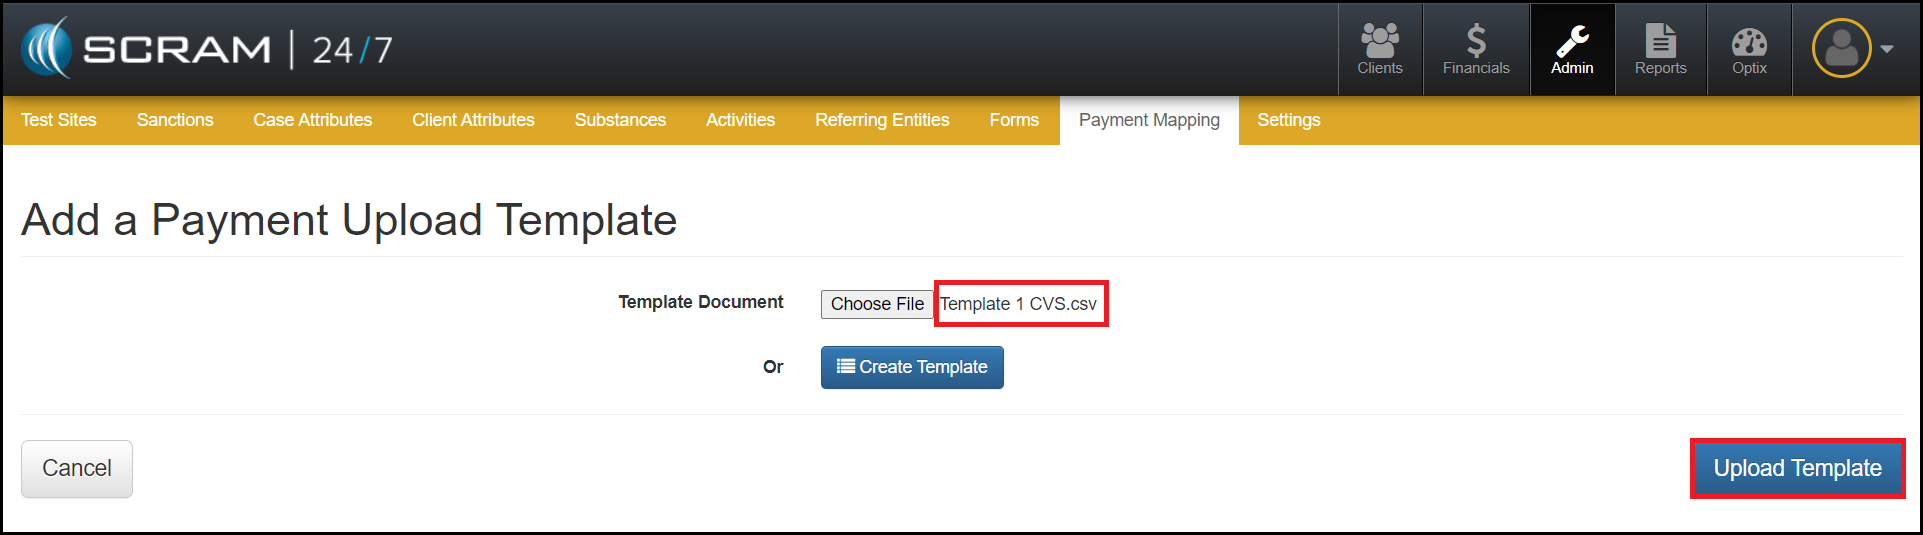
- Select the blue Upload Template button.

- There are three required fields that need to be matched to the template.
- Client Id
- Date (& Time)
- Amount
- Matching Additional Fields:
-
- Any other fields that are mapped to “Additional Fields” will be combined in a text field and presented with the upload field name. For example, if “Category”, “Transaction ID”, and “Payment ID” are all set to “Additional Fields”, the text field would read:
Category: Electronic Monitoring
Transaction ID: A123456
Payment ID: P987654321
-
- Additional fields are optional fields but provide additional information when troubleshooting any issues. We recommend that you map to the client’s name.
- Date/Time can be combined by choosing the Date/Time dropdown for both Date and Time. This will combine the two into a date/time field.
- To complete the template, change the Destination fields to the desired configuration.
- Once complete, select the green Save Template button.