Add Client Test Check-In for a Random Drug Test Activity
To get started:
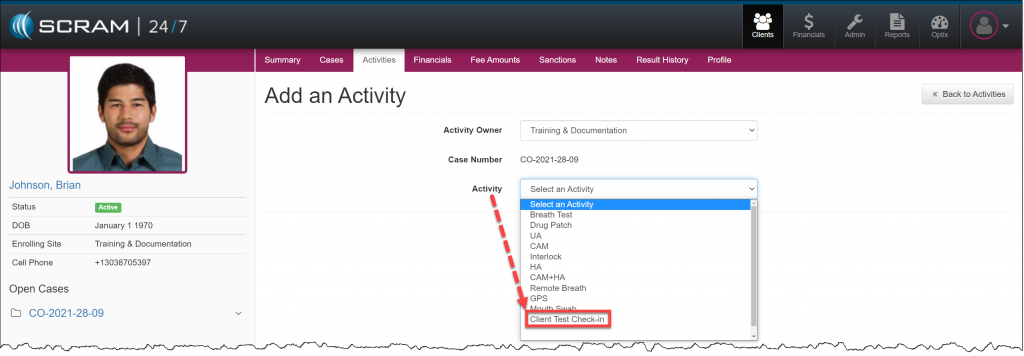
- From the client’s Summary page, select the Activities tab.
- Click the Add Activity button.
- From the Activity menu, select the option of Client Test Check-in.
click to enlarge
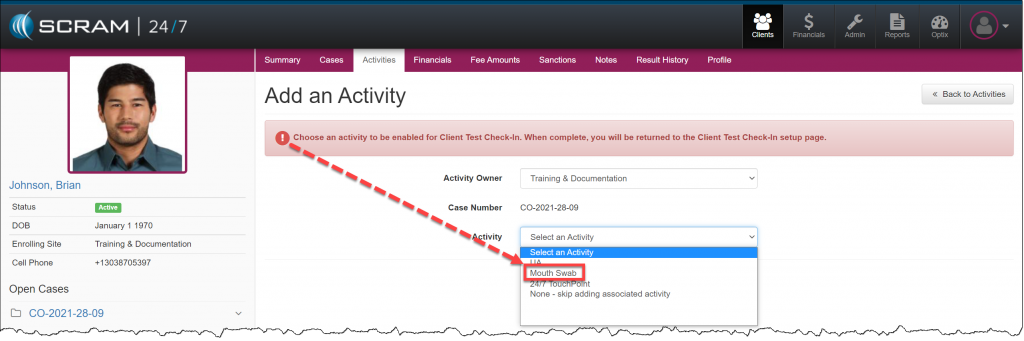
- Select the Activity to associate to Client Test Check-In from the Activity menu. Only activities that have random test schedules are displayed. In this example Mouth Swab was selected.
click to enlarge
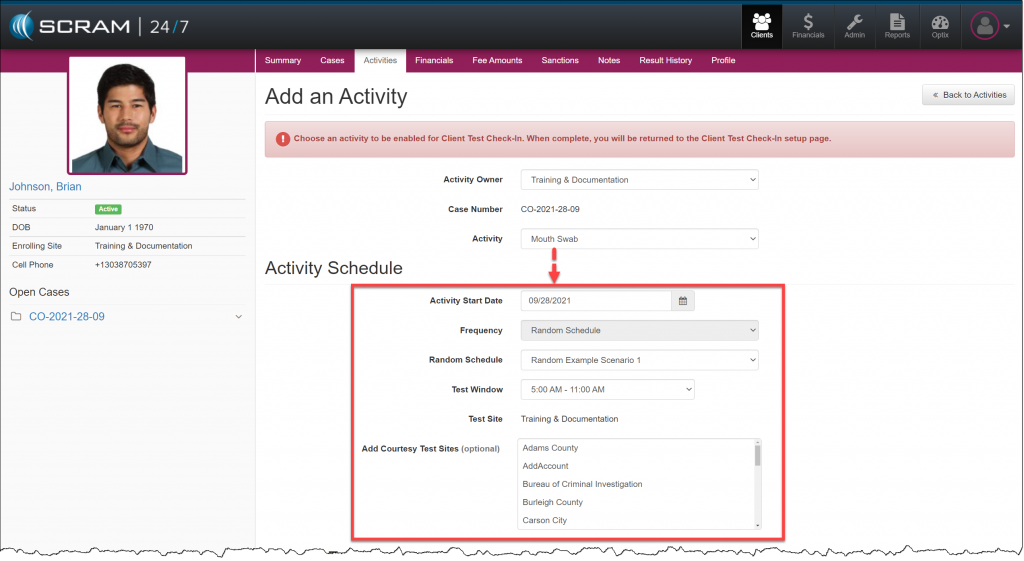
- Add the Mouth Swab activity details in the Activity Schedule section.
click to enlarge
- Click the Add Activity button to save the Mouth Swab activity details.
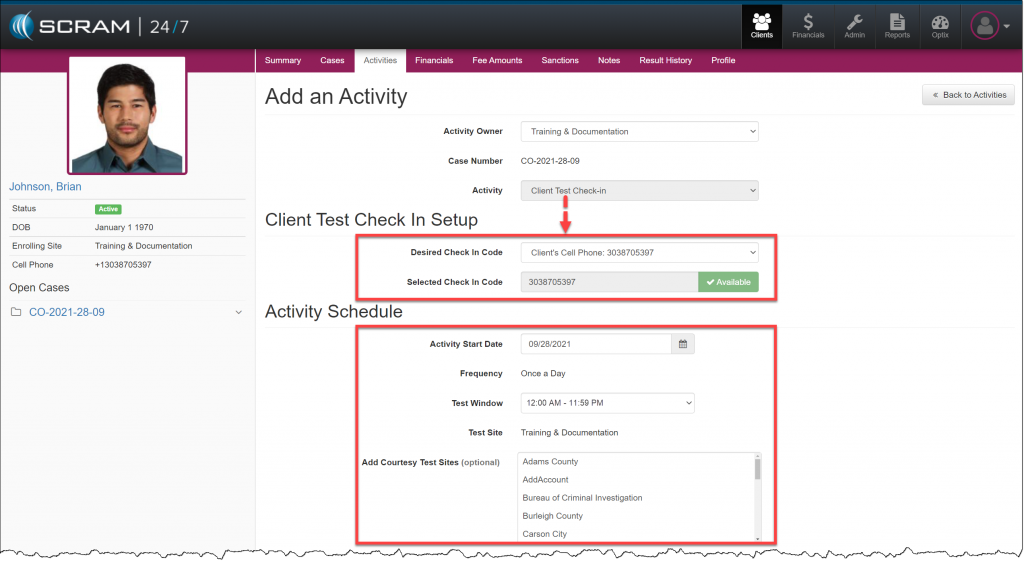
- Add the Client Test Check-In details:
- Client Test Check-In Setup
- The Desired Check-In Code is the unique validation code used by the client to access the secure phone system for testing requirements each day.
- Add the Activity Schedule
- SCRAM Systems recommends a 24-hour test window for the CTCI activity.
- Client Test Check-In Setup
click to enlarge
- Click the Add Activity button to save the Client Test Check-In details.
The client’s Summary page will now display both the Mouth Swab and Client Test Check-In appointment information.

click to enlarge
Every day the client completes a successful Client Test Check-in, the CTCI appointment will display as Attended automatically.
If the client does not complete a CTCI during the selected window, the CTCI appointment will display as Missed.
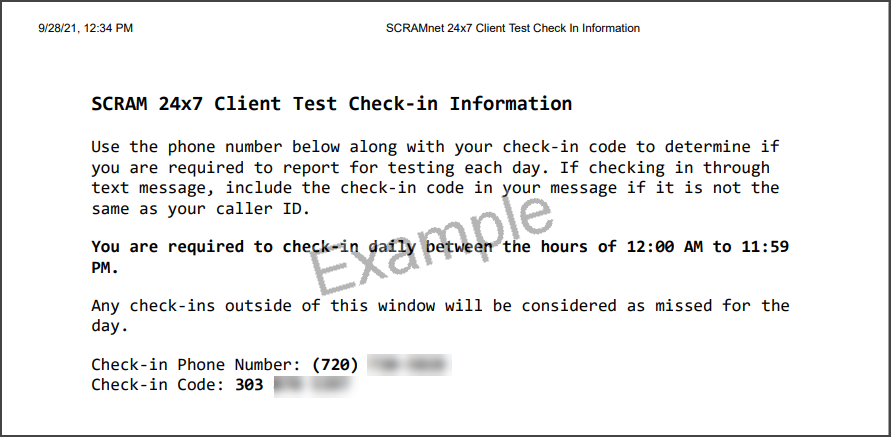
Client Test Check-In Registration Information
Provide your client with a copy of the CTCI registration information. This document provides the client with instructions on how to complete their check-in call or text.
click to enlarge
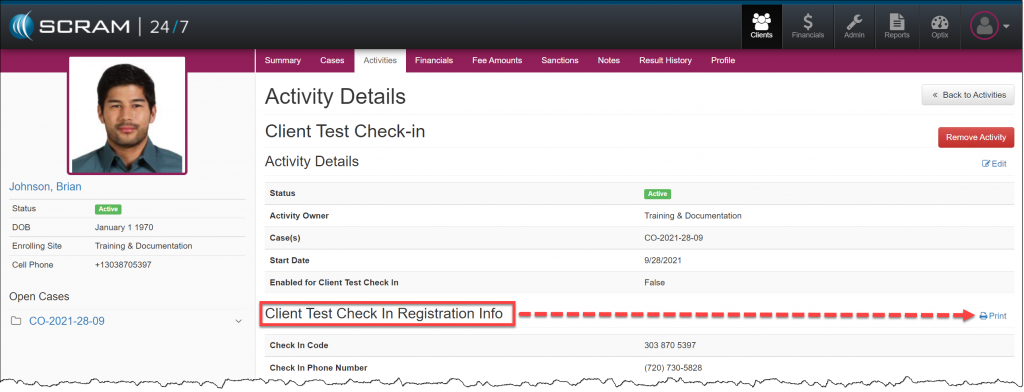
On the client’s Activity page:
- Click the Client Test Check-In activity hyperlink.
- Locate the Client Test Check-In Registration Information section and click the Print hyperlink.
click to enlarge
Edit the Check-In Code
To edit the Check-in Code:
- Navigate to the client’s Activity tab in SCRAM 24/7.
- Select the Client Test Check-In activity.
- Select the Edit hyperlink next to the Client Test Check In Registration Info section.
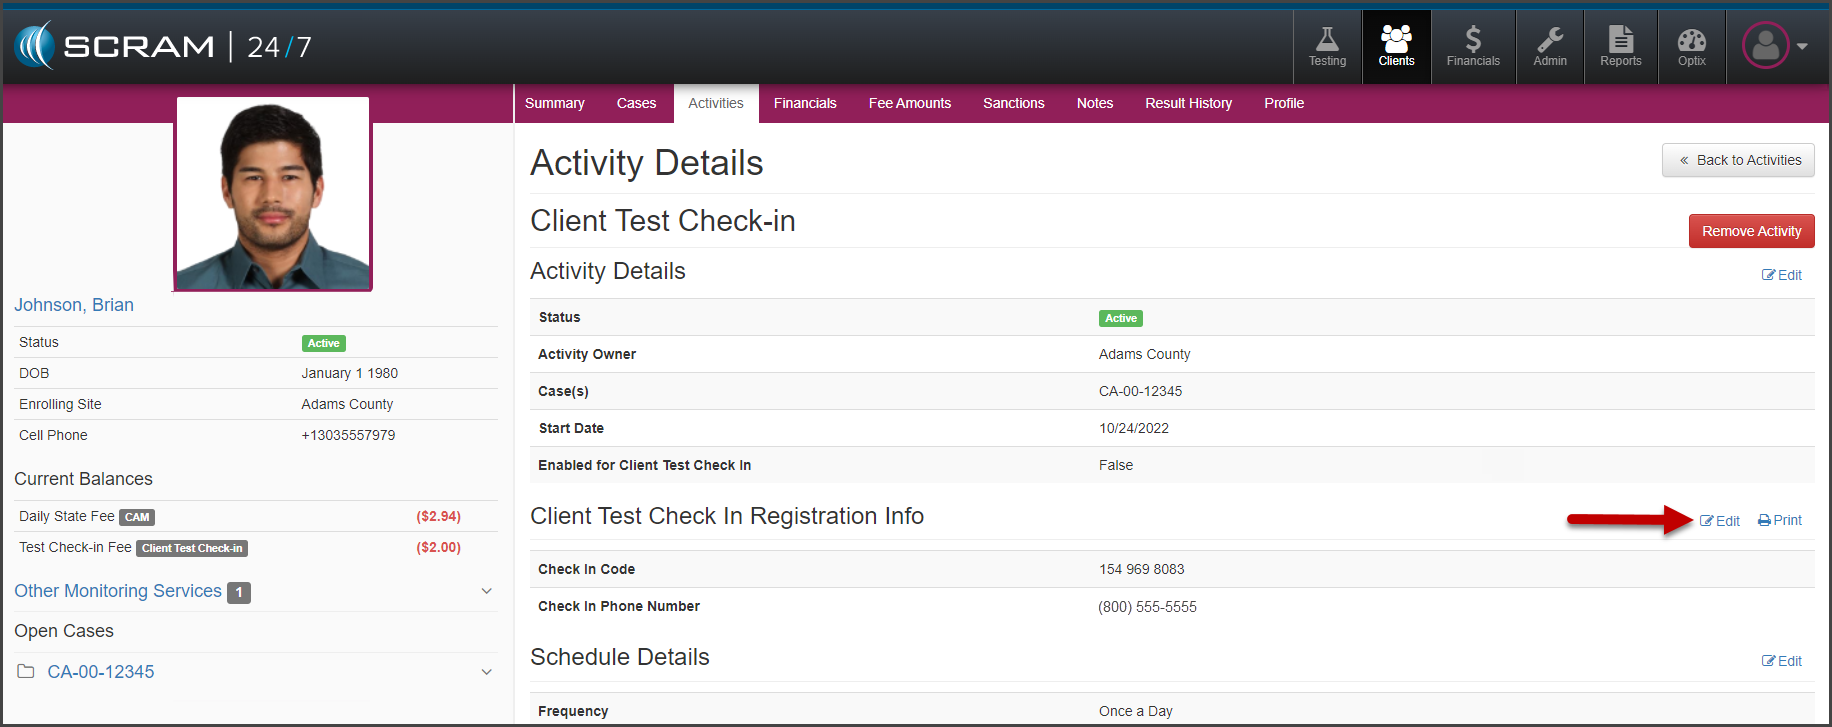
Client Test Check-In Activity Details page (click to enlarge)
- Enter in the new “Check In Code.”
- Select the Save Changes button.
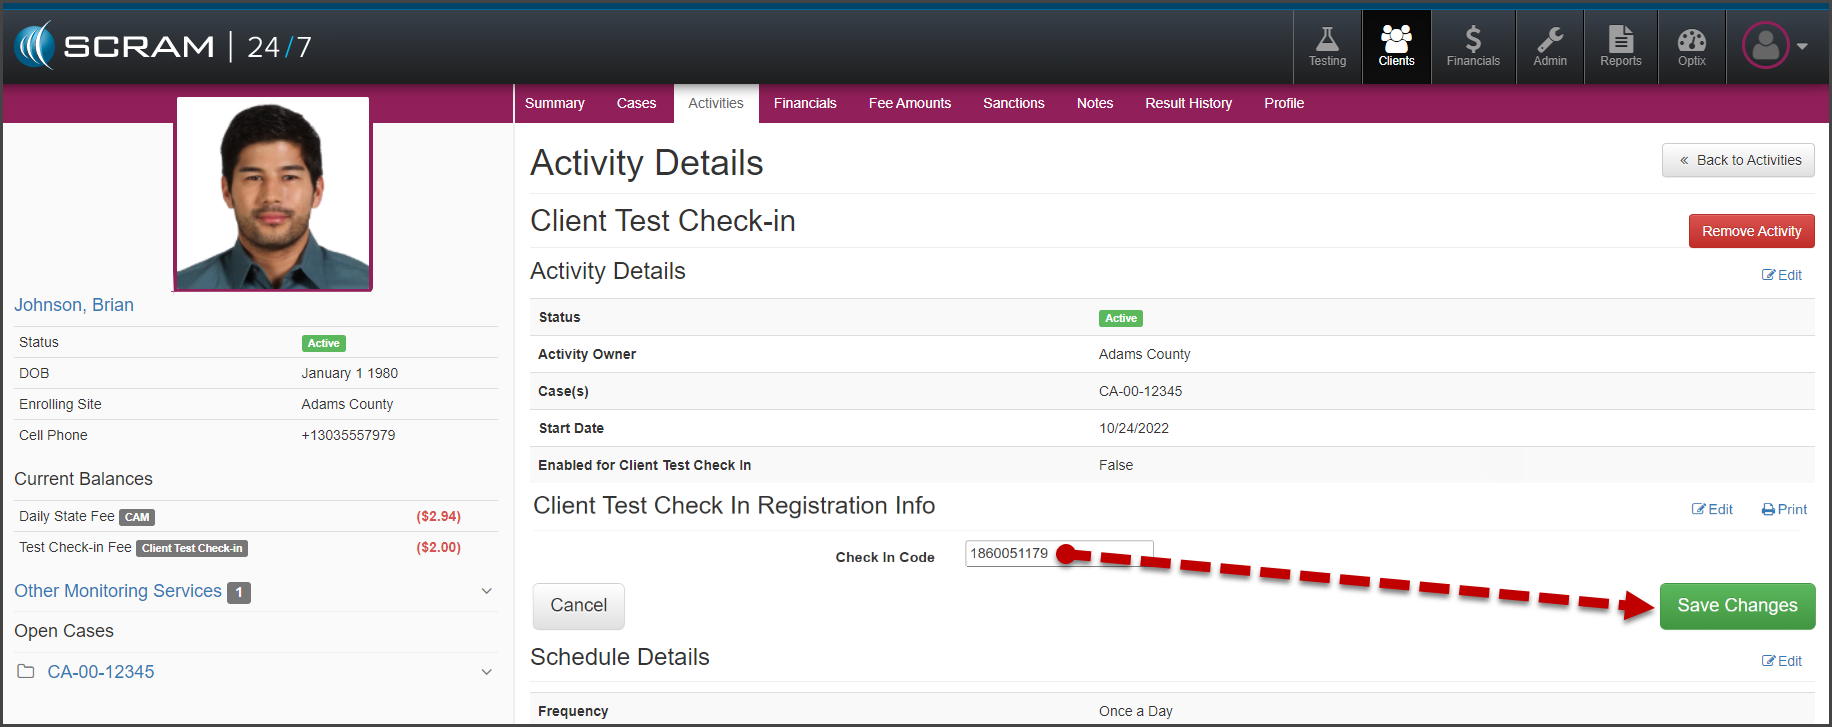
Client Test Check-In Activity Details, Edit Check in Code (click to enlarge)
If needed, you may print a new copy of the SCRAM 24×7 Client Test Check-in Information sheet by selecting the Print hyperlink.
Suspending an Activity with CTCI Enabled
When a random test activity needs to be suspended, SCRAM Systems recommends suspending both the CTCI and the random test activity.

click to enlarge