When recording a client’s UA appointment, you will record the client’s attendance, the initial UA screening and results (if available), whether the sample was sent to a lab for analysis, the next appointment, and any payment collected. Based on your selections, the options available on the page will be updated.
Recording an Appointment
You may access the client’s UA appointment by selecting the Record UA Appointment from either the Appointments page or from their Summary page in the Pending Items section.
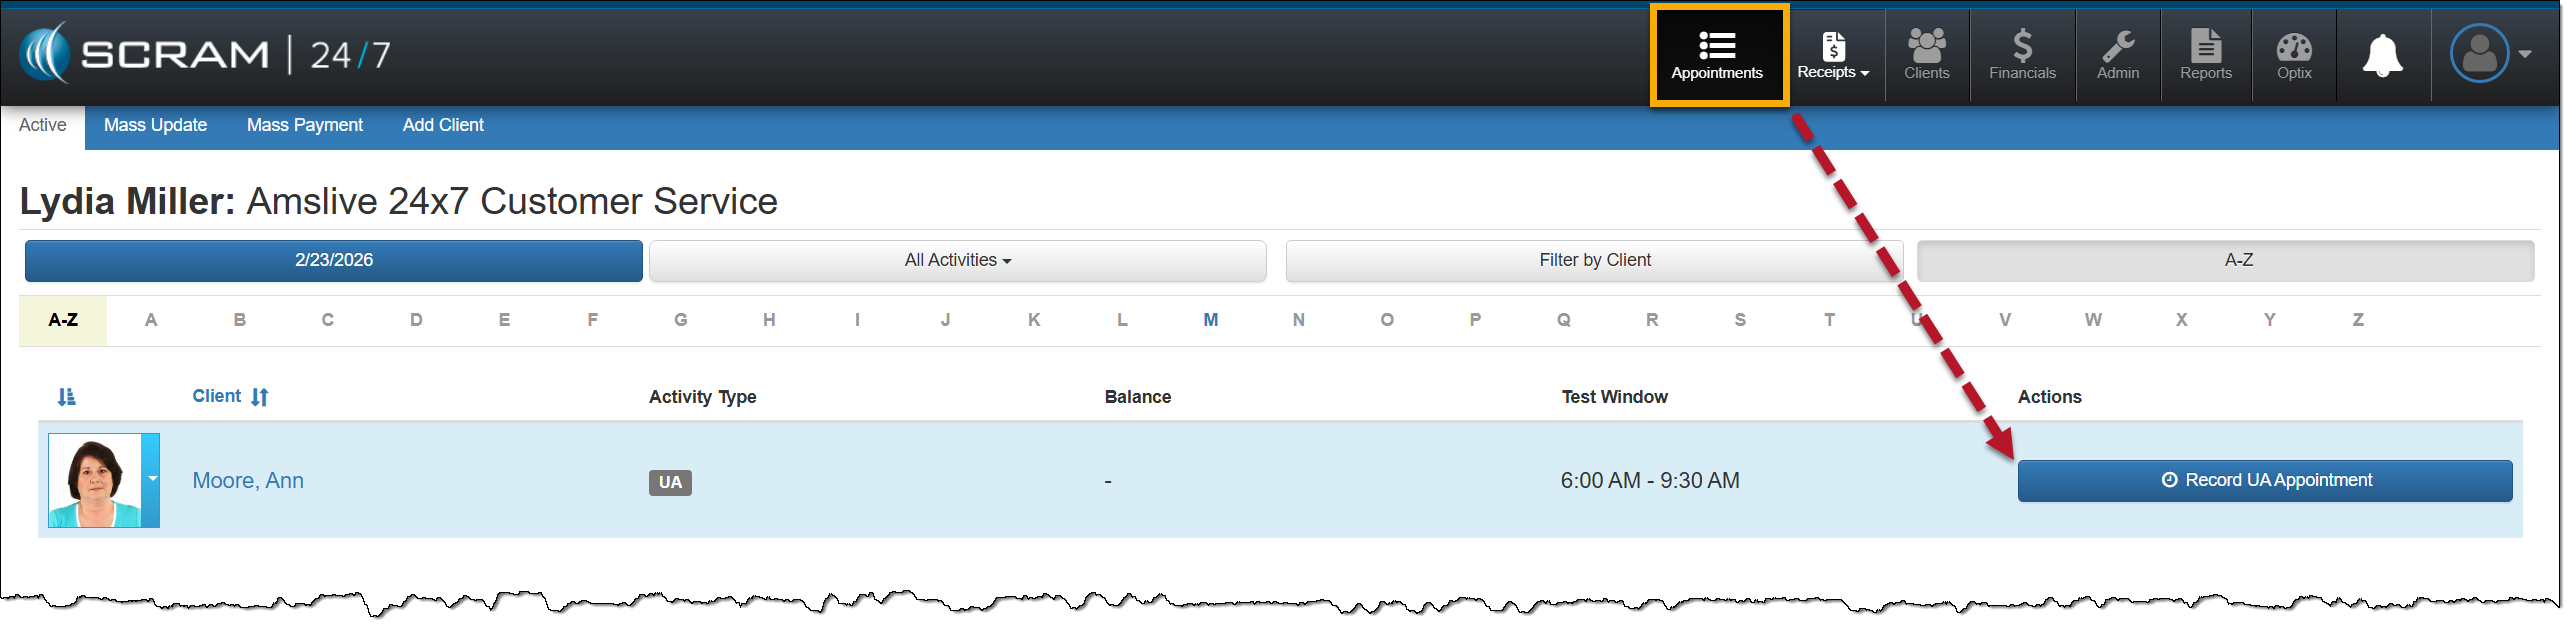
Appointments Page – click to enlarge
On the UA appointment page, the appointment date and testing window are displayed across the top.
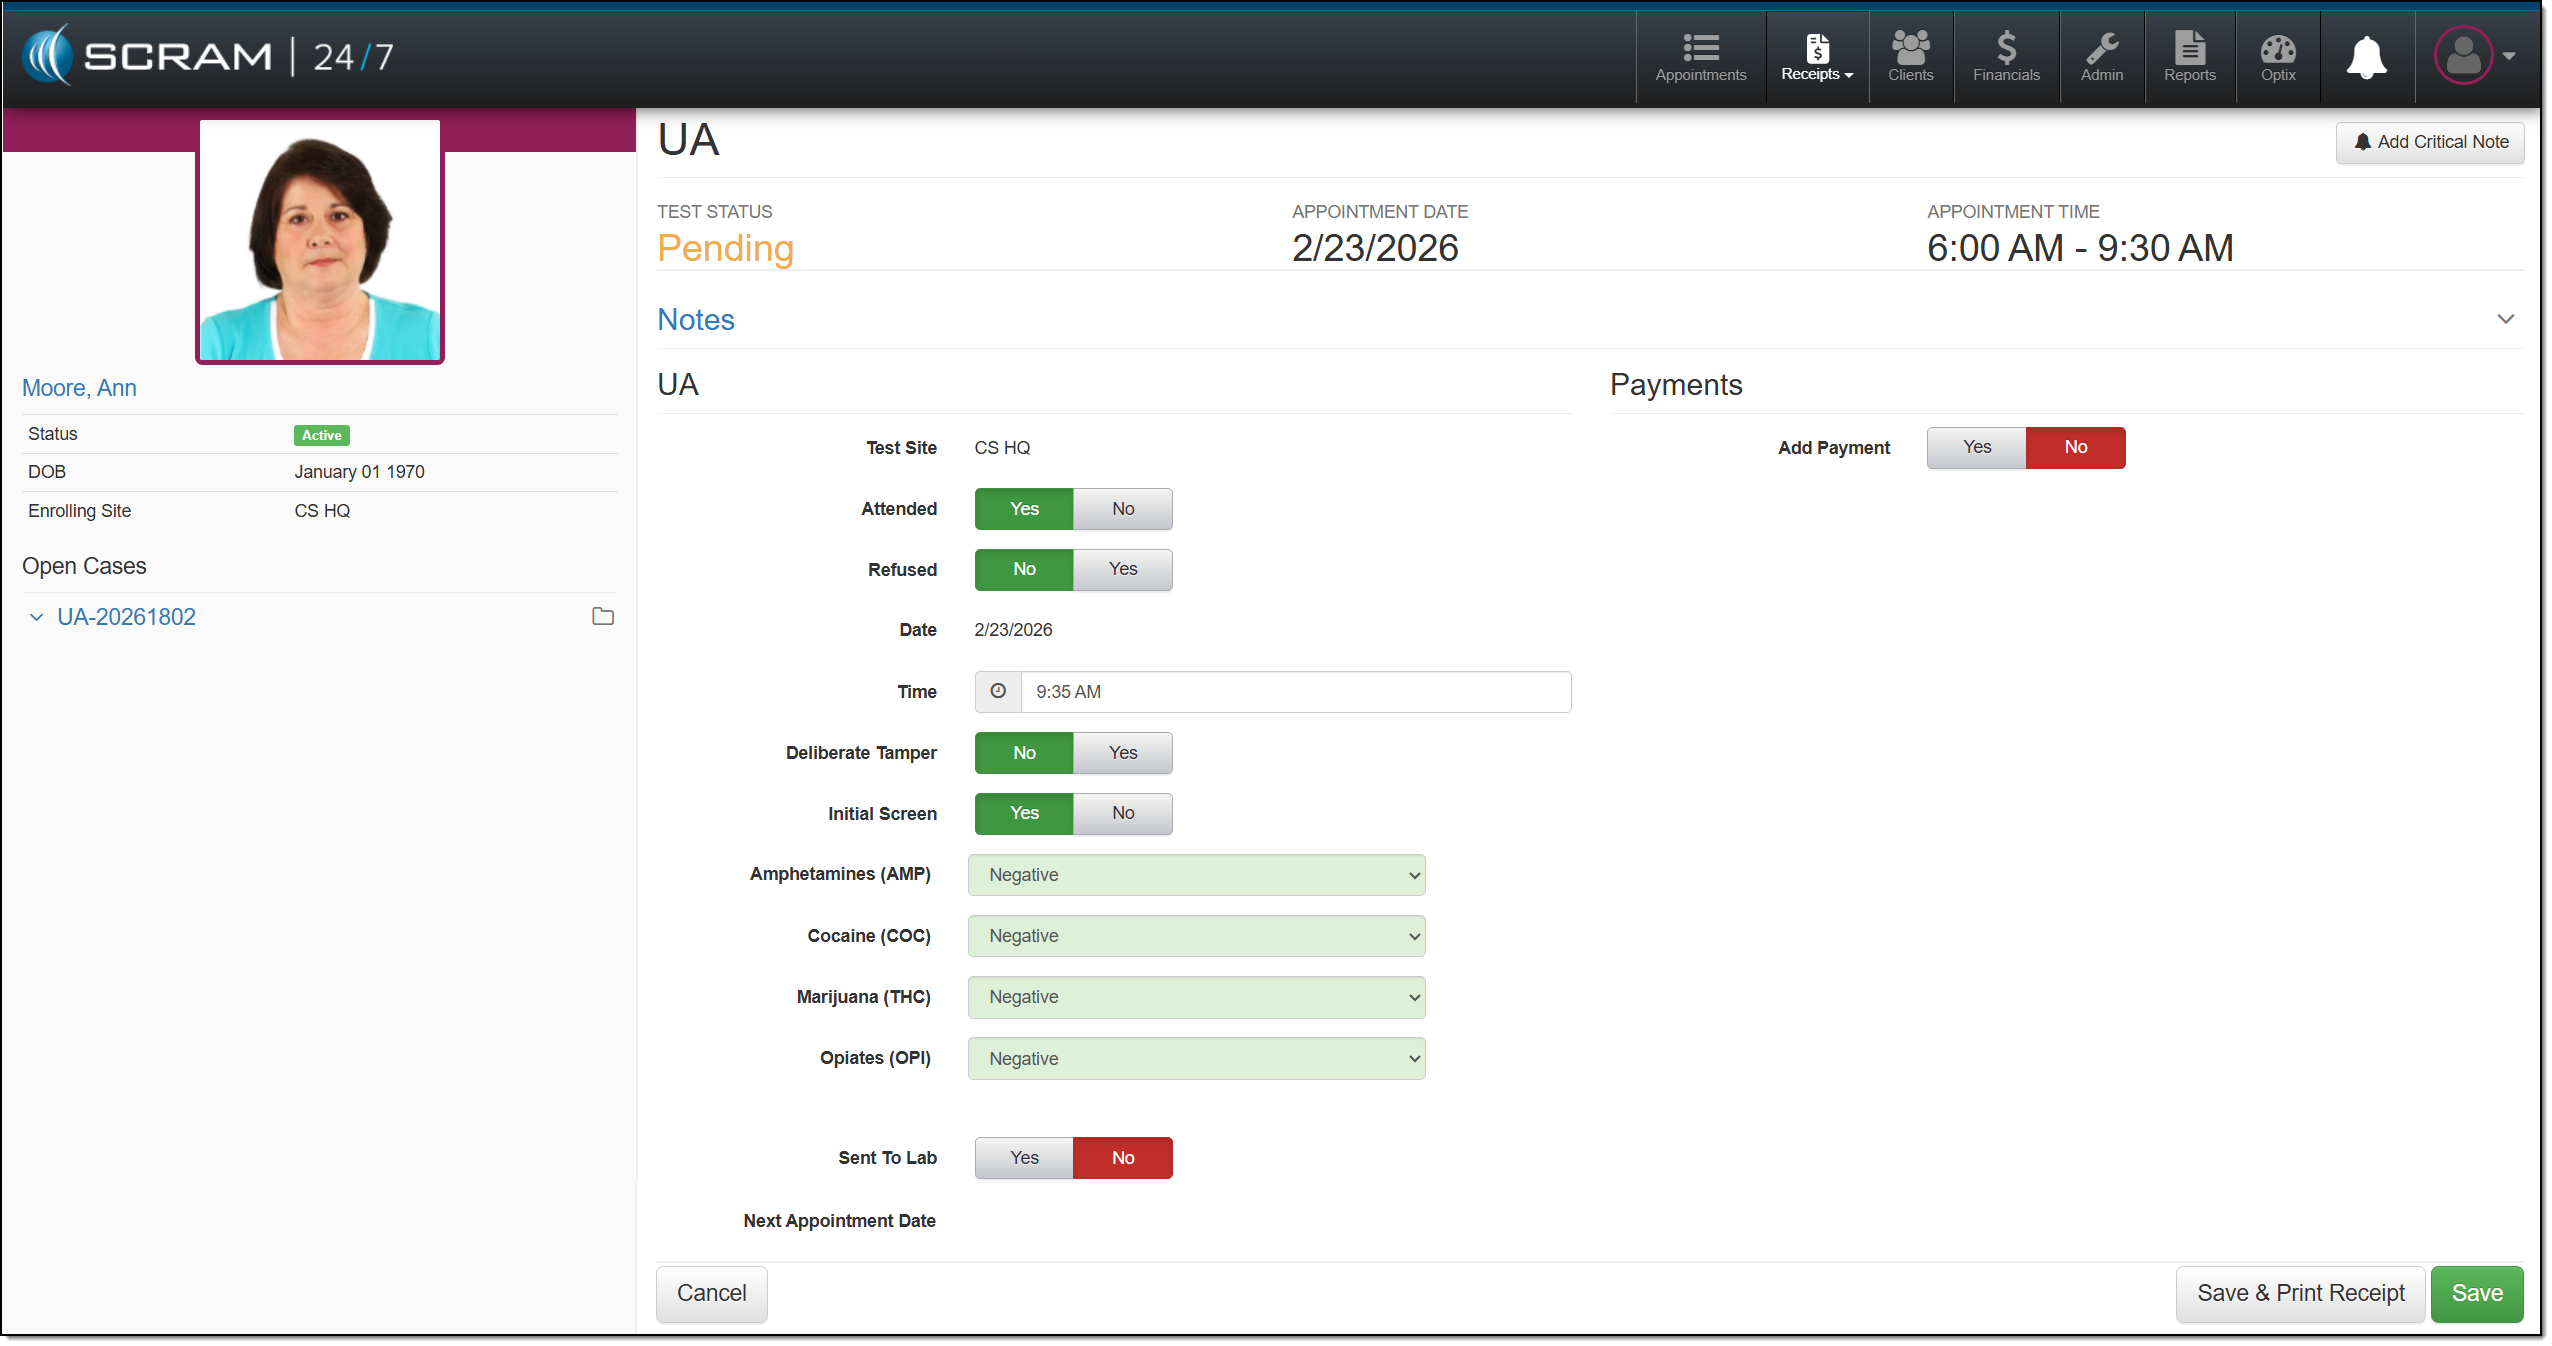
UA Appointment Page – click to enlarge
You may add a note for this appointment by expanding the Notes section and entering any details.
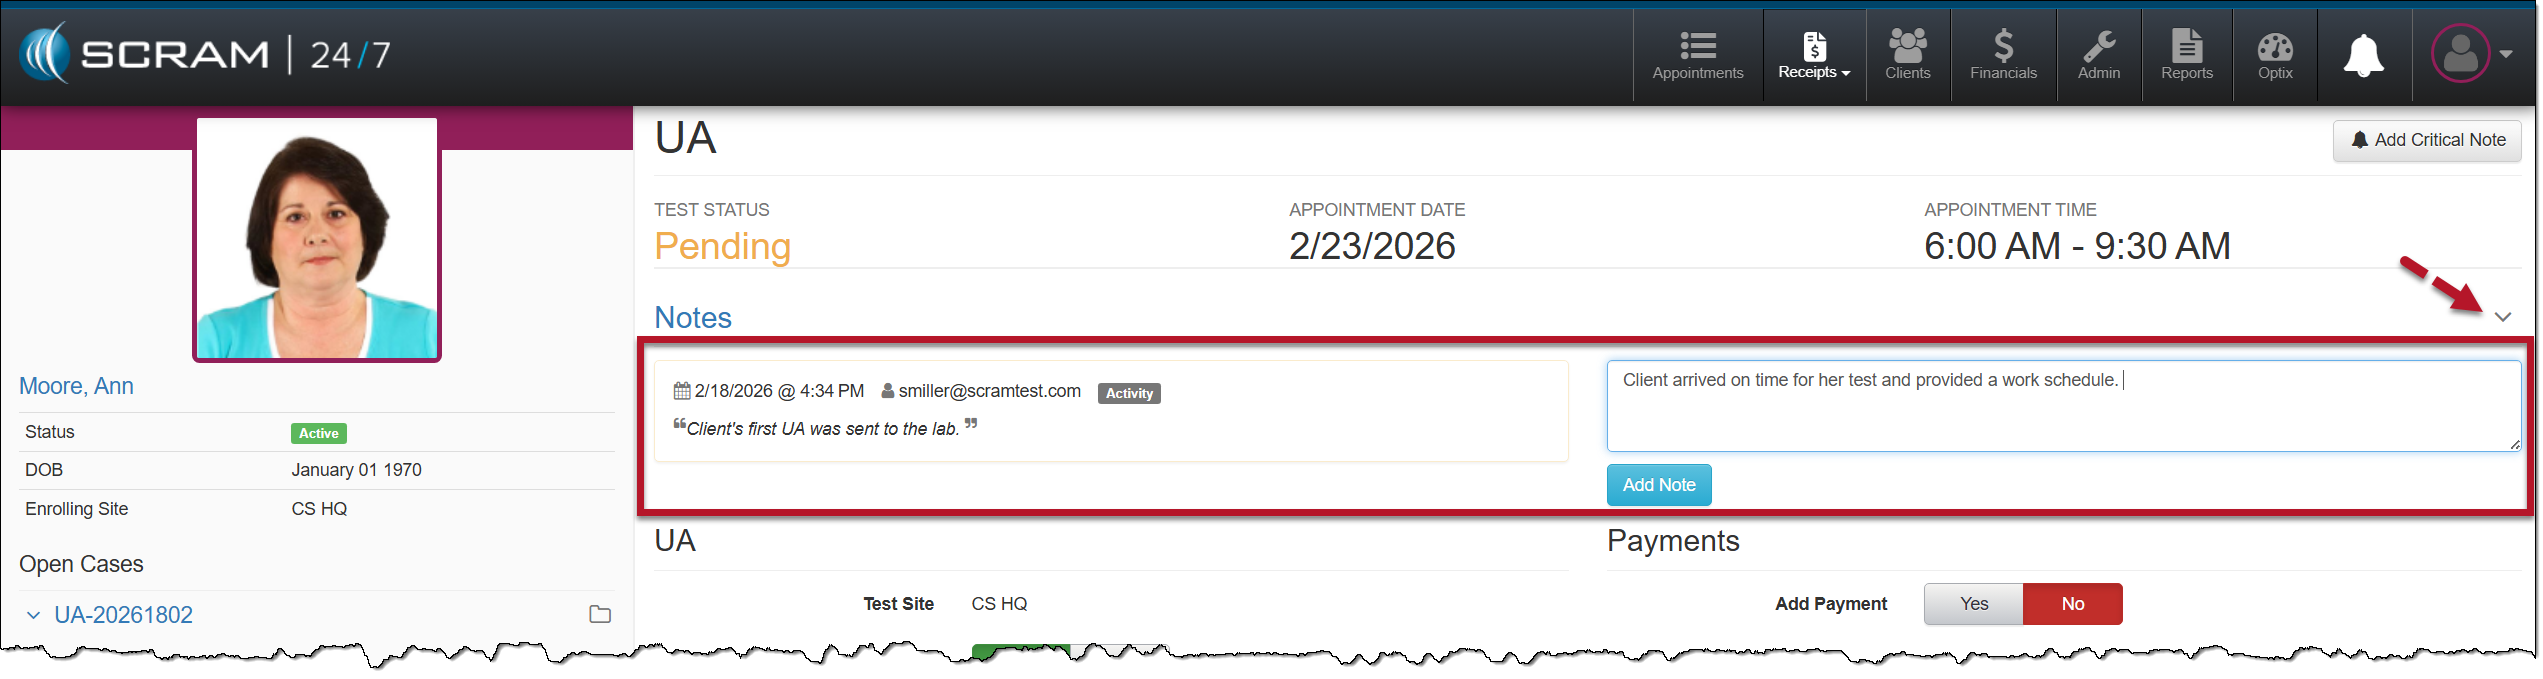
UA Appointment Page, Notes Section – click to enlarge
Start by:
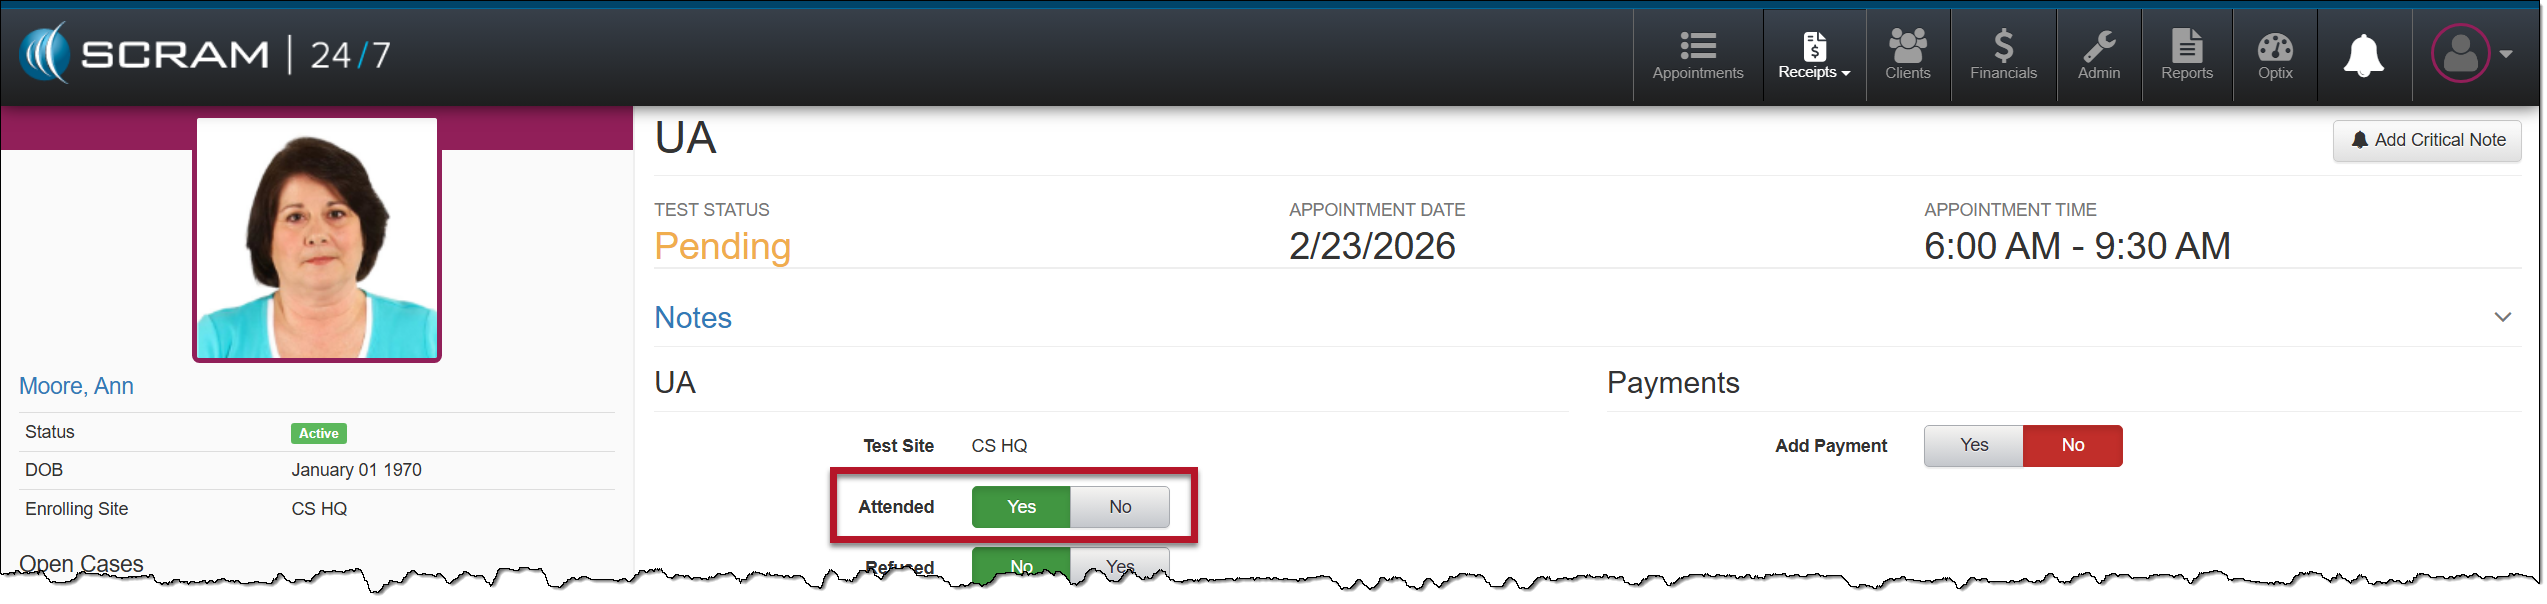
- Record if the client is in attendance.
- When you select the attendance option of No, you will select whether the absence was excused and the reason for the absence.
Record UA Appointment Attendance – click to enlarge
- Next, select if the client provided a UA sample.
- If the client refused to provide a UA sample, the last step is to save the appointment.
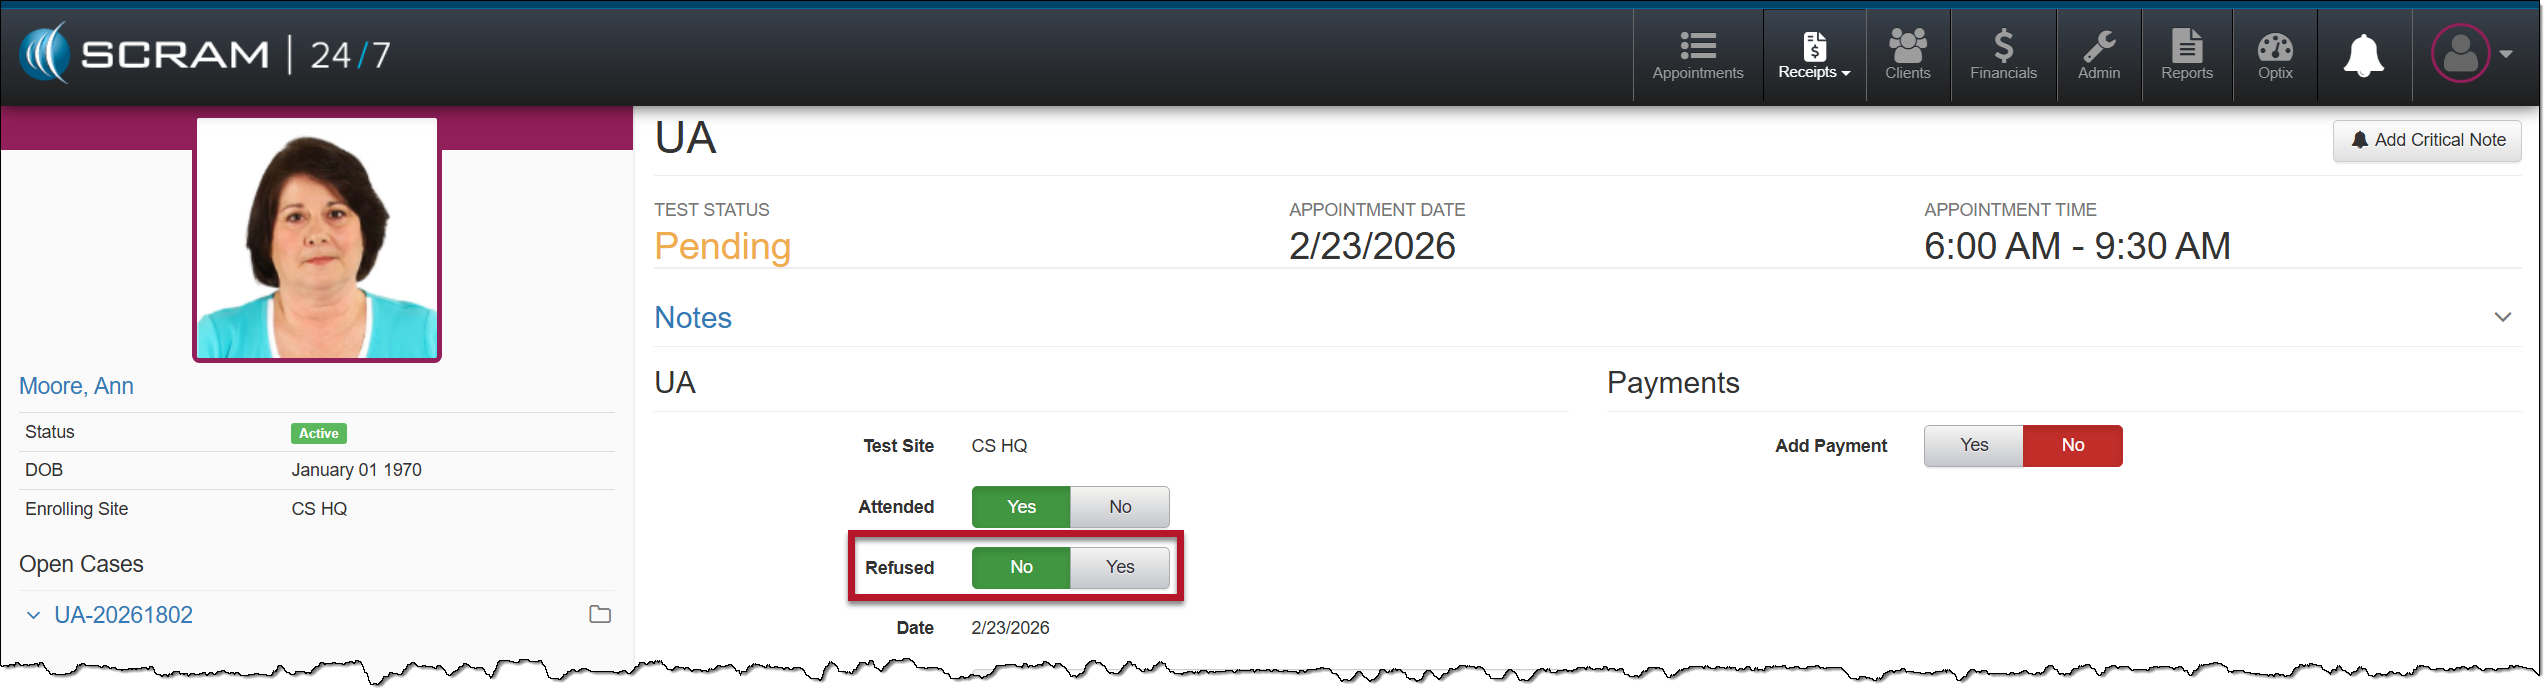
Recording Client Compliance in Providing a UA Sample – click to enlarge
- Next, you will select the appropriate details about the UA sample gathered during the appointment. Based on your selections, the options will update on the page.
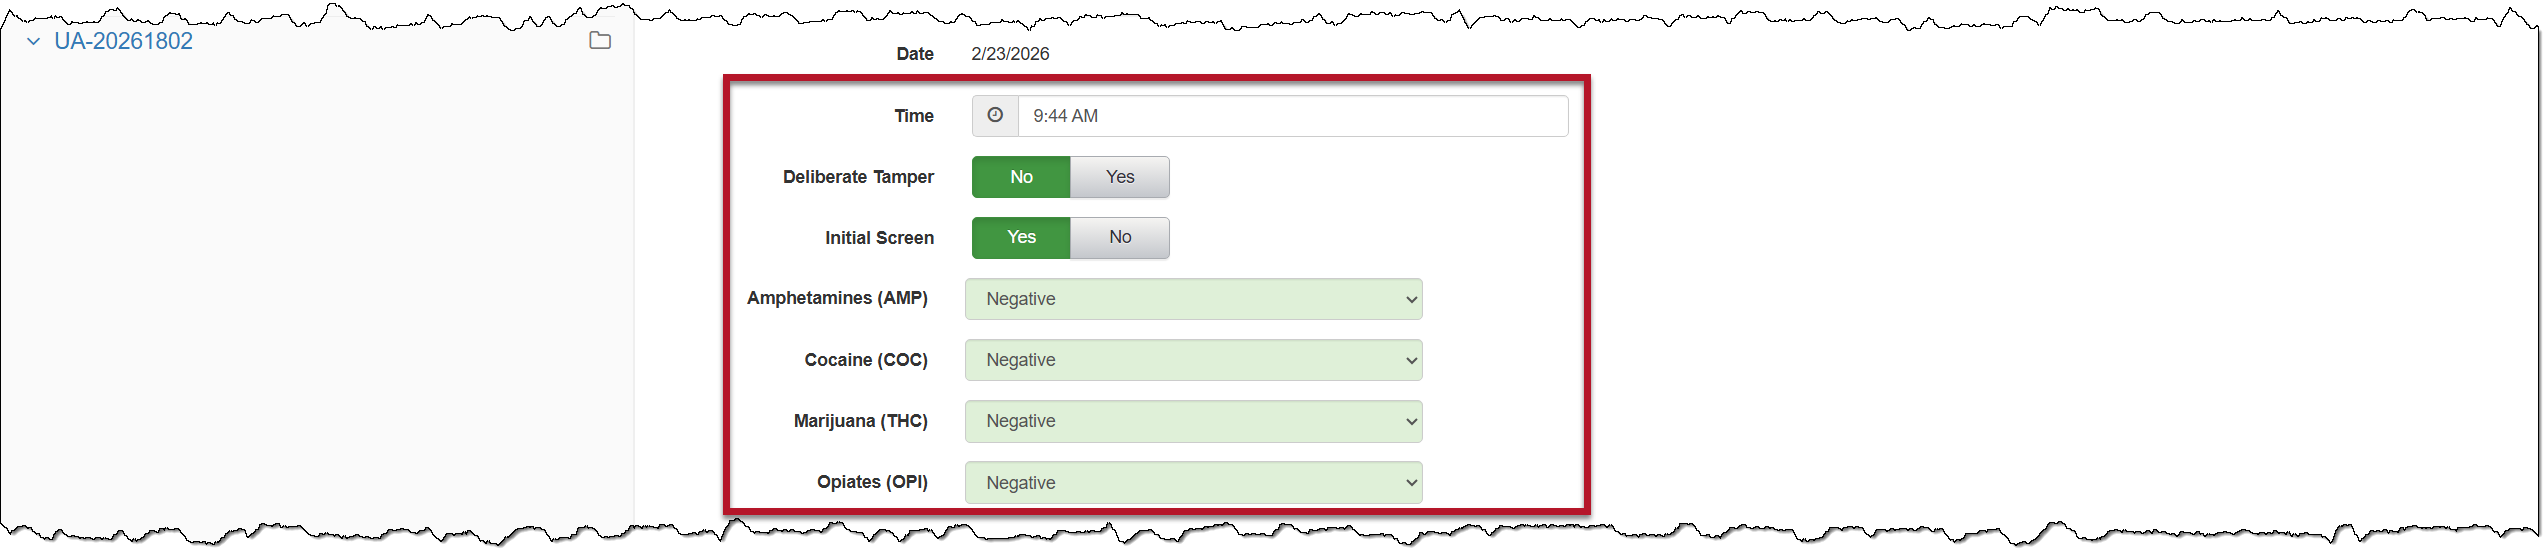
Initial UA Test Results – click to enlarge
| The list of substances available to record is set on the Admin tab. |
- If the UA sample will be sent to a lab for analysis, select the Yes Once selected, enter the UA ID# that will identify the sample. This ID number will be used to record the sample upon its return.

UA Sample Sent to Lab and UA ID – click to enlarge
- If you will be collecting a payment from the client at this time, select the Yes option and record the payment information.
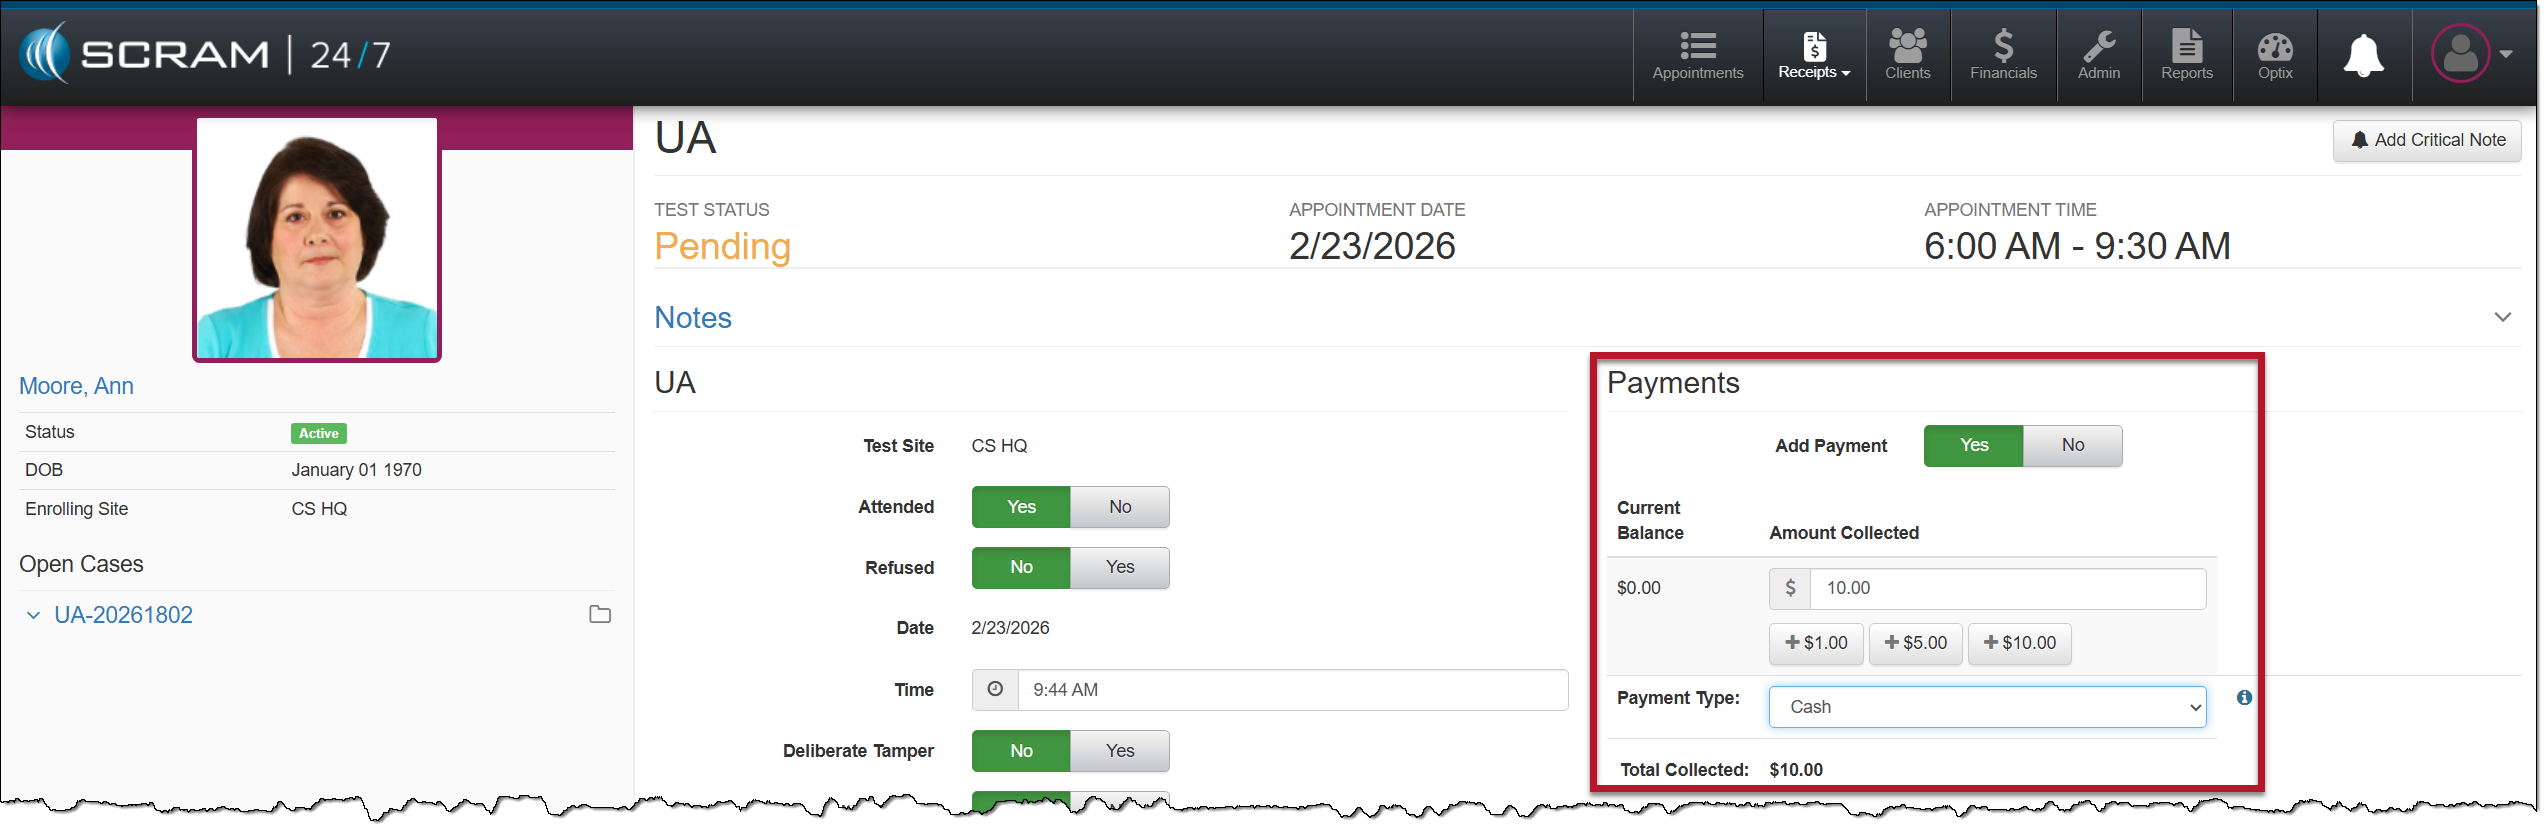
UA Appointment Payment – click to enlarge
- The last step is to save the appointment.
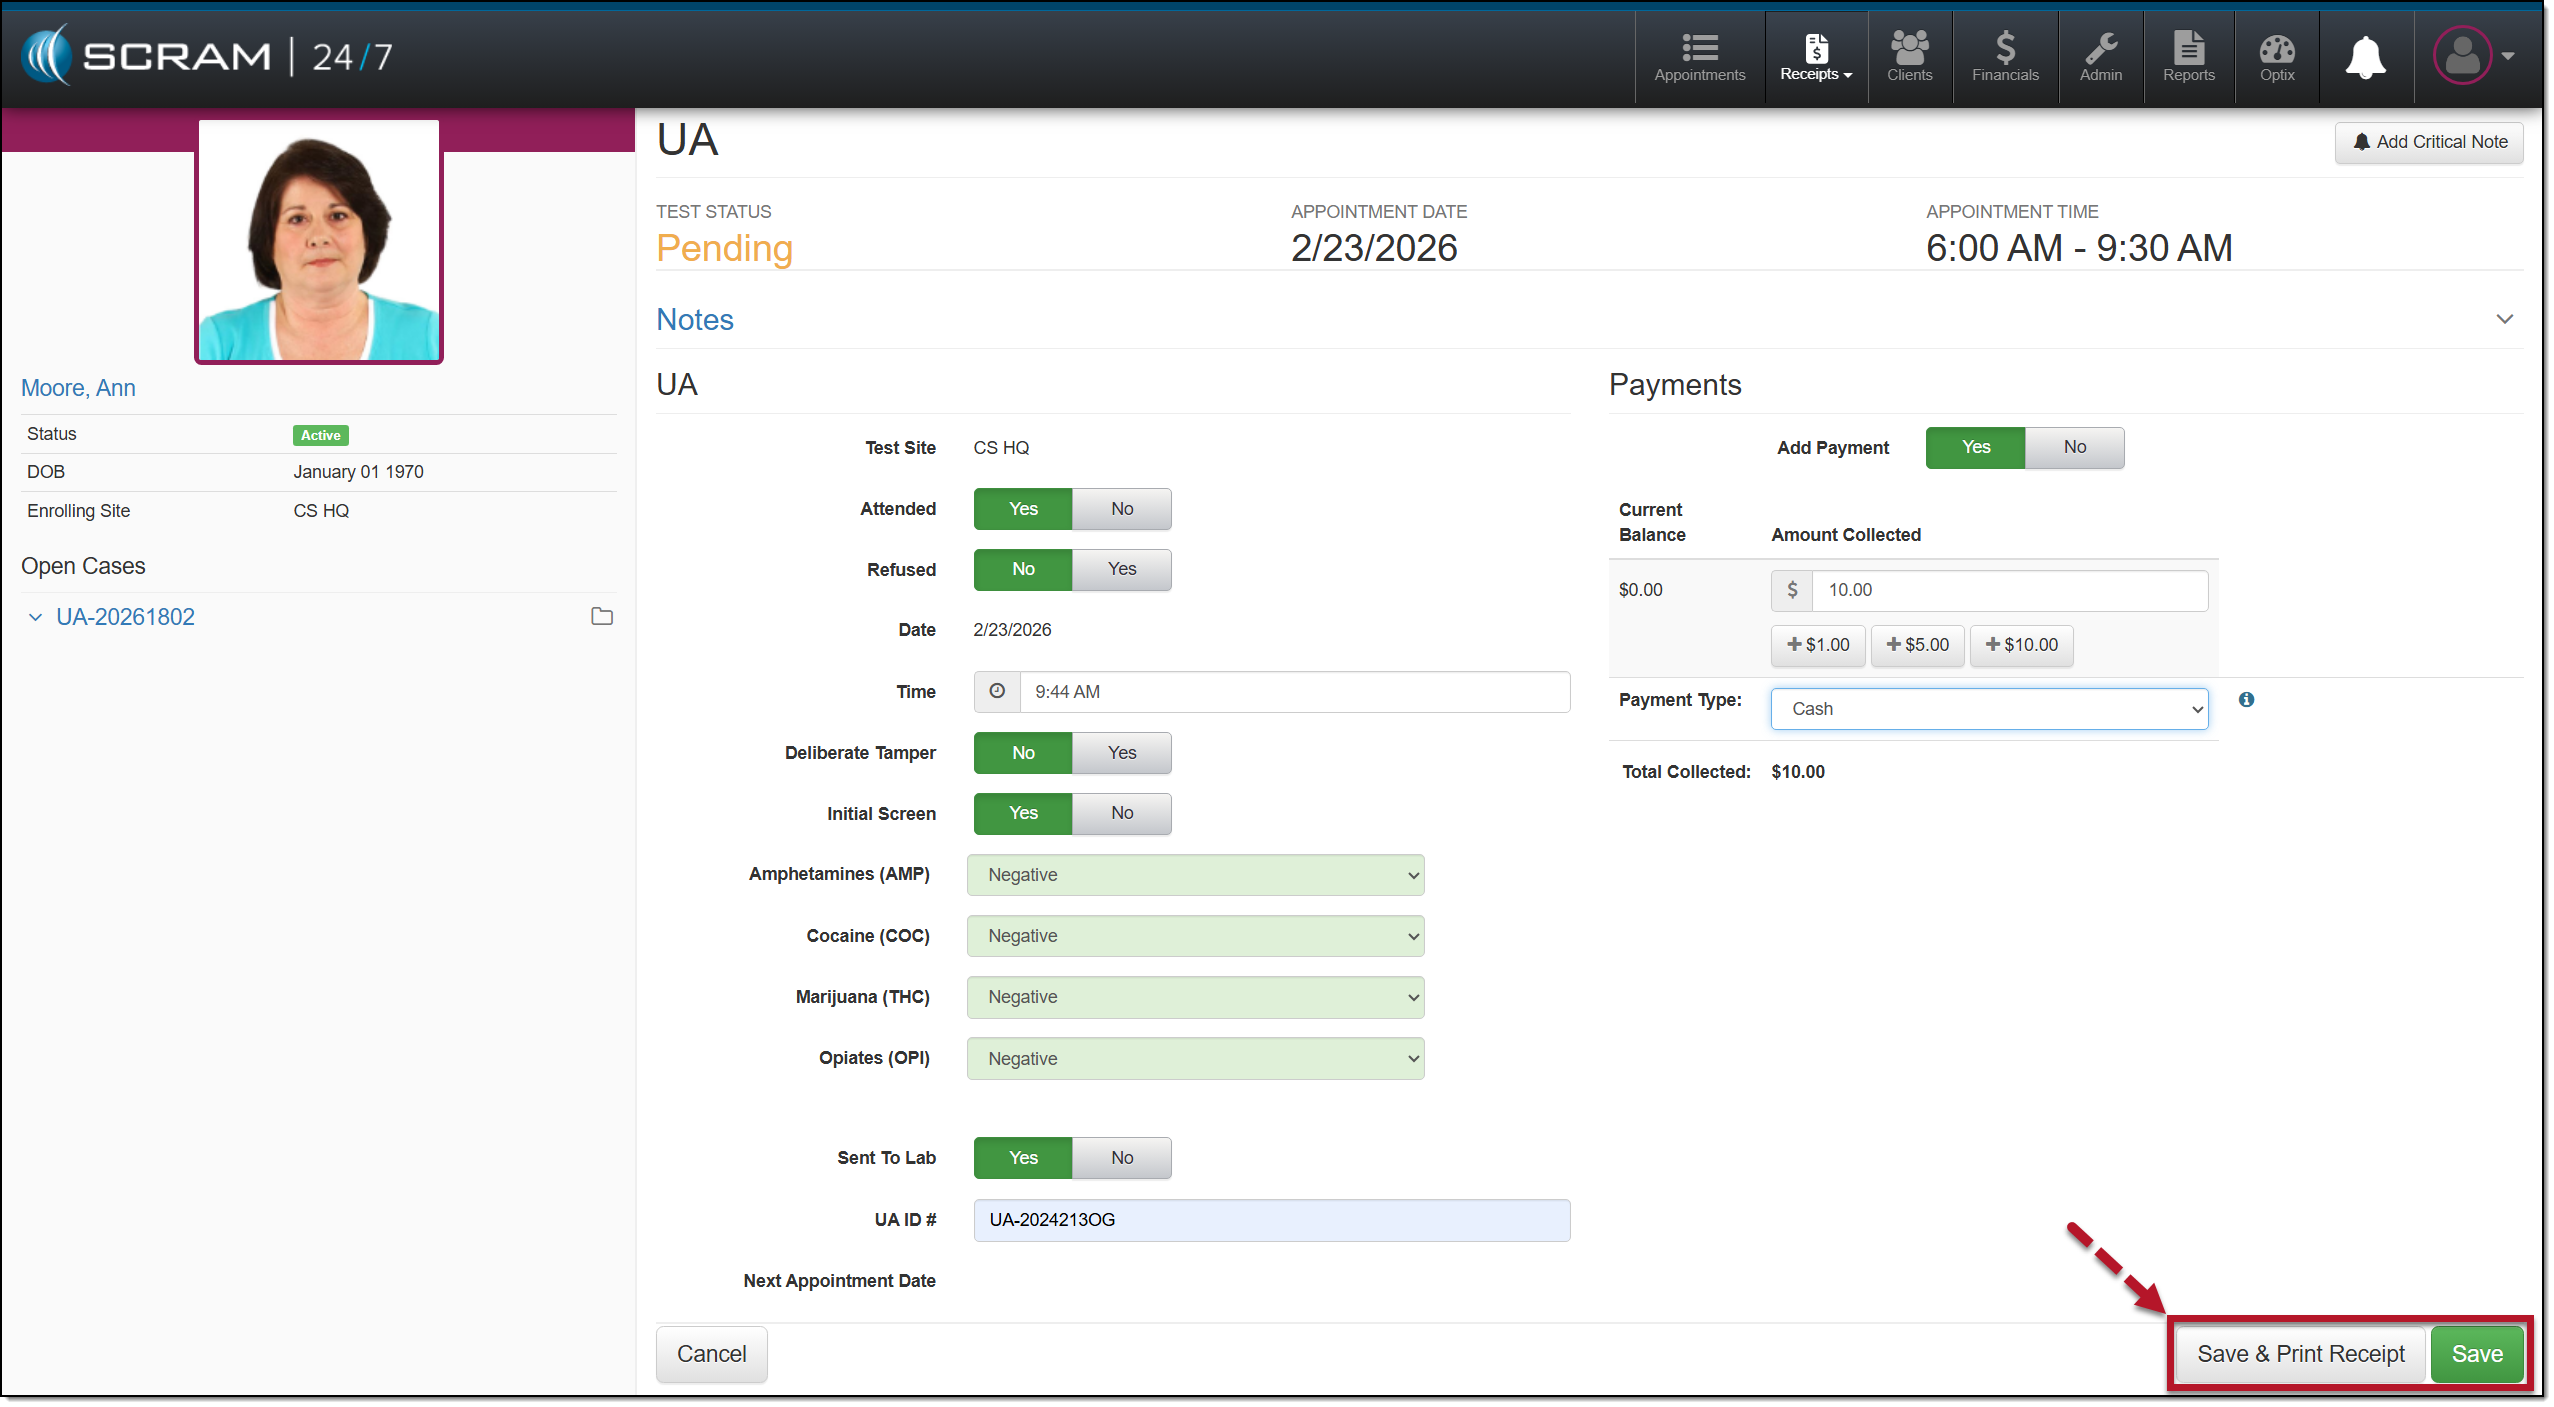
Complete UA Appointment – click to enlarge
You may view the completed appointment on the Result History page.
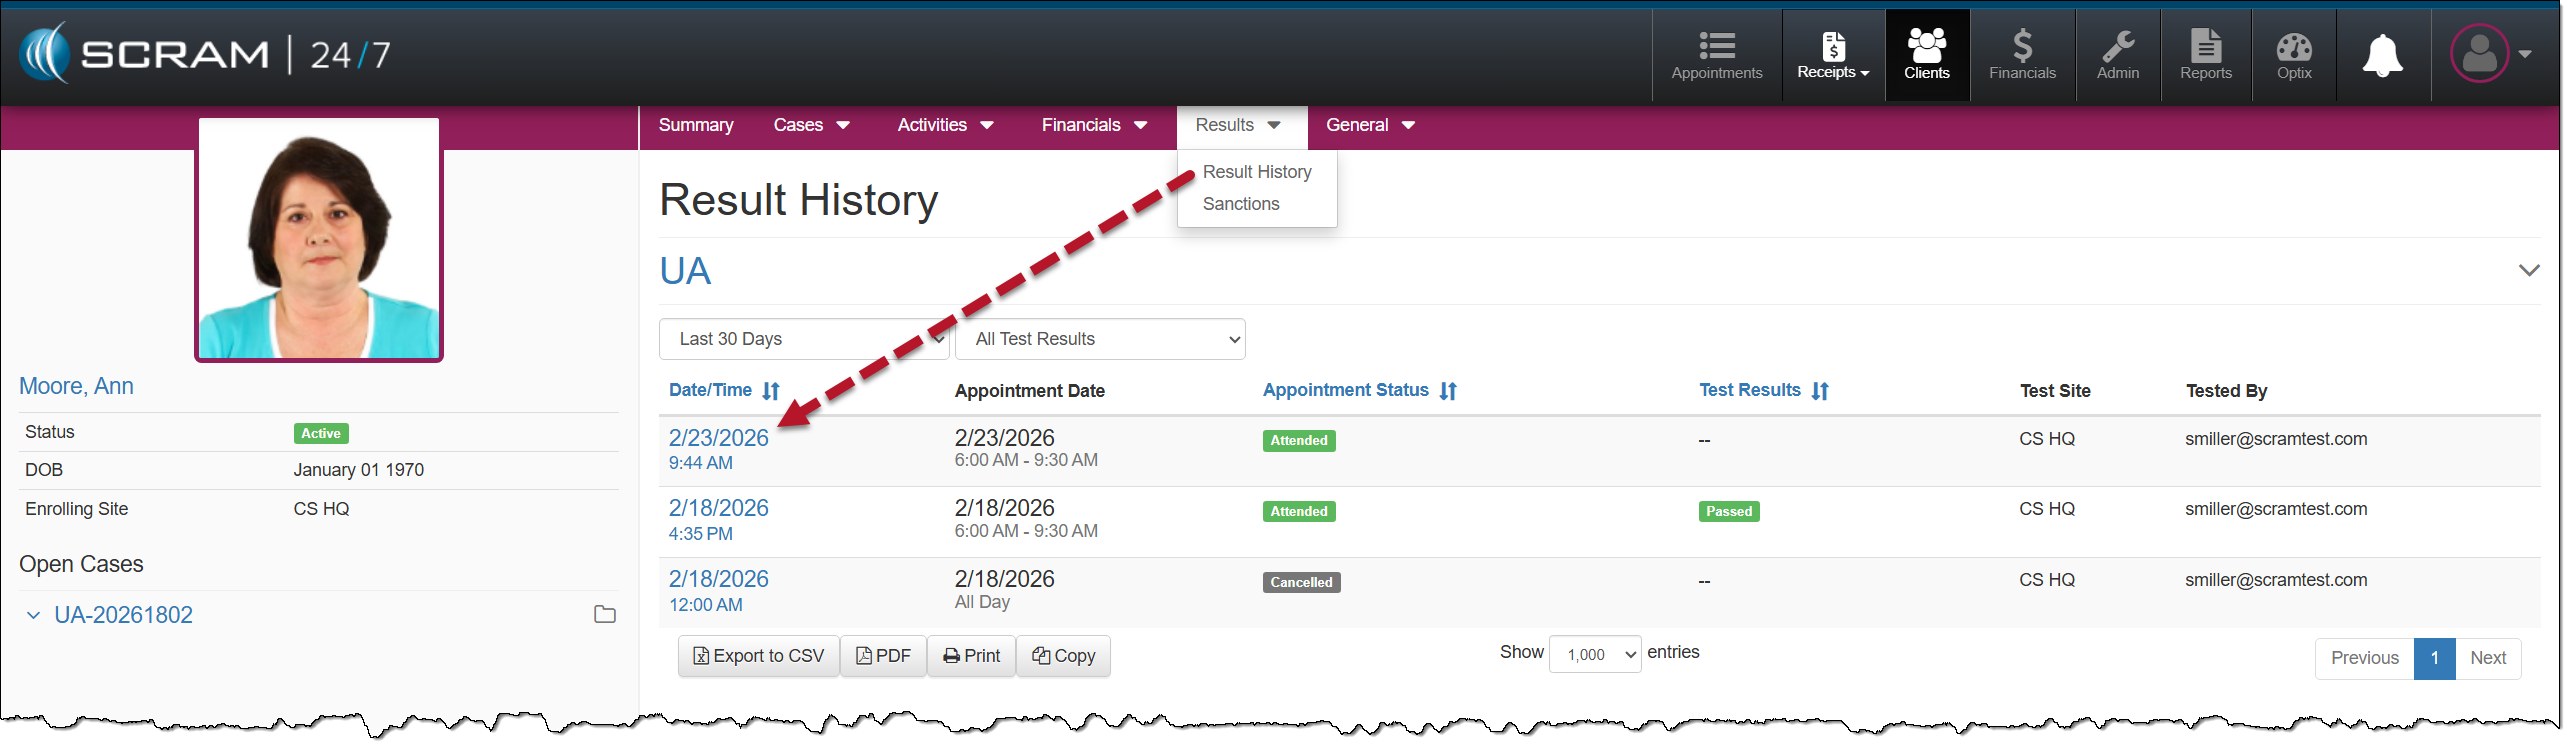
Results History Page – click to enlarge