Once you have created the client’s profile in SCRAM 24/7, the next step is to add the GPS Activity and then complete the equipment assignment.
Starting on the client’s Activities tab:
- Select the +Add an EM Activity button, then select the Add GPS Activity option from the dropdown menu.
|
General Step
- Add the client-specific and “SCRAMNET GPS account” information. The fields and options available here are based on the selected Account.
- You may elect to assign a SCRAM GPS bracelet and Beacon at this time by selecting the checkboxes next to the appropriate selections in the Optional Settings section.
- Once your selections are made, select the Save & Continue button.
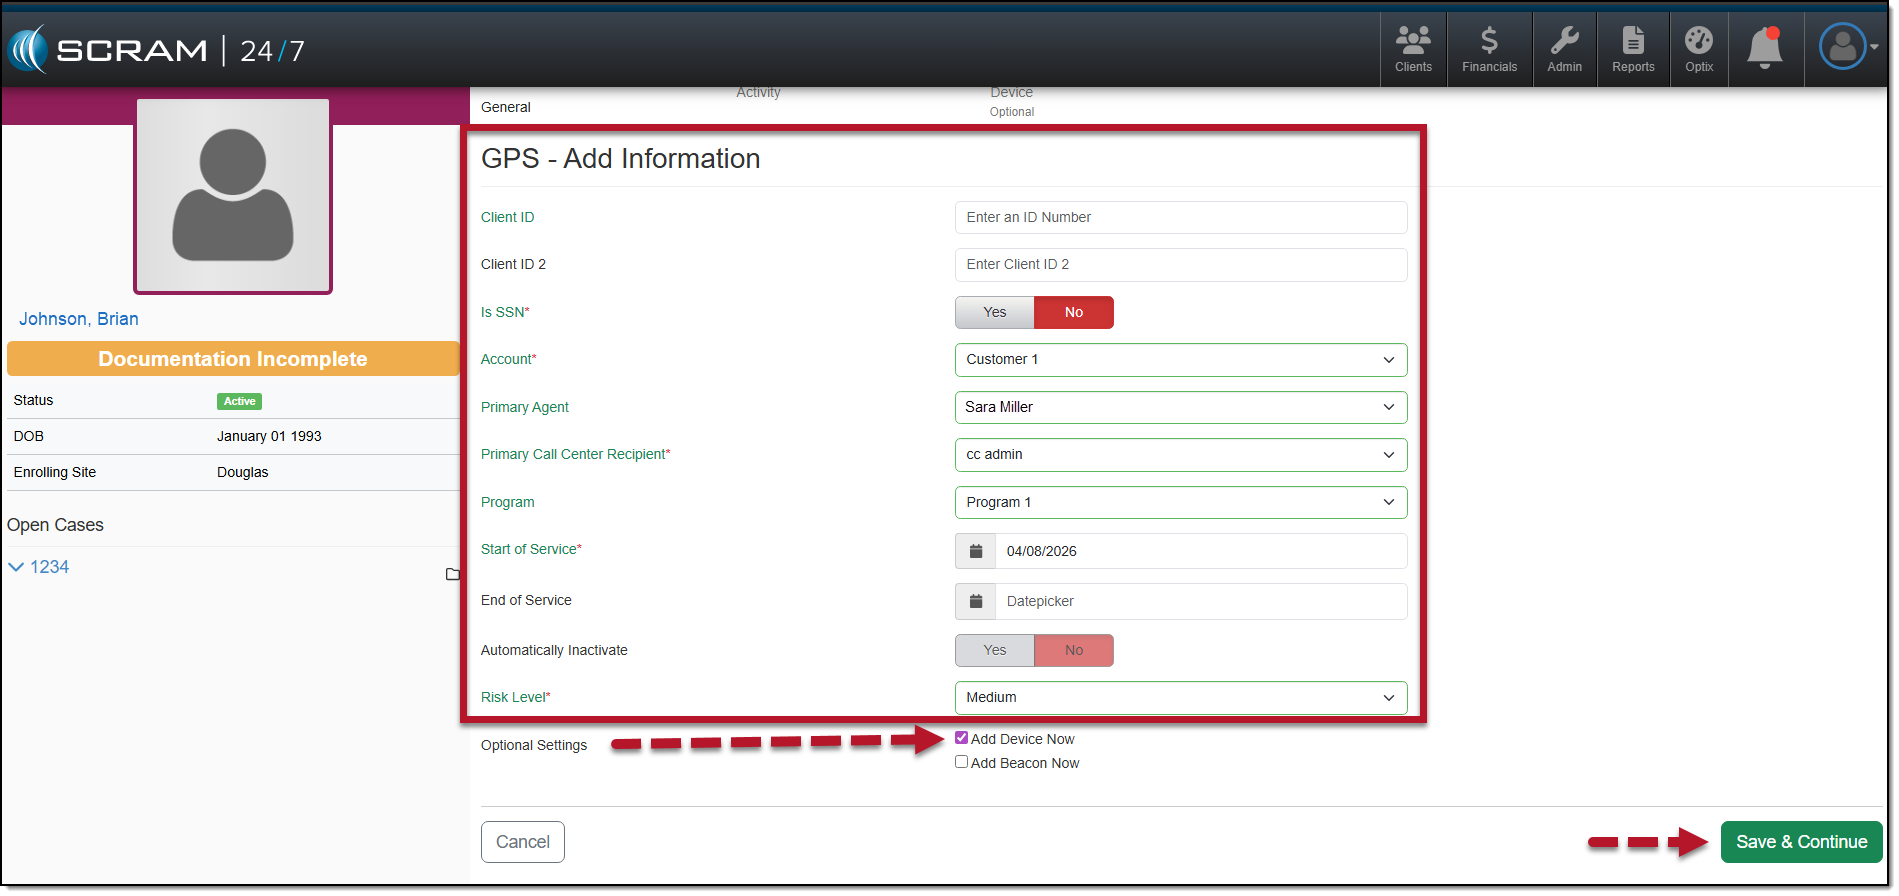
GPS Activity – Add Information page – click to enlarge
Activity Step
- Add the Activity details. All required fields are marked with a red asterisk.
- Appointment Type:
- The two options available are “No Schedule” or “In-Person Appointments.” When this In-Person Appointments option is selected, you will enter the appointment details. Once saved, the appointment is visible on the client’s Activity Calendar on the client’s Summary page and will populate on the Appointments Dashboard on the appointment date.
- Verify and update the Activity Fees if needed.
- After making your selections, select the Save & Continue button.
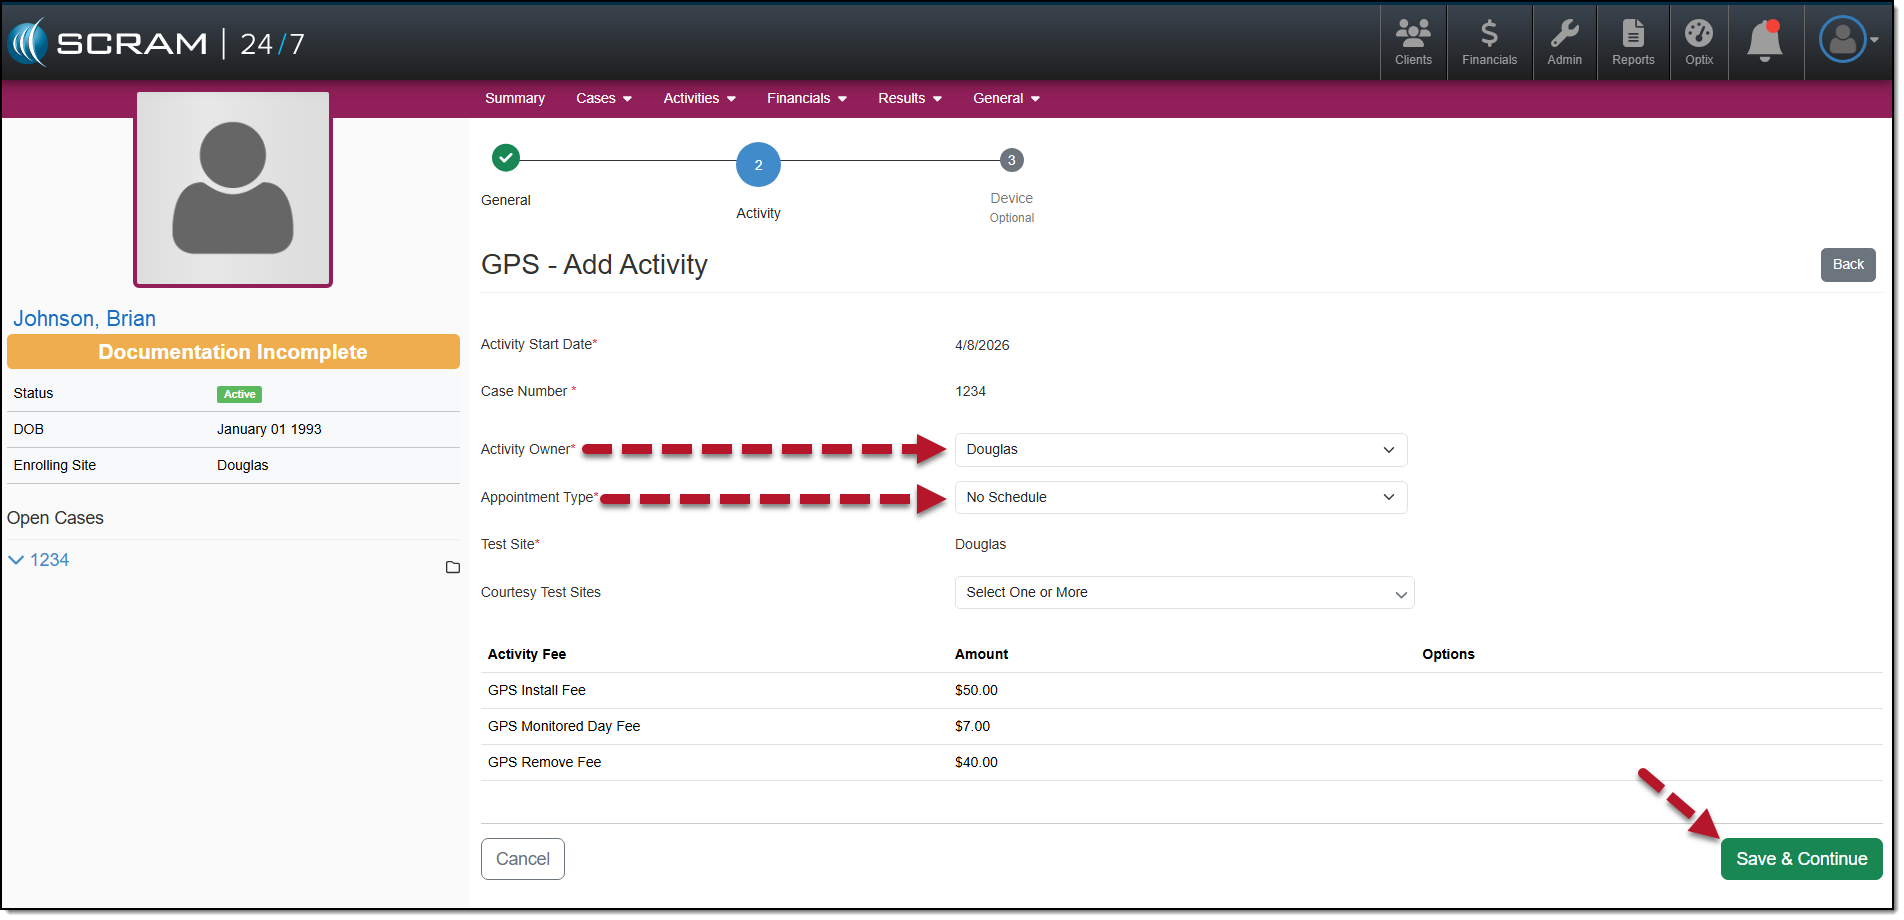
GPS Activity Owner and Appointment Type – click to enlarge
Device Step
- Select a locator from the dropdown menu.
- Select the Supervision Plan from the dropdown menu.
|
- Select the appropriate Participant Agreement Acknowledgment radio button.
- Select the Apply Changes button.
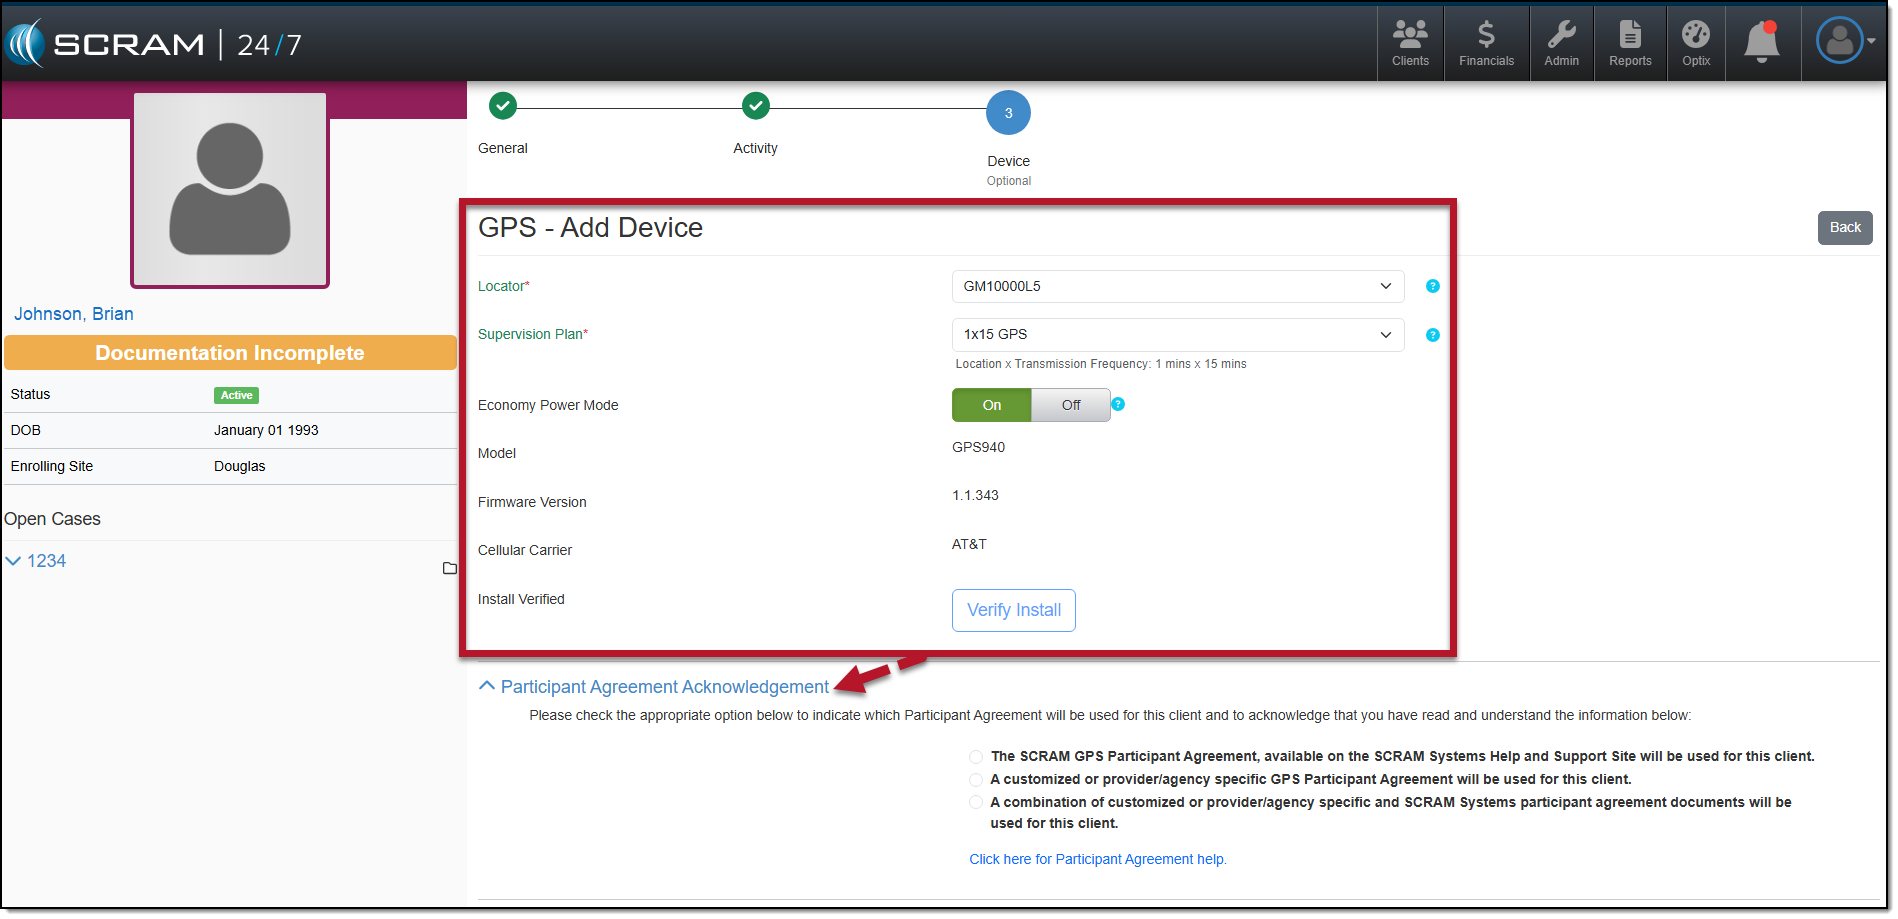
Add GPS Device page – click to enlarge
At this time, the system is communicating with the device. Once the device assignment is complete and the supervision plan is set, you will see a green check mark next to each selection indicating a successful assignment.
- Once installed on the client’s ankle, you may select the Verify Install button to verify a successful installation of the device.
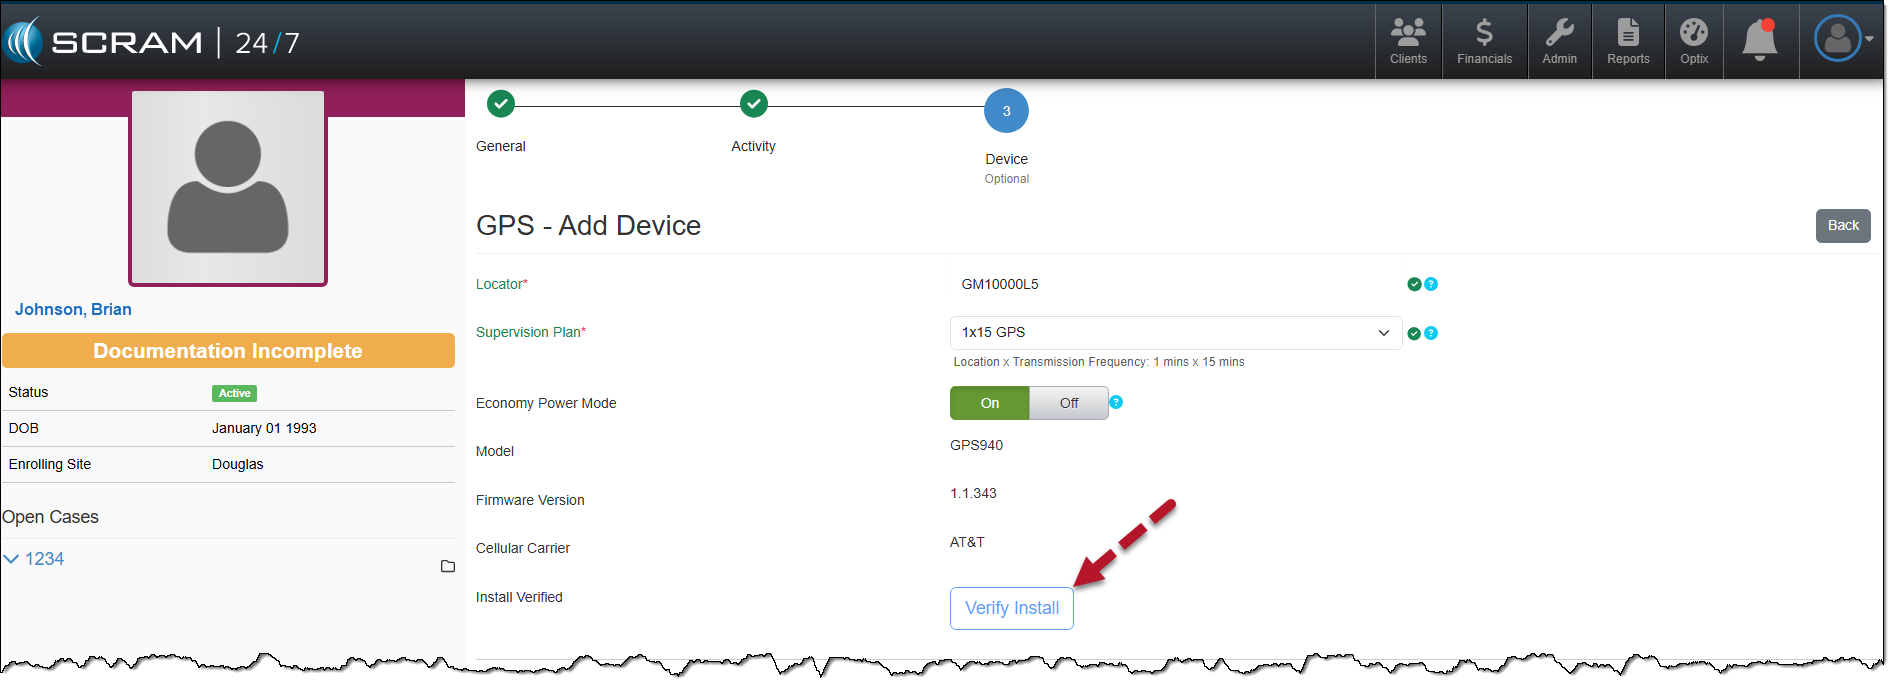
Verify GPS Bracelet Installation – click to enlarge
- Select the Next button.
- If you elected to assign a Beacon, you will enter the Beacon details now. Once entered, select the Apply Changes button and then the Next button.
GPS Activity Add Beacon – click to enlarge
Once you have added the GPS Activity to the client, the client’s Summary page will display the GPS equipment information, and the Activity Calendar and Daily Activity screen will display a completed GPS Installation Appointment.
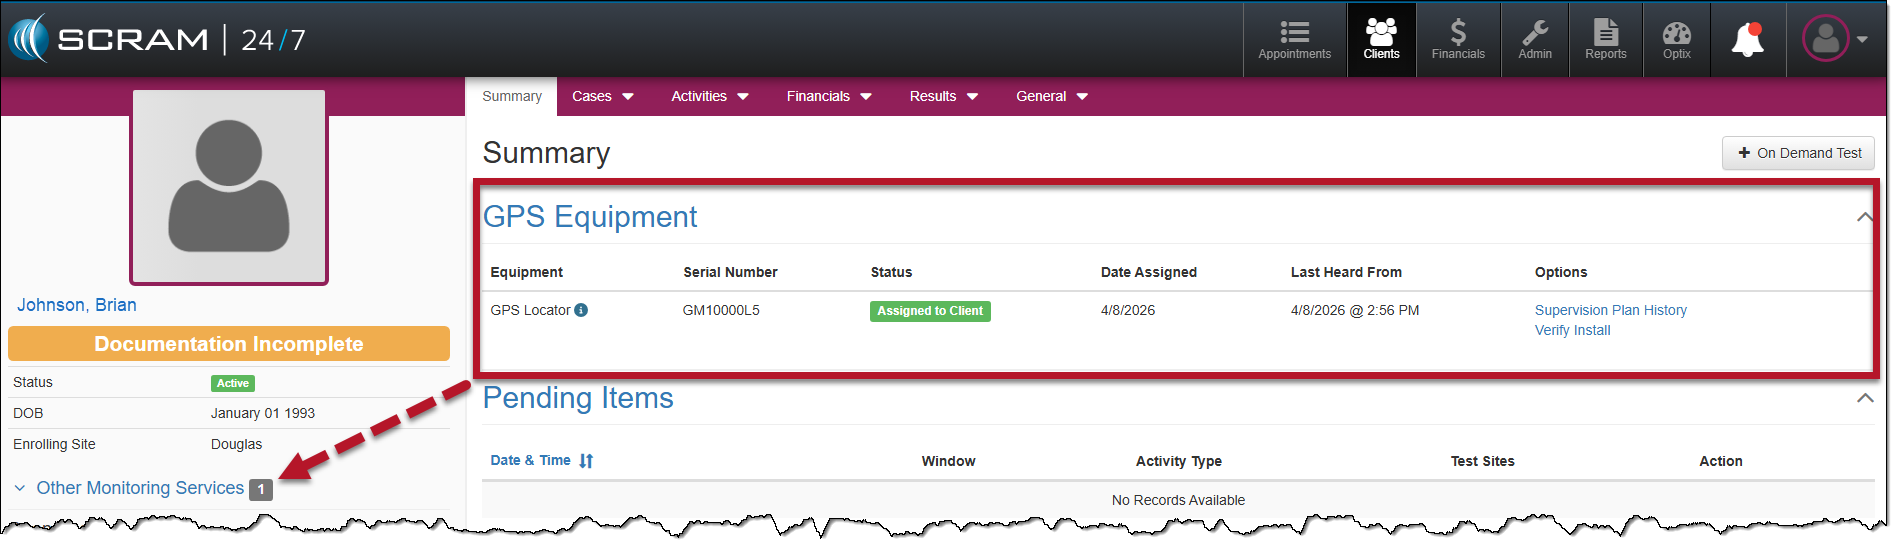
Client Summary page – click to enlarge
| At this time, you must access the client’s SCRAMNET GPS profile page by selecting their name hyperlink in the Other Monitoring Services section in the sidebar.
It is imperative that you:
If you skip this step, the client may not be properly monitored. |
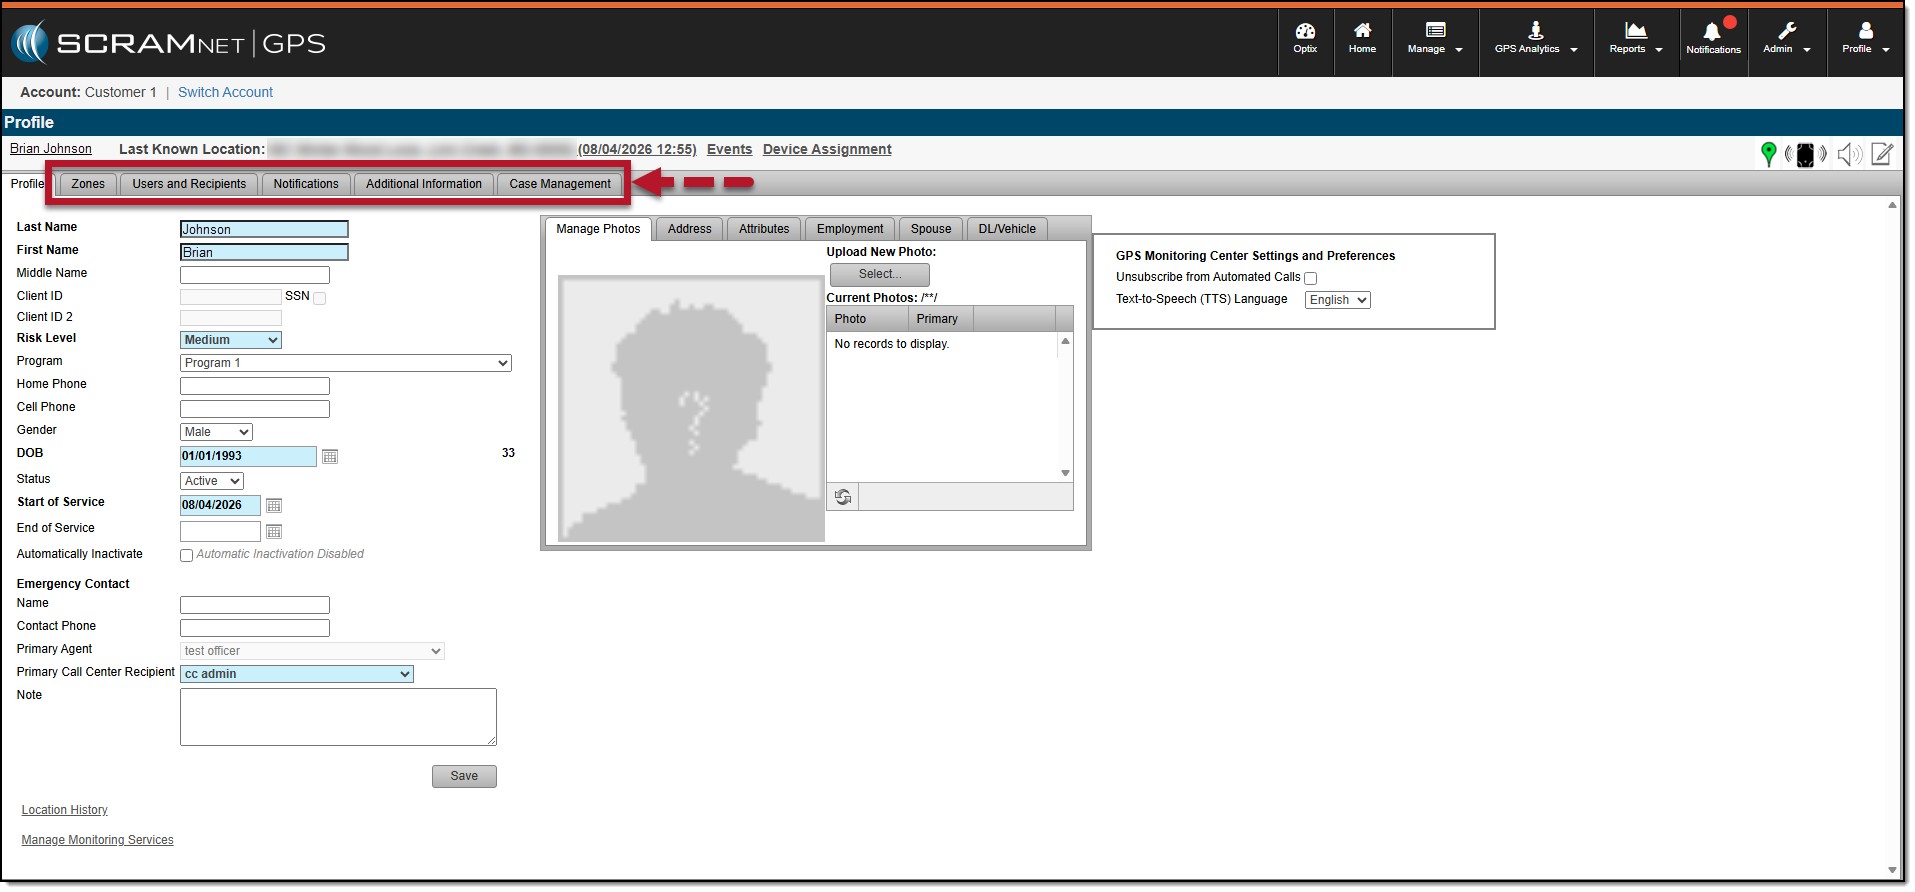
SCRAMNET GPS Client Profile – click to enlarge
Supervision Plan History Hyperlink
You may view the supervision plan information for the assigned bracelet by selecting the Supervision Plan History hyperlink located in the Options column on the client’s Summary page.
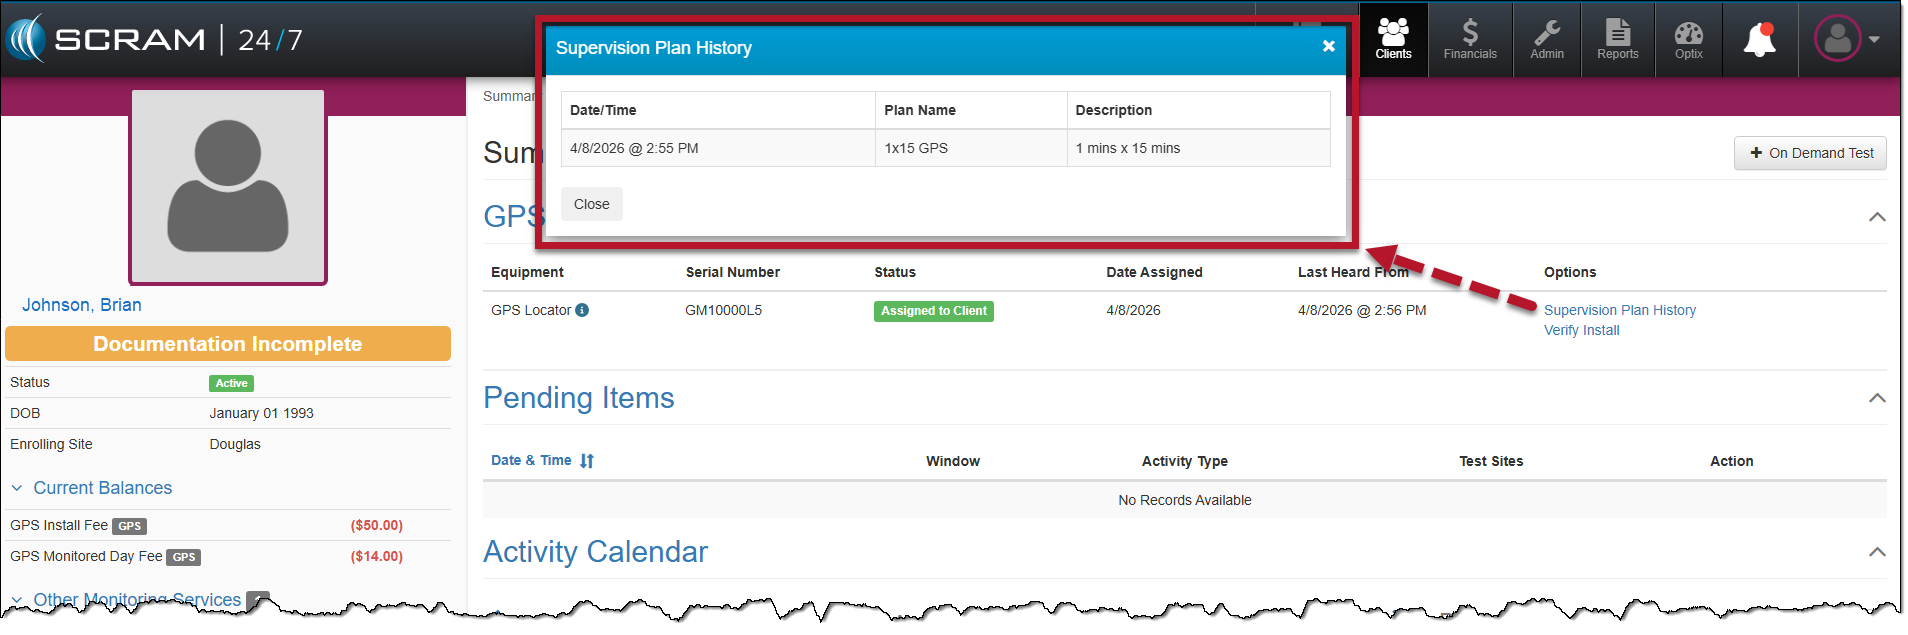
Supervision Plan History Pop-up Window – click to enlarge