Once you have created the client’s profile, add the Drug Patch Activity to begin monitoring.
Starting on the client’s Active Activities page:
- Select the +Add a New Activity button.
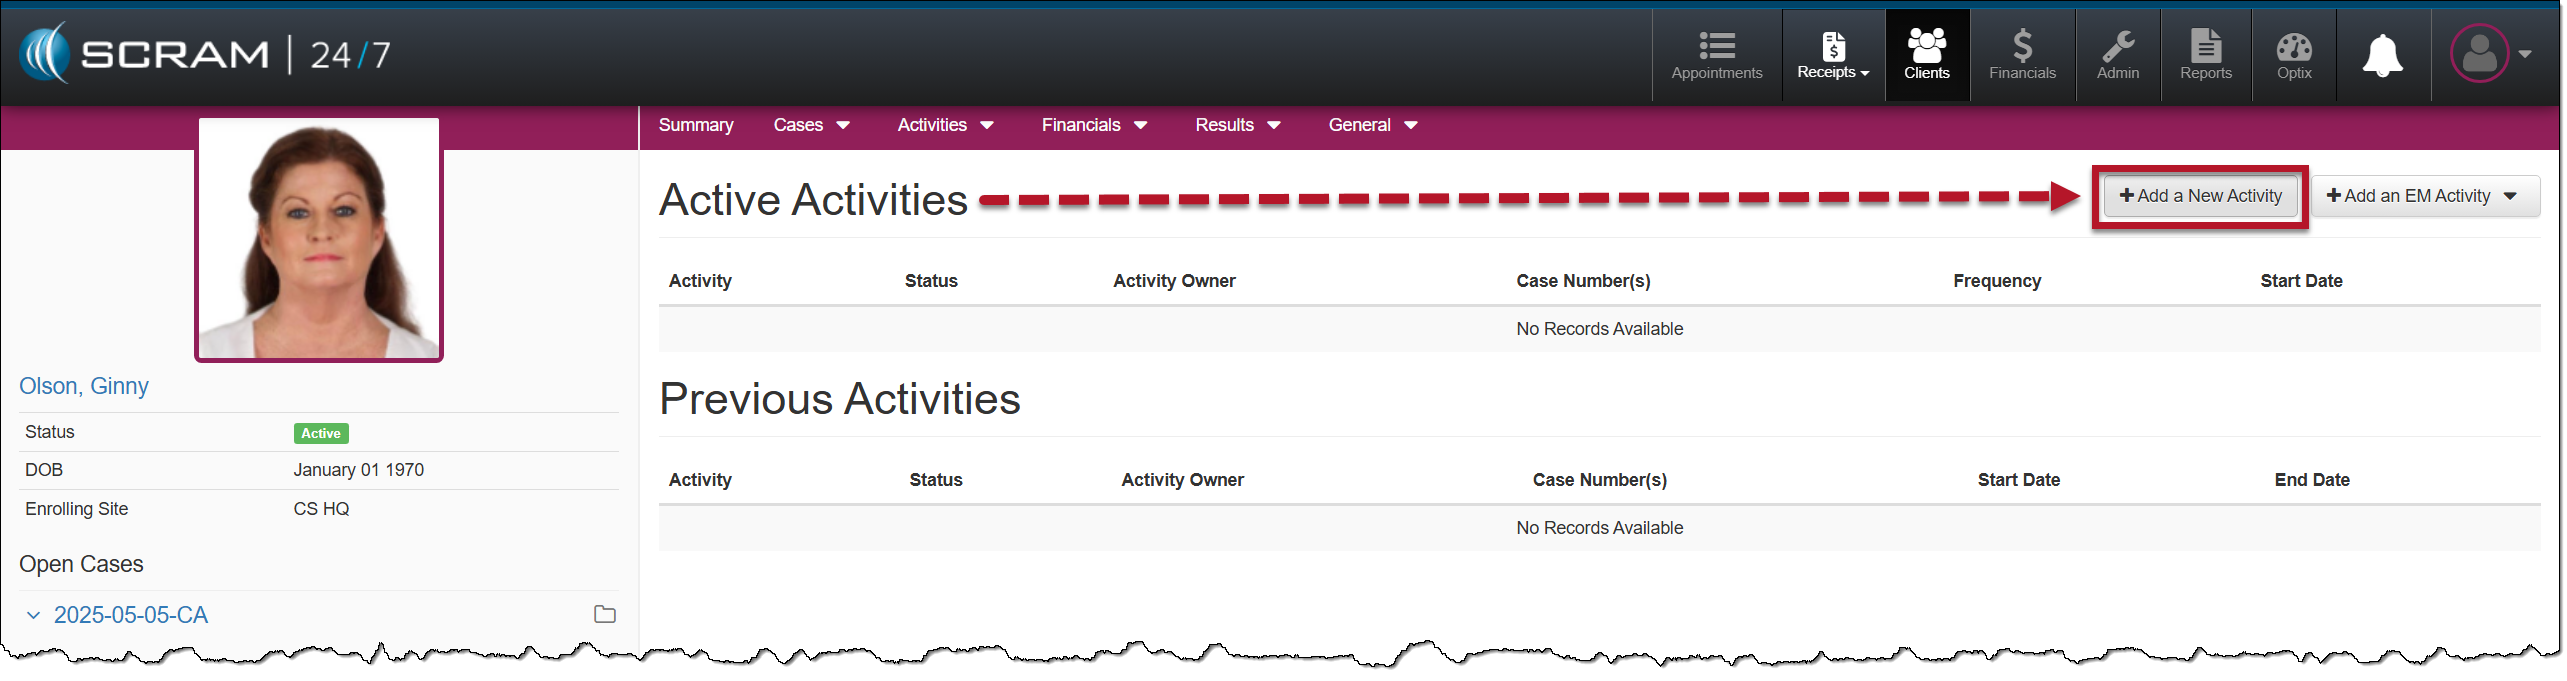
Client Active Activities Page – click to enlarge
- Open the Activity dropdown menu, and select the Drug Patch option.
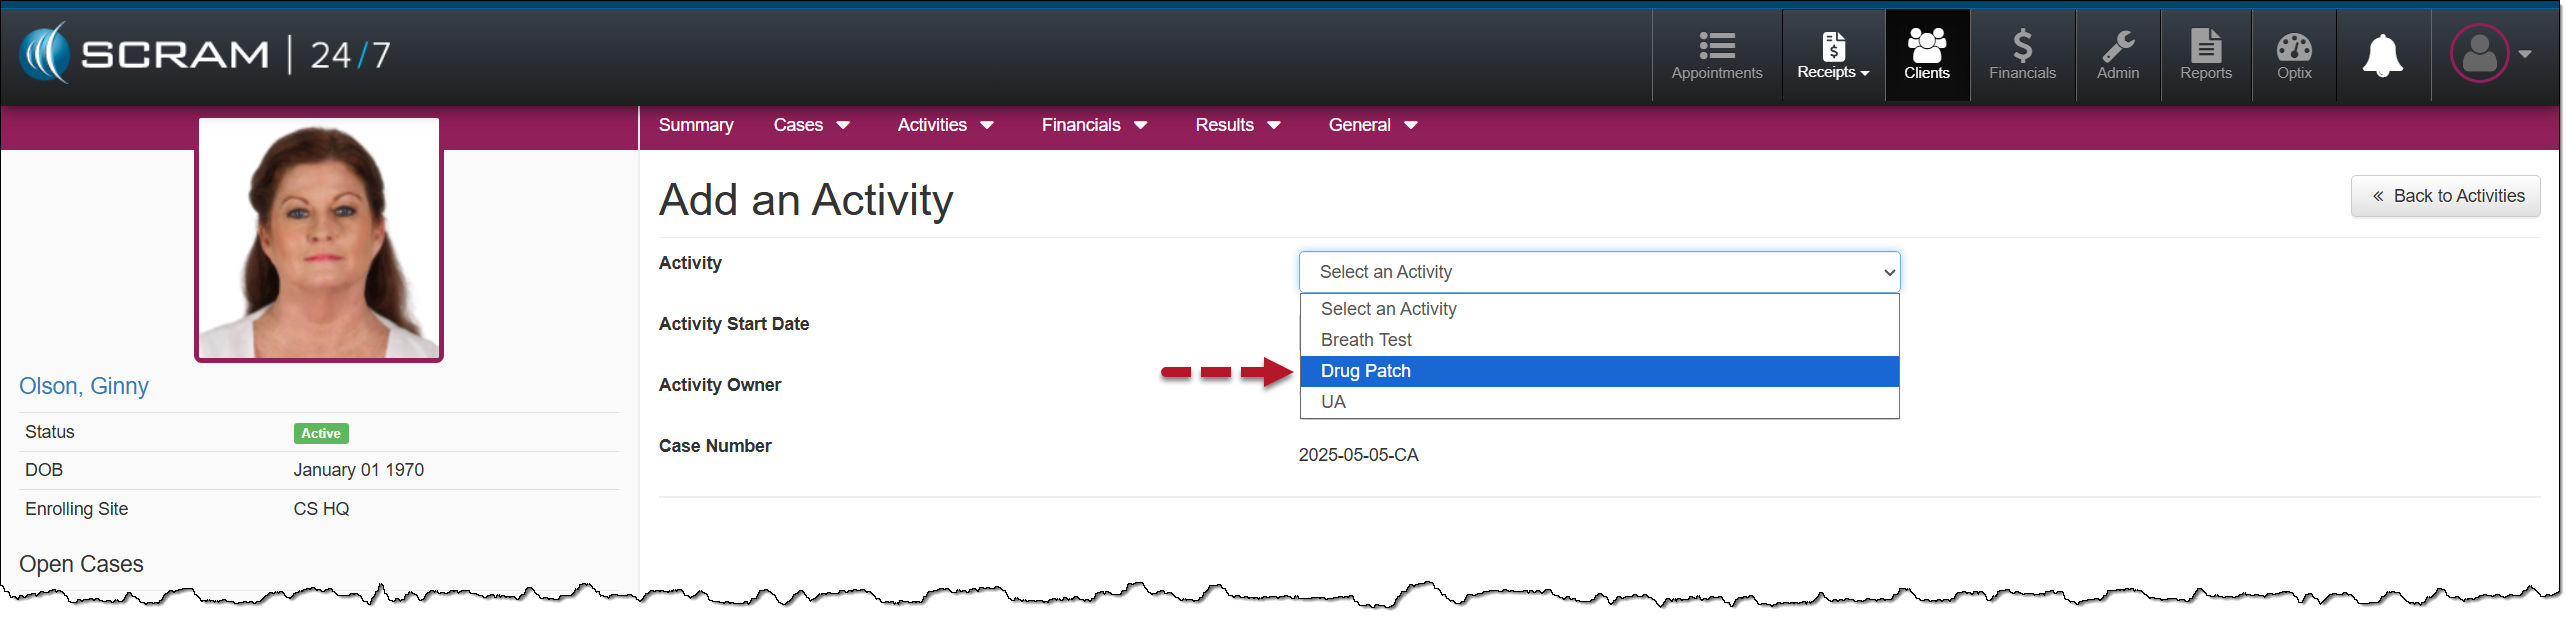
Activity Dropdown Menu Drug Patch Option – click to enlarge
- If needed, update the Activity Start Date.
- Open the Drug Patch Interval dropdown menu and select how often the drug patch will be replaced. This will schedule the client’s future replacement appointment on the calendar.
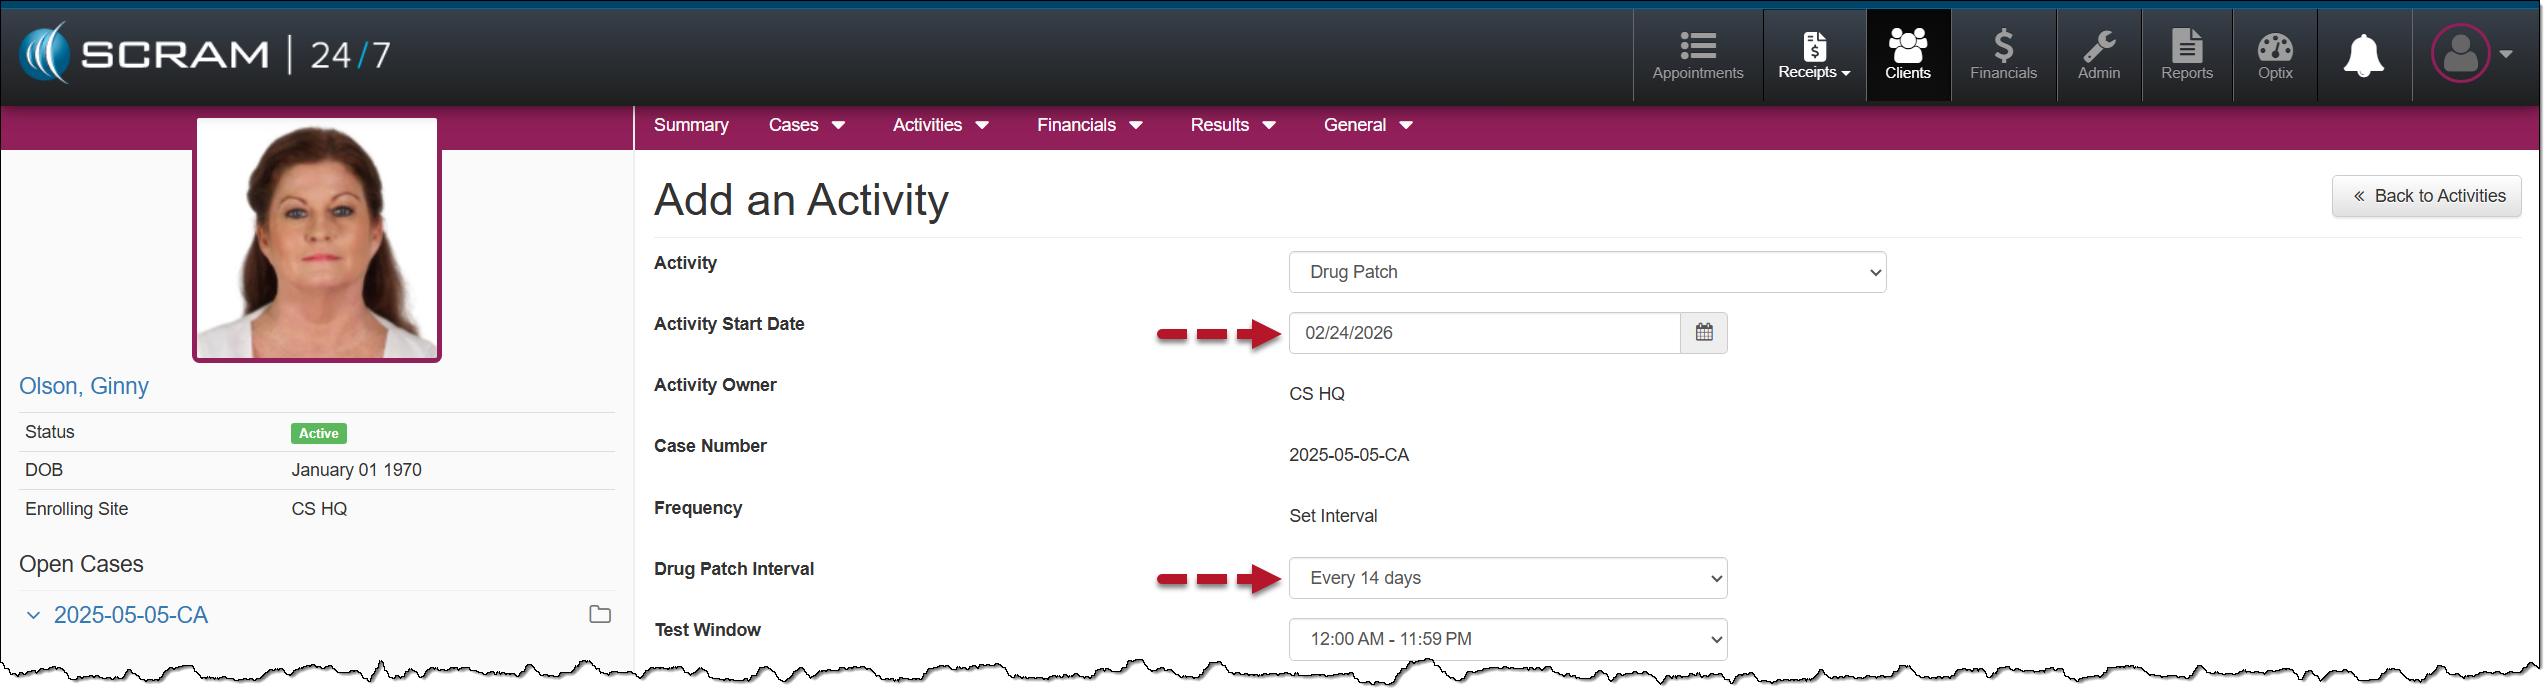
Activity Start Date and Drug Patch Interval selections – click to enlarge
- Open the Test Window dropdown menu and select the appropriate option. This is the appointment window.
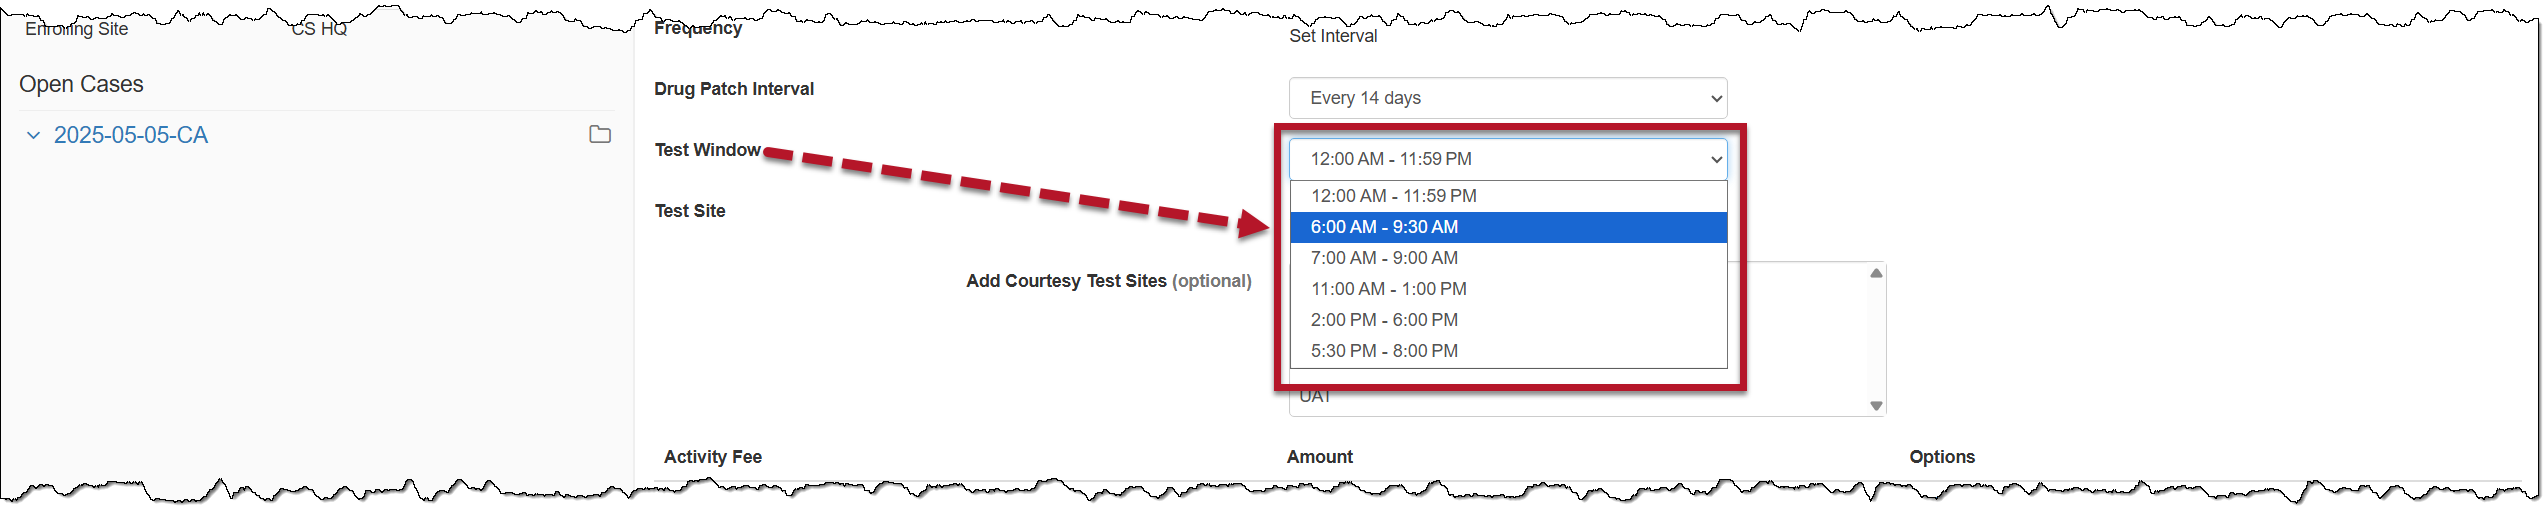
Drug Patch Appointment Test Window – click to enlarge
- Select a Courtesy Test site if required.
- Adjust the Activity Fees if needed
- After entering the details for the Drug Patch Activity, select the Add Activity button.
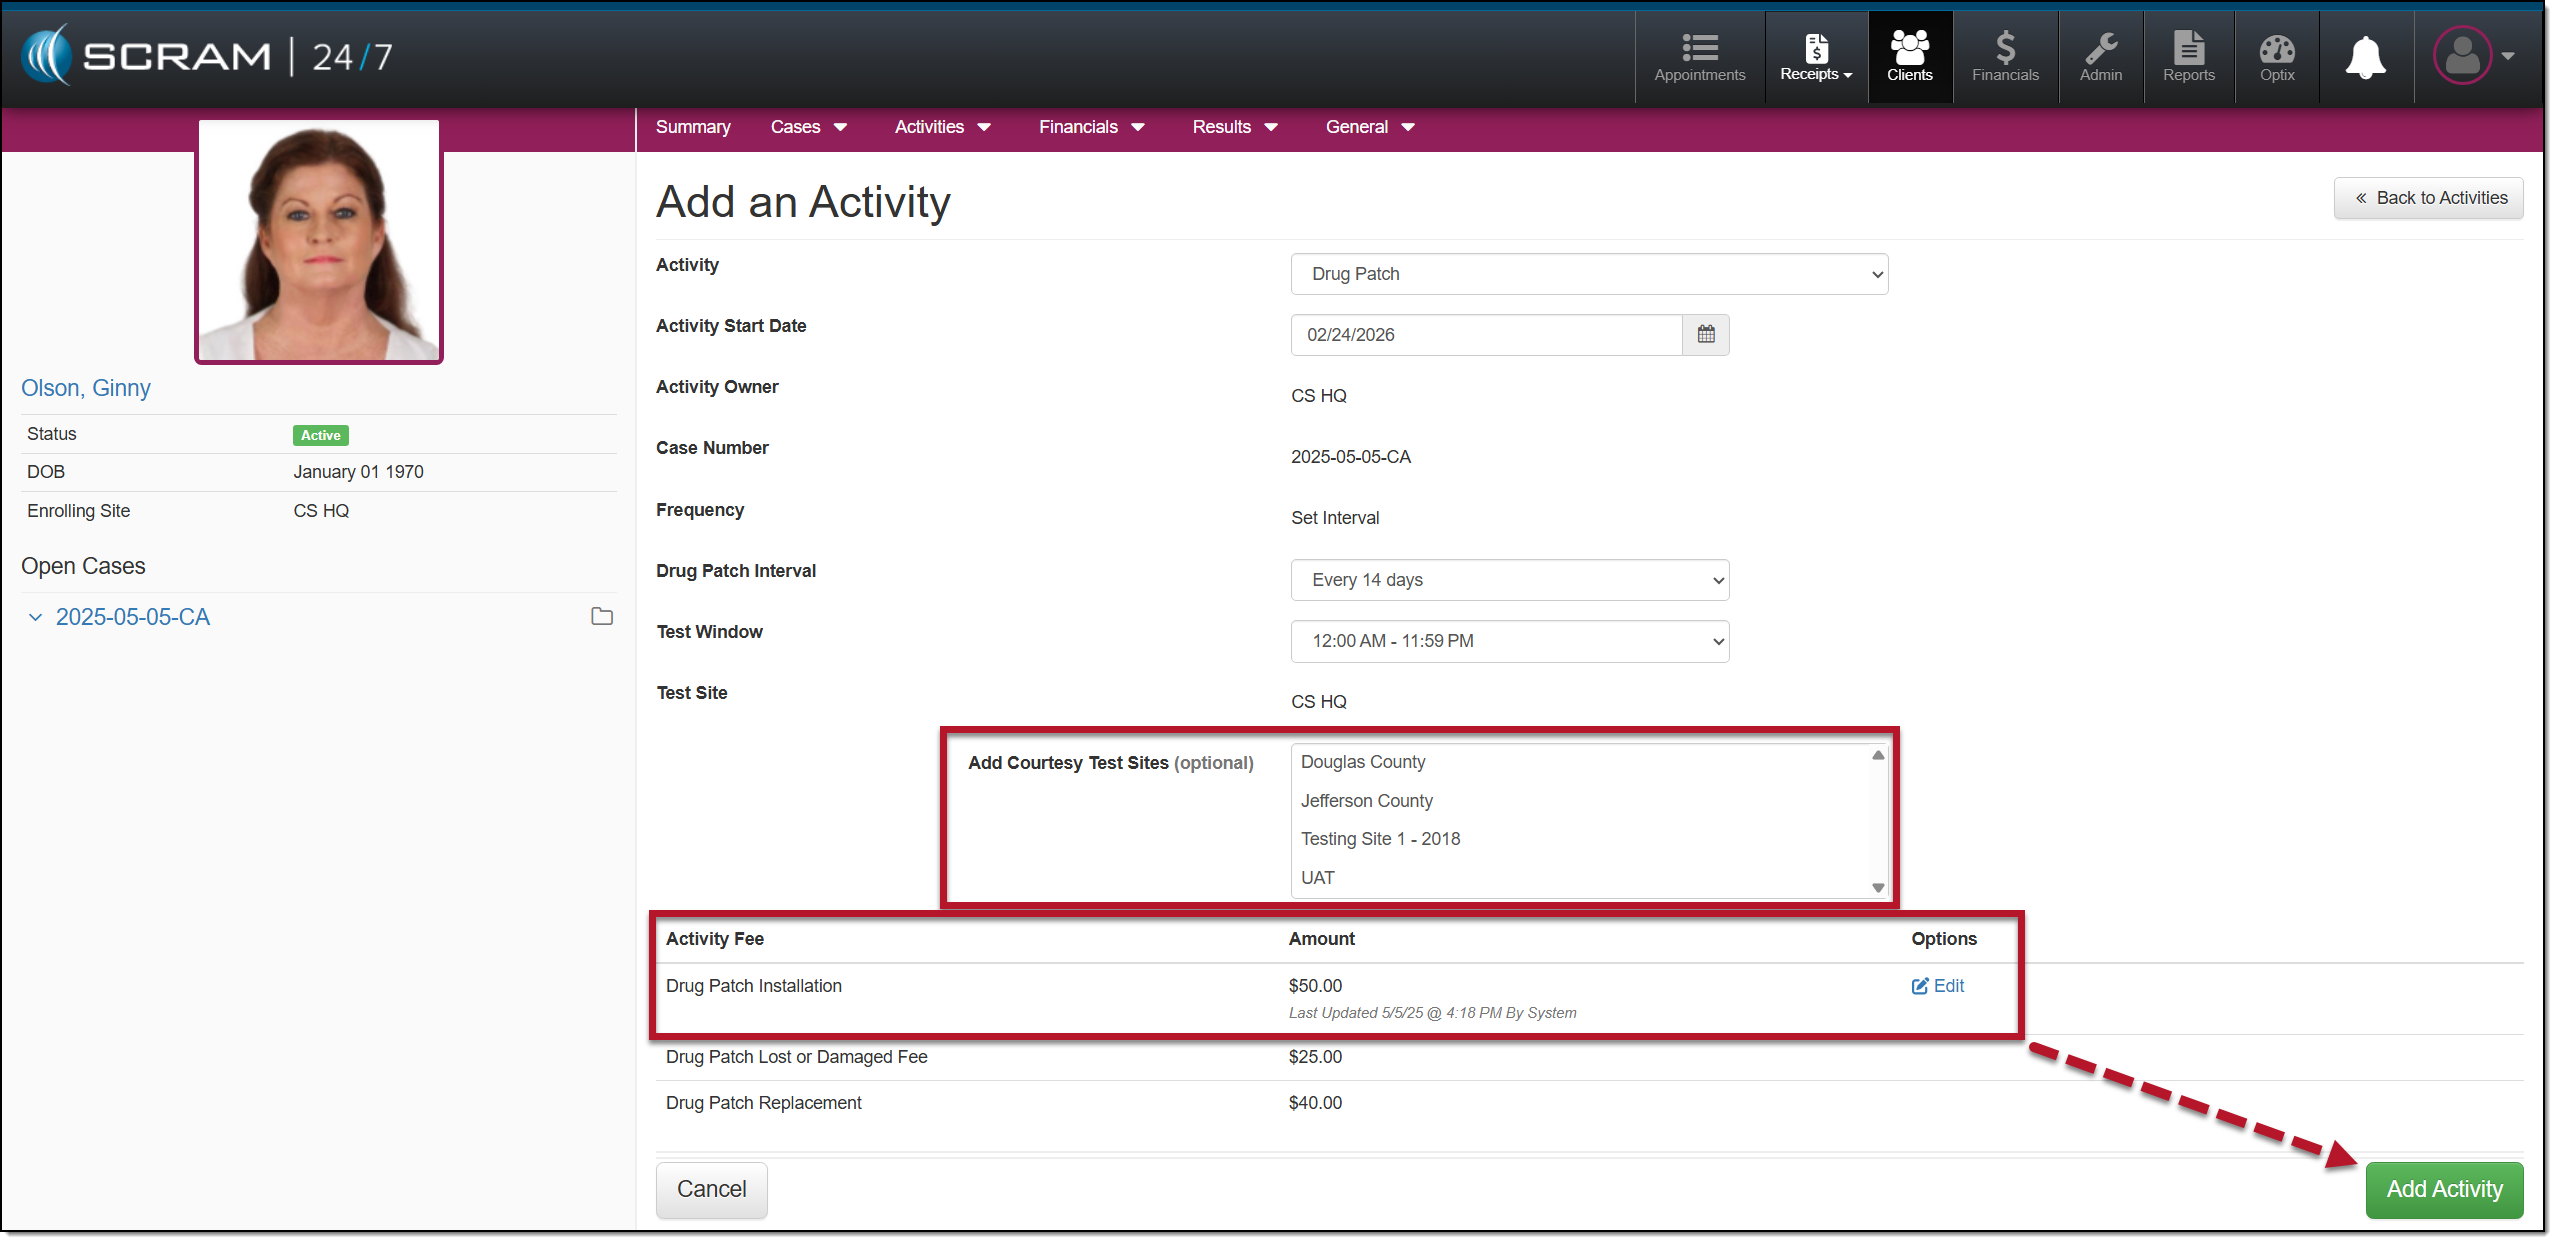
Courtesy Test Sites and Activity Fee options – click to enlarge
The client’s Summary page will display an Install a Drug Patch appointment.
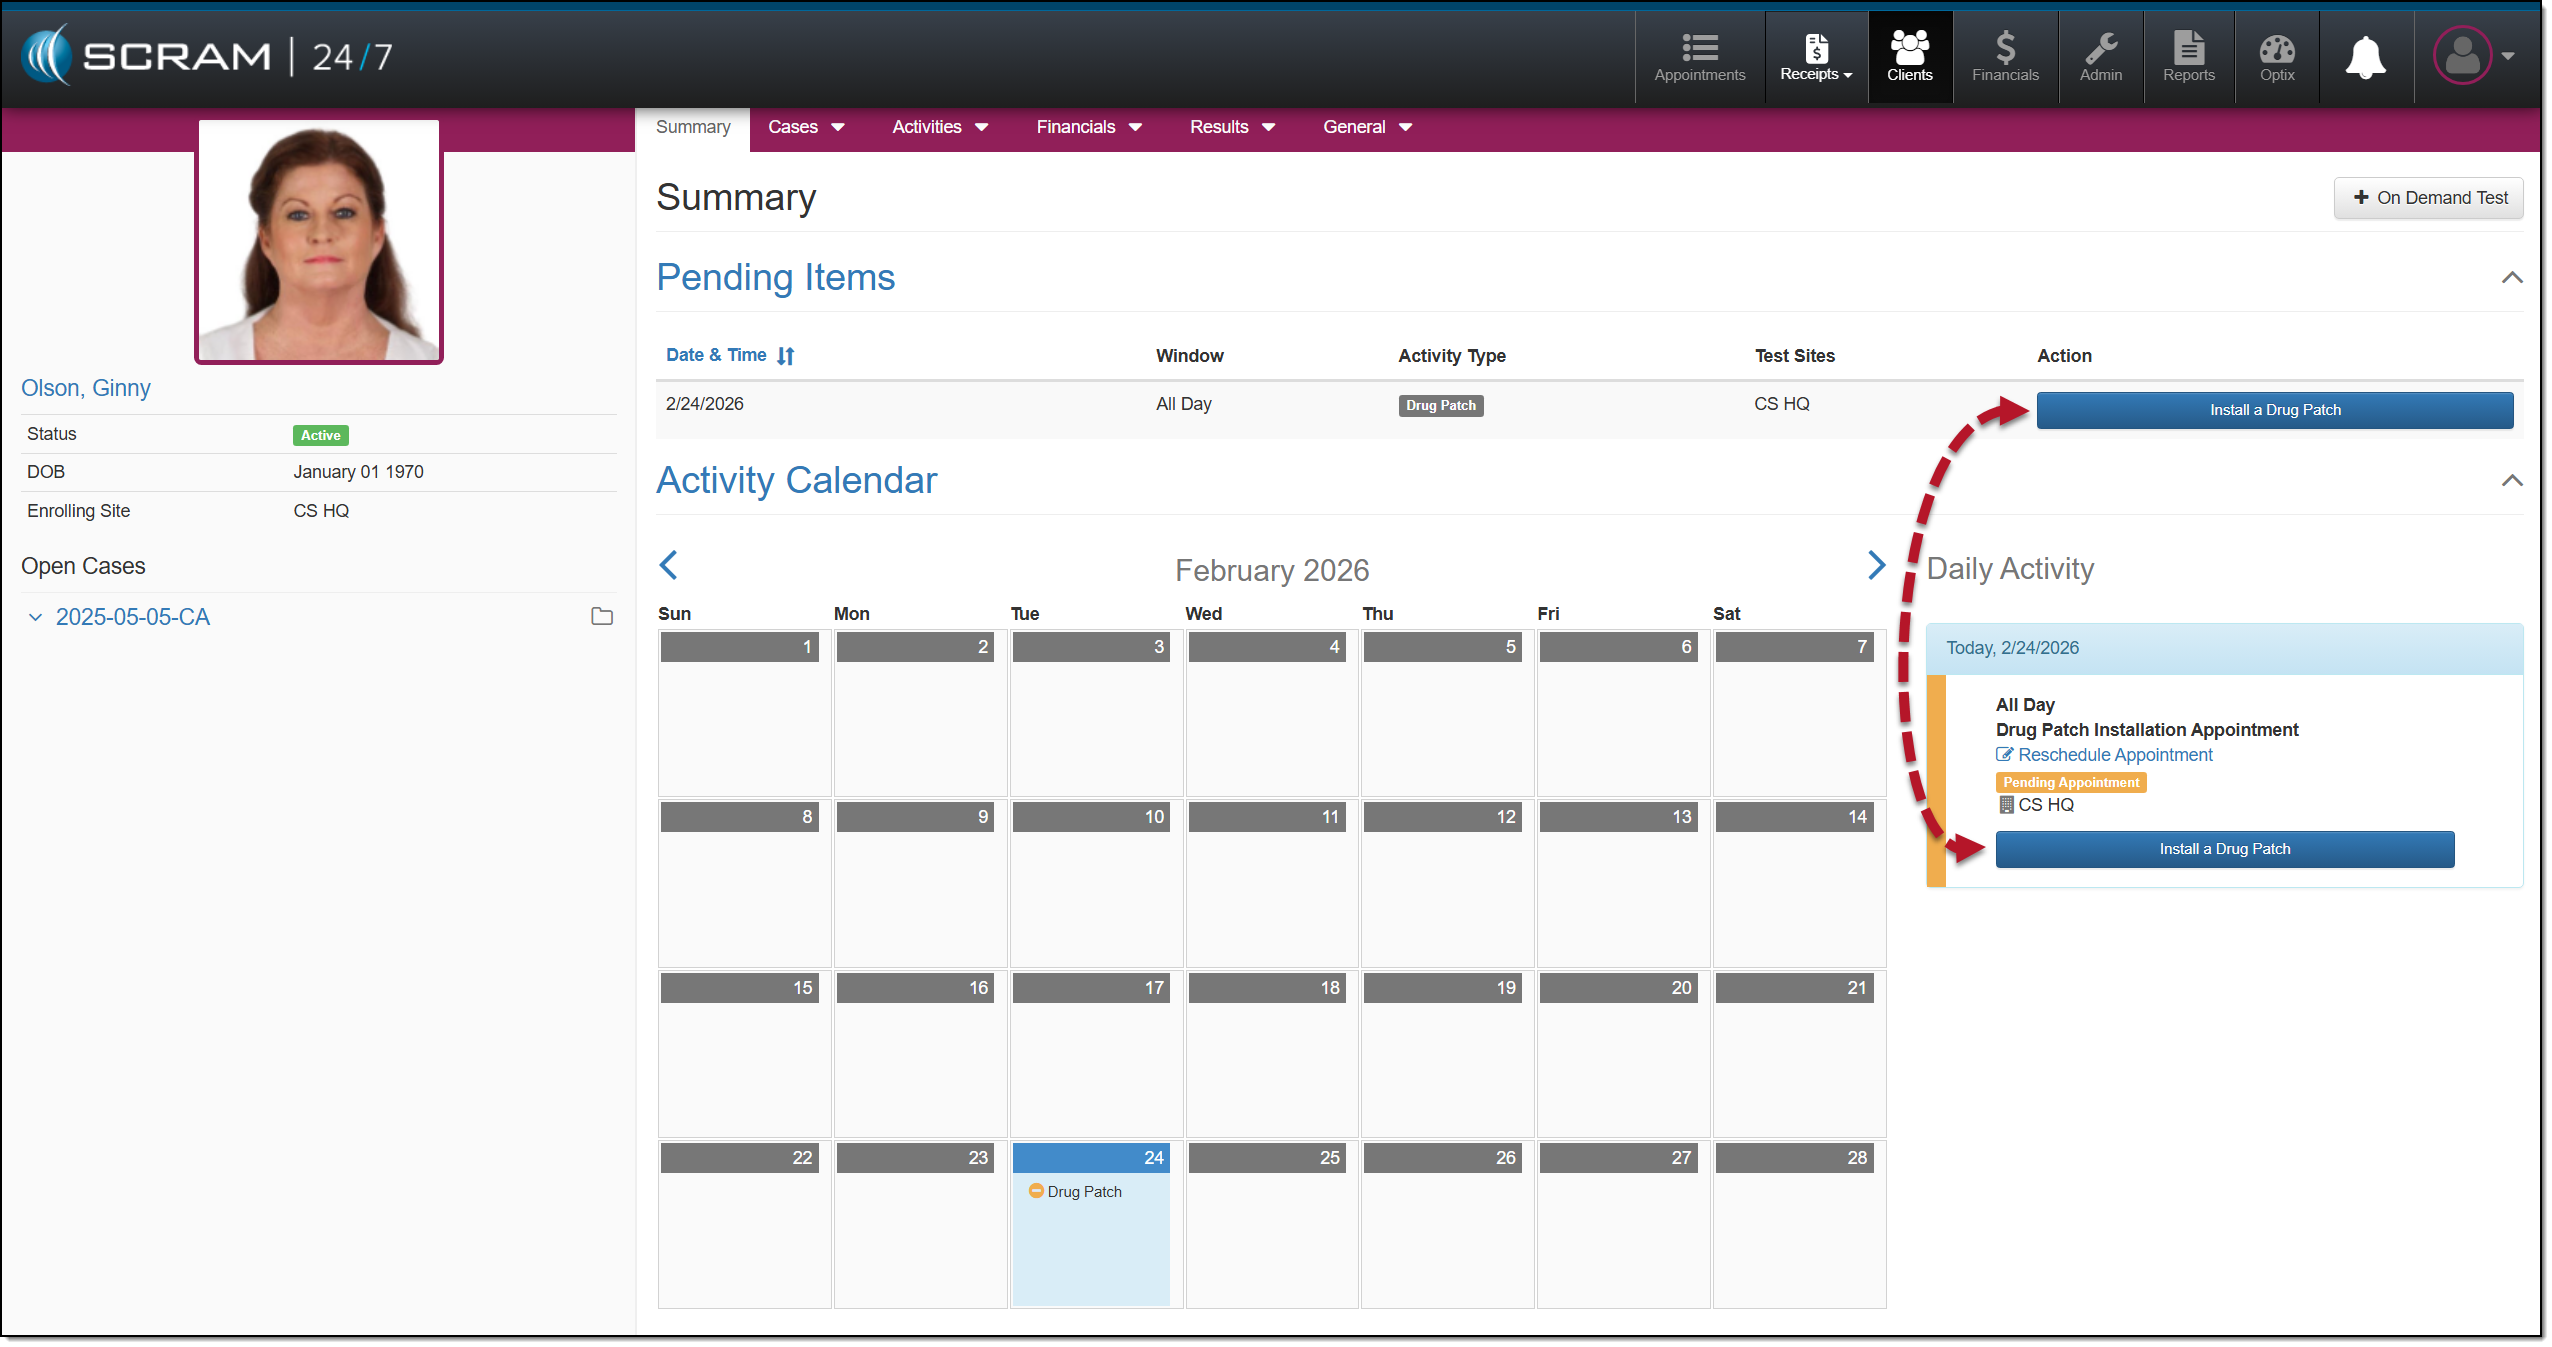
Summary Page, Install a Drug Patch Appointment – click to enlarge
At this time, you may complete the Install a Drug Patch ” appointment.
Start by:
- Selecting the Install a Drug Patch button.
- On the Drug Patch appointment page, you may add a note by expanding the Note section.
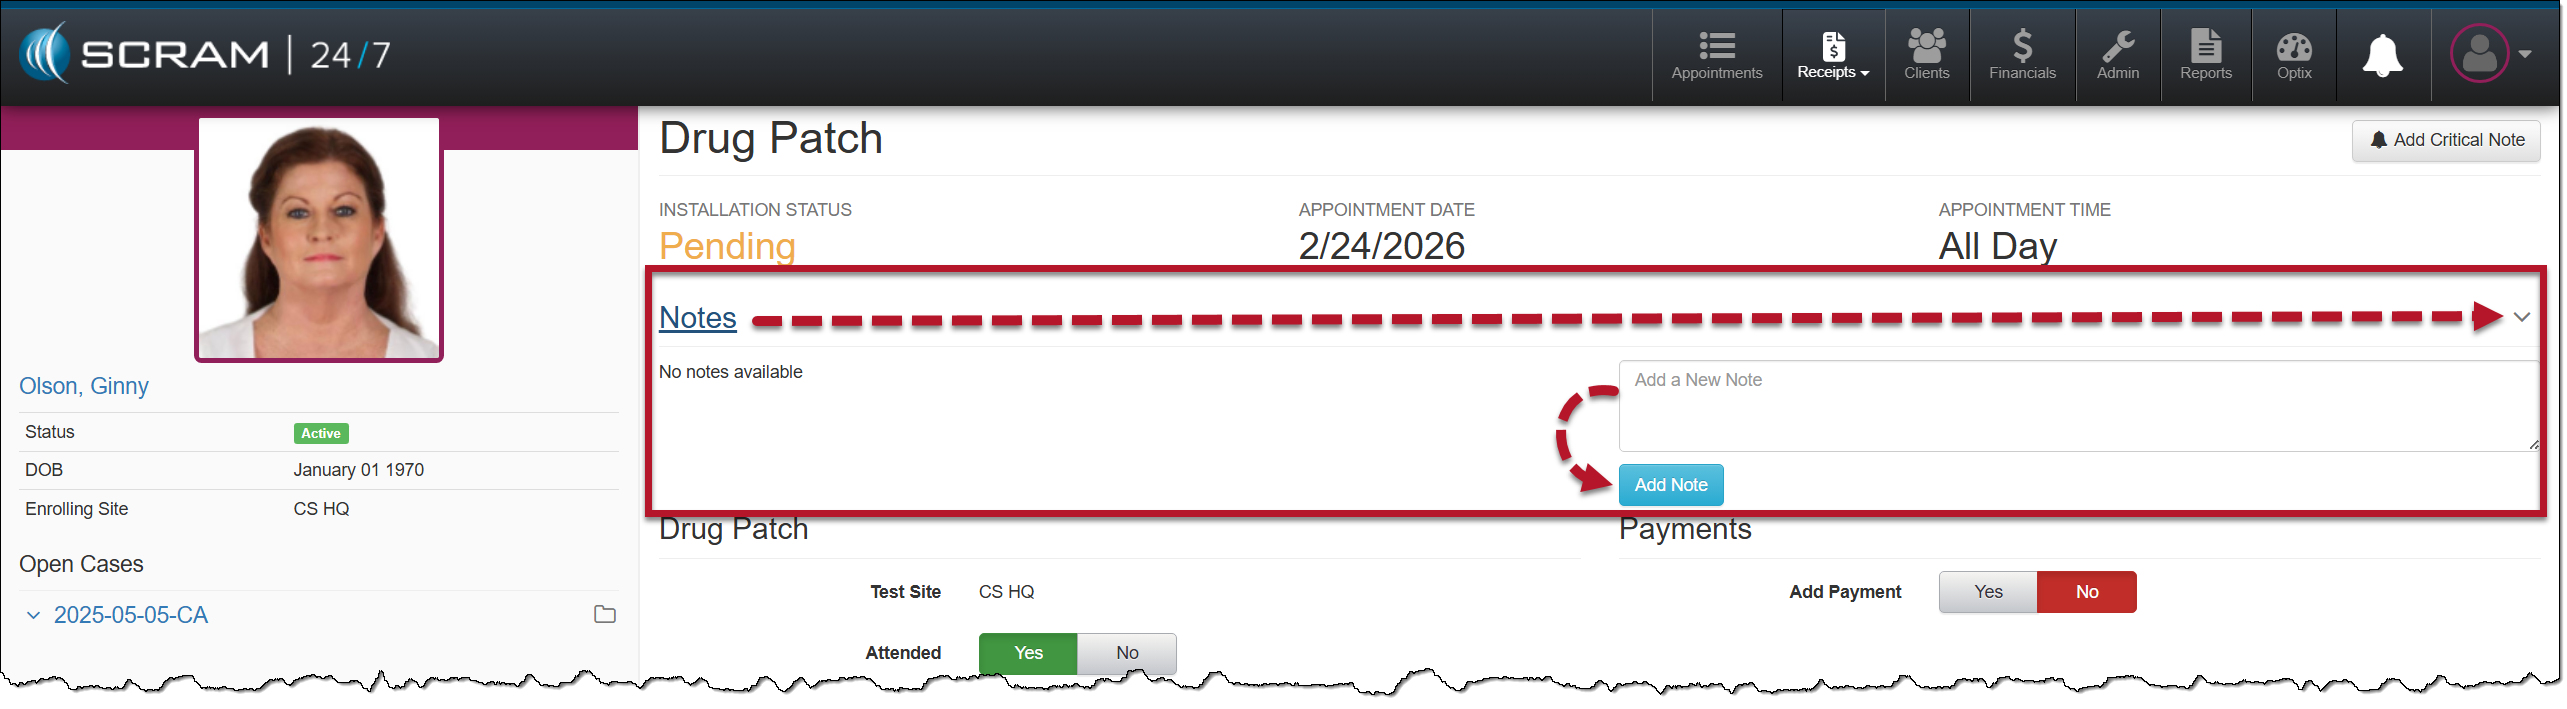
Install Drug Patch Notes Section – click to enlarge
- Next, record whether the client attended the appointment.
- If you select the No option, you will have additional fields to complete.
- Enter the current time.
- Add the drug patch’s ID number. This number identifies this drug patch and associates it with the client, ensuring the drug patch results are recorded for the correct client.
- Verify the next appointment date.
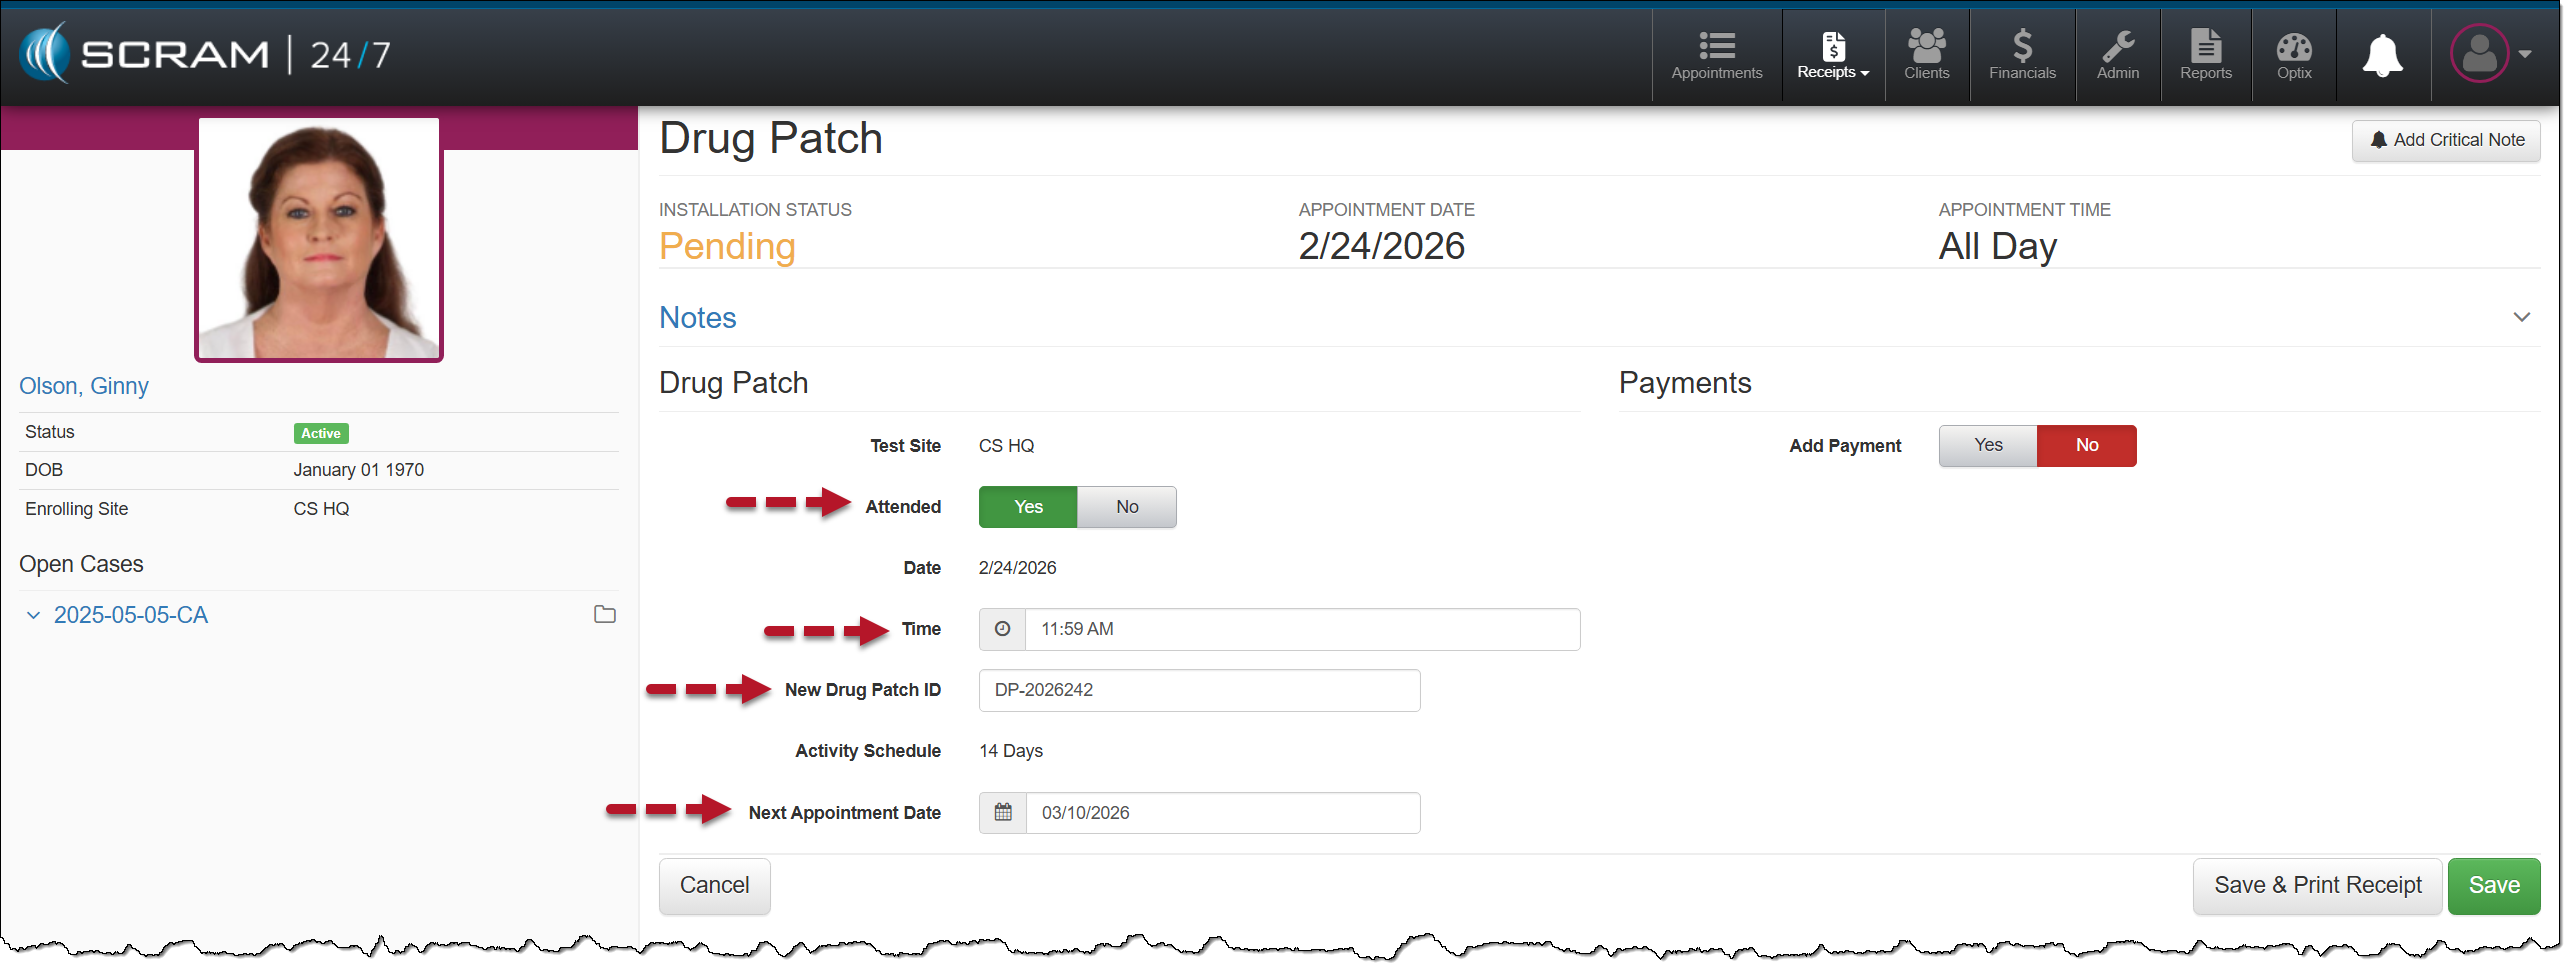
Install Drug Patch Appointment and Drug Patch ID details – click to enlarge
- If you are collecting a payment from the client at this time, select the Yes option in the Payments section and enter the details for the payment.
- The last step is to save the appointment.
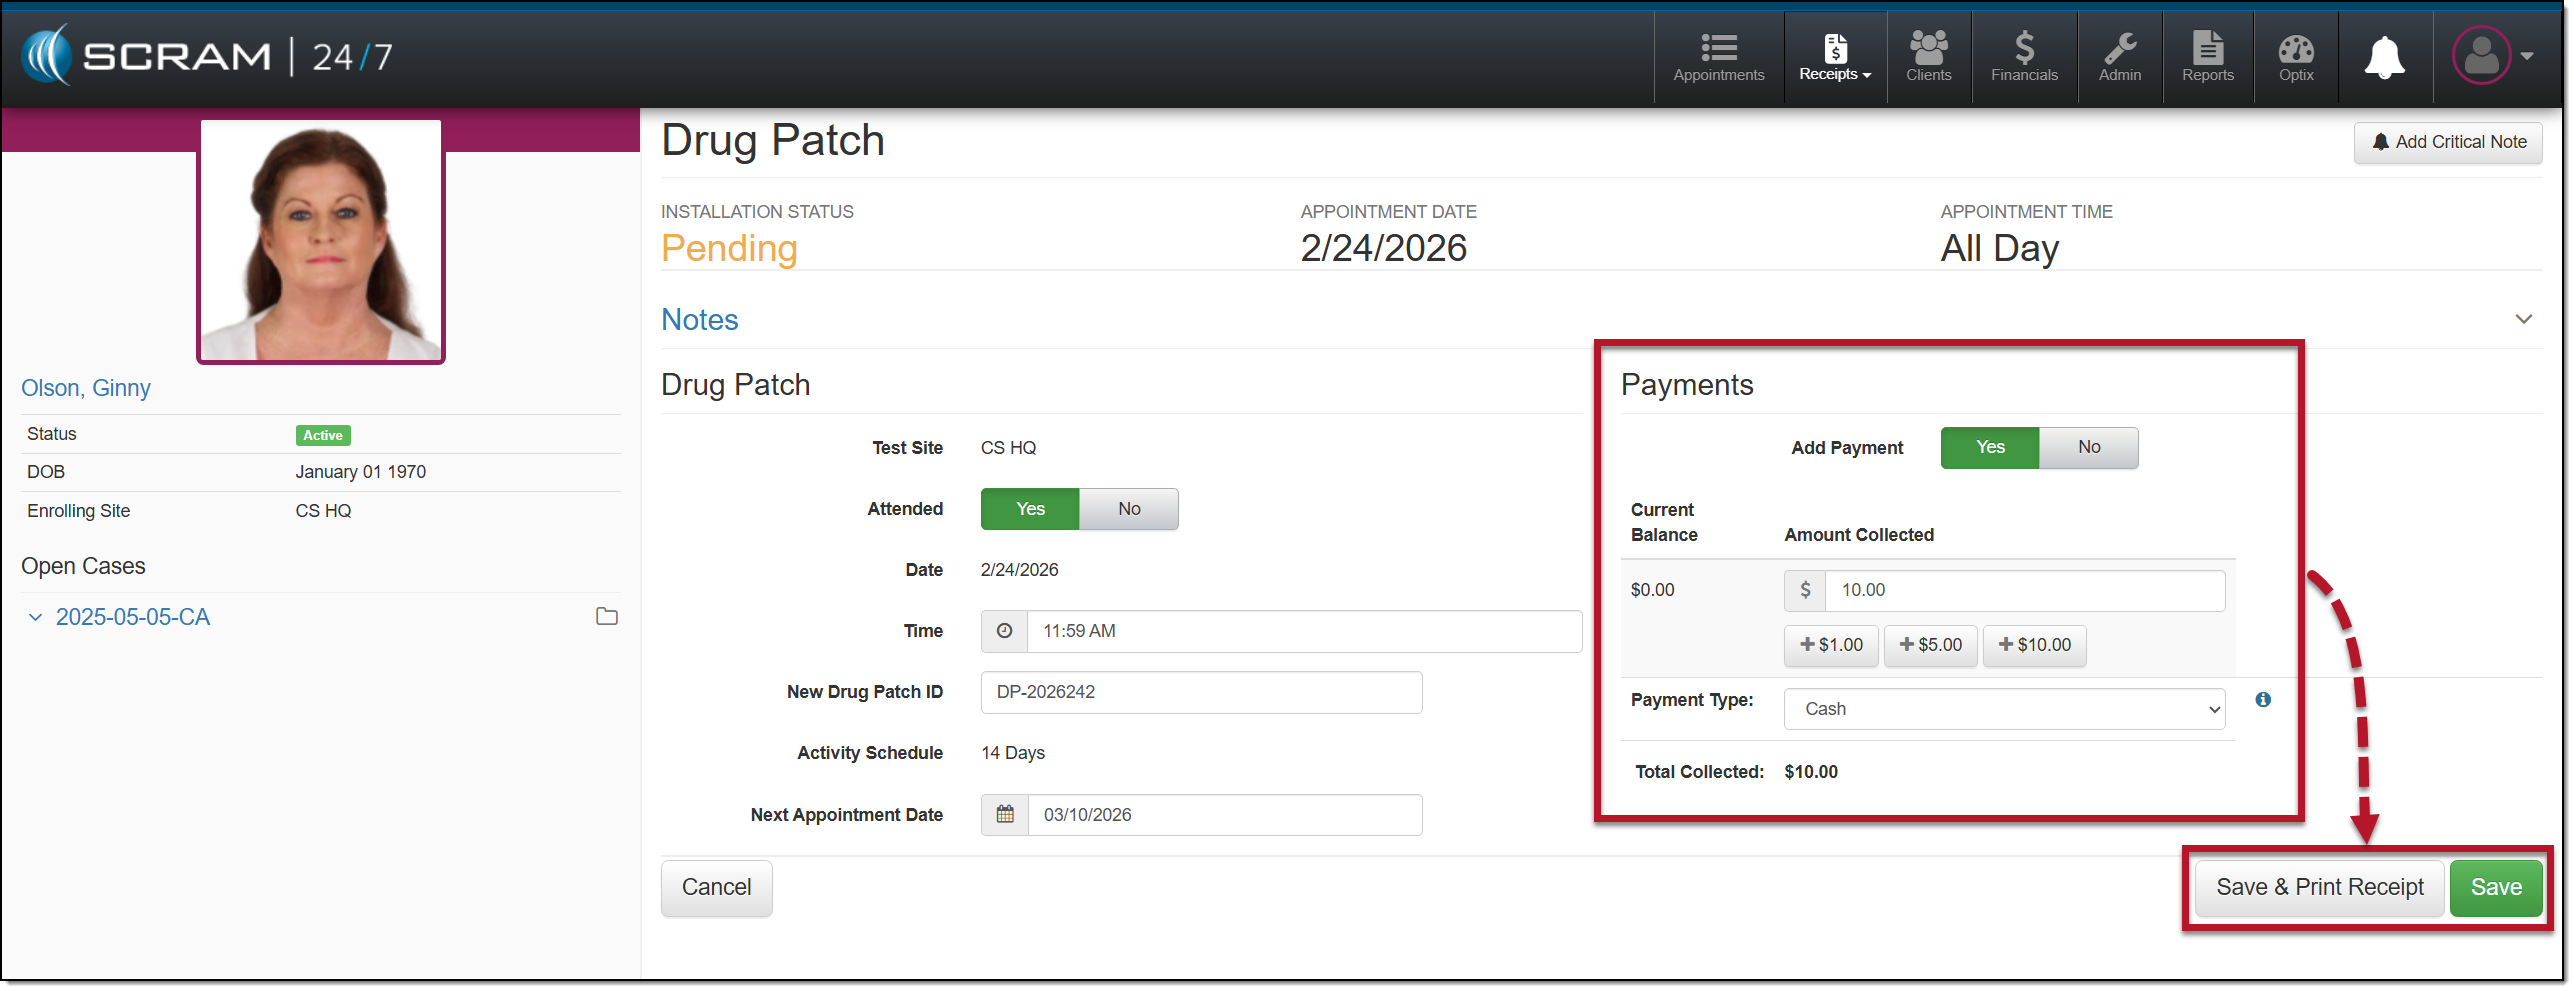
Drug Patch Payment and Save Options – click to enlarge
The appointment is now shown as complete on the client’s Summary page.
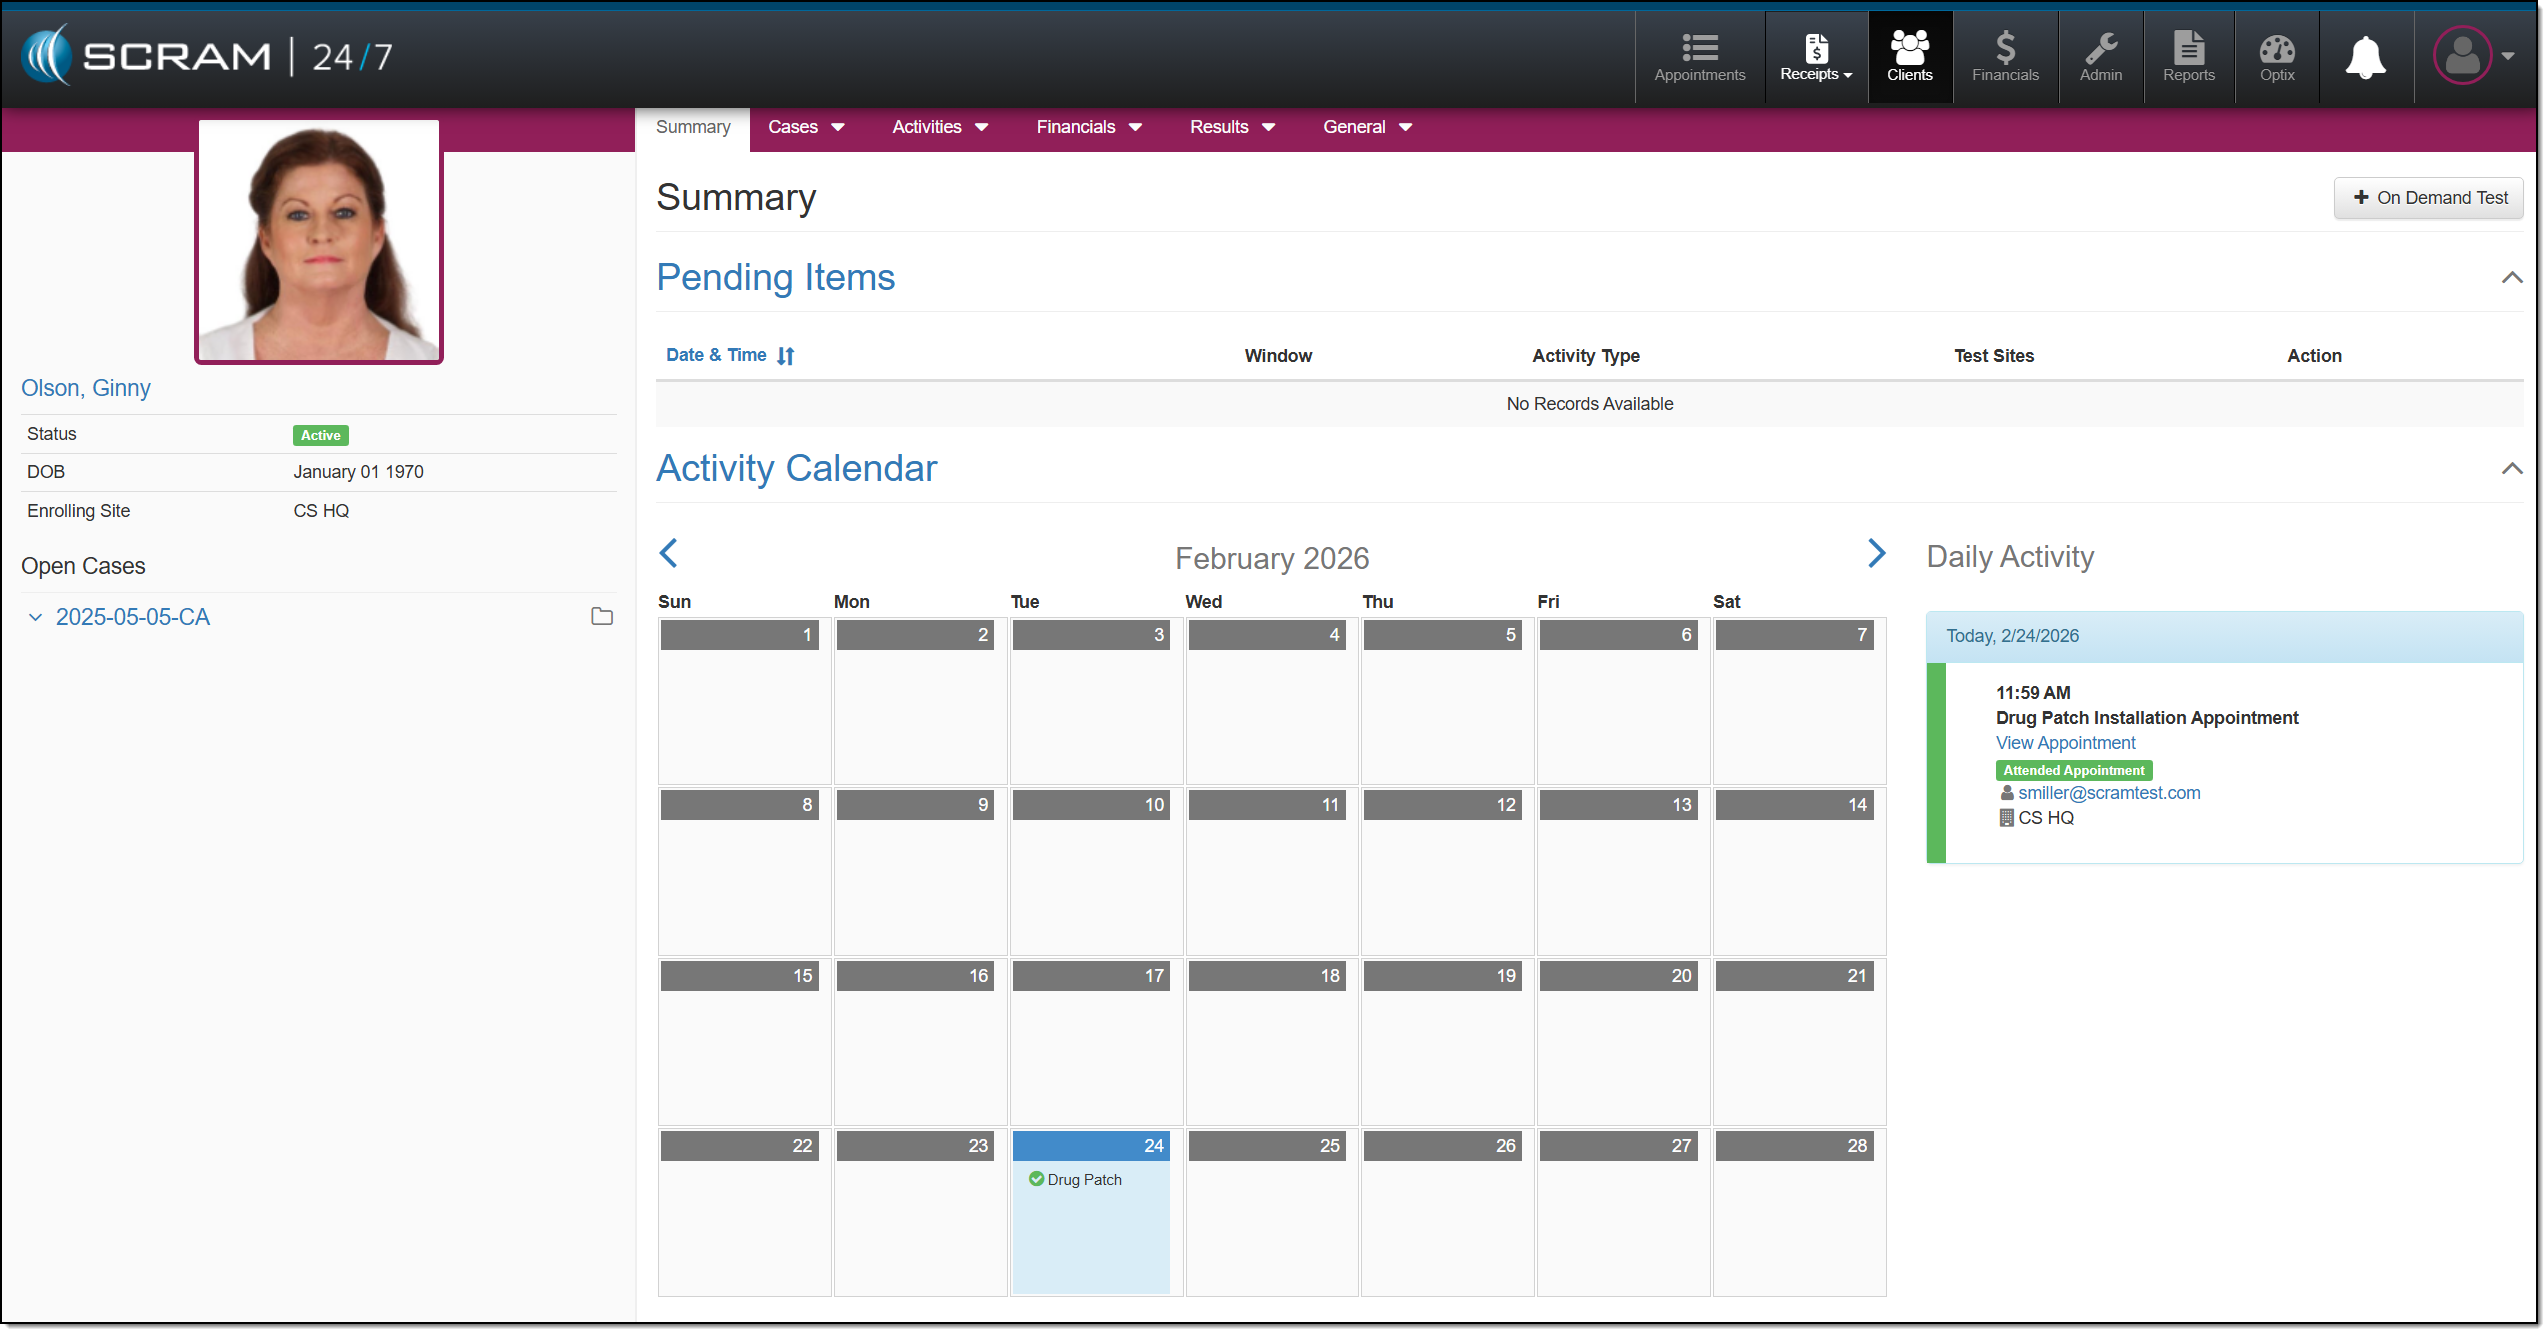
Summary Page, Appointment Complete – click to enlarge
To record future Drug Patch Replacement and Record Drug Patch Results appointments, follow the step-by-step instructions located in the Manage Drug Patch Activity in the Caseload Management section.