Once you have created the client’s profile, add the UA Activity to begin monitoring.
Starting on the client’s Activities tab:
- Select the +Add a New Activity button.
- Open the Activity dropdown menu, and select the UA option.

UA Activity Option – click to enlarge
- If needed, update the Activity Start Date.
- Locate the Frequency option and select either the Set Interval or Set Schedule option. Based on your selection, enter the details.
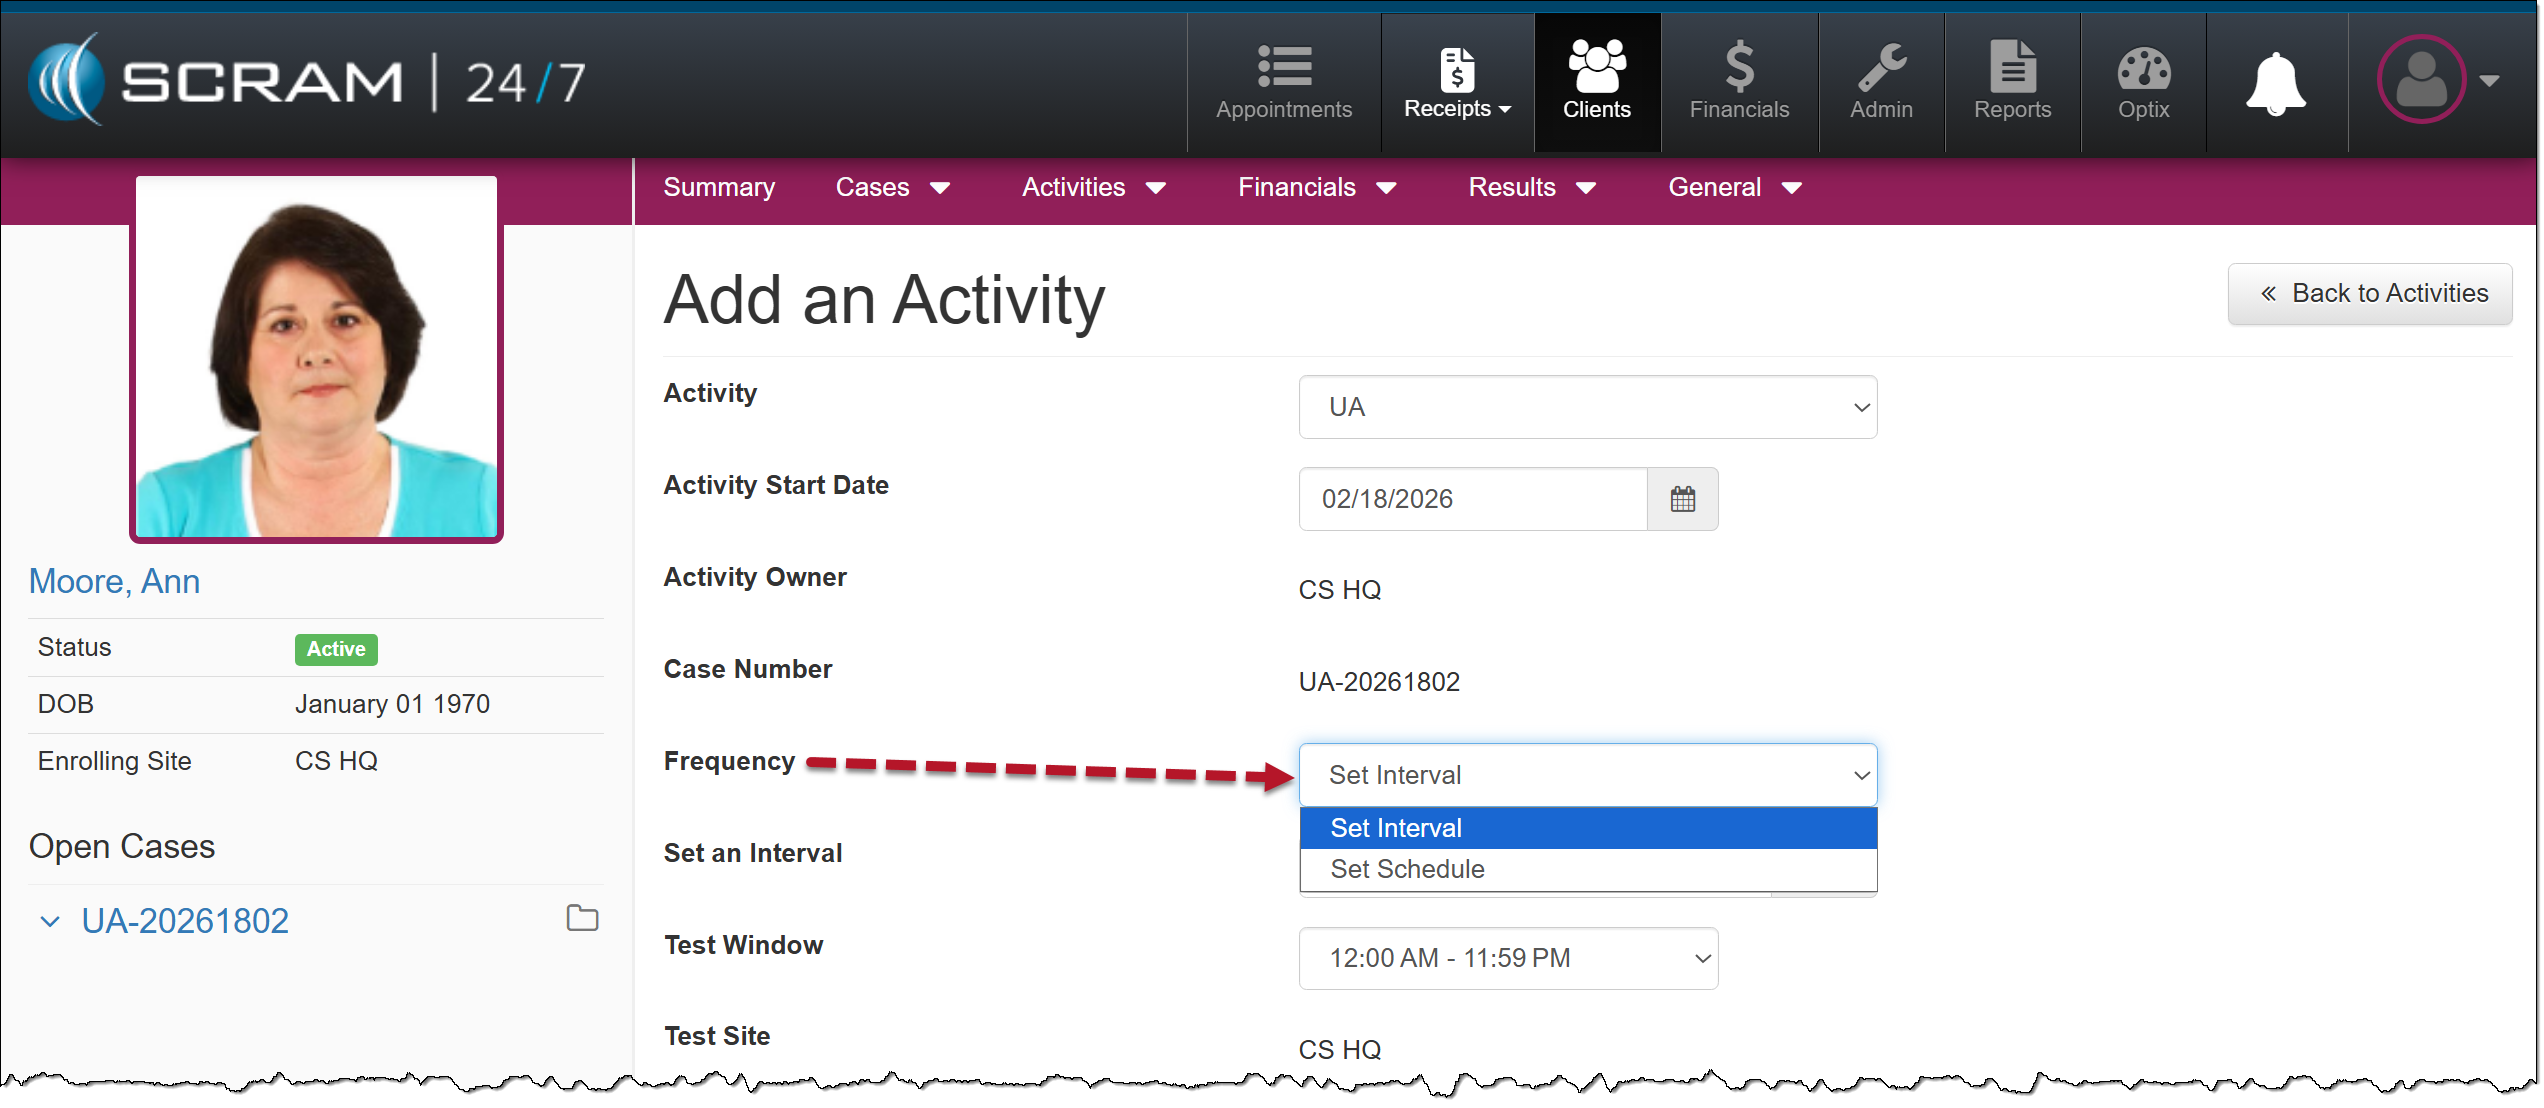
Frequency Option Menu – click to enlarge
- Open the Test Window dropdown menu and select the appropriate option.
| The testing time frames are preset by a user with Caseload or Administration permission. |
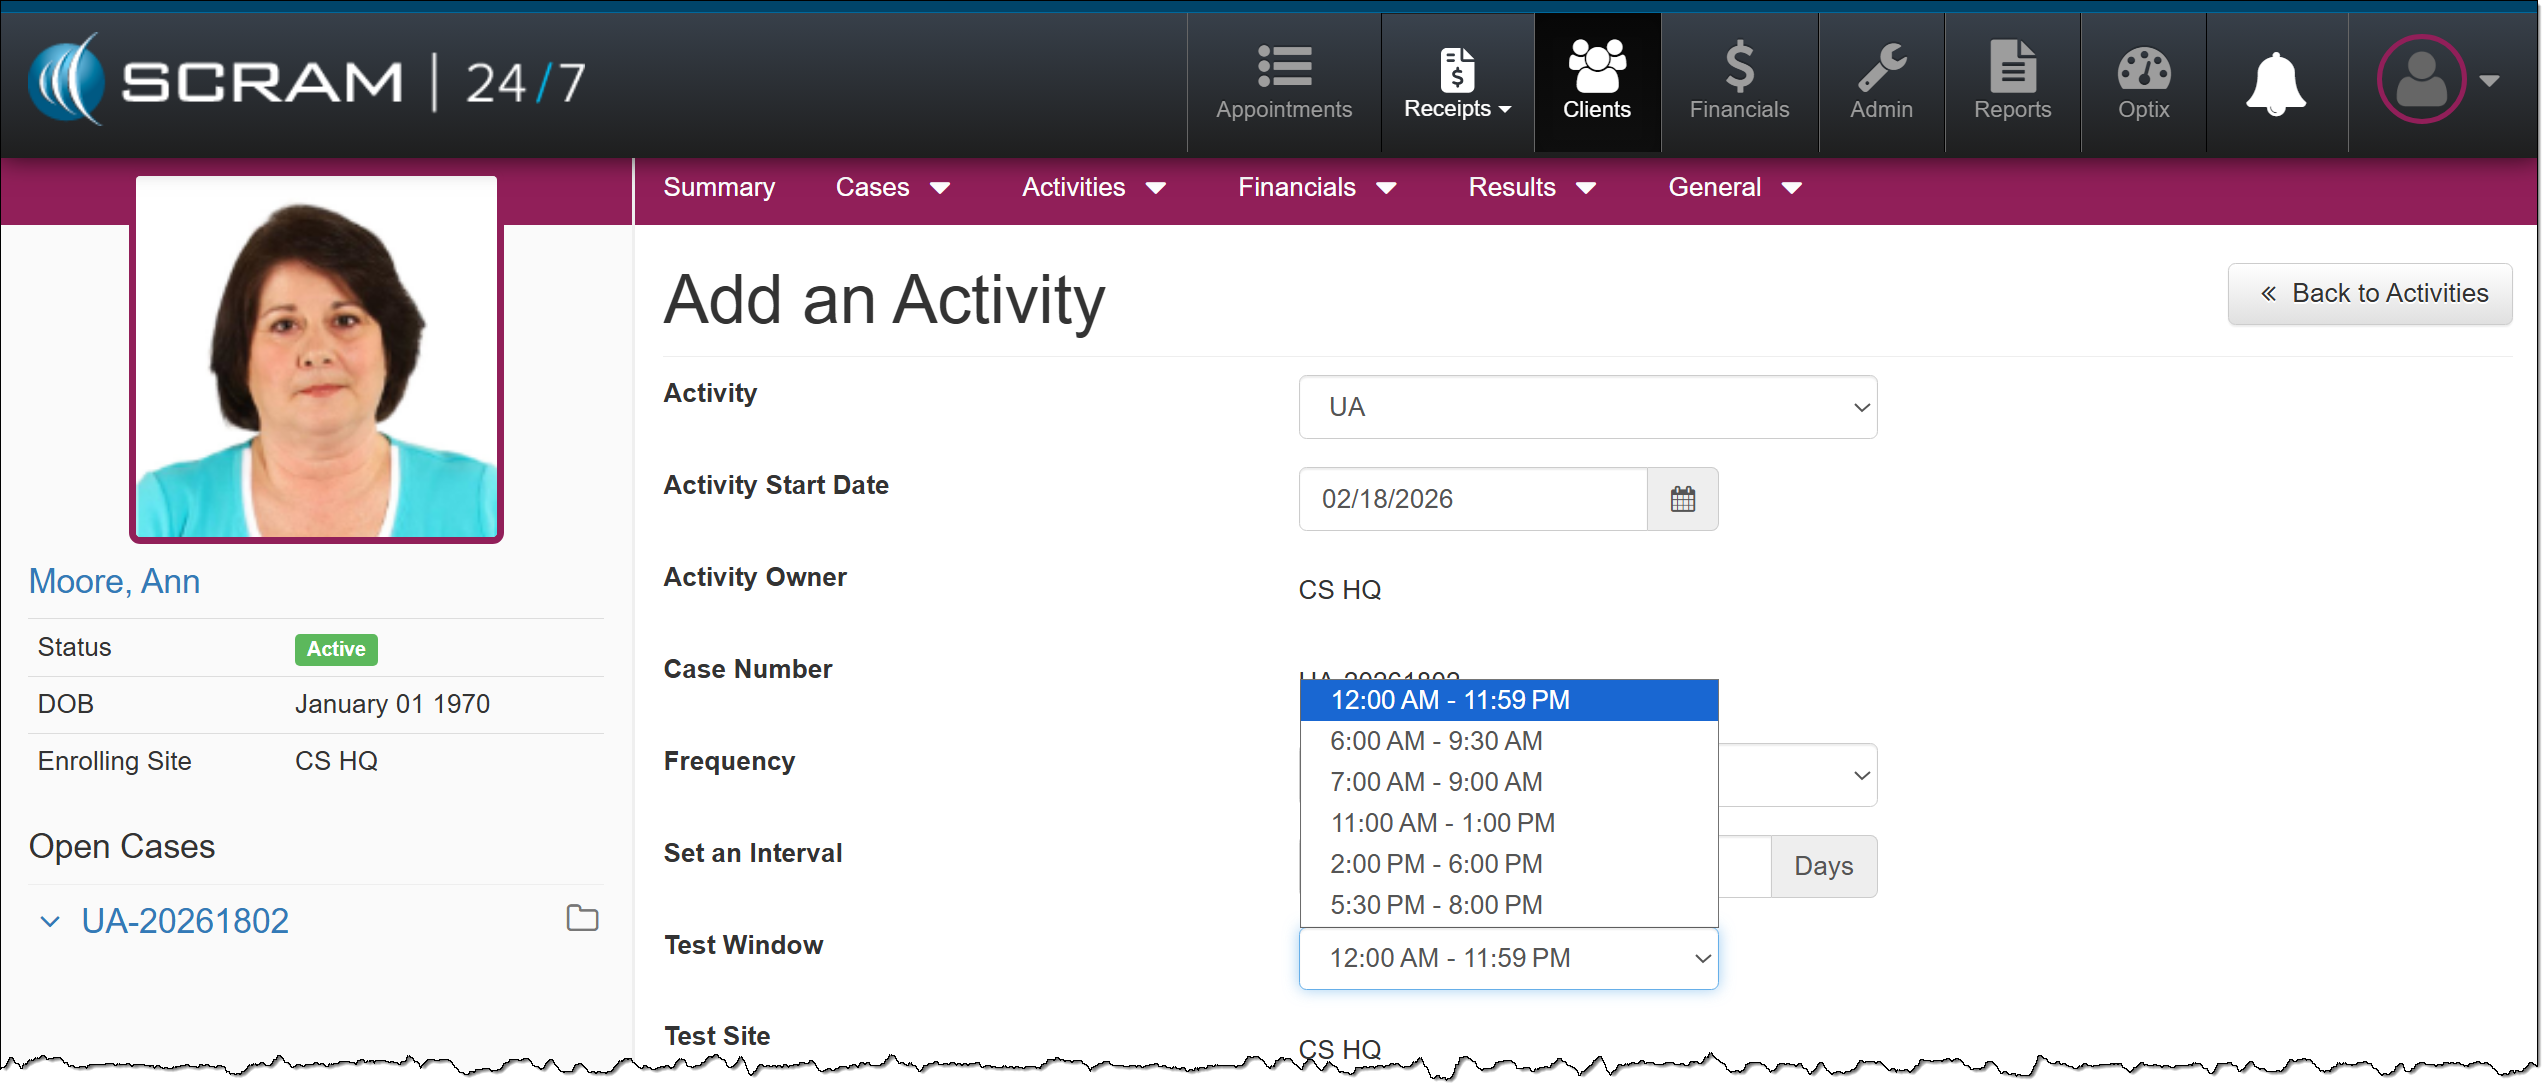
Test Window Options – click to enlarge
- Select a courtesy test site if required.
- Adjust the Activity Fees if needed
- After entering the details for the UA Activity, select the Add Activity button.
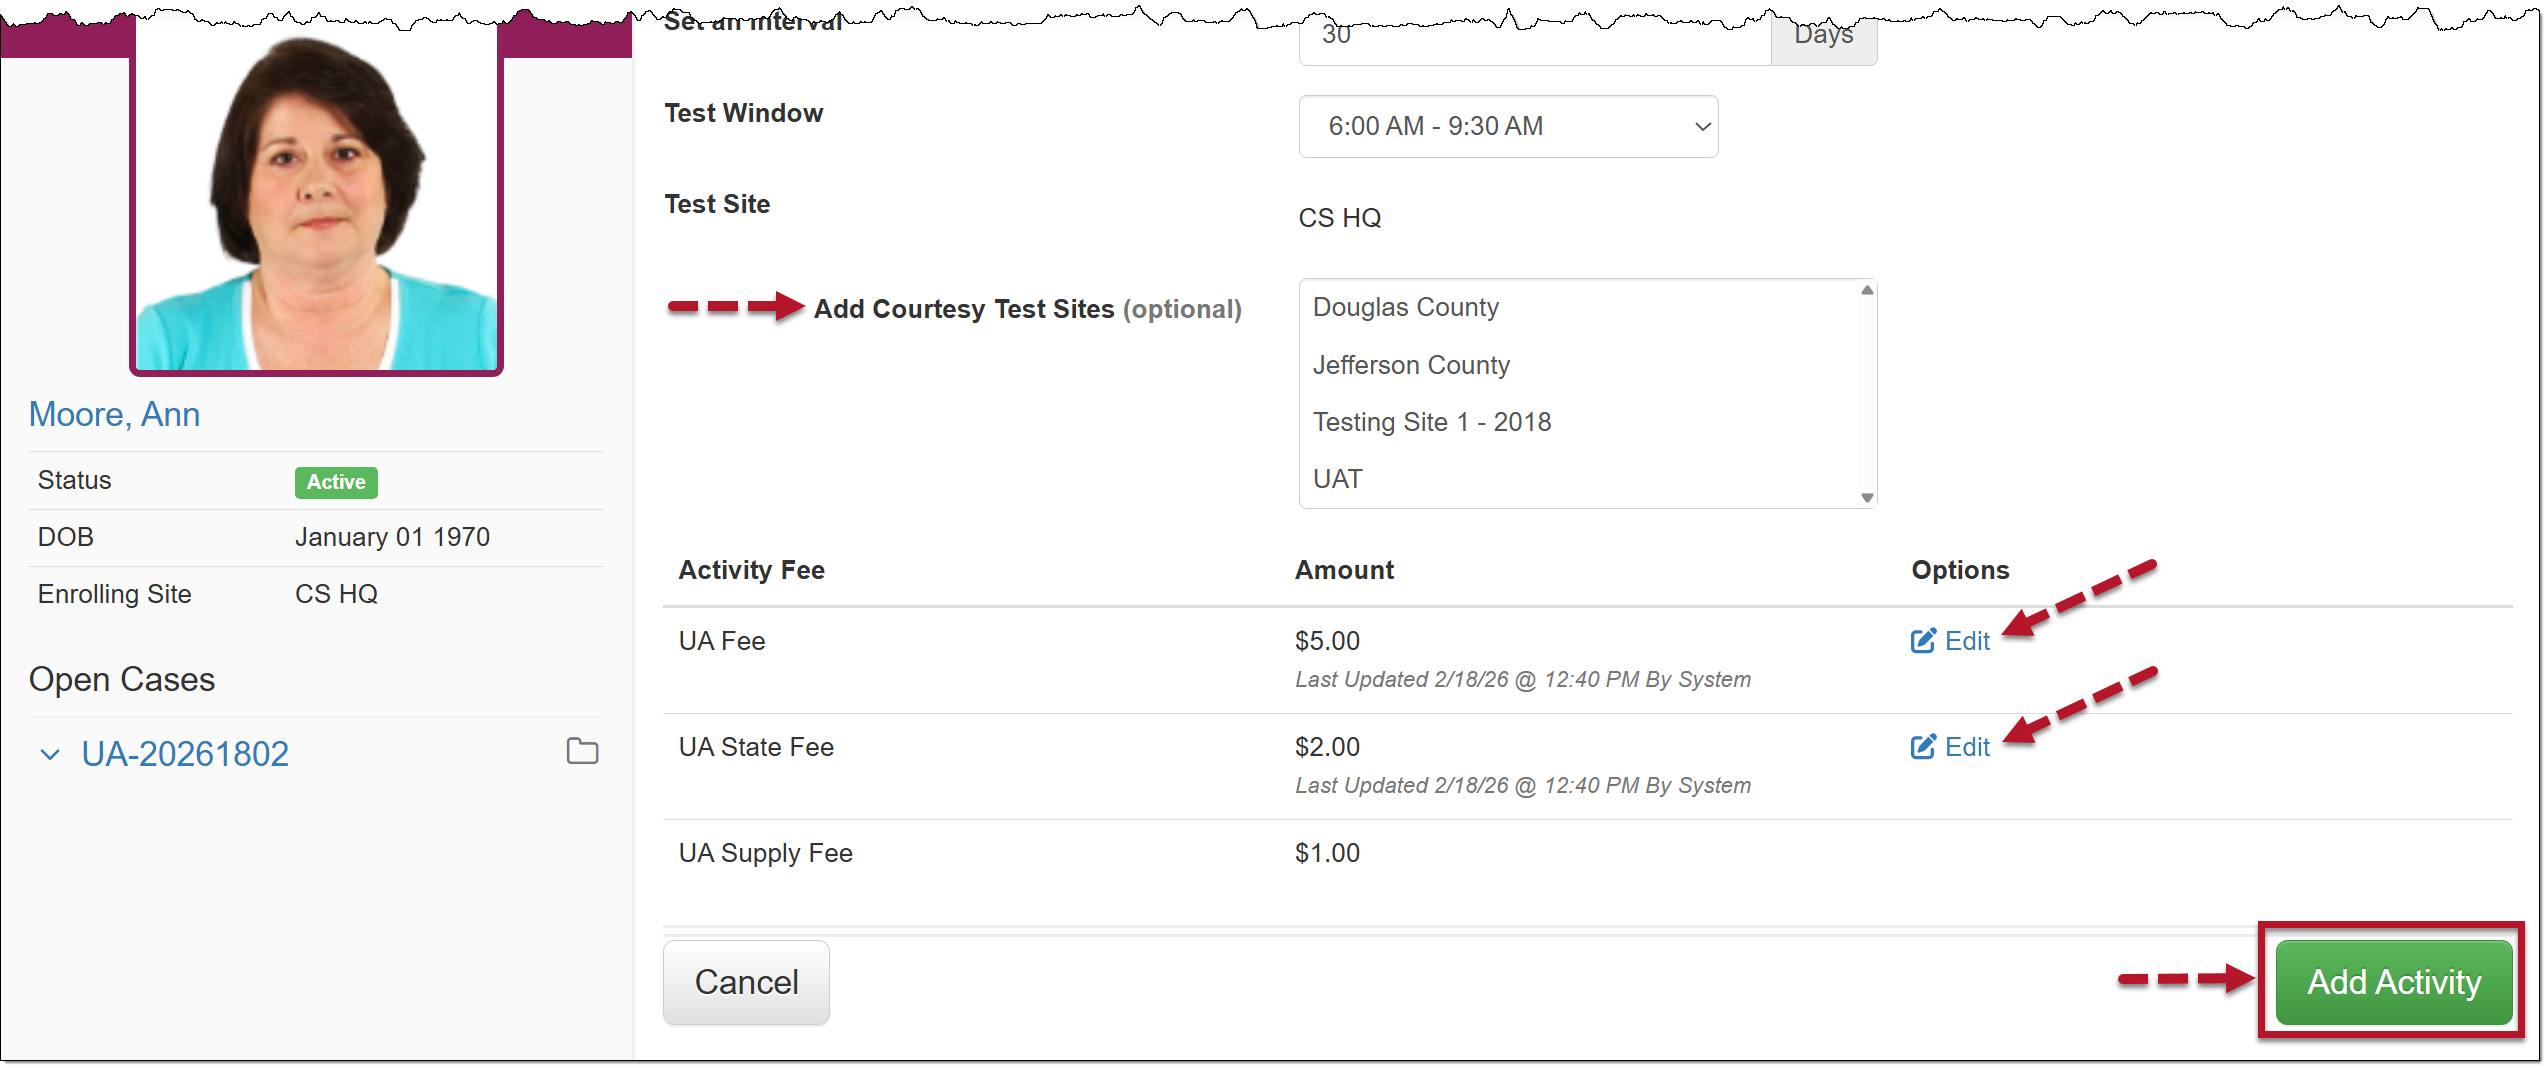
Courtesy Test Sites, Activity Fees and Add Activity Steps – click to enlarge
The Summary page will display a pending UA appointment.
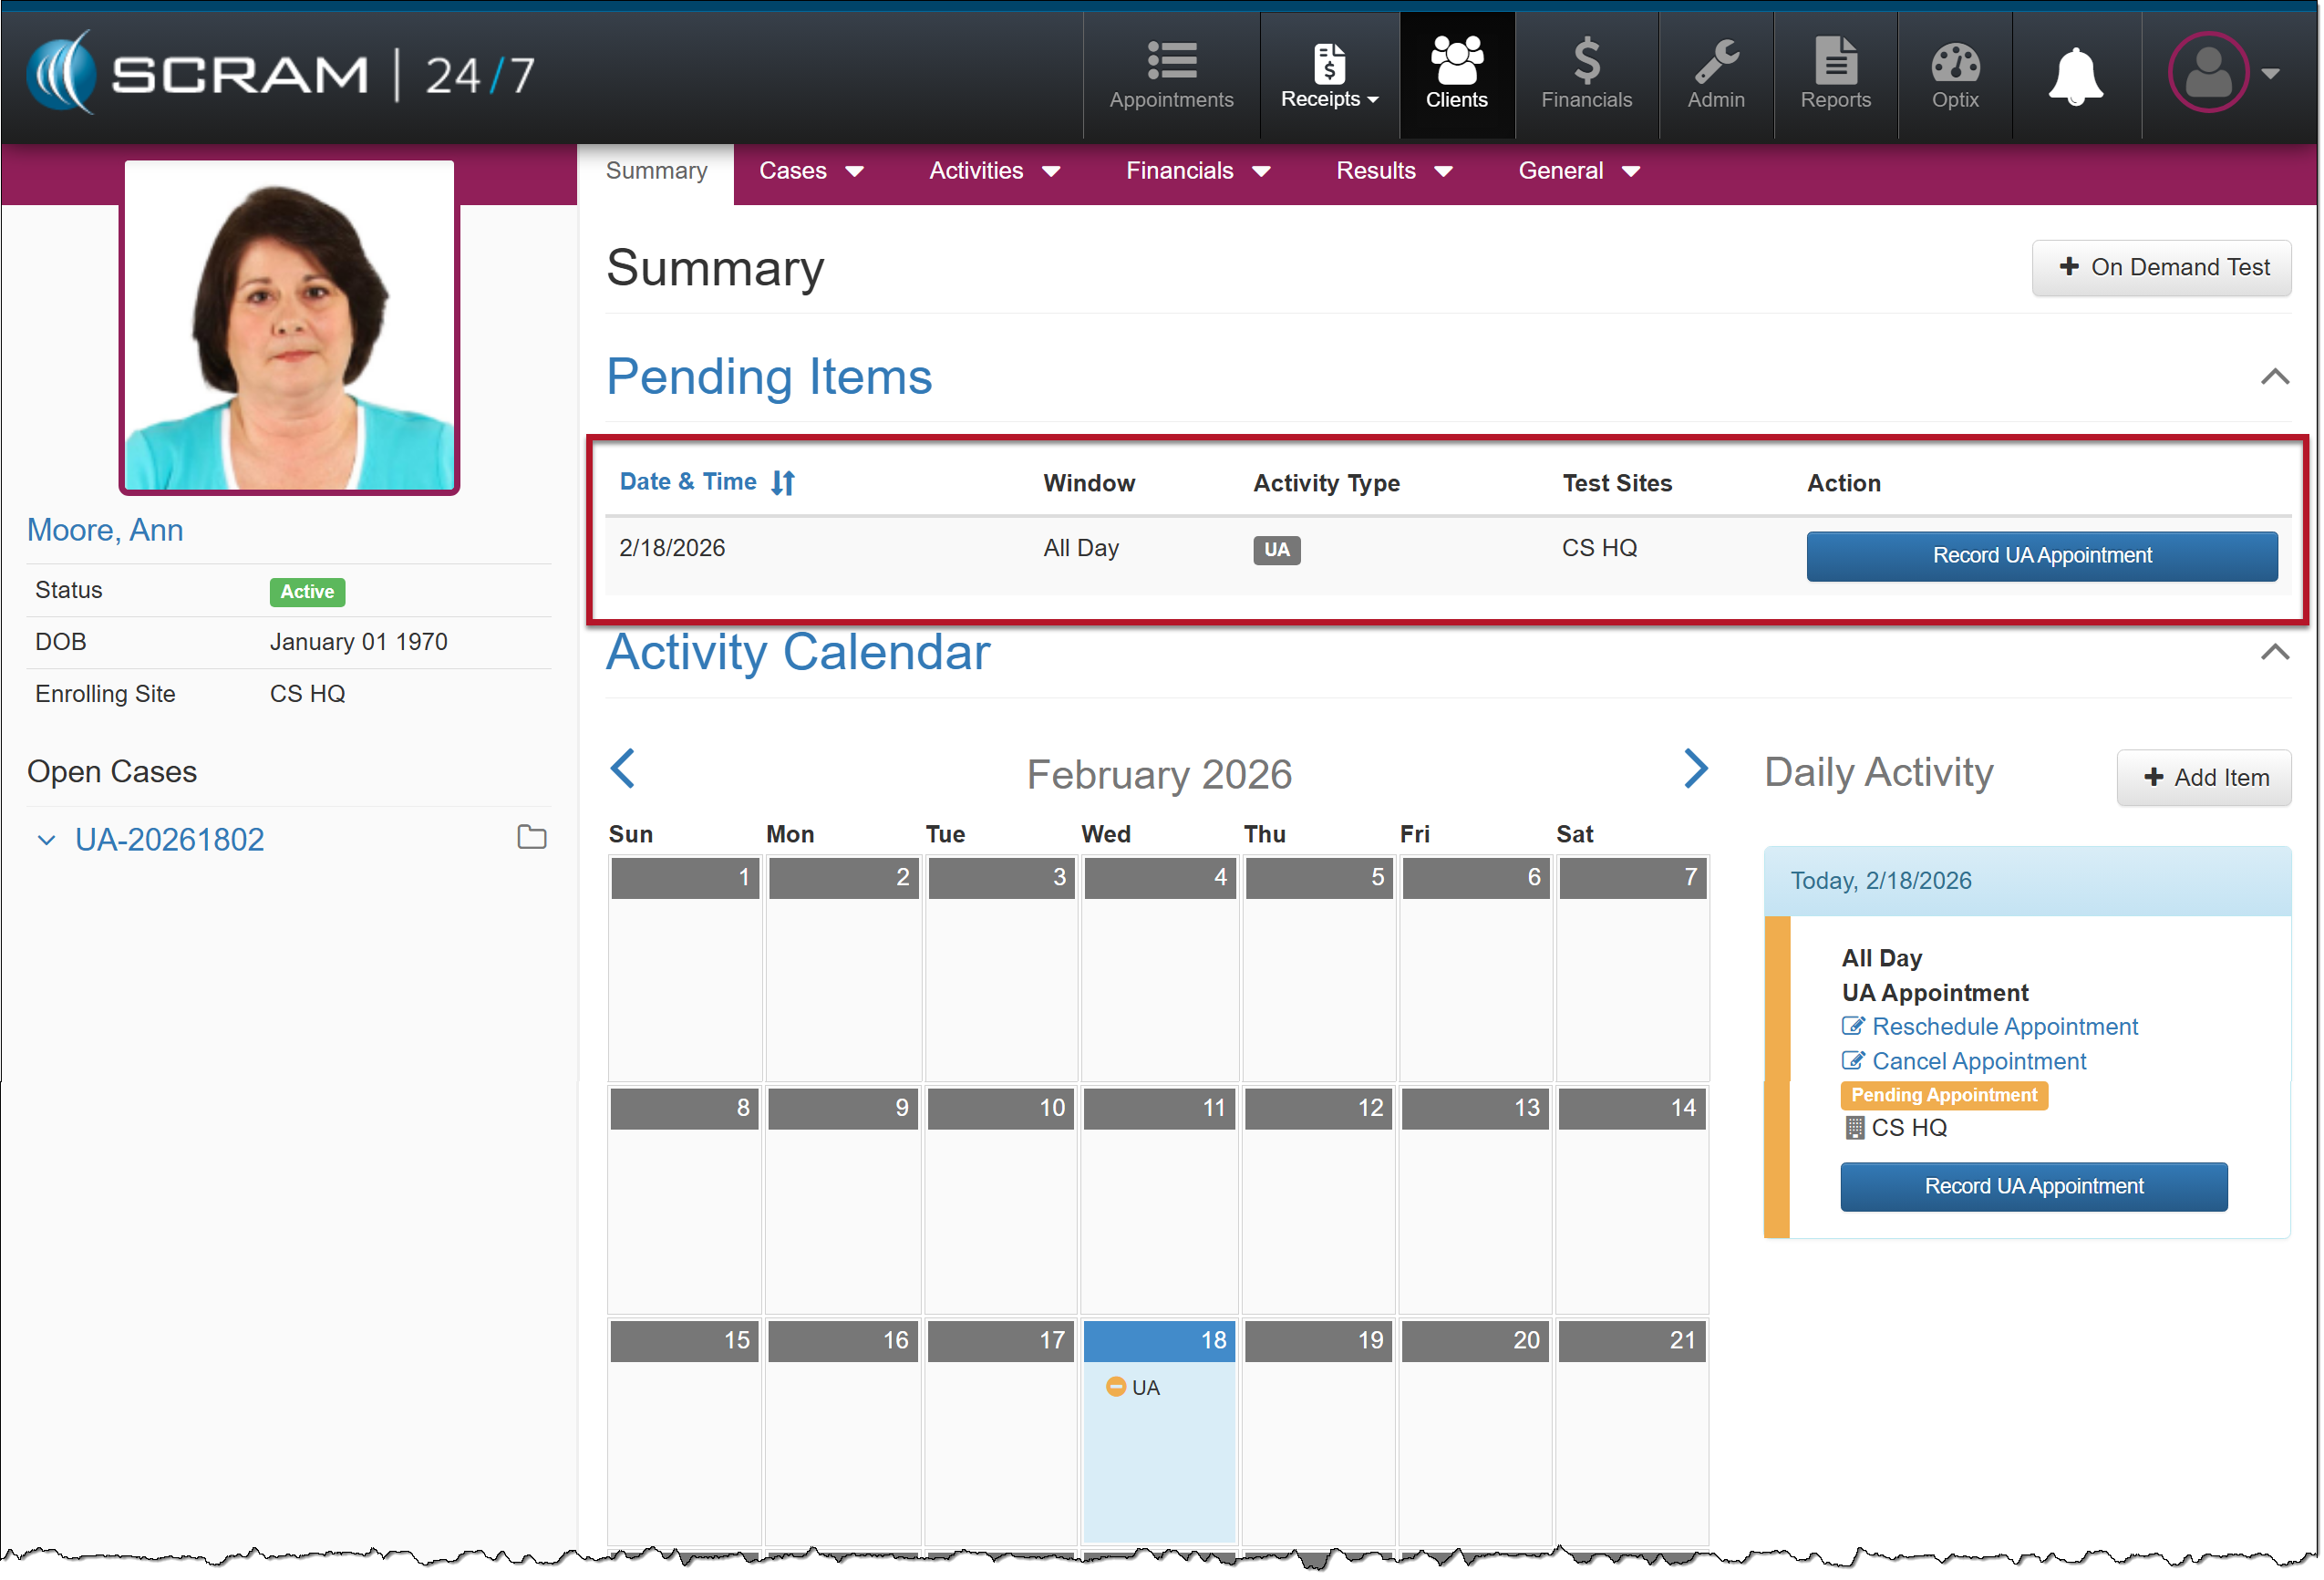
Client Summary Page – click to enlarge
At this time, you may record the first UA appointment.
For step-by-step instructions on recording a UA appointment, as well as recording UA results received from a lab, view the Manage UA Activity in the Caseload Management Section.