Step-by-Step Installation Instructions:
Use these simple instructions to install the SCRAM GPS Bracelet on your client.
You will need the SCRAM GPS Bracelet being assigned to the client and a backplate.
Installation Video:
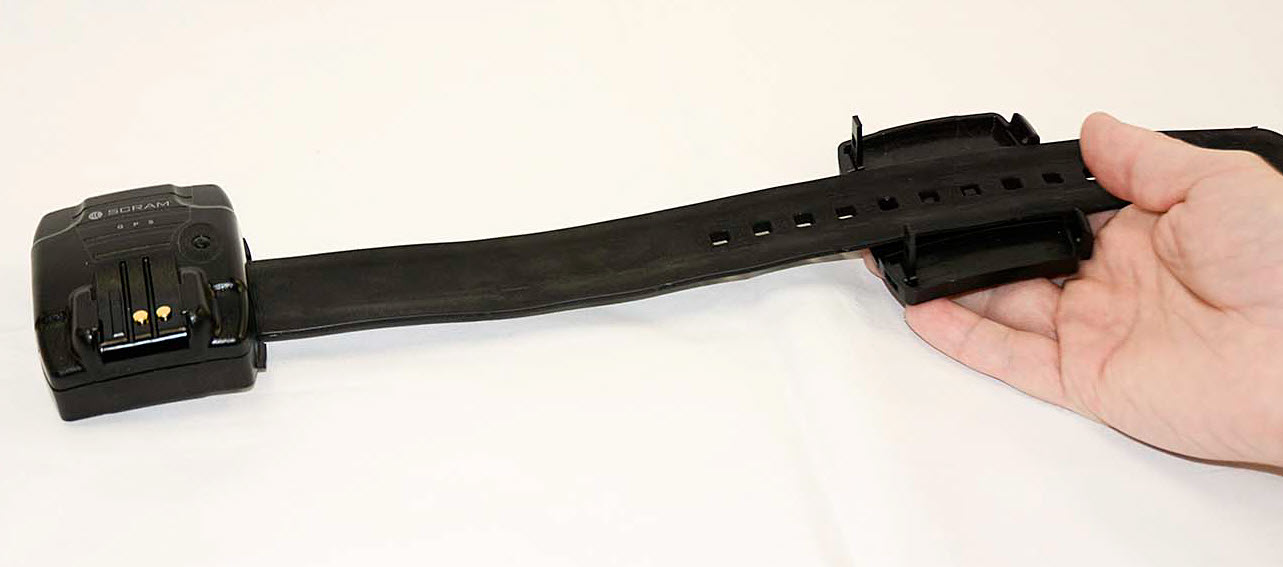
Proper Alignment of the Bracelet and Backplate
To ensure the backplate is oriented correctly for installation:
- Place the bracelet face up on a desk with the strap on the right side.
- Next, place the backplate under the strap with the large posts closest to the bracelet.
The farther away the backplate is positioned from the bracelet body, the larger the circumference of the strap.
Proper Alignment of the Bracelet and Backplate – click to enlarge
| IMPORTANT!
There are nine sizing notches in a “small” (sometimes referred to as “juvenile”) SCRAM GPS strap, and 14 sizing notches in a “regular” (adult) SCRAM GPS strap. Ensure that the three raised pegs in the backplate fit into three of the available sizing notches in the strap. DO NOT attempt to secure the strap on only the last two notches of the strap (8 & 9 for small, or 13 & 14 for regular); otherwise the backplate will not close flush against device casing and may result in tamper alerts being generated in SCRAMNET GPS. |
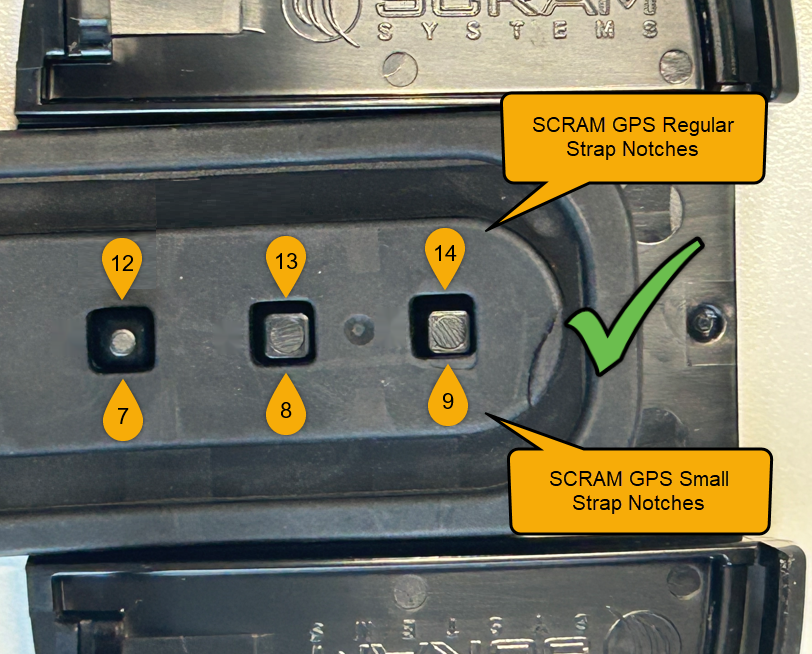
Proper Positioning of the end of SCRAM GPS Straps on Backplate (click to enlarge)
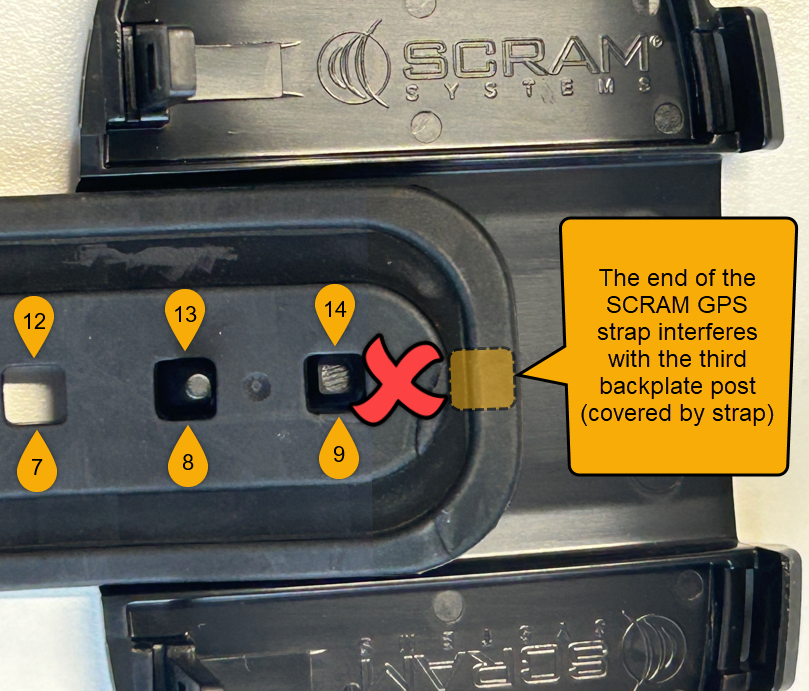
Improper GPS Strap Positioning (click to enlarge)
Installing the Bracelet on the Client’s Leg
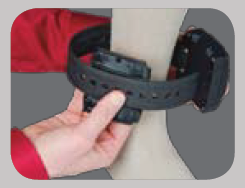
- While holding the backplate and the strap with one hand, place the smooth side of the backplate against the client’s leg.
- Wrap the bracelet body around the client’s leg until it is just above the backplate. The bracelet body will overlap the end of the strap, which will now rest against the client’s skin.
 |
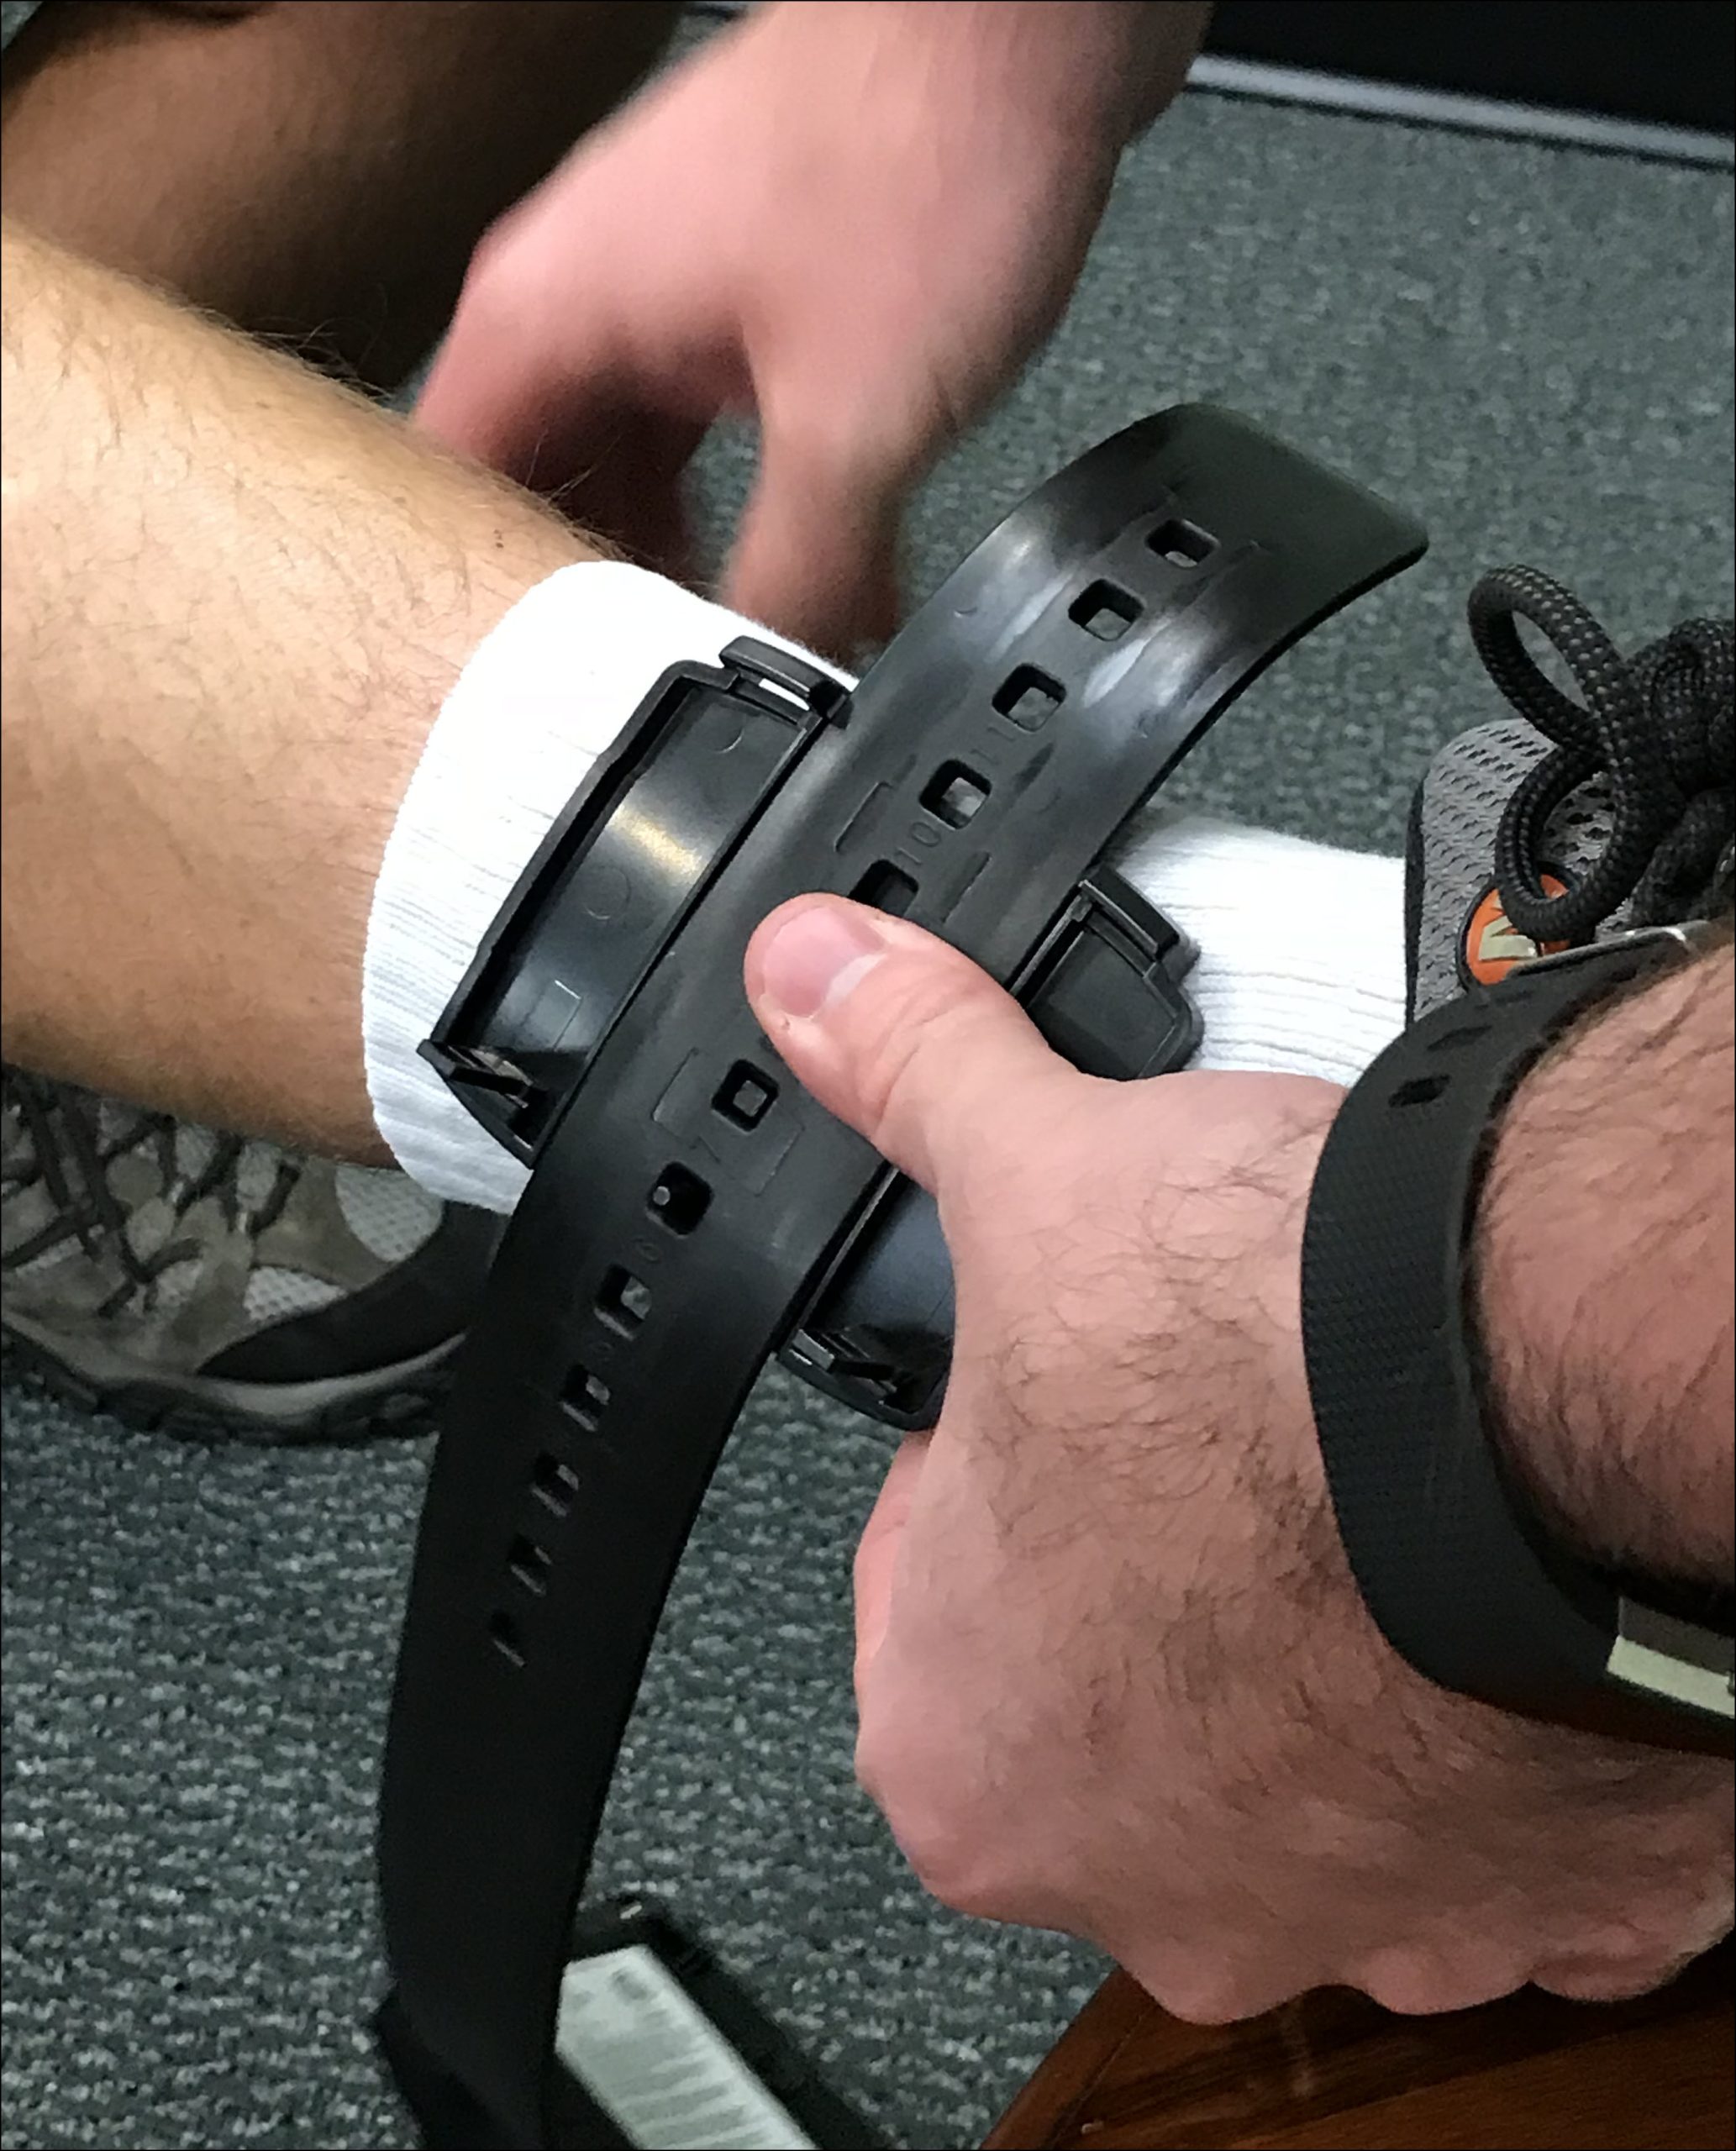 |
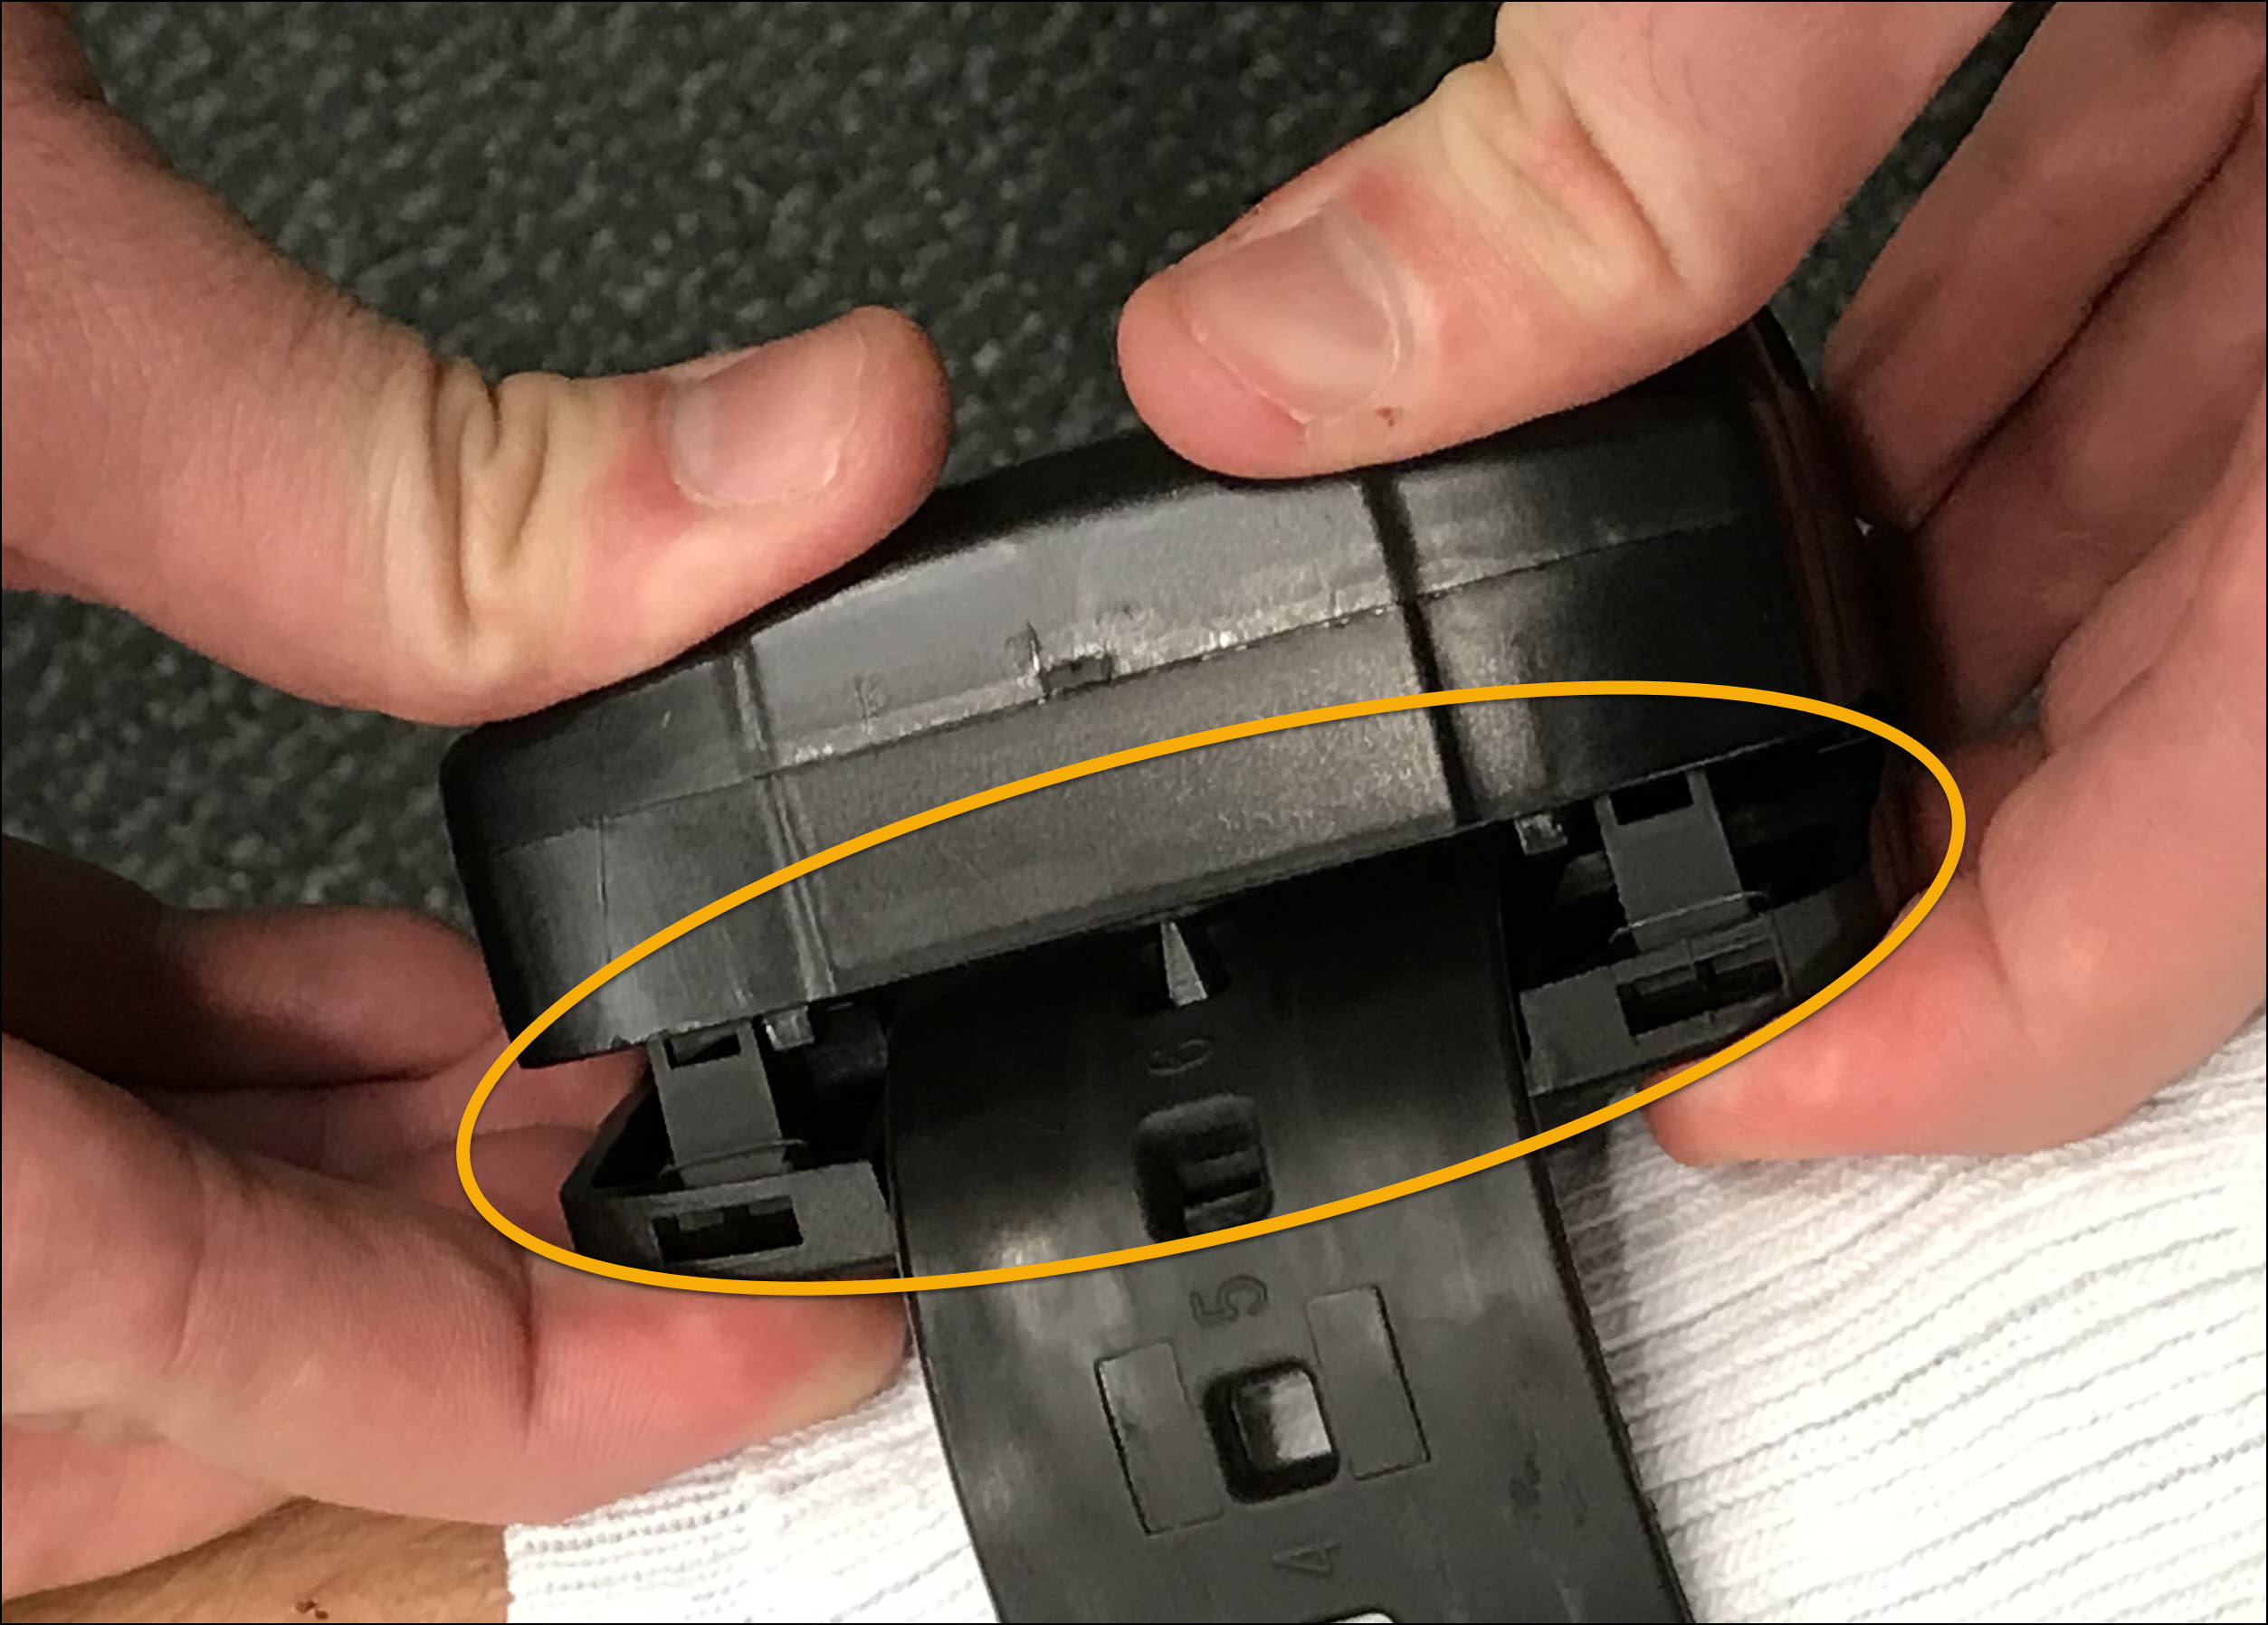
- Next, align and insert the tabs on the bracelet’s body with the hook-like tabs on the backplate.
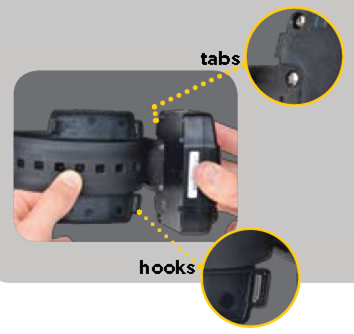
When connected correctly, it creates a hinge-like motion that closes the distance between the bracelet body and the backplate.
| Tip: Do NOT fully close. Before proceeding, ensure that both tabs are fully inserted under the hook-like tabs. |
Proper Alignment of the Bracelet Body with the Backplate – click to enlarge
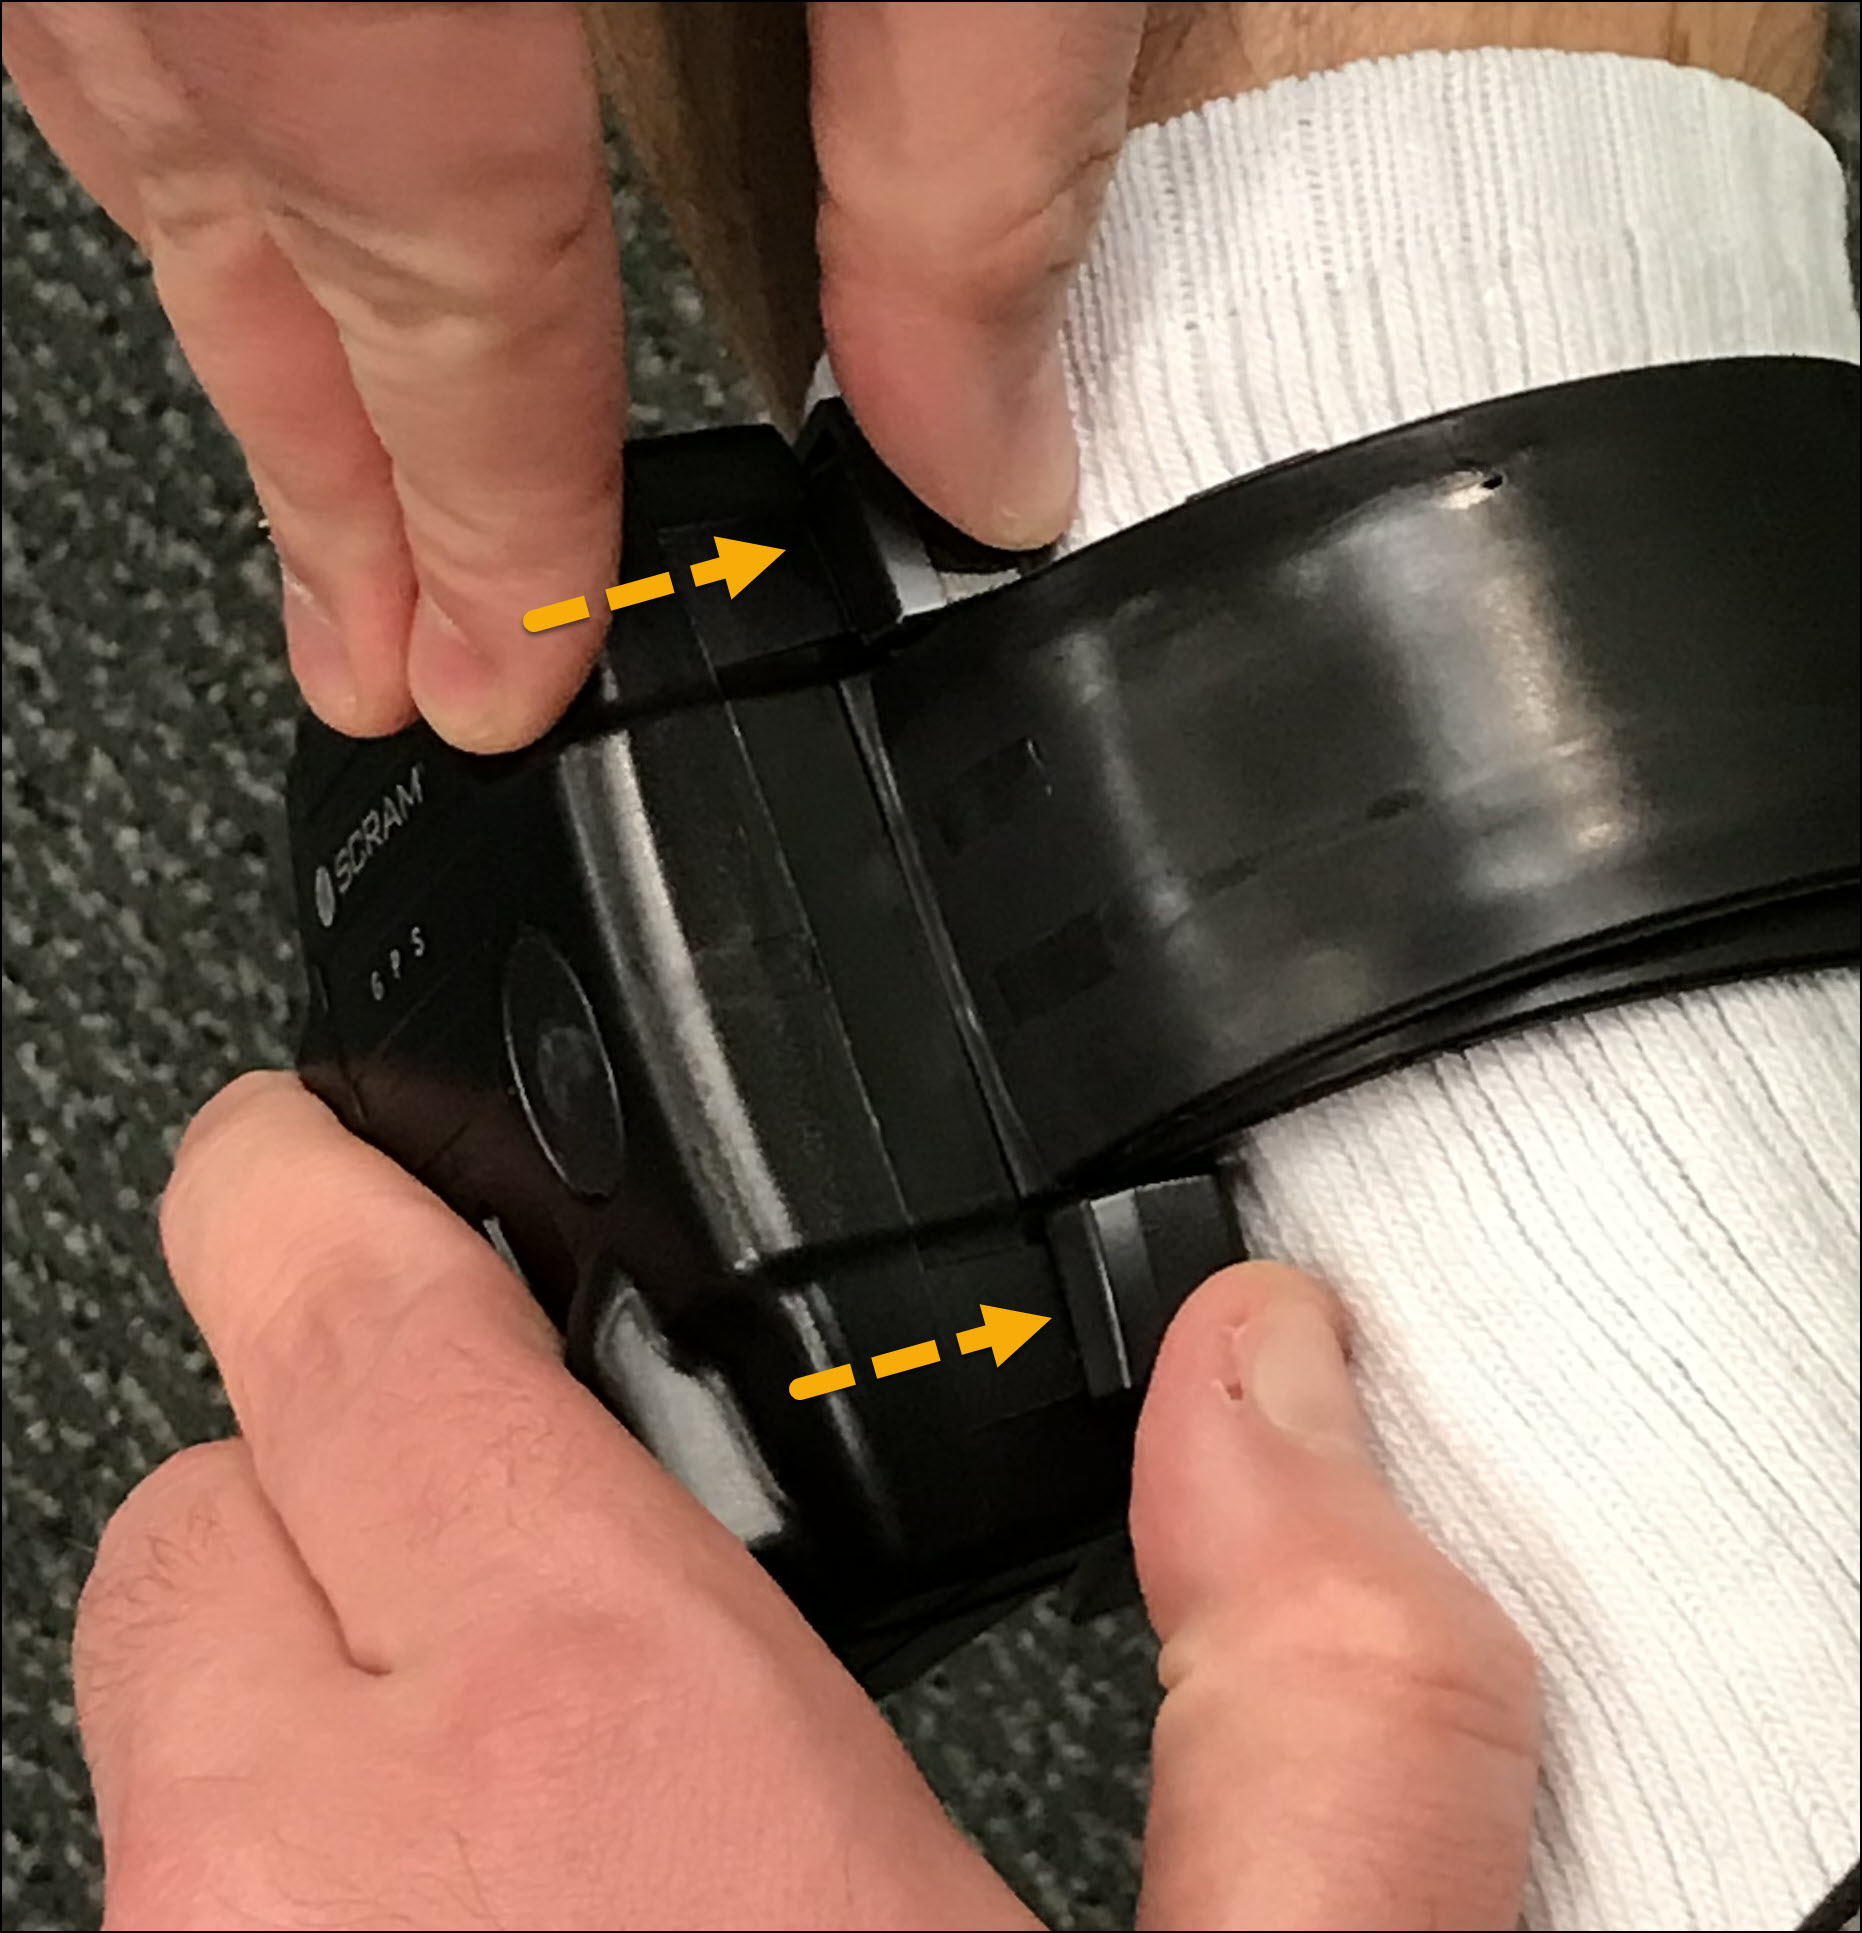
- As the gap between the bracelet and the backplate decreases, you will hear the first in a series of soft clicks. After you hear the first soft clicks, stop applying pressure.
At this time, verify the bracelet’s fit on the client’s leg. If necessary, you may pull the bracelet body away from the backplate without damaging it and then adjust the placement on the strap.
Before realigning the backplate on the strap and installing it on the client’s leg, verify that the backplate was not damaged in any way, and that the holes on the back of the bracelet’s body are clear of any debris by lightly tapping the device on your hand.
Once verified, repeat steps 1-6.
Small Gap Between the Bracelet Body and Backplate – click to enlarge
- After verifying the fit, use two hands to pinch the backplate and bracelet closed. This will eliminate the small gap and produce the final soft clicks.
Bracelet Body Secured to the Backplate – click to enlarge
Verify Installation
Once you have installed the device on the client’s ankle, before letting the client leave, complete these final installation and system checks.
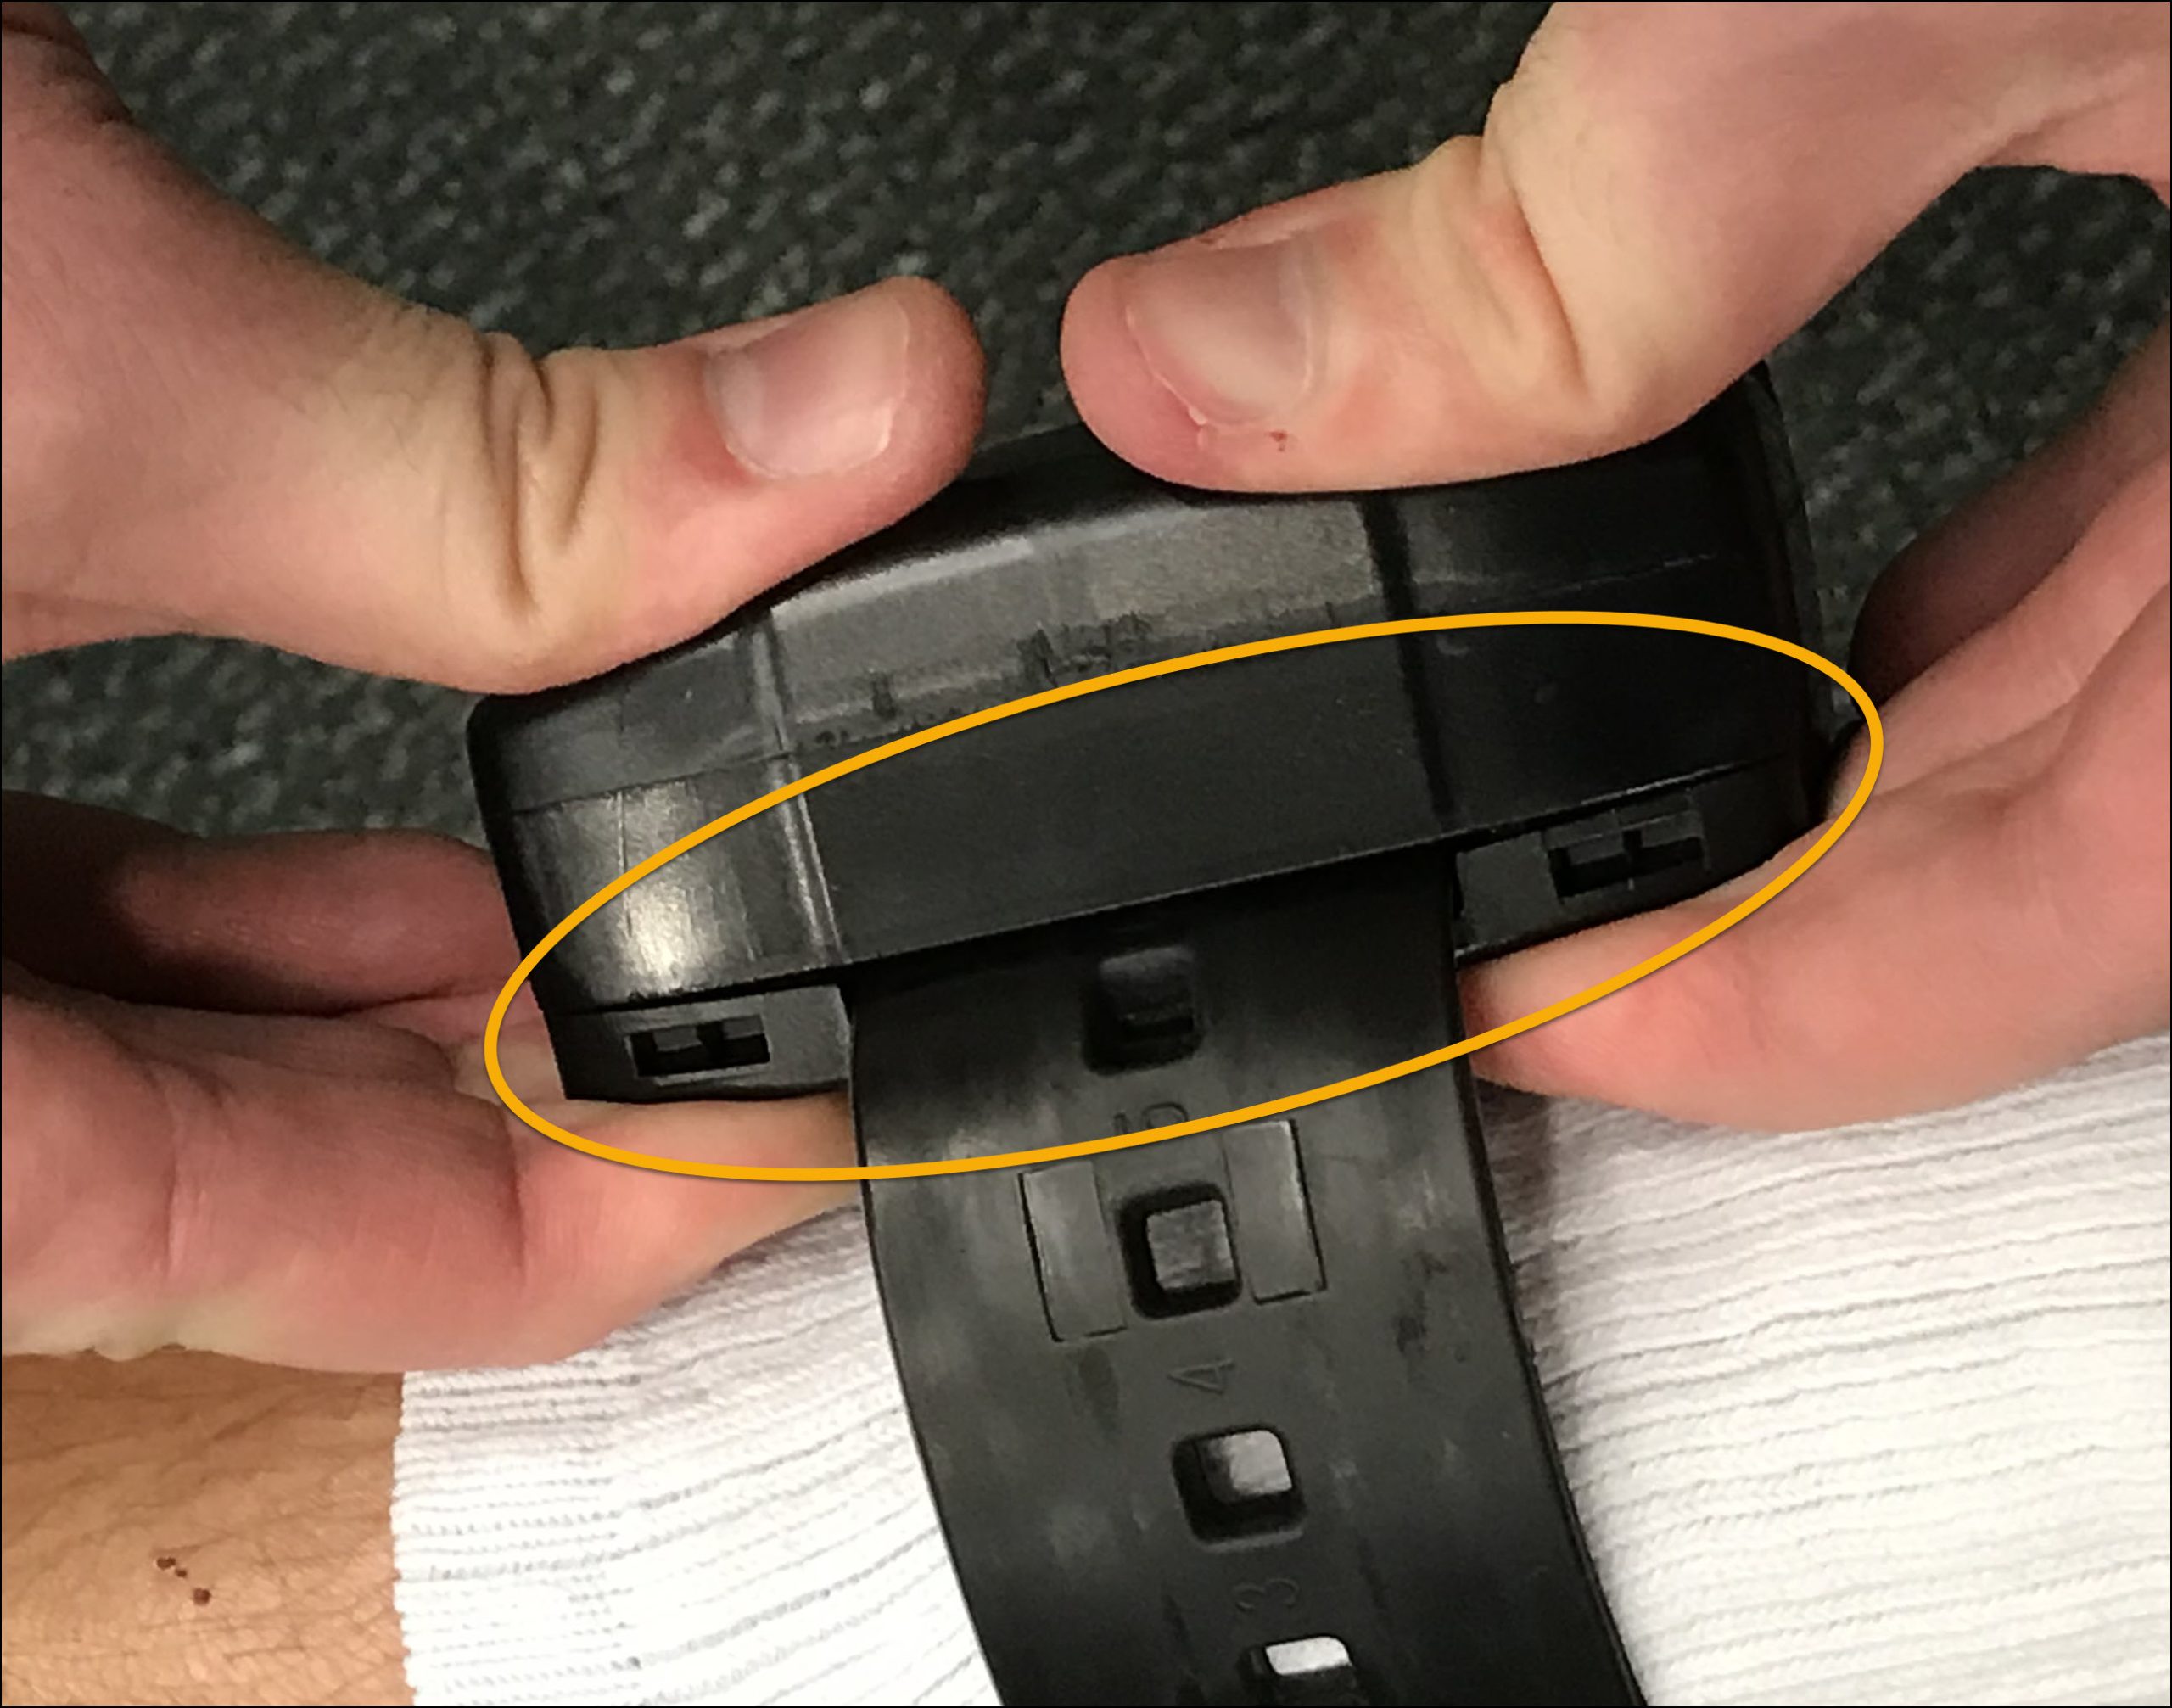
- Ensure that the bracelet is securely attached to the backplate. Verify that the small gap between the backplate and the bracelet’s body has been eliminated. The backplate should be completely flush against the back of the bracelet’s body.
| Verification Tip:
Grab the bracelet’s body, and gently pull it away from the client’s leg. Doing this should NOT cause gaps between the backplate and the bracelet body or produce any “clicking” sounds. |
- Next, navigate to the SCRAMNET GPS Dashboard and clear any device tamper alerts triggered during the client’s installation.
| IMPORTANT! SCRAM GPS 9 Plus Device Tamper events may only be cleared once a Device Tamper Clear event has been received from the device. |
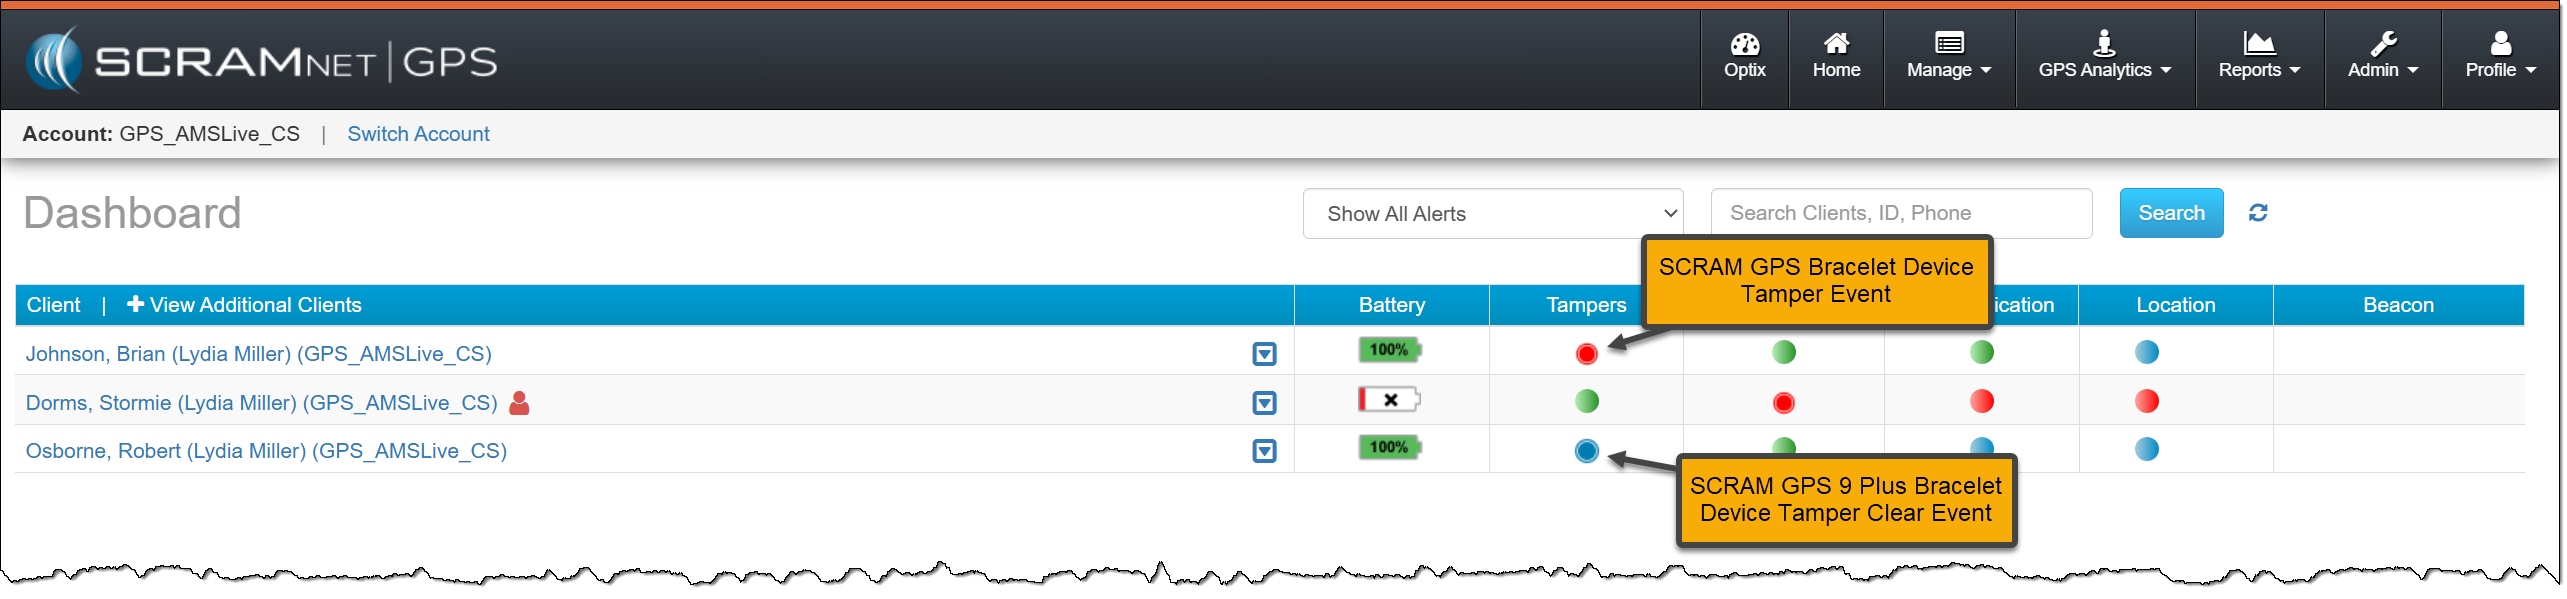
Device Tamper Events – click to enlarge
Device Tamper Events Cleared from the Dashboard – click to enlarge
- Next, navigate back to the client’s Device Assignment page by selecting the client’s name hyperlink and then the Device Information hyperlink.
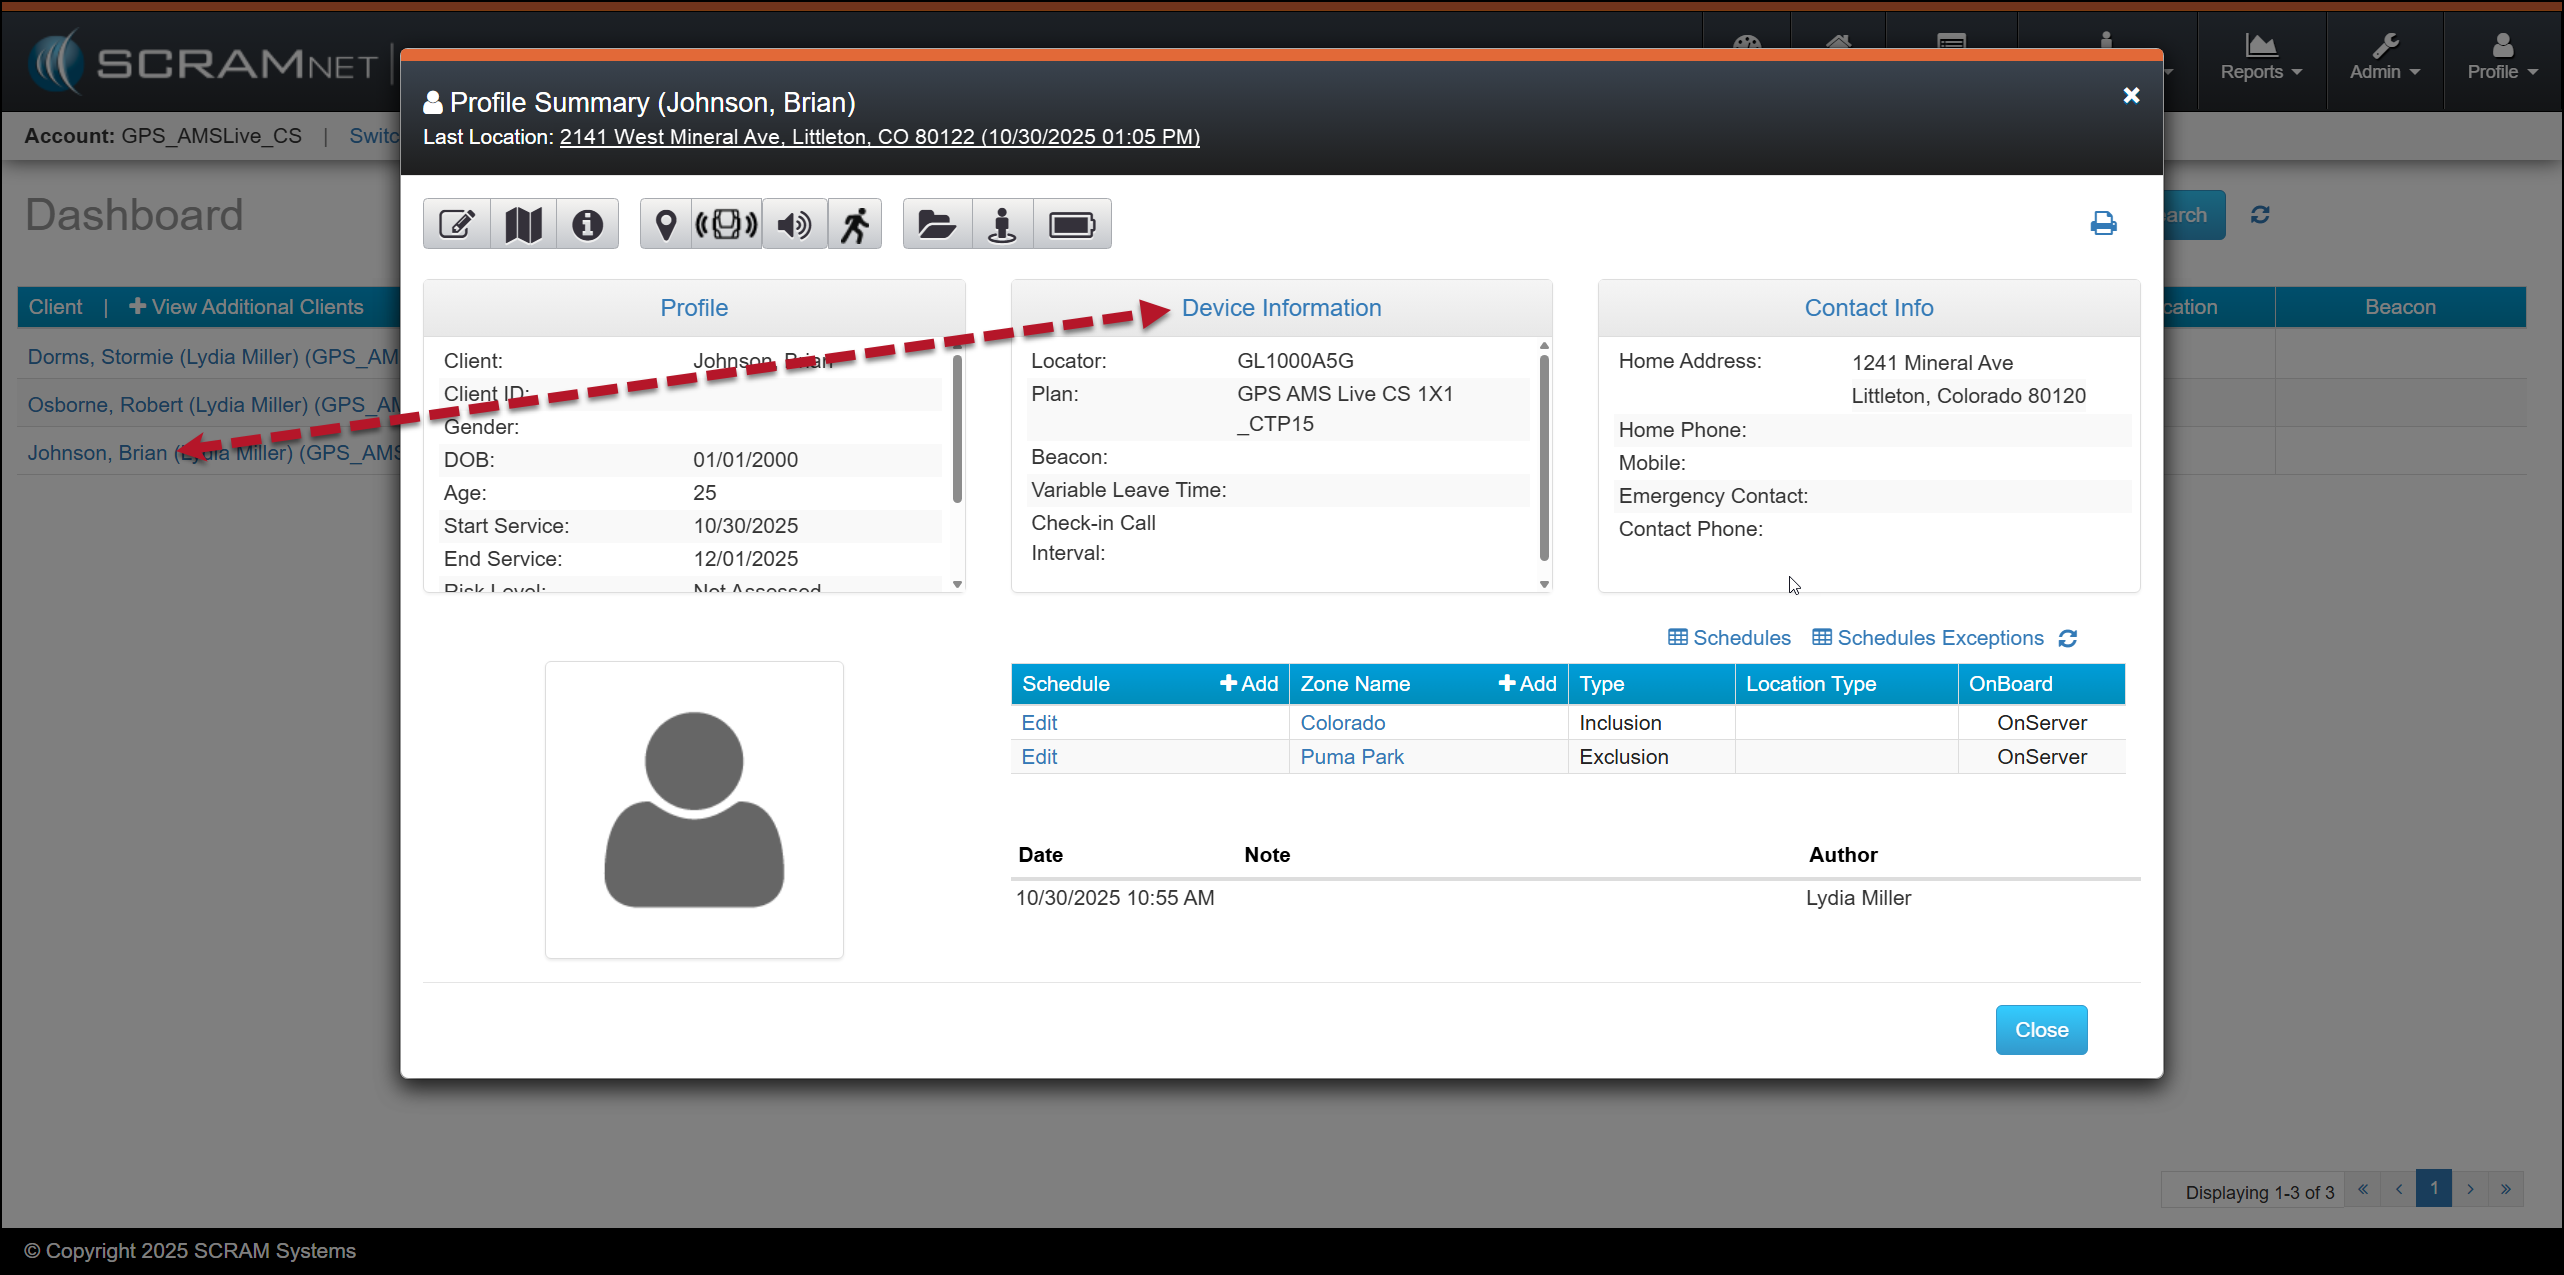
Profile Summary Pop-up Window – click to enlarge
- On the Device Assignment page, select the Edit hyperlink.
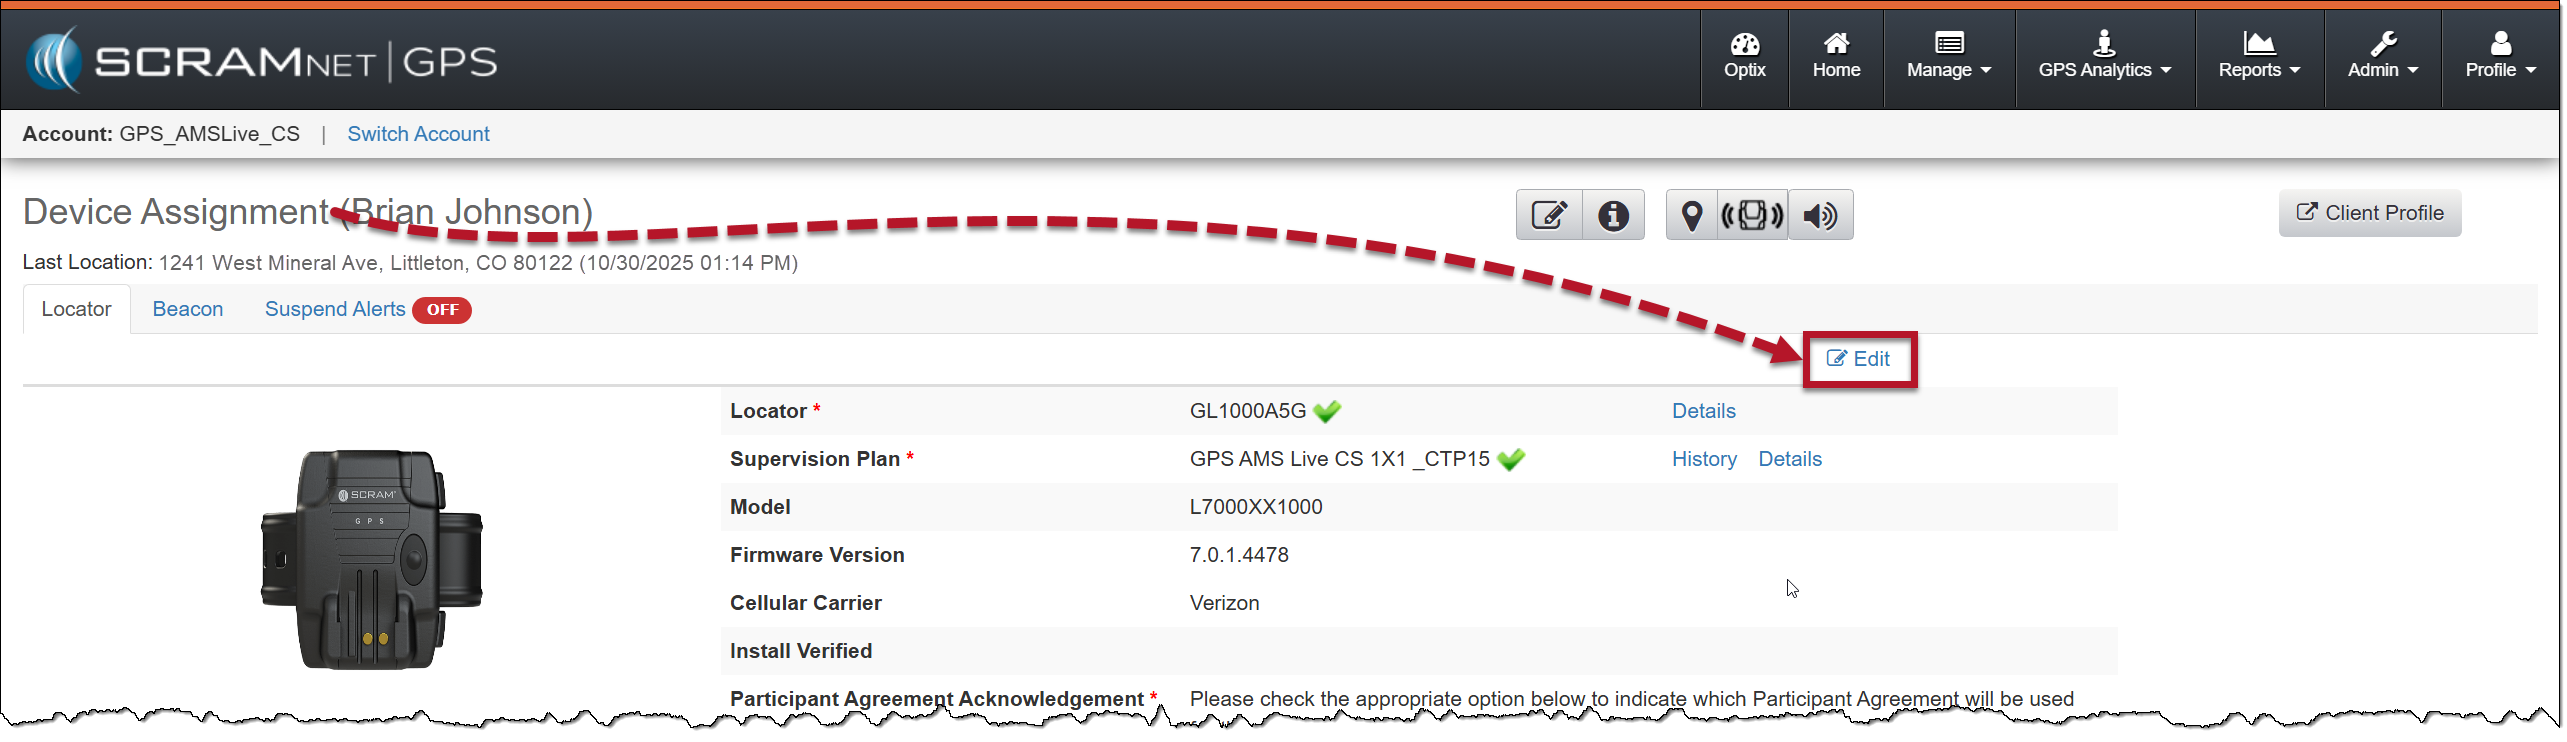
Client Device Assignment Page – click to enlarge
- Locate and select the Verify Install button.
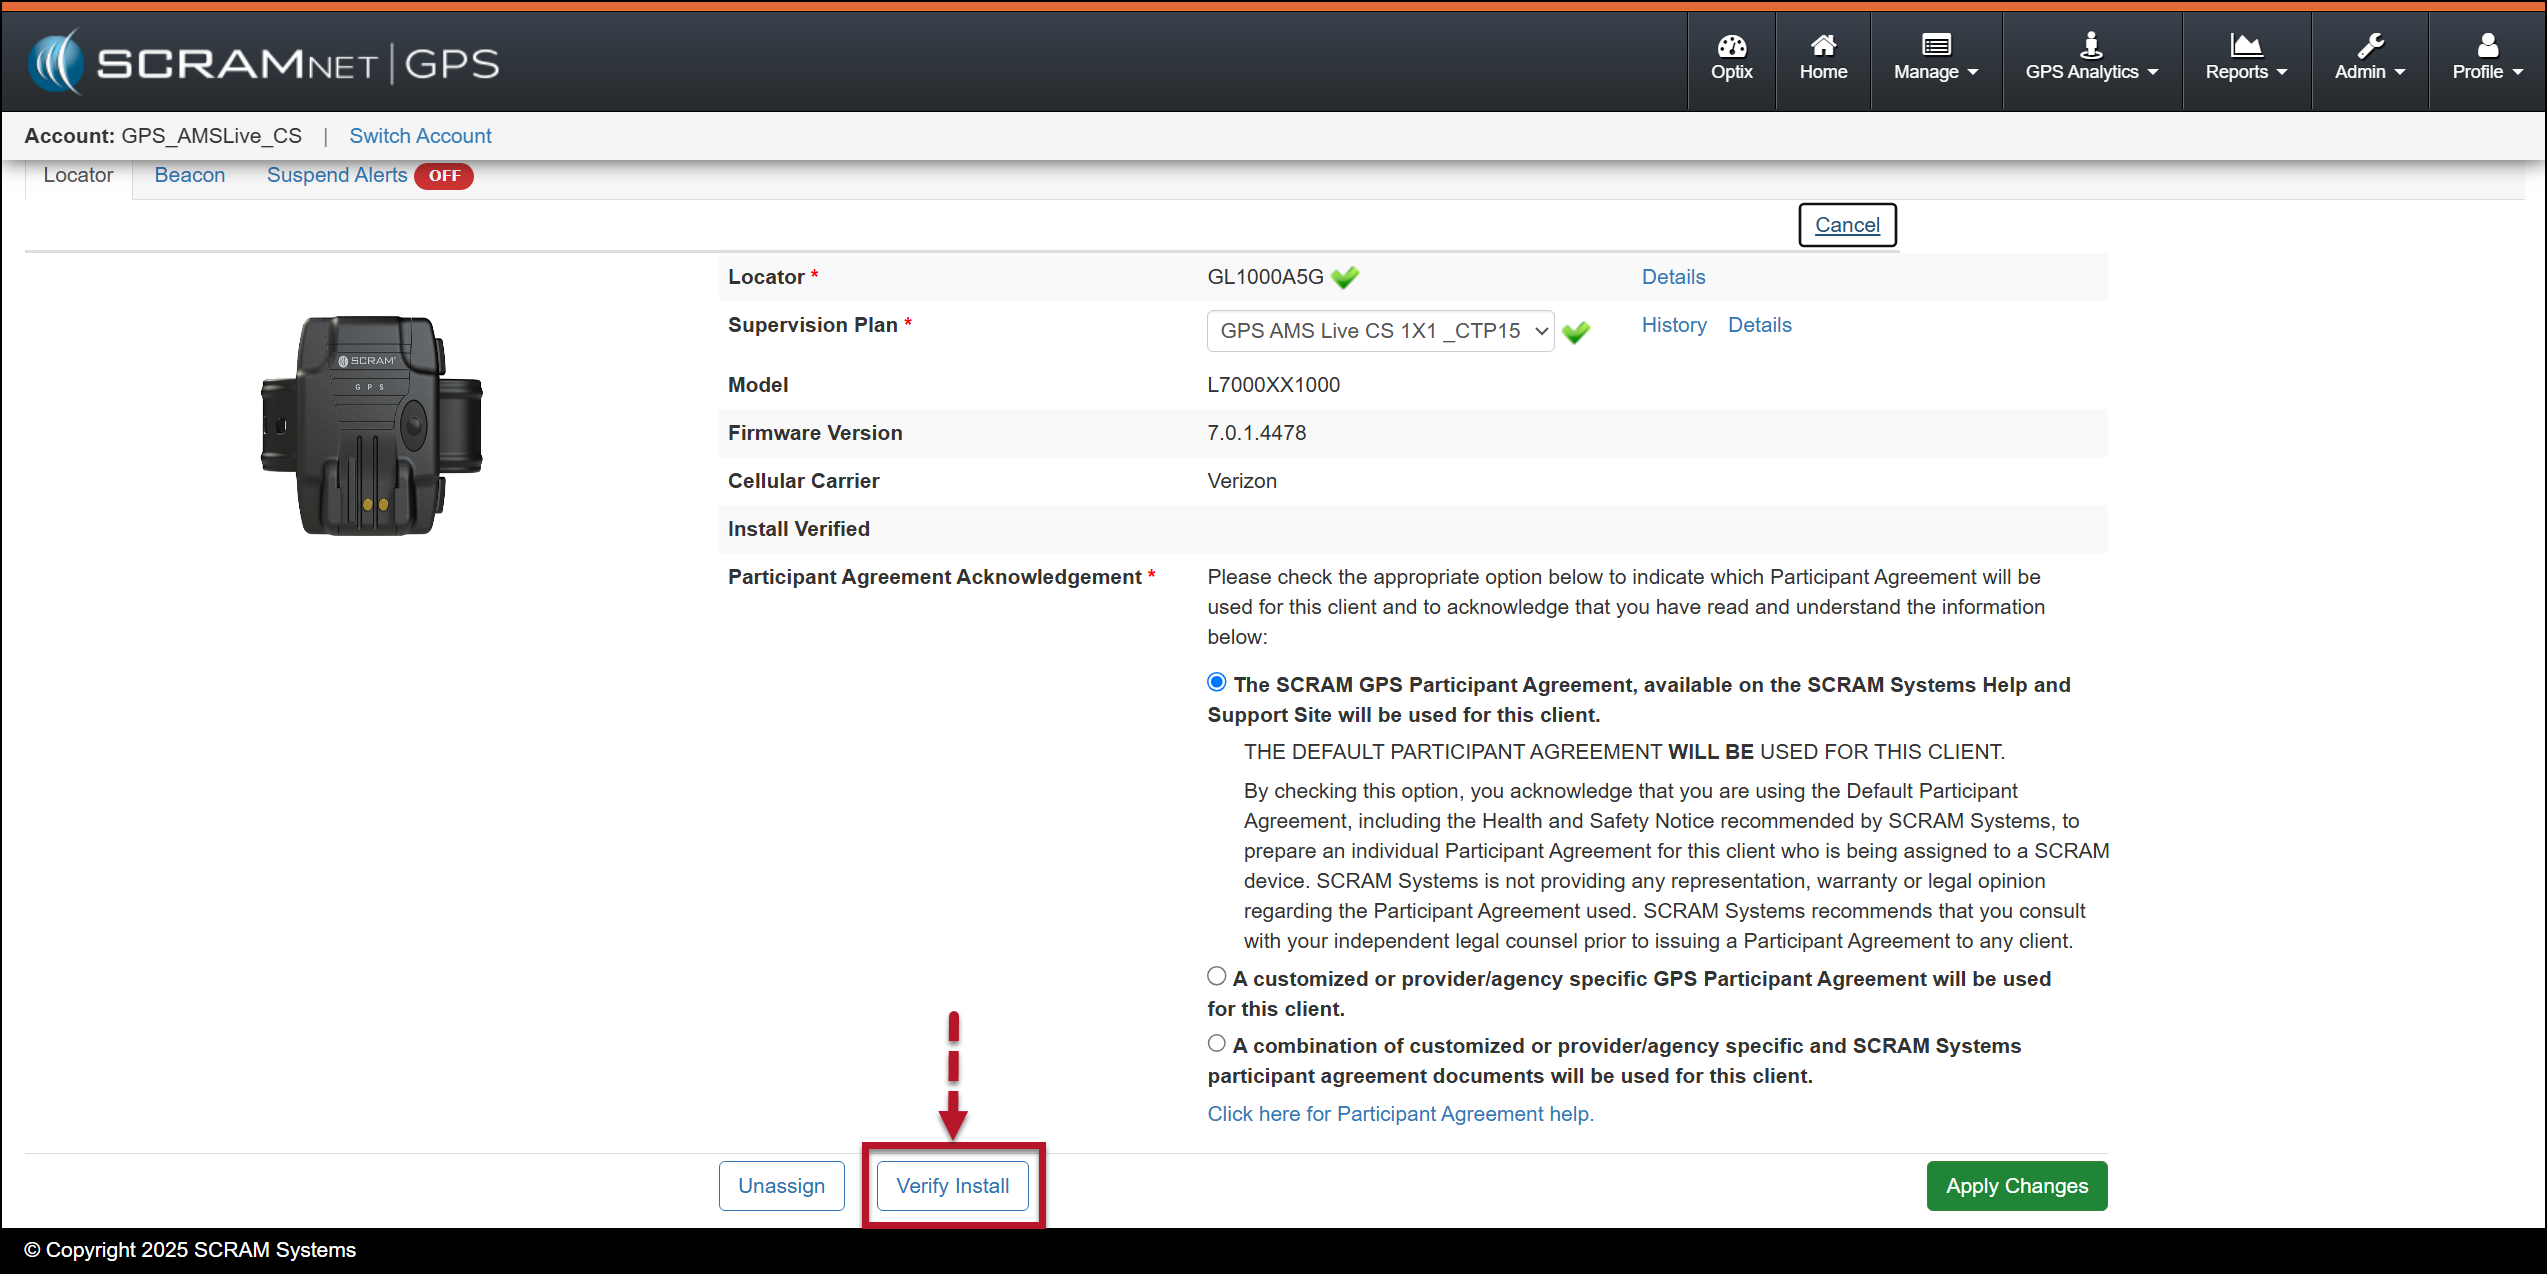
Edit Device Assignment page – Verify Install Button – click to enlarge
At this time, SCRAMNET GPS is waiting for verification from the GPS bracelet that the backplate is installed correctly.
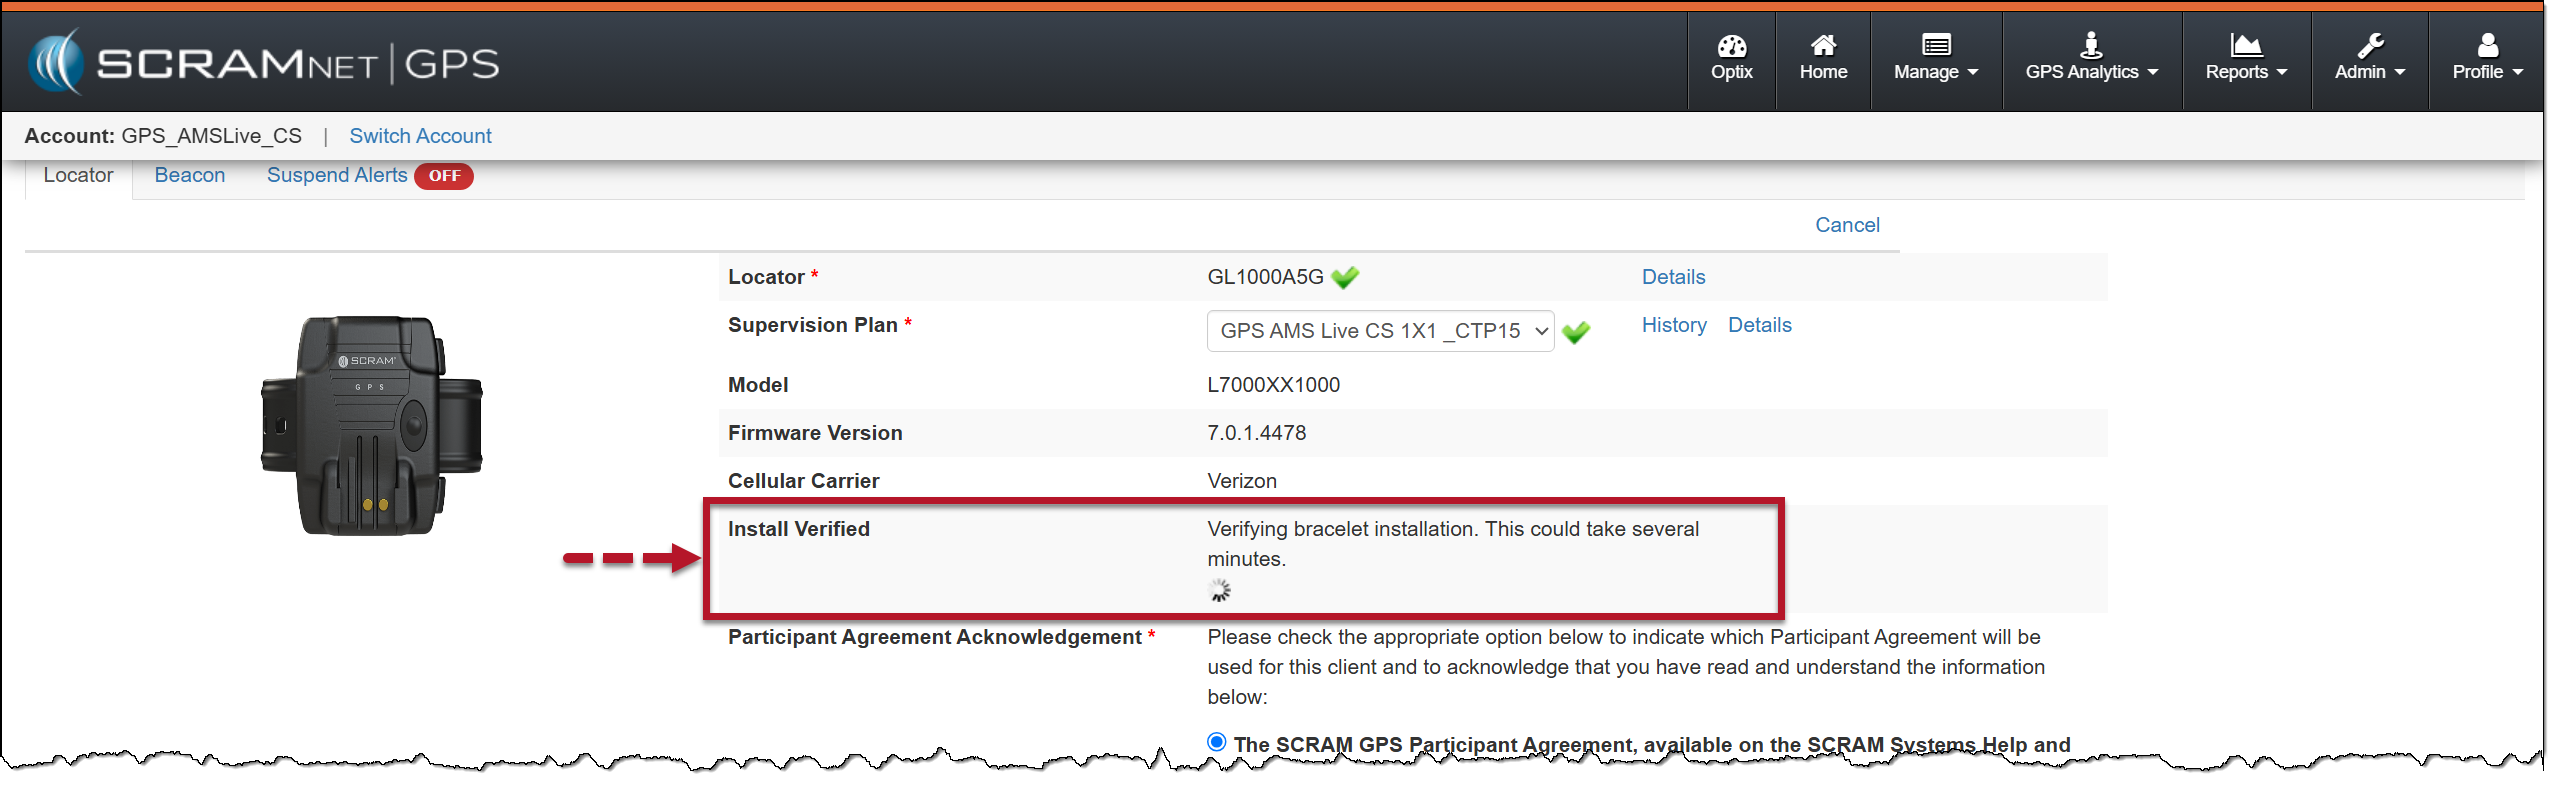
Installation Verification In Process – click to enlarge
Once received, the results will be displayed in the Installed Verified section.
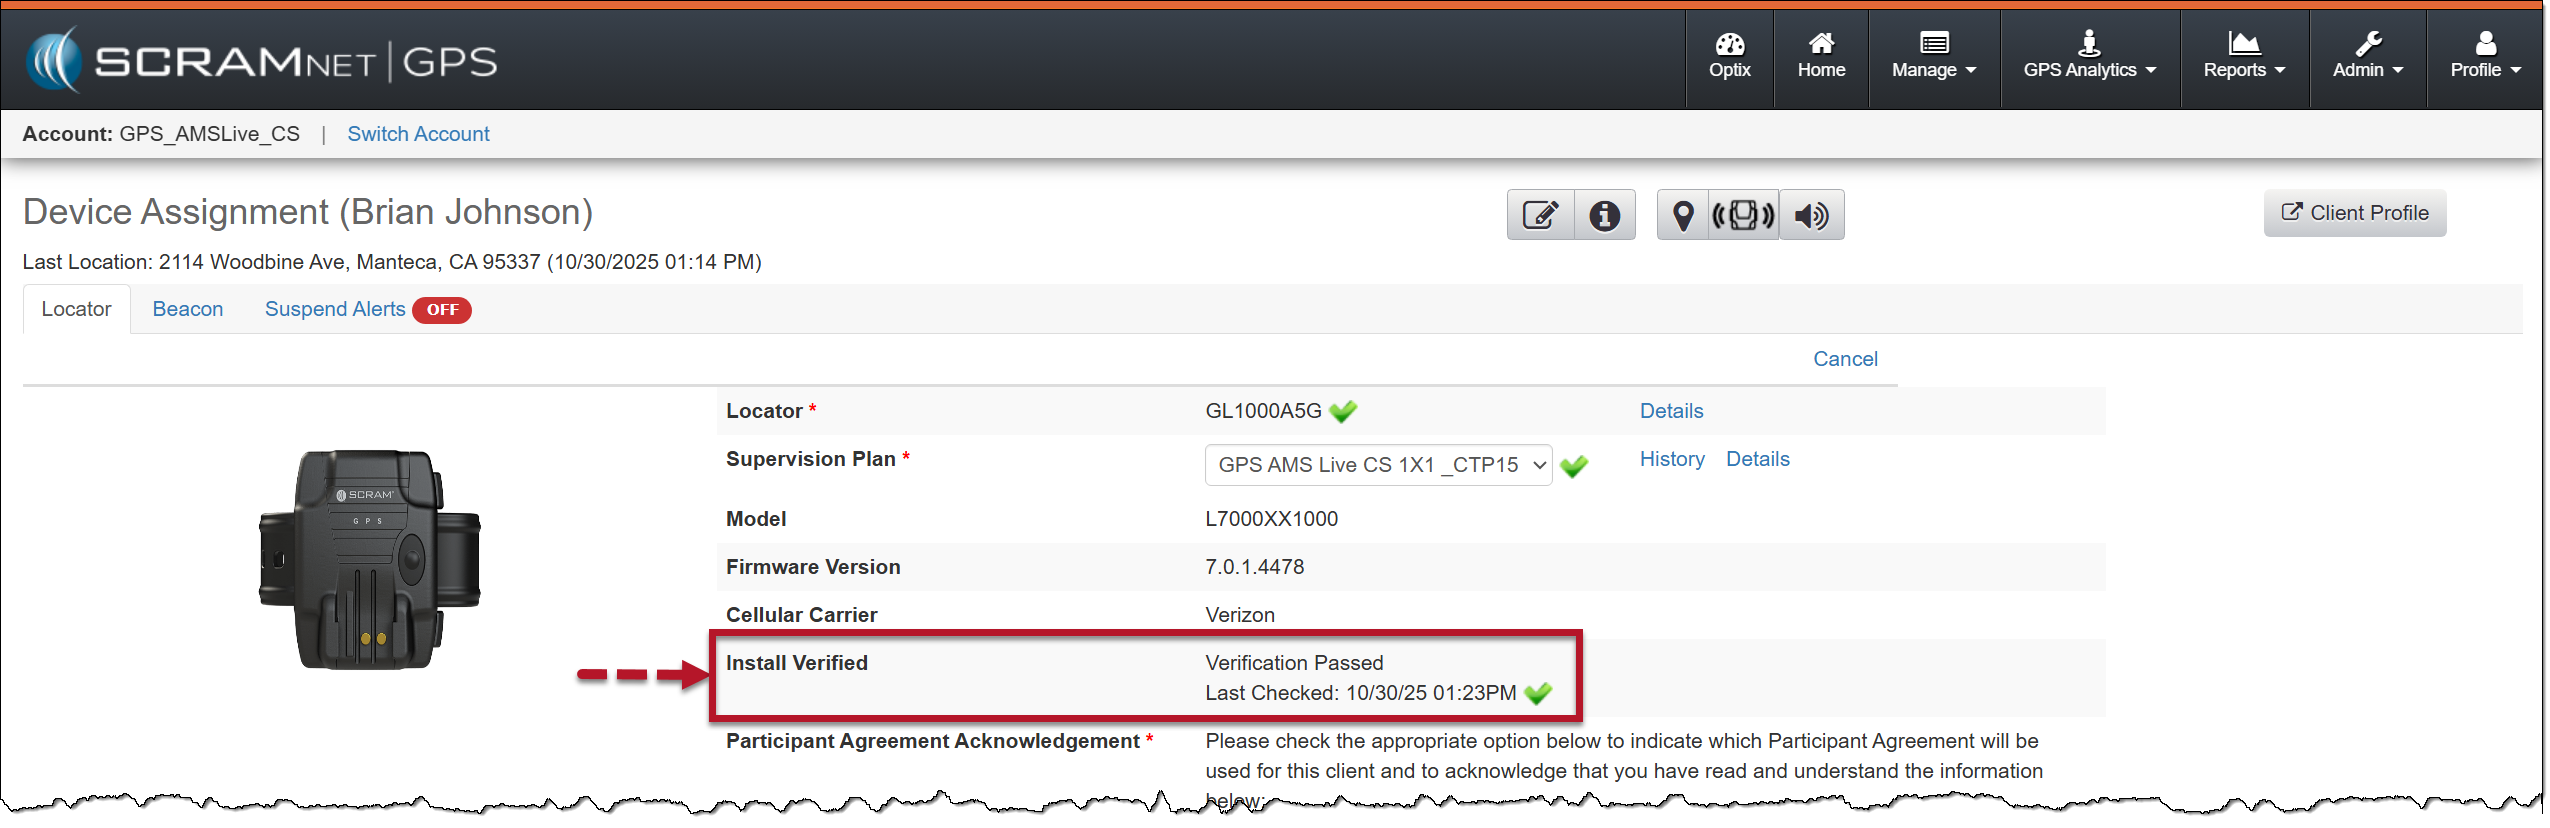
Install Verified Passed – click to enlarge
If the installation verification fails, ensure the backplate is correctly aligned with the bracelet body and completely snapped into place. In some cases, you may need to remove the bracelet from the client’s leg, reinstall it with a new backplate, and then repeat steps 8-11.
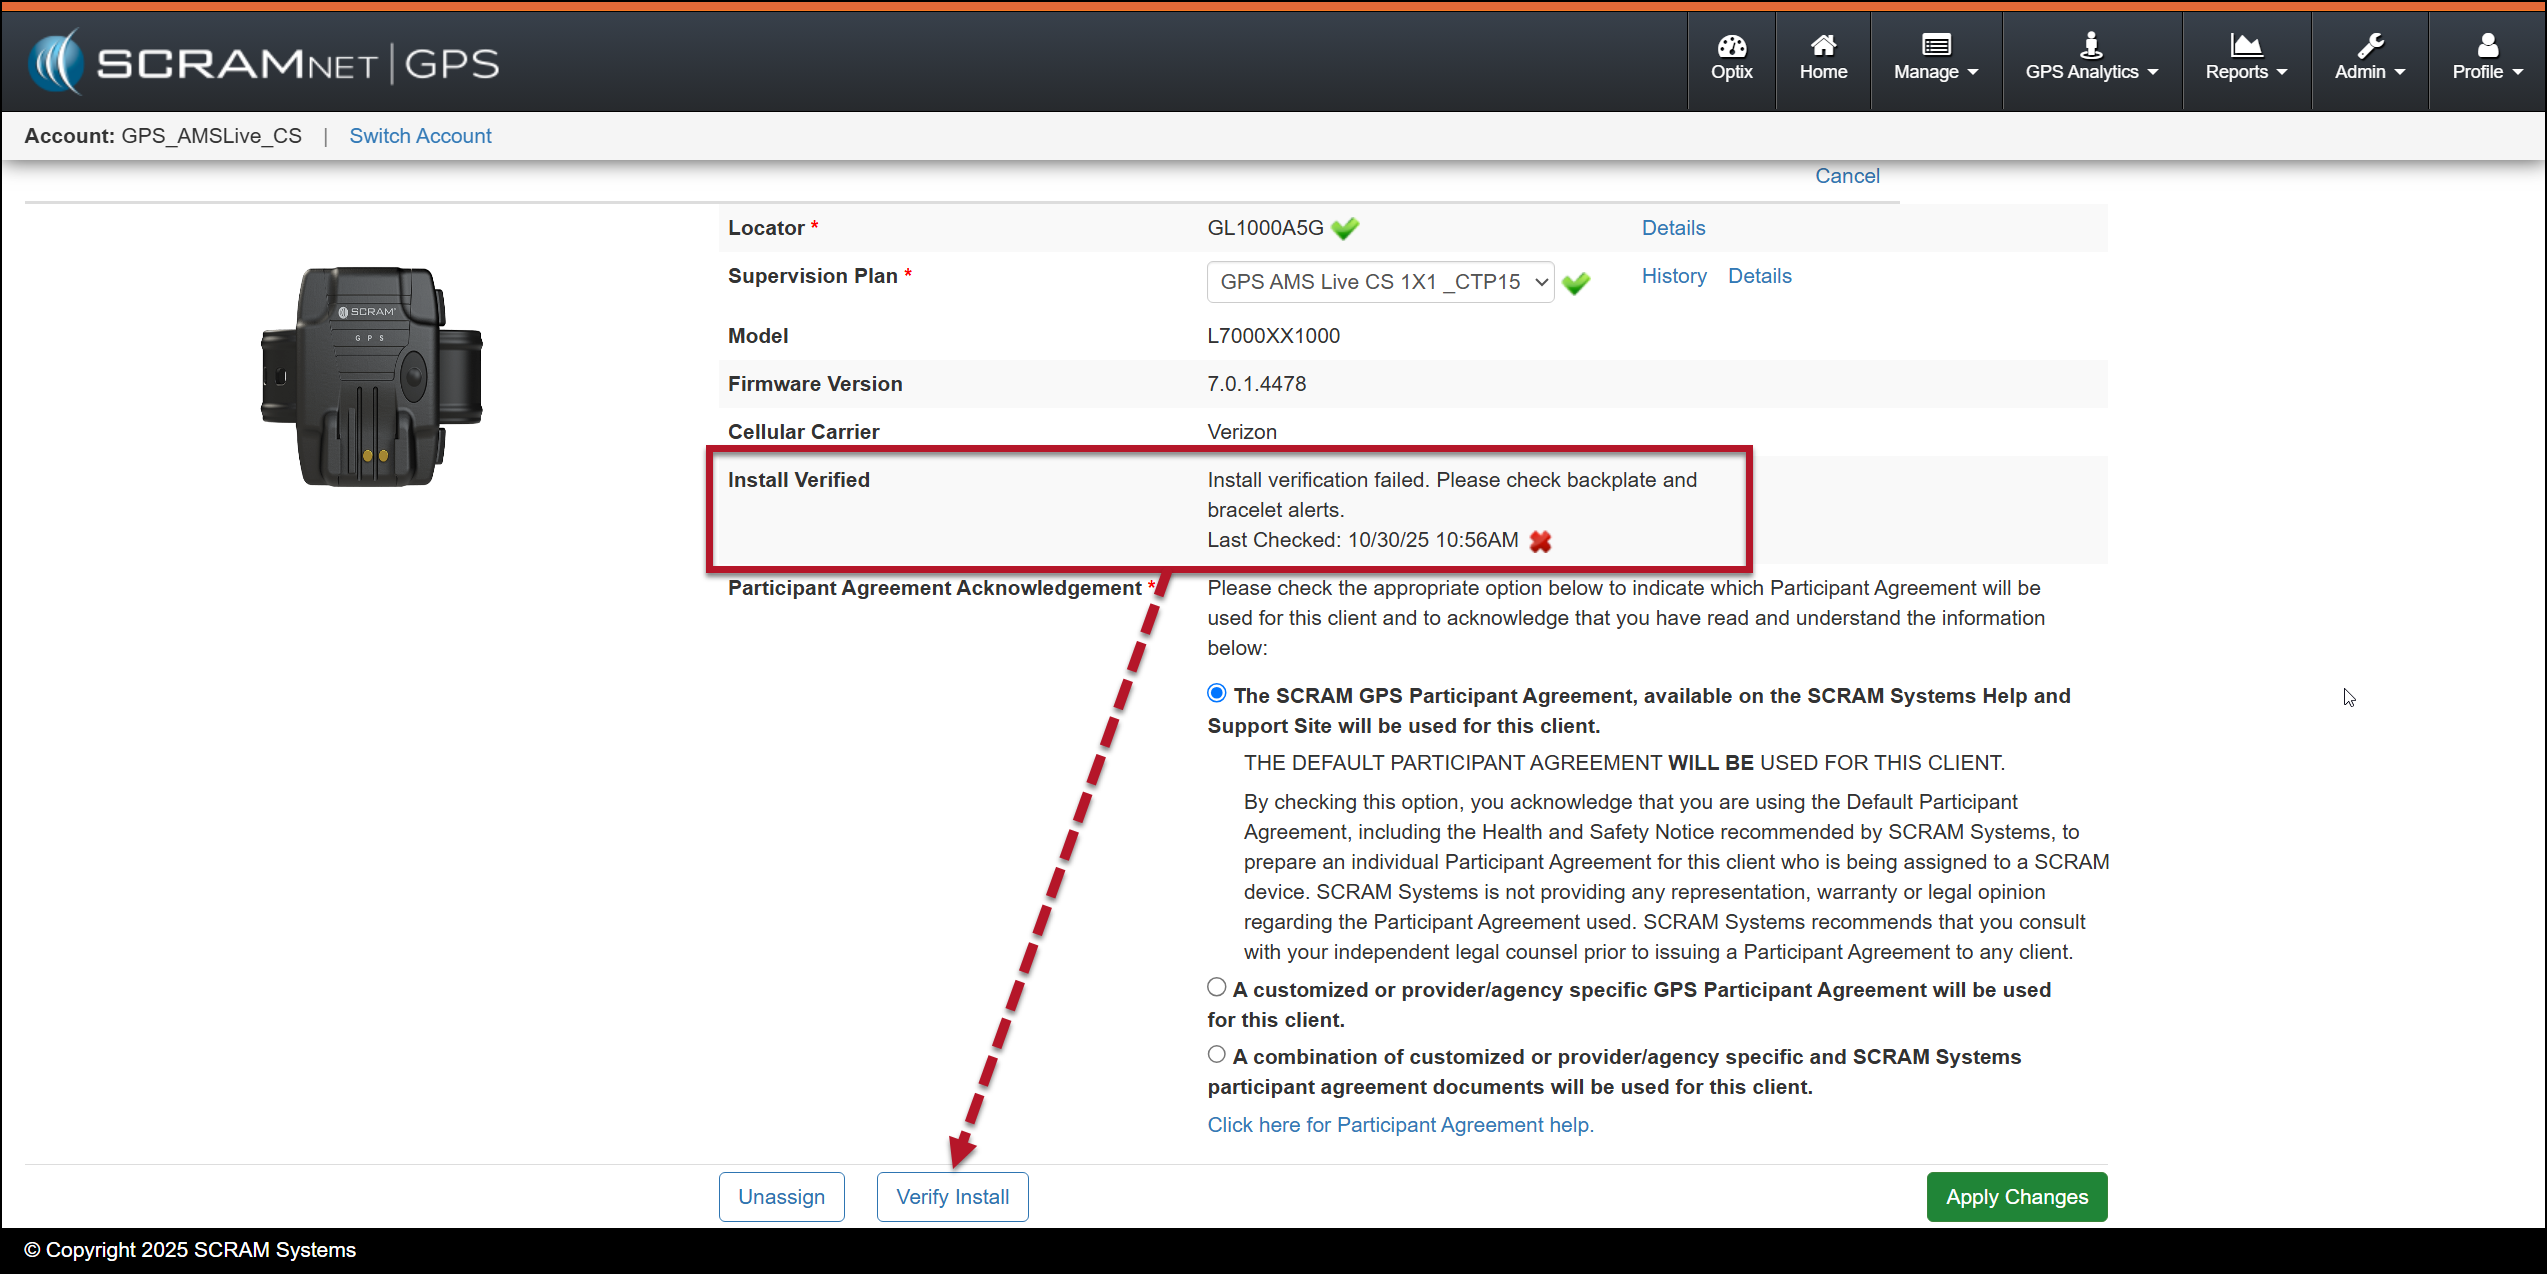
Failed Verification Message – click to enlarge