archives

Effective, July 13,2022, your SCRAM 24/7 clients can receive appointment reminder messages utilizing the SCRAM TouchPoint mobile application. Once enabled, the TouchPoint Activity is activated within SCRAM 24/7 on the client’s Activity page.

Once the client is active and the mobile application has been uploaded to the client’s smartphone, a pair of reminder messages will be sent 24 hours and two hours prior to a scheduled client appointment or sobriety testing window. Clients with a random test schedule will receive a message two hours prior to the random test window.

Additionally, if an appointment or sobriety test is cancelled, reinstated, or rescheduled, a notification message will be sent to the client’s TouchPoint Mobile app with the updated appointment information at the time of the change.

SCRAM TouchPoint Caseload and User Setup

Once your 24/7 program has been enabled for the TouchPoint Activity, first you will create your TouchPoint client caseload in SCRAMNET Optix and update or add user access before you enable the client’s TouchPoint Activity in 24/7.

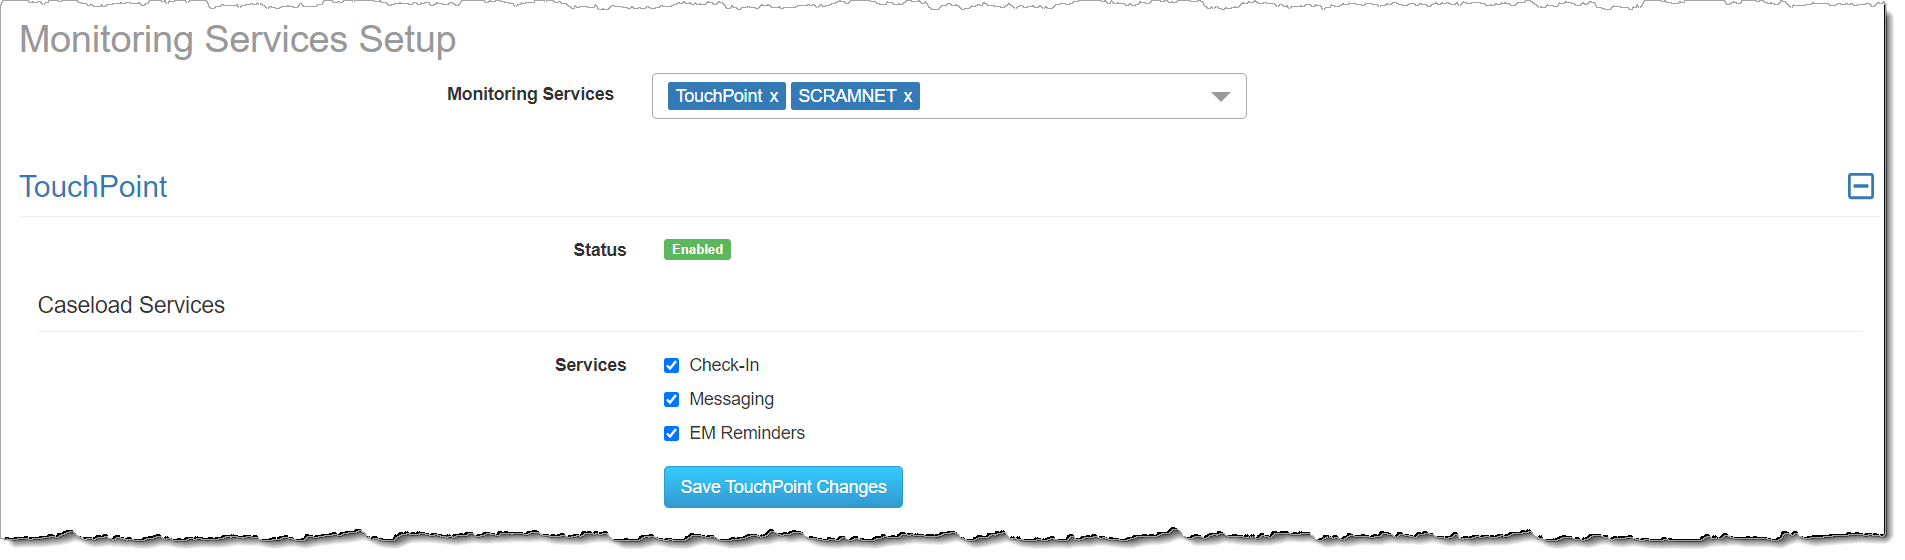
The TouchPoint Setup and Management section of the Optix and TouchPoint Help pages provides you with the process you’ll need to follow to create a new TouchPoint caseload and establish user access.

Use the below Help articles to complete TouchPoint setup:

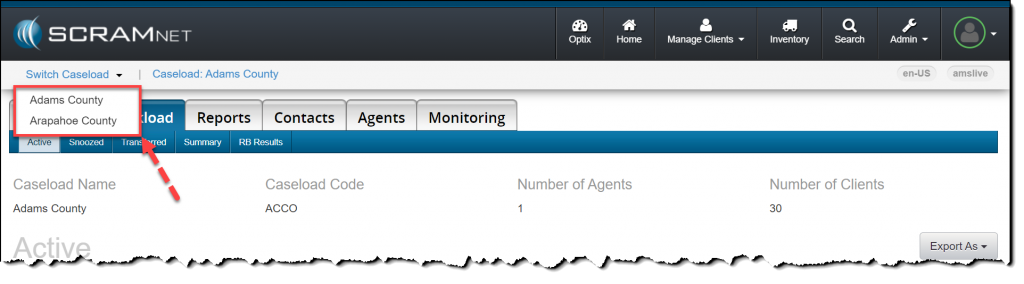
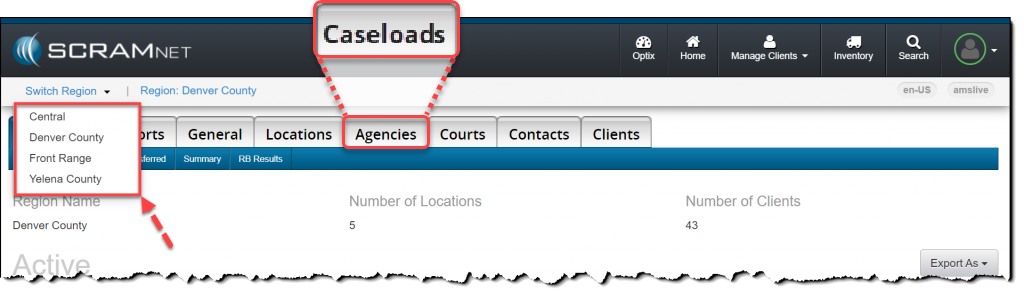
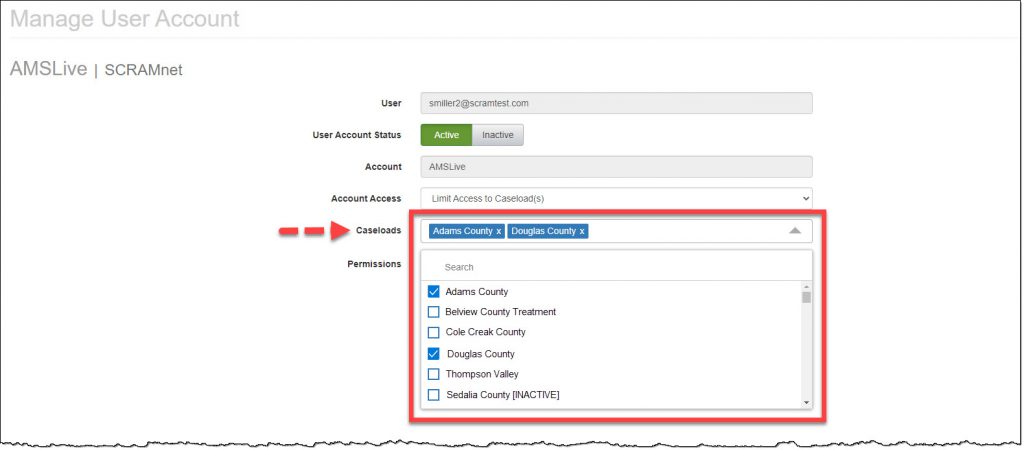
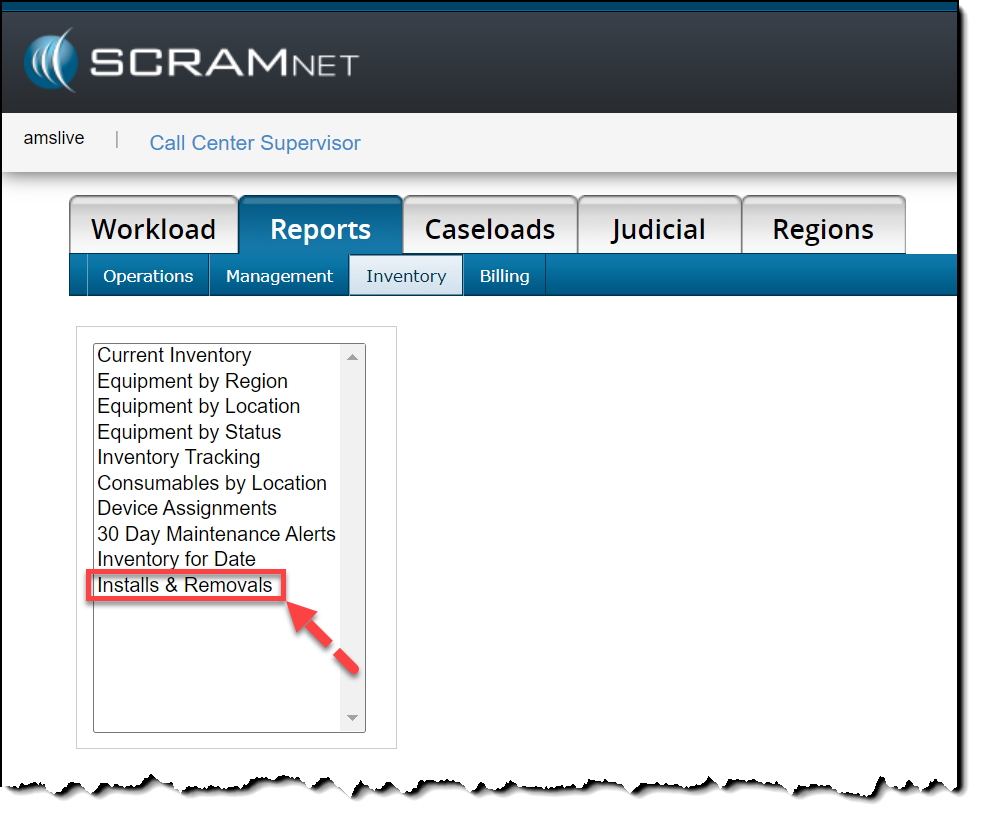
  1. How to Navigate to the manage Caseloads Page
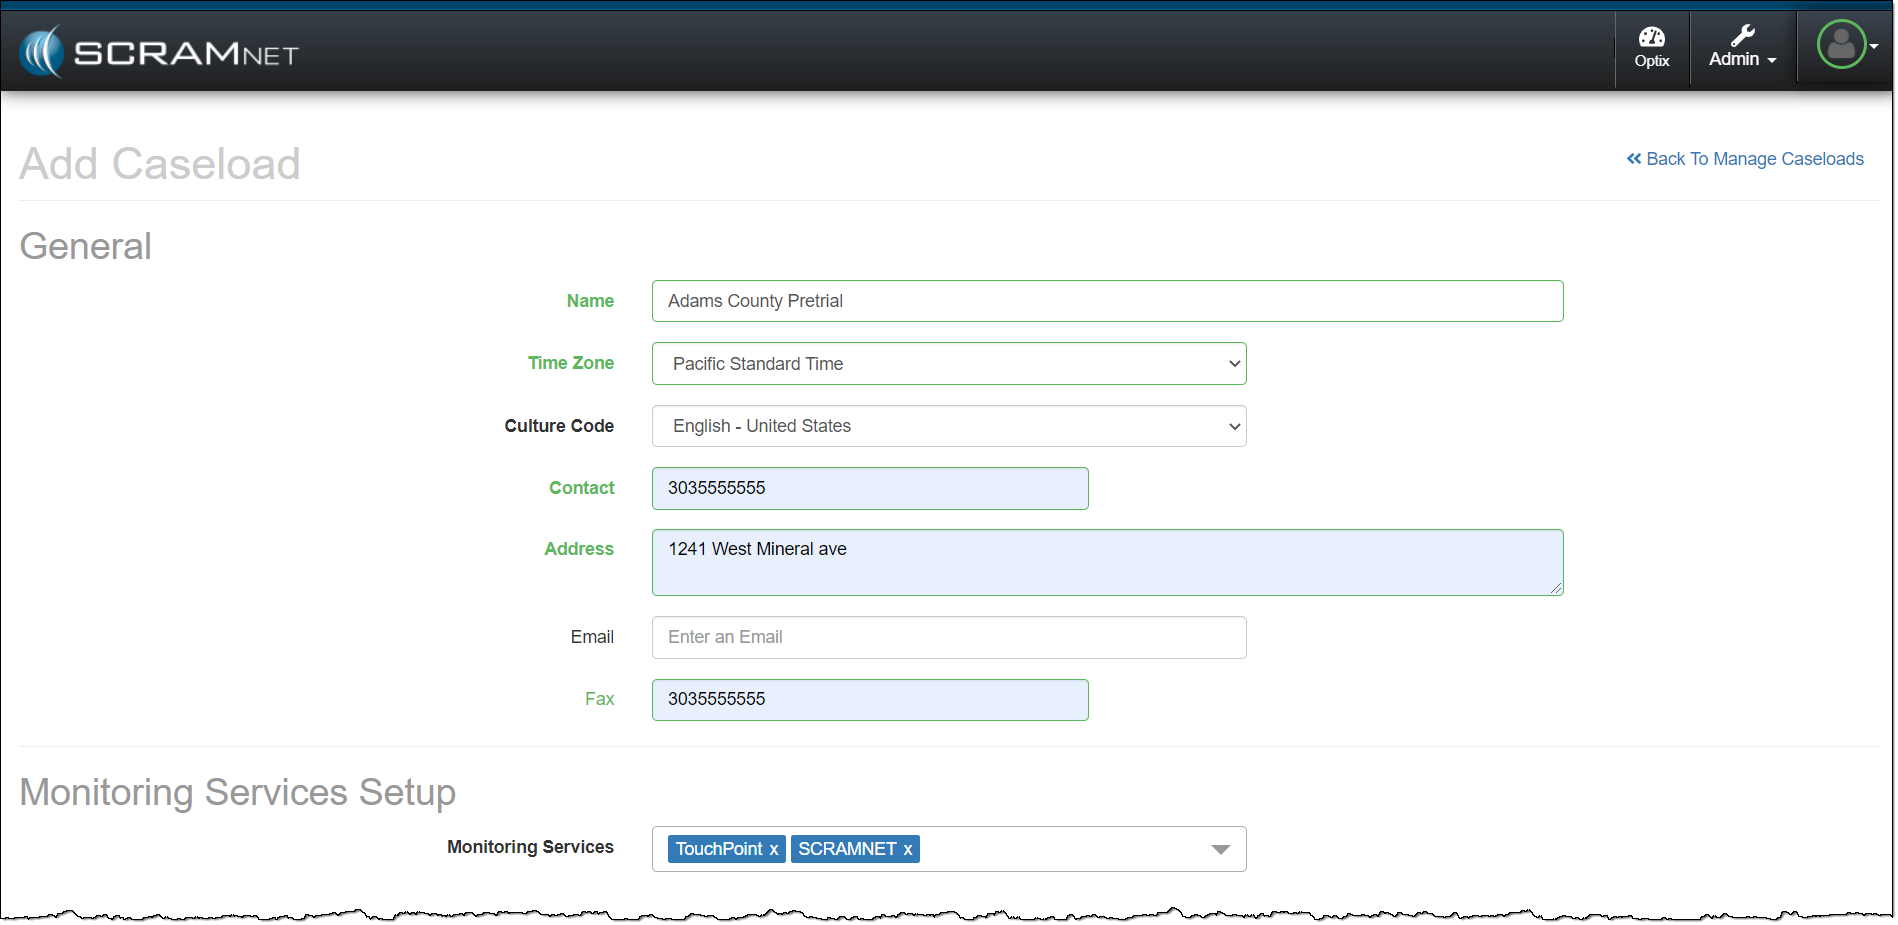
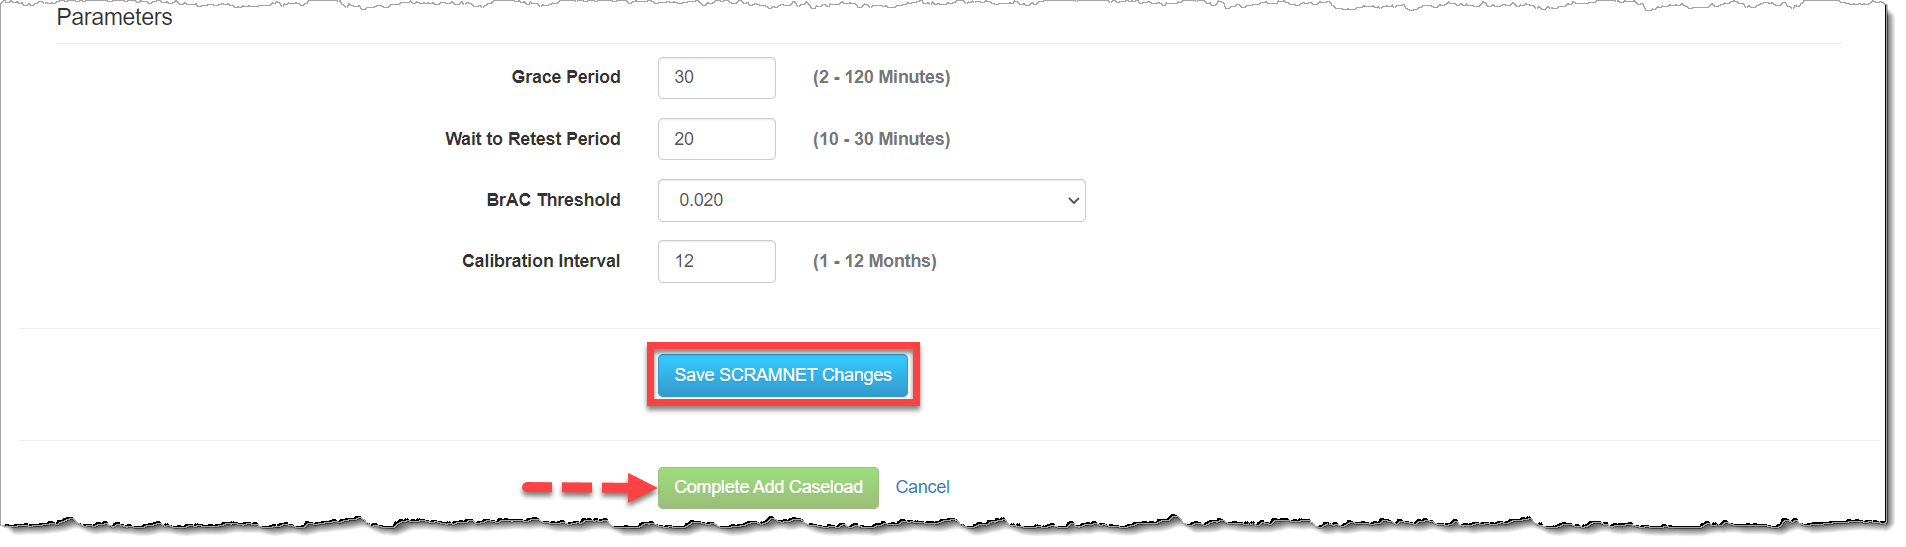
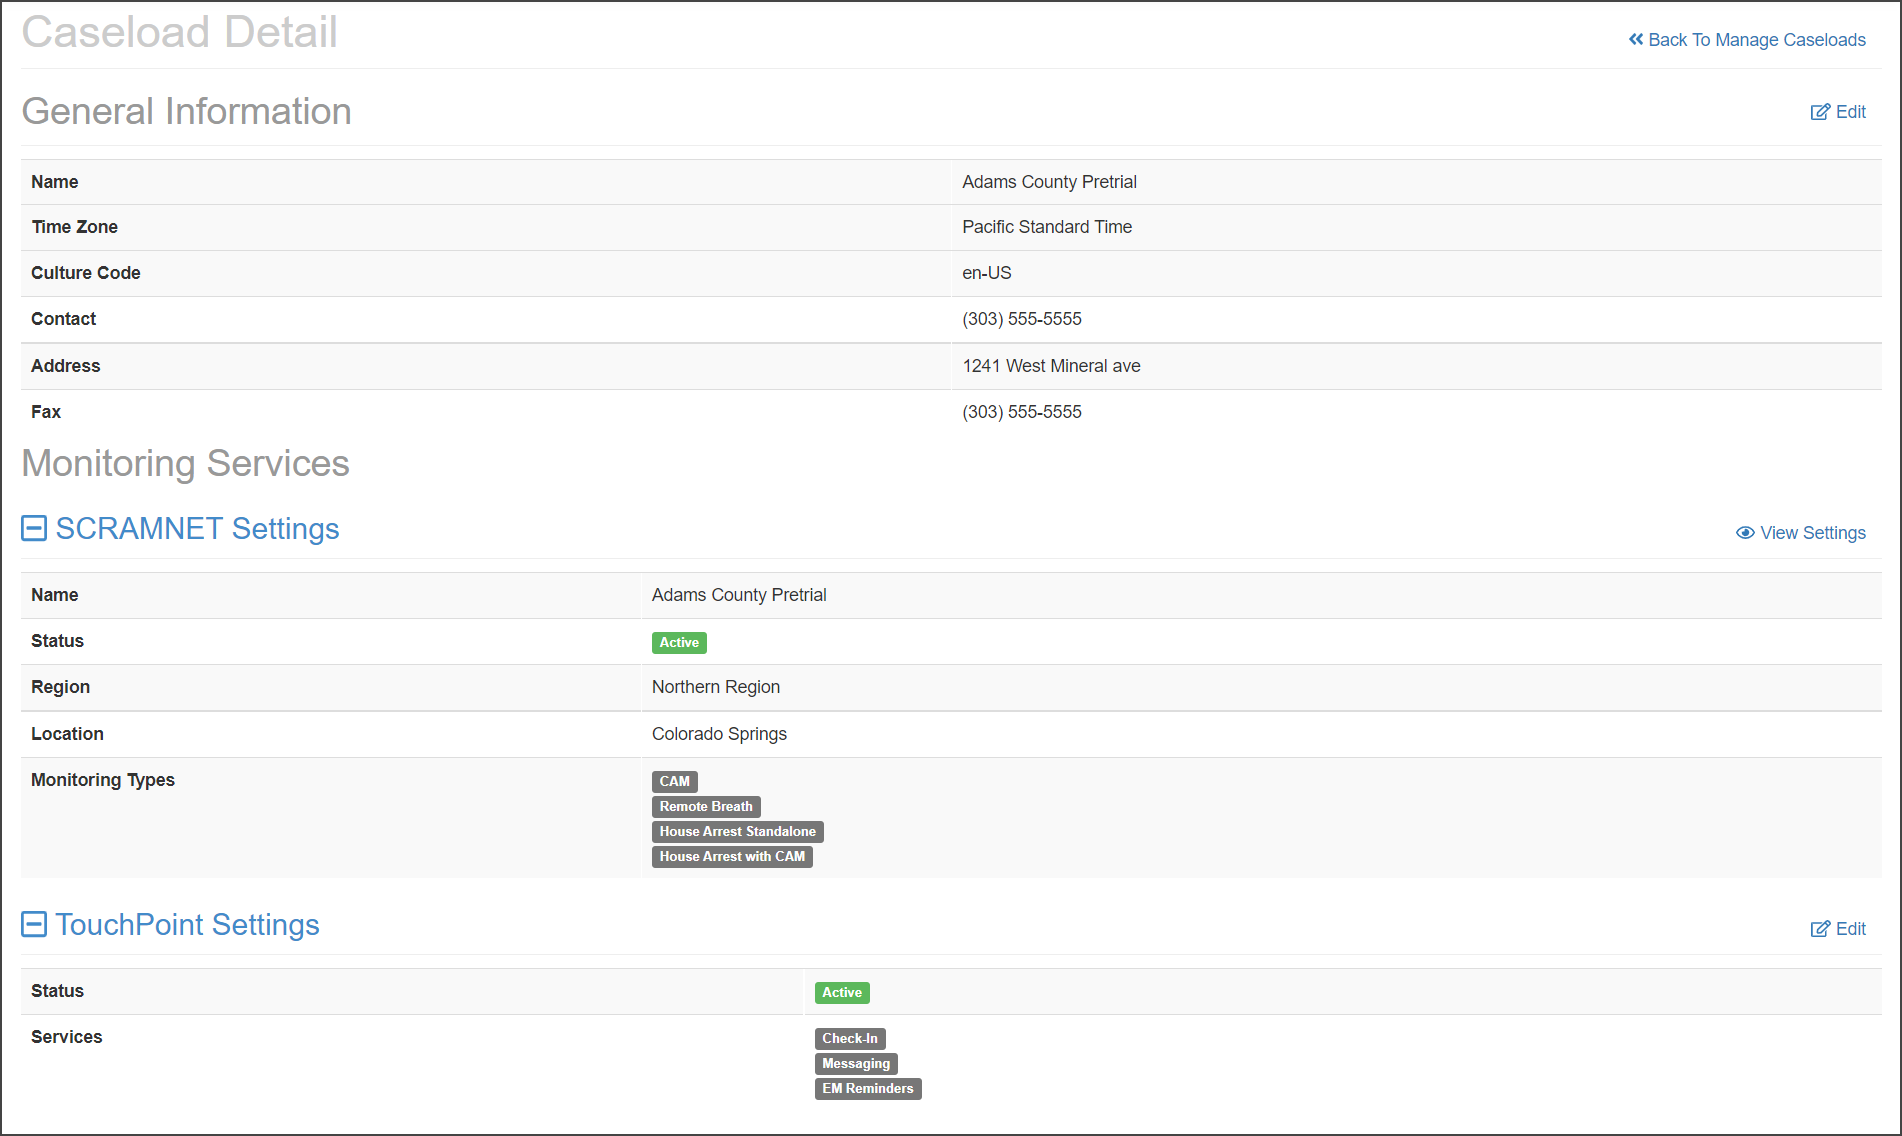
  2. How to add a New TouchPoint Caseload
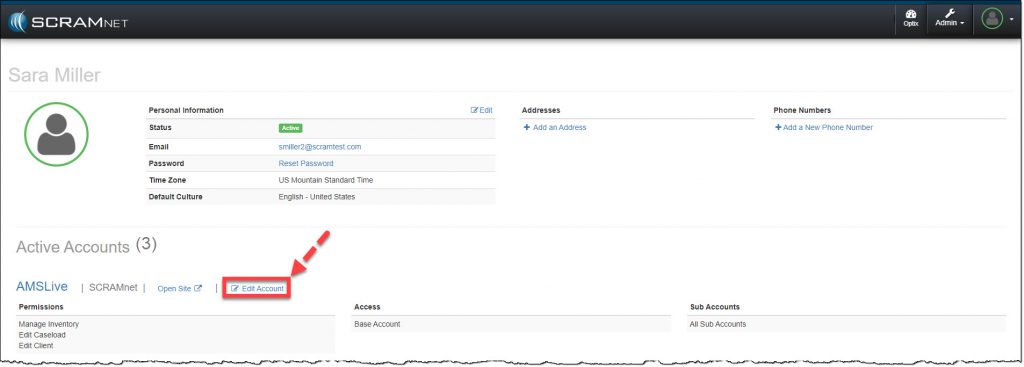
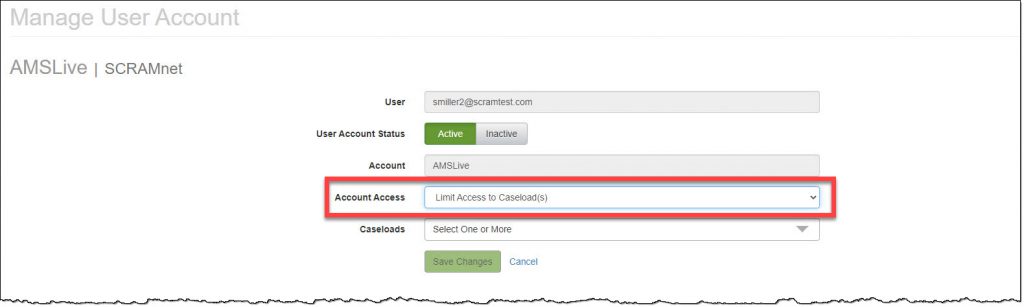
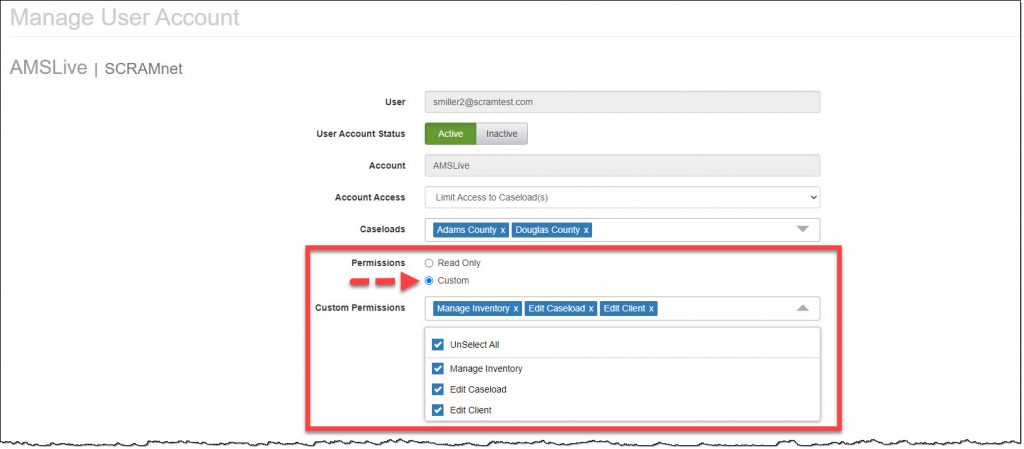
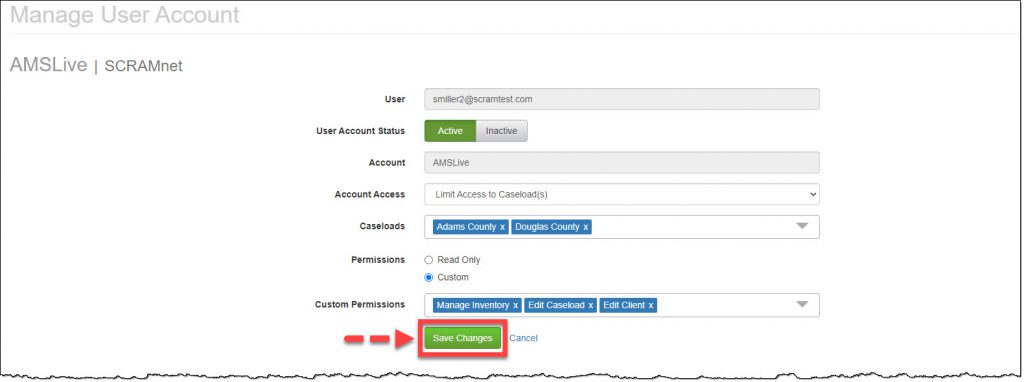
  3. Add/Update User Access

24/7 Client Setup

Once your SCRAM TouchPoint caseload and user access has been established, the next step is to add the TouchPoint Activity to new or existing clients on your 24/7 caseload.

The best practice is to setup the client’s profile in SCRAM 24/7 first, and then add the required activities. 

Step one: Add TouchPoint Activity to the client in SCRAM 24/7.

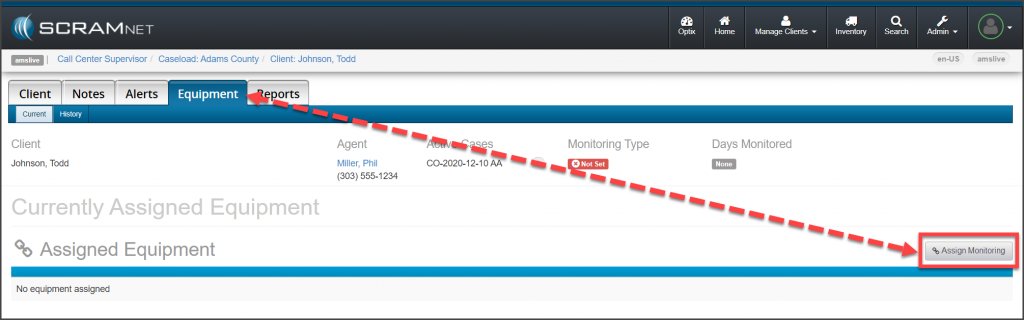
  1. Navigate to the client’s Activity tab in SCRAM 24/7.
  2. Select the +Add a New Activity button.
  3. From the Activity menu, select the TouchPoint option.
  4. On the Add an Activity page, verify the activity start date, and then select the Add Activity and Finish Setup button.
  5. You are navigated to the SCRAMNET Optix client search page. Locate the client’s profile under the Potential Duplicates list and then select the Link 24/7 to this client and add Touchpoint hyperlink.
  6. In the Link to this profile? pop-up, select the Yes, Link to this Profile button.
  7. You are navigated to the Add TouchPoint Client page where you will add the required information.
    • The Email address entered for the client is their username for the TouchPoint app on their smartphone.
  8. On the Client successfully added to TouchPoint pop-up, select the Configure TouchPoint Services button.

Step Two: Enable Client Messaging in TouchPoint.

Once you have selected the Configure TouchPoint Services button, you are navigated to the client’s TouchPoint profile located on SCRAMNET Optix. On the client’s Profile page:

  1. Locate the Client Messaging section and select the Edit hyperlink.
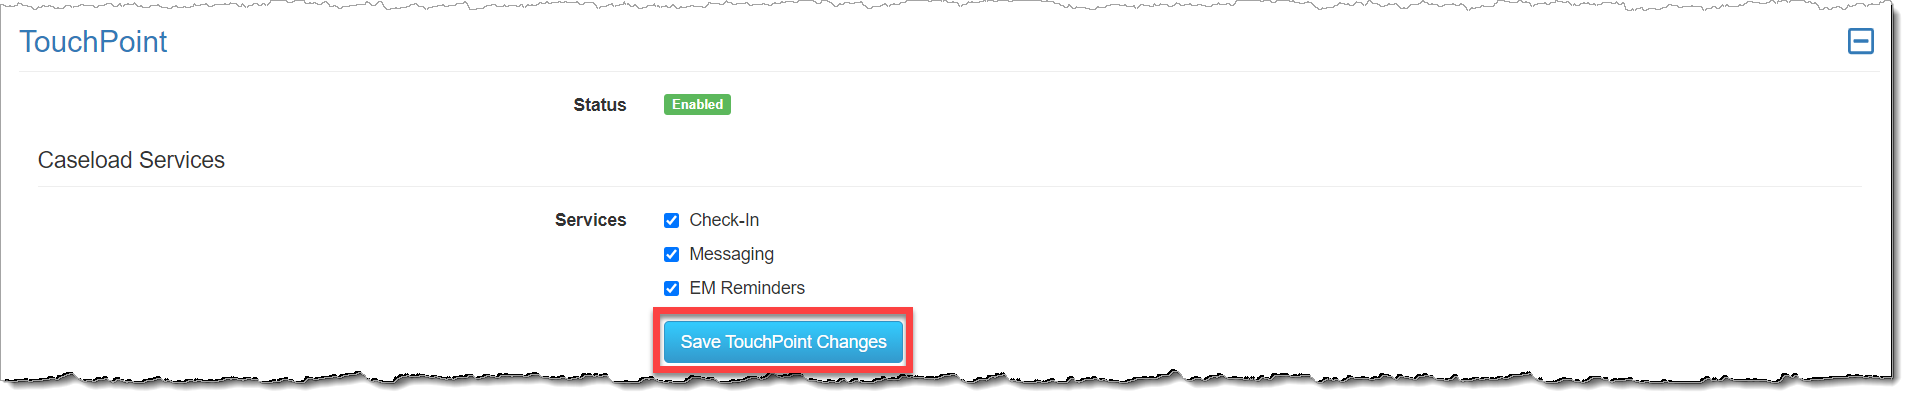
  2. Select the Enabled toggle box.
  3. Select the Save Changes button.

A temporary password is displayed on the client’s SCRAMNET Optix Profile page under the TouchPoint Section. The client will use their email address and the temporary password to access the app for the first time.

The first time the client logs in they will be asked to:

  • Create a secure password.
  • Review and Accept the Terms and Conditions for using the TouchPoint Mobile application.
  • Enable Push Notifications for the app.

Step Three: Instruct the client to download the TouchPoint app on their smartphone.

Step-by-step printable instructions (available in English and Spanish), as well as an instructional video, are available to you on the Help page in the TouchPoint Client Instructions article. The same instructions and video are available to your clients on the SCRAM TouchPoint Help page in the “SCRAM Device Help” menu on www.scramsystems.com.

TouchPoint Messaging gives you the ability to send text-style messages to an individual client or a group of clients with the Text to All feature. The client can then respond to messages from within the TouchPoint app and the information will be displayed on the Messaging page for that client.

Continue Reading

Effective July 7, 2022, SCRAM Systems® will release an update that will enable better inventory management of RB LTE Adapters that are placed in an “Awaiting Return” status.

Once the RB LTE Adapter is placed into an “Awaiting Return” status for the client, a new “Move To Inventory” hyperlink will display under the Options column on the client’s Equipment page. Once the adapter has been returned, simply select the “Move To Inventory” hyperlink to return the adapter to an “In Inventory” status.

Client Equipment page.
Click to enlarge

Continue Reading

Today, May 4, 2022, SCRAM Systems® will update the Active Clients with Delinquent Balances and Inactive Clients with Delinquent Balances report for your caseload. With this update, you will be able to view both delinquent and positive client account balances. In addition, a user with Base Account permissions will be able to select a specific account for the report.

Select the Balance Option

On the Clients report page, you will notice the report headings have been updated to reflect “Active Clients with Balances” and “Inactive Client with Balances.”

Administrative User

click to enlarge

Base Account User

click to enlarge

To run a report:

  1. Select the Activity Fee from the menu options.
  2. Leave the default setting of Delinquent and Positive Balances selected, or select another option from the menu.
    • Delinquent Balances” are displayed in red.
    • Positive Balances” are displayed in black.
  3. After making your selection, click the Run Report button.
click to enlarge
If a client’s financials are current, meaning they do not have a delinquent or positive balance, their name will not display on the report.

Continue Reading

On the afternoon of March 24, 2022, SCRAM Systems® released a new and improved Client Non-Compliance Report in SCRAMNET. This redesigned and streamlined report replaces both the former non-compliance report as well as the custom “Court Report.” The new Client Non-Compliance Report is conveniently located under the client’s Reports tab in SCRAMNET

Client Report tab Non-Compliance subtab highlighted
Non-Compliance Report sub-tab (click to enlarge)

Here are the enhancements you will see:

  • Multiple confirmed alerts may be included in a single report and will be listed chronologically
  • The alert confirmation criteria are included in the report
  • The Manufacturer’s Description of Technology has been updated
  • A Data Interpretation Summary has been added to the report
  • Your organization’s name now appears on the cover page as the preparer of the report
  • The client’s data interpretation is included with each graph
  • Reports are immediately available on-demand in an easy-to-print format

View an example Client Non-Compliance Report (PDF).

To view the step-by-step instructions to create a non-compliance report for a client, visit the Non-compliance Report Help article located in the CAM Help section.

Continue Reading

On, February 9, 2022, SCRAM Systems® will release an update to the client Financials page.  With this update, you will be able to void multiple transactions on the client’s financials Transactions History section at one time. This new feature can be accessed from the individual client’s profile or the caseload’s Financials page.

To get started:

  1. Navigate to the client’s Financials tab and locate the Transaction History section.
click to enlarge
  1. Select the checkbox to the left of each transaction you wish to void.
  2. Click the Void Transactions button.
click to enlarge
  1. In the Void Transactions pop-up box:
    1. Notate the reason for voiding the transaction(s).
    2. Click the Void Transaction(s) button.
click to enlarge

The Transaction History section will reflect the activity.

click to enlarge

Continue Reading

SCRAM Systems has changed the timing of the SCRAM CAM bracelet Annual Maintenance Required alert in SCRAMNET. Instead of being alerted at 366 days of on-ankle use, you will now be alerted that an RMA has been issued for the device on Day 355. This will allow you 10 days to arrange to meet with the client and replace the bracelet. The device will stop generating non-compliance alerts on Day 366. Details below.

At 300 to 354 days of on-ankle use:

  • A warning message will display under the SCRAM CAM bracelet serial number on the Equipment Assignment page in SCRAMNET.
    • This message provides the number of assigned days available before the bracelet will reach 365 days of on-ankle use and will require replacement.
    • This will aid you in assigning the appropriate SCRAM CAM device from your inventory to meet your clients’ monitoring requirements.
  • The bracelet is still available for client monitoring at this point in time.
Warning Message (click to enlarge)

At 355 days of on-ankle use:

  • An Annual Maintenance RMA is issued for the device, which generates an “Annual Maintenance Required” alert on the Workload page under the ‘Equipment Alerts’ section in SCRAMNET.
  • You have 10 days from this point to replace the SCRAM CAM device and return it to SCRAM Systems for reconditioning and calibration.
  • At this time, the client is still being monitored, and alerts will continue to generate in the system for all non-compliance events.
‘Annual Maintenance Required’ Equipment Alert (click to enlarge)

On Day 366 of on-ankle use:

  • The status of the RMA issued for the device updates to “Failed.”
  • Alcohol and Tamper alerts stop generating in the system for non-compliance events. The client is effectively no longer being monitored.
  • The bracelet should be replaced immediately.  

Continue Reading

On November 18, 2021, the Change Monitoring button located on a new client’s Equipment page will display as “Assign Monitoring” until a monitoring type has been associated with the client. The updated verbiage on the button for this initial association to a monitoring type, more accurately reflects the action being completed for a new client.

Client's Equipment Page Assign Monitoring button
click to enlarge

Once the initial association to a monitoring type has been selected, the button will display as Change Monitoring from that point forward.

The process of adding a monitoring type to a new client itself has not changed; this is just a simple verbiage update to the action button. To review the process of creating a client in SCRAMNET, select the hyperlinks below to navigate to the corresponding monitoring technology’s Help articles:

Continue Reading

On September 23, 2021, SCRAM Systems released two enhancements for SCRAMNET.  

  1. Access Multiple Regions/Locations or Caseloads. This enhancement allows a user to access multiple SCRAMNET Sub Accounts (Regions and Locations), or multiple Caseloads with a single sign-on. 
  2. New Installs & Removals Inventory Report. The report displays a detailed history of your inventory’s installations and removals for the last 30 days. 

Access Multiple Regions/Locations or Caseloads

Users with access to multiple Regions/Locations or Caseloads may navigate within SCRAMNET using the Switch Caseload menu accessed within the quick access ribbon.

click to enlarge
click to enlarge
InformationEffective October 28, 2021, “Agencies” will be referred to as “Caseloads” in the SCRAMNET monitoring system. This change brings SCRAMNET up-to-date with current terminology.

Add Multiple Caseloads to a Current User

For a current user:

  1. Access the Manage Users page and click the user’s name hyperlink.  
  2. Select the SCRAMNET Edit Account hyperlink.
Manage User profile page, Edit Account hyperlink
click to enlarge
  1. Open the Account Access menu and select the option of Limit Access to Sub Account(s) or Limit Access to Caseload(s). (Example shown)
Manage User Account page set Account Access to Limit Access to Caseload(s)button
click to enlarge
  1. Open the Caseloads menu and mark the Caseload(s) to which the user will require access by checking the box to the left of the caseload name. There is no limit on the number of caseloads a user may access. (The first caseload selected from the menu will be the default landing page for the user in SCRAMNET)
Manage User Account page Add caseloads to client profile
click to enlarge
  1. Verify or update the Permissions settings for the user. (The permissions apply to each caseload associated to the user)
Manage User Account page Update Permissions
click to enlarge
  1. Click the Save Changes button.
Manage User Account page Save Changes button
click to enlarge
Information

Users with “Access to the Entire Account” Account Access, will continue to navigate using the Regions and Caseloads tabs.

Users with access to a single Region, Location, or Caseload in SCRAMNET will continue to navigate the site in the traditional manner.

click to enlarge

Installs & Removals Report

To locate the new Installs & Removals report available in SCRAMNET, navigate to the Reports tab and Inventory sub-tab. The report displays information for up to the past 30 days, including:

  • Device Serial Number
  • Client’s name
  • Install Date
  • Removal Date
  • Removal Direct Connect Date
  • Agent Name
  • Caseload Name
click to enlarge
InformationBecause of its wide layout, it is highly recommended that you view the Installs & Removals report in Web format, or export it to Excel format only.
Web format (click to enlarge)
Excel format (click to enlarge)

Continue Reading

On August 19, 2021, SCRAM Systems® will be releasing a new software enhancement to SCRAM TouchPoint Manage Caseload page.

On the Manage Caseload page you now can:

  • View and edit current TouchPoint and SCRAMNET caseloads within the Manage Caseload page.  
  • Add a new caseload with the monitoring services of TouchPoint, SCRAMNET, or both services.

Add a New Caseload

On the Manage Caseload page:

  1. Click the +Add a New Caseload button.
  2. Enter in the General information for the caseload. All fields with headings in bold print are required fields.
  3. Under the Monitoring Services Setup section, select all the Monitoring Services required for the new caseload from the drop-down menu.
    • Note: The monitoring services available from the drop-down menu will reflect the current access level and permissions for that user.
Manage Caseload: adding a new caseload General information added and Touchpoint and SCRAMNET monitoring services selected.
click to enlarge
  1. Customize the monitoring services, settings, and monitoring parameters.
Manage Caseload: adding a new caseload with Touchpoint and SCRAMNET monitoring services selected.
click to enlarge
Manage Caseload: adding SCRAMNET caseload details.
click to enlarge
  1. Once all customizations are selected, click the Save TouchPoint Changes, and/or Save SCRAMNET Changes button.
Manage Caseload: adding TouchPoint caseload services
click to enlarge
Manage Caseload: Save SCRAMNET caseload changes button and complete Add caseload button.
click to enlarge
  1. The last step is to click the Complete Add Caseload button.
Manage Caseload, Adams County Pretrial Caseload Detail page
click to enlarge

Continue Reading

SCRAM Systems is pleased to announce the addition of two NEW client participant videos to the Help page in addition to the SCRAM CAM participant agreement video already available! These videos describe what is expected of a client as a participant in the SCRAM CAM, Remote Breath, and GPS monitoring programs. Have your clients view the video prior to having them sign the Participant Agreement.

Continue Reading