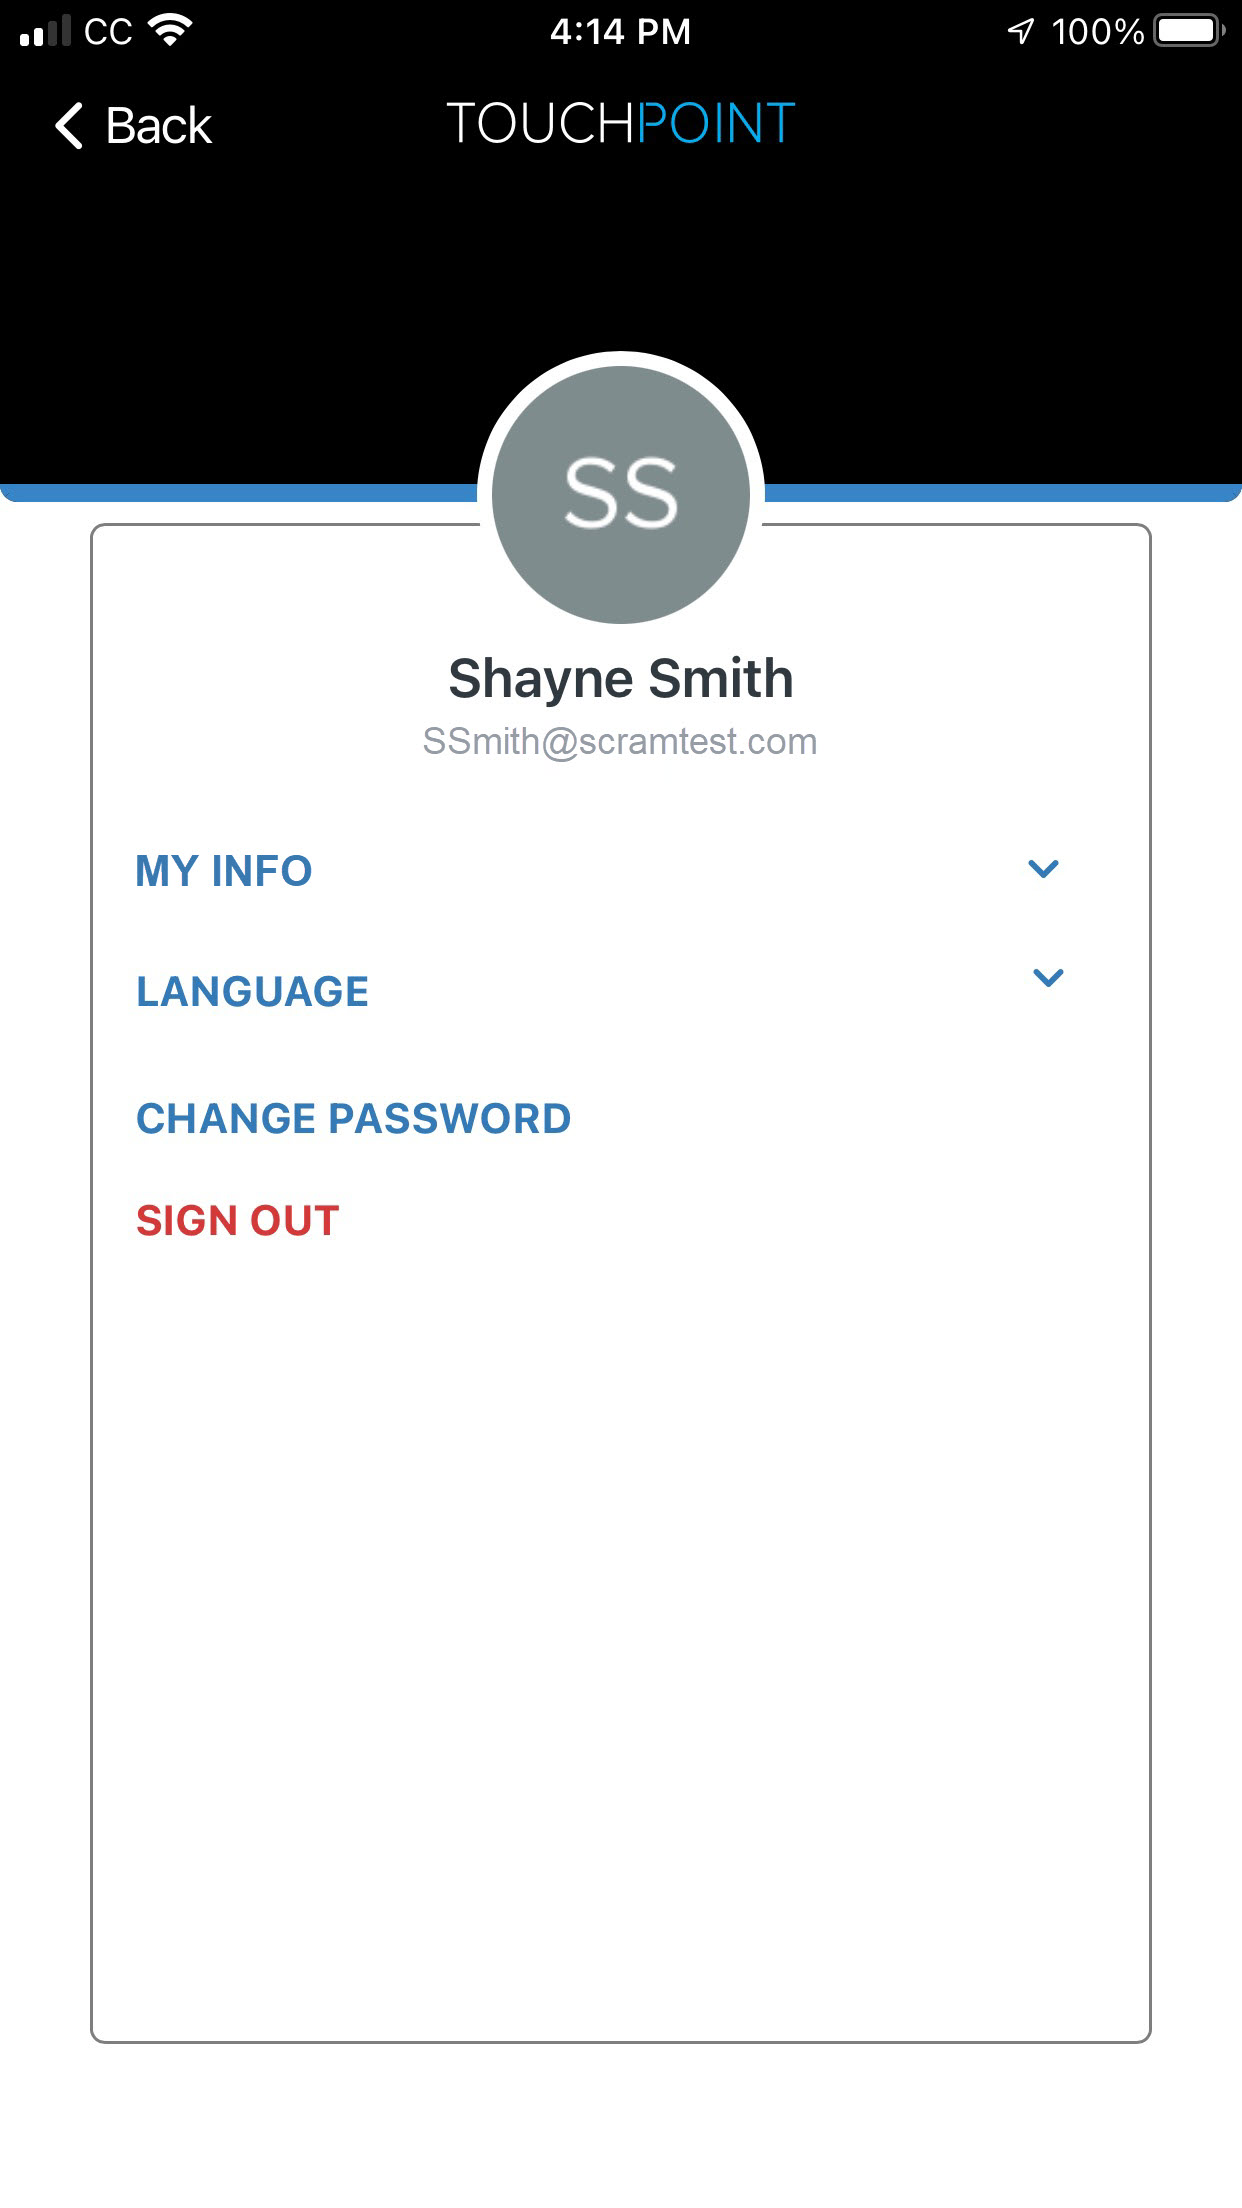
Today, April 27, 2023, SCRAM Systems released a new workflow when activating SCRAM TouchPoint Client Check-In activity to your client’s SCRAM Nexus supervision plan.
With this release:
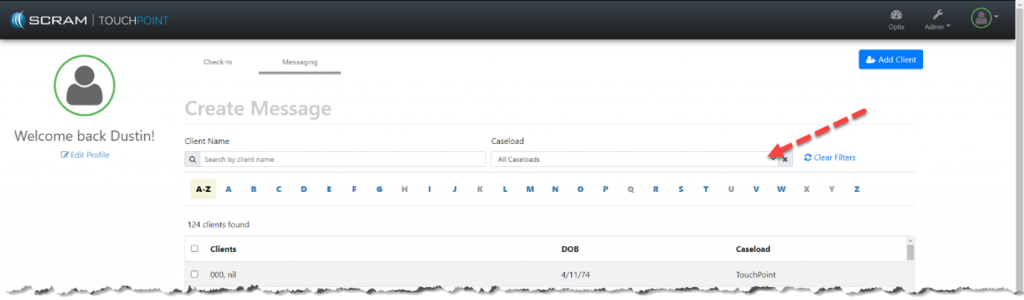
- Complete your client TouchPoint activation directly within the Nexus platform.
- Scheduling options have been updated for
additional flexibility when customizing your client check-in requirements.
- The frequency options are Daily, Weekly, or Monthly.
- You may set the duration between each check-in by days, weeks, or months.
- You may add multiple random check-ins to a single check-in window.
- Single occurrence check-ins will automatically have a 15-minute grace period added to the end of the check-in window.
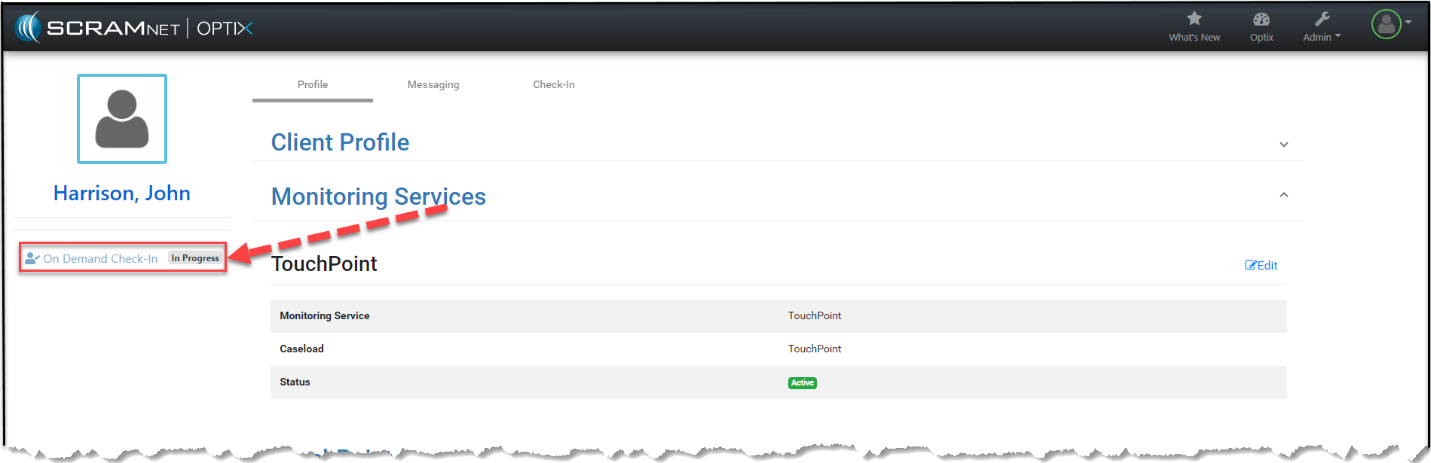
How it works
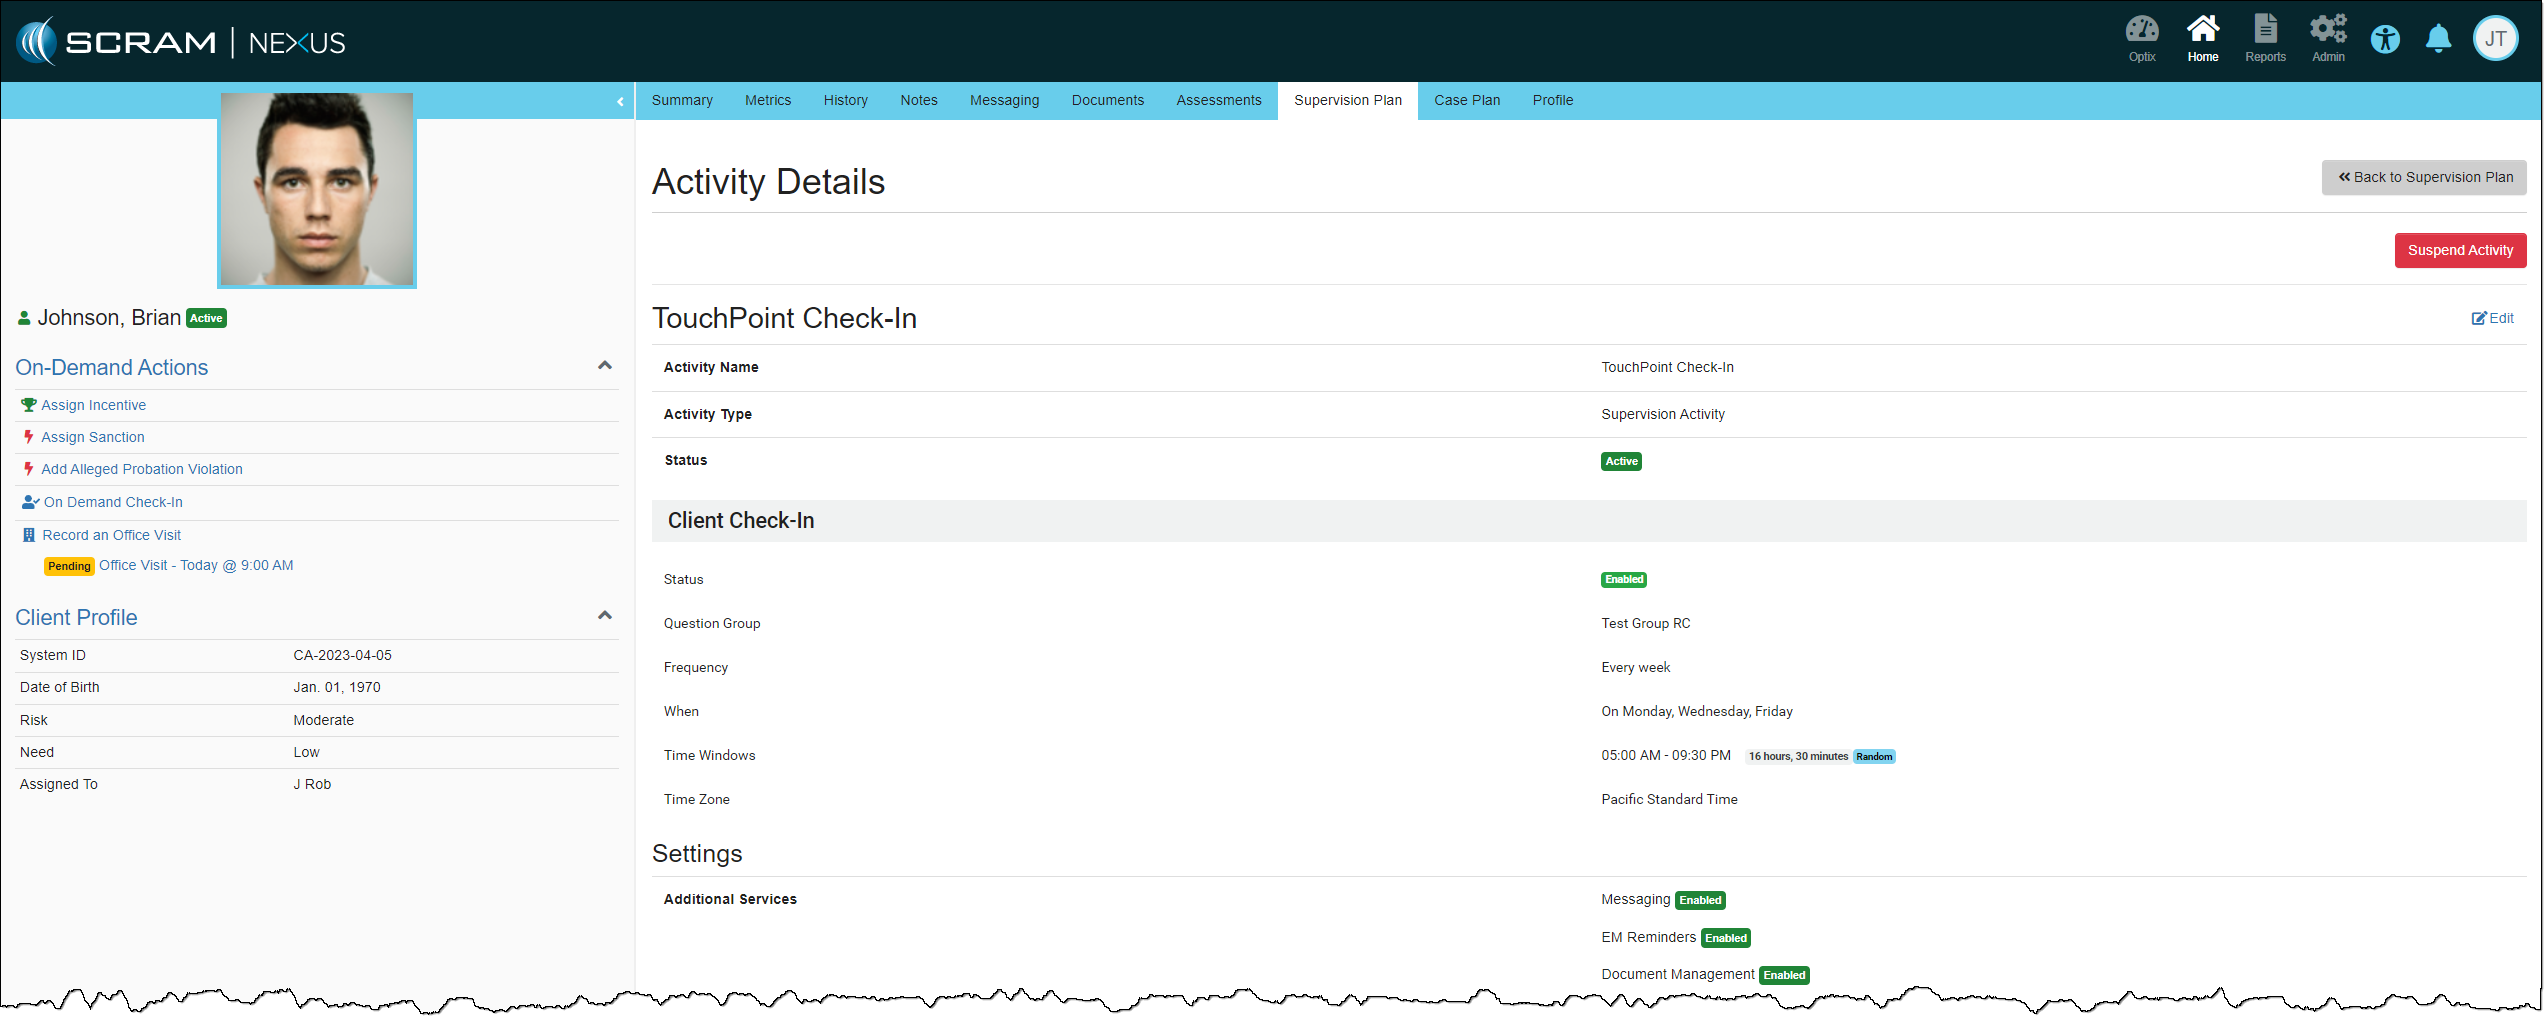
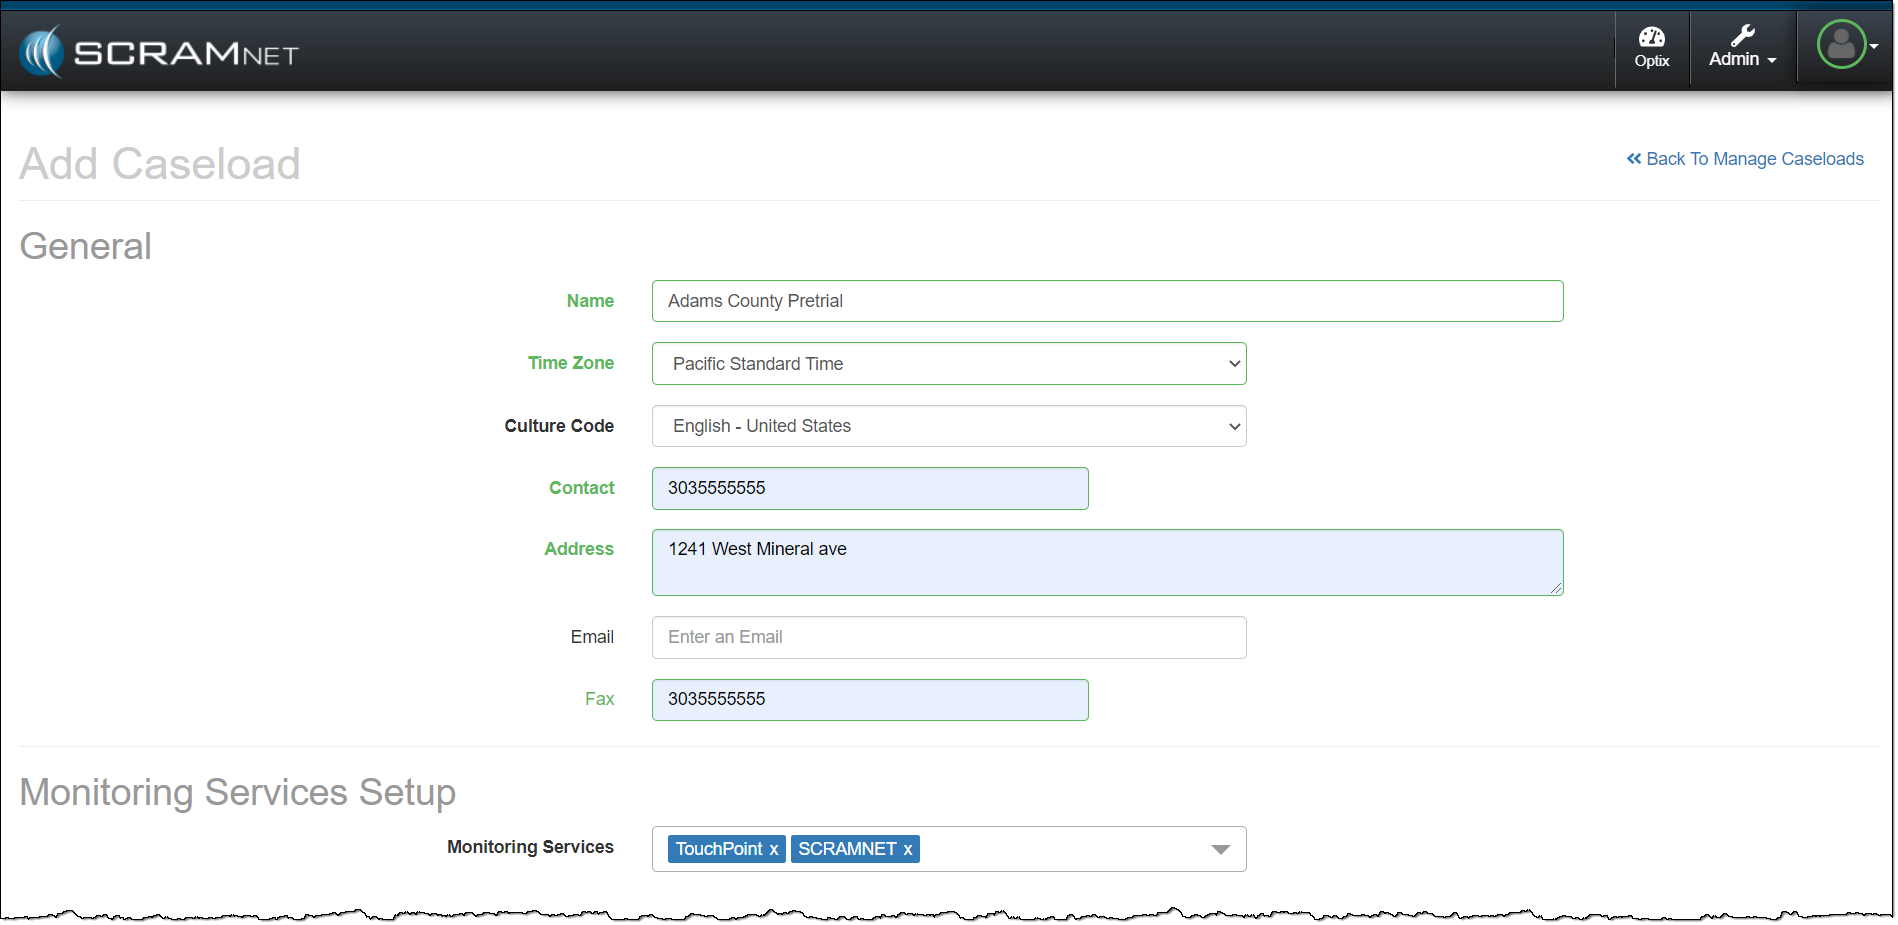
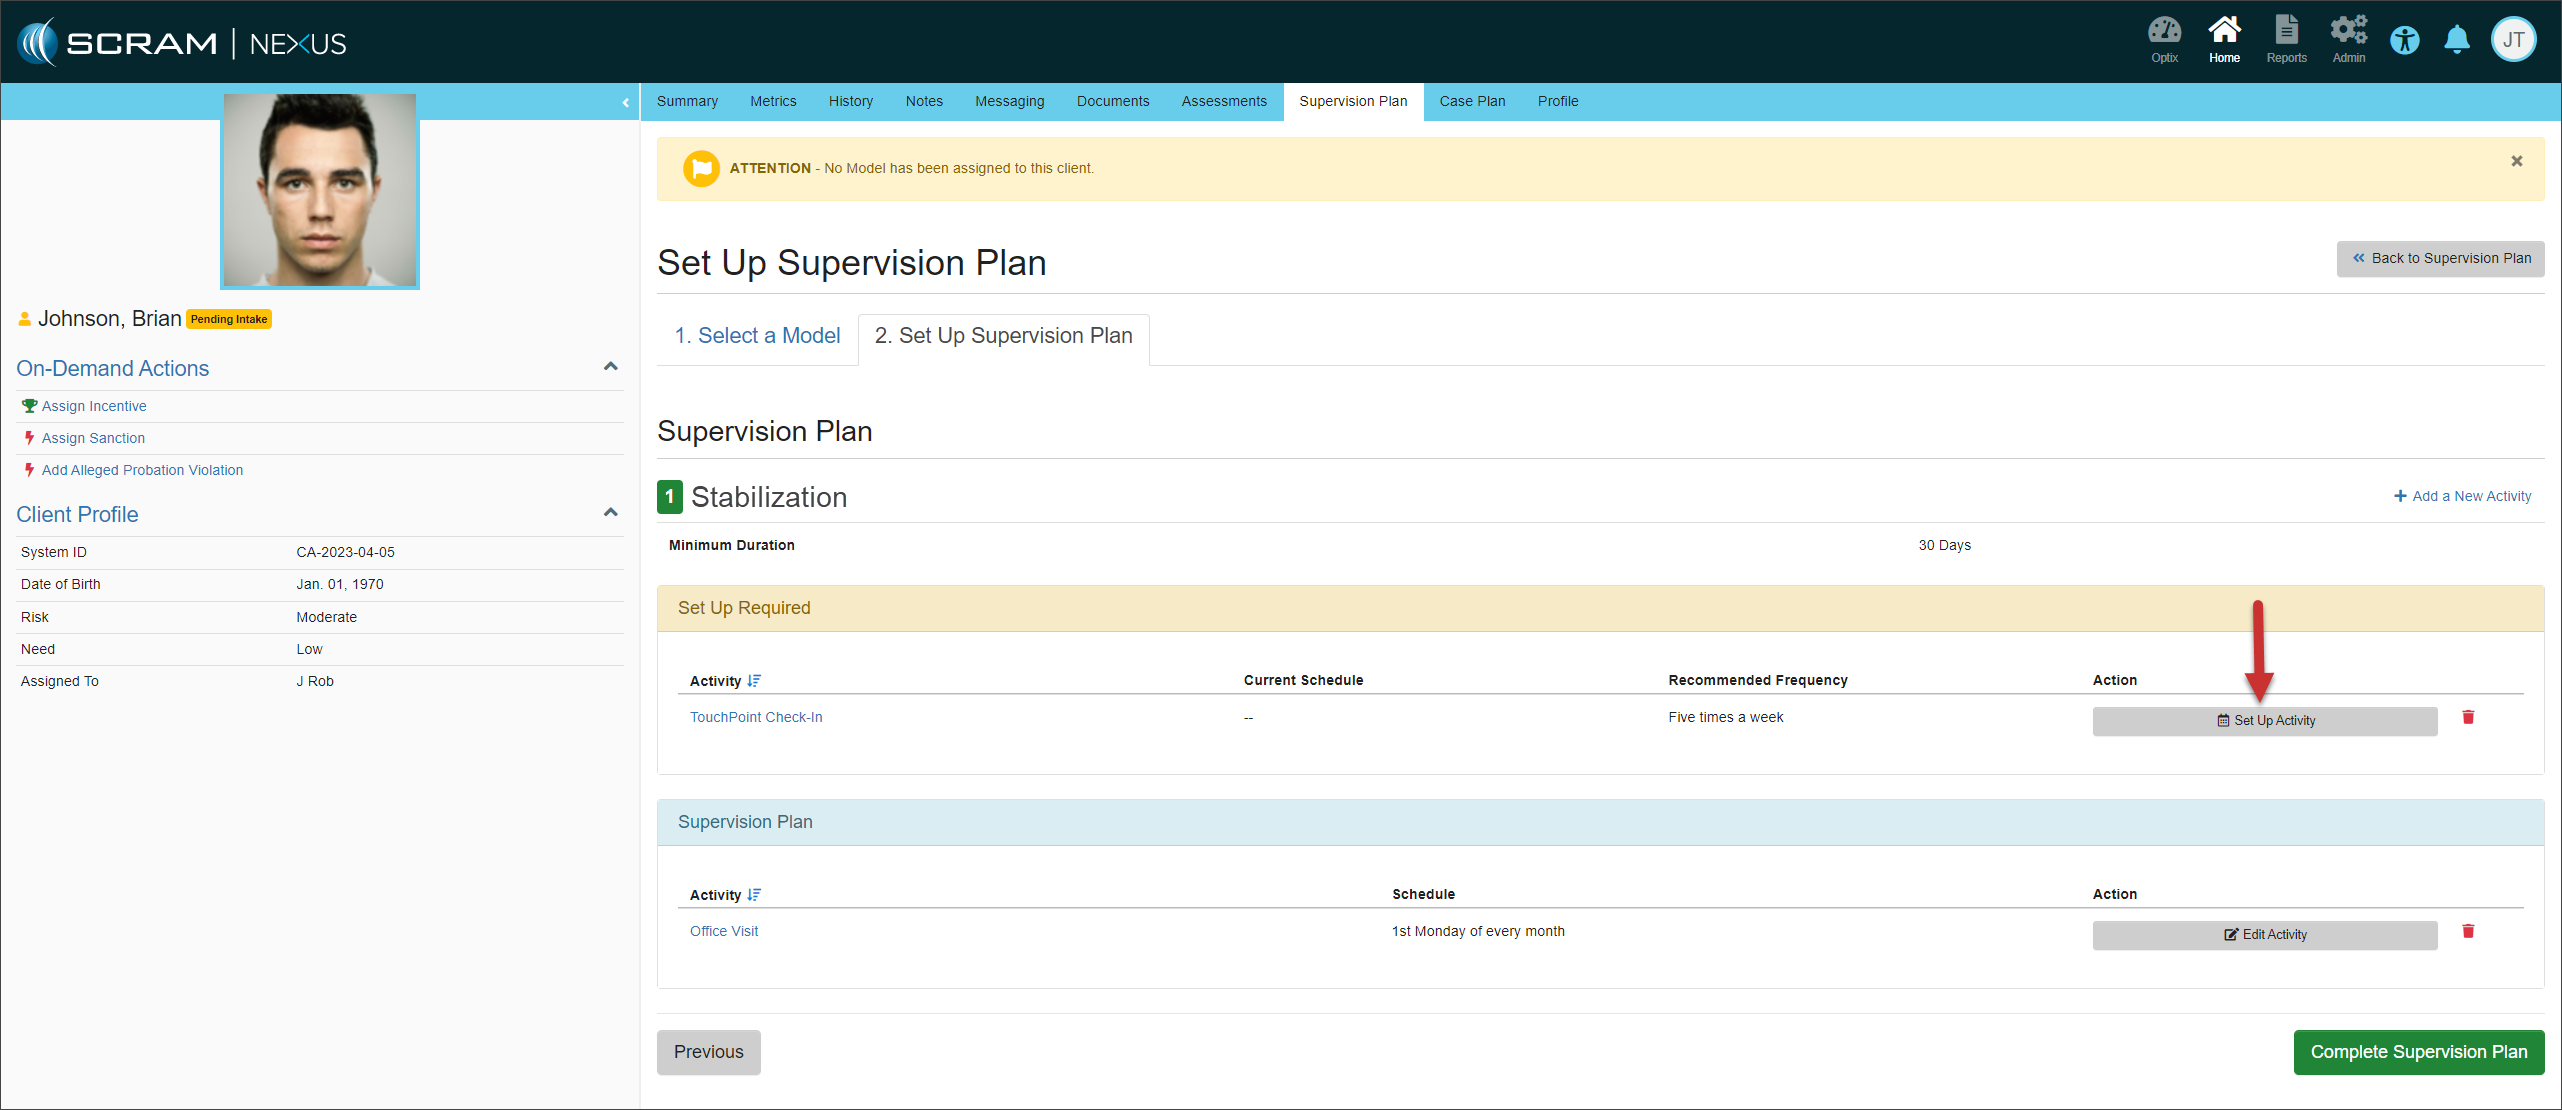
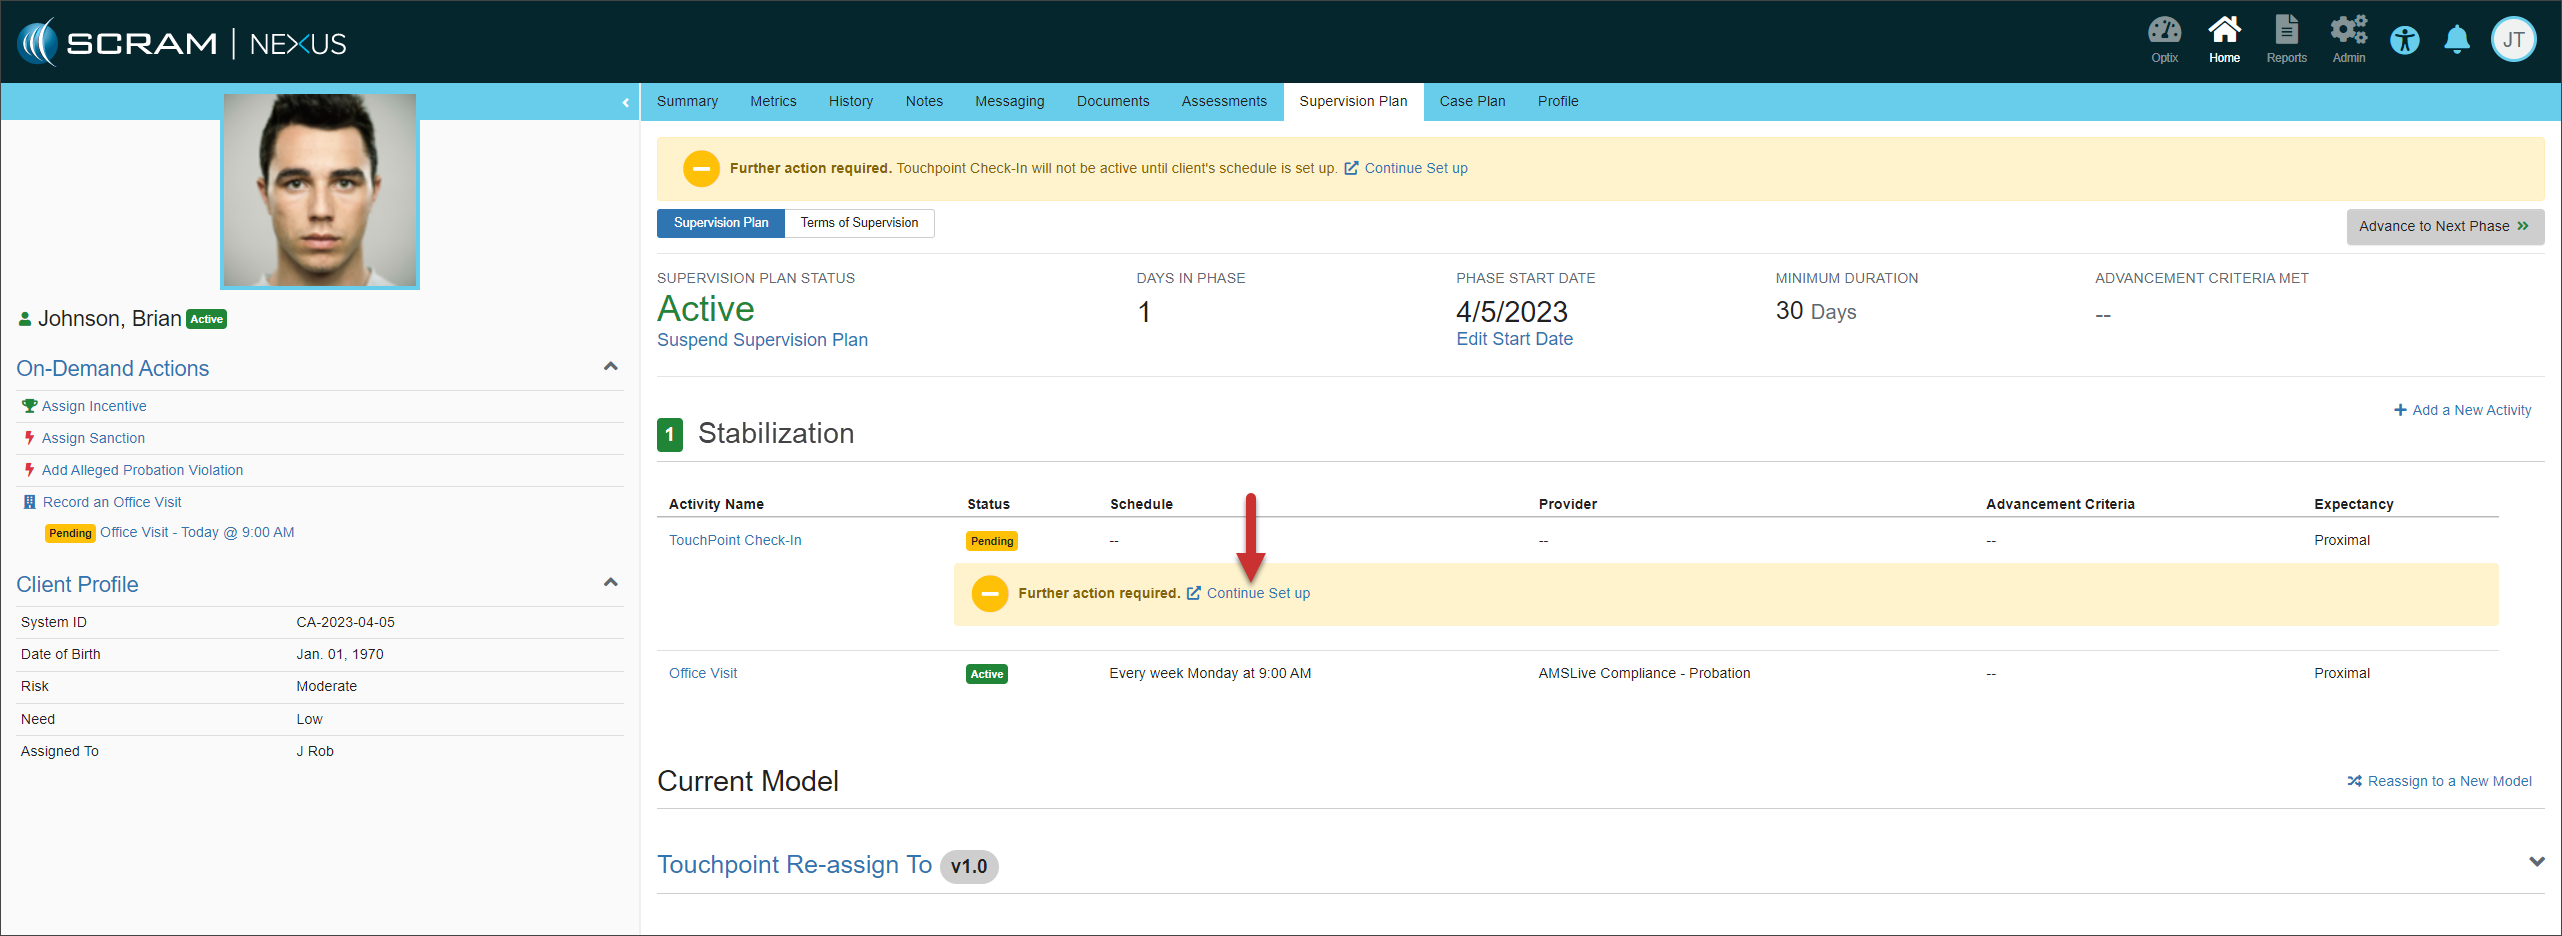
Once you have selected a client’s Supervision Plan, you will enable the Touchpoint Check-in activity for your client. To do this:
- On the Set Up Supervision Plan page, select the Set Up Activity button for the TouchPoint Check-In activity.
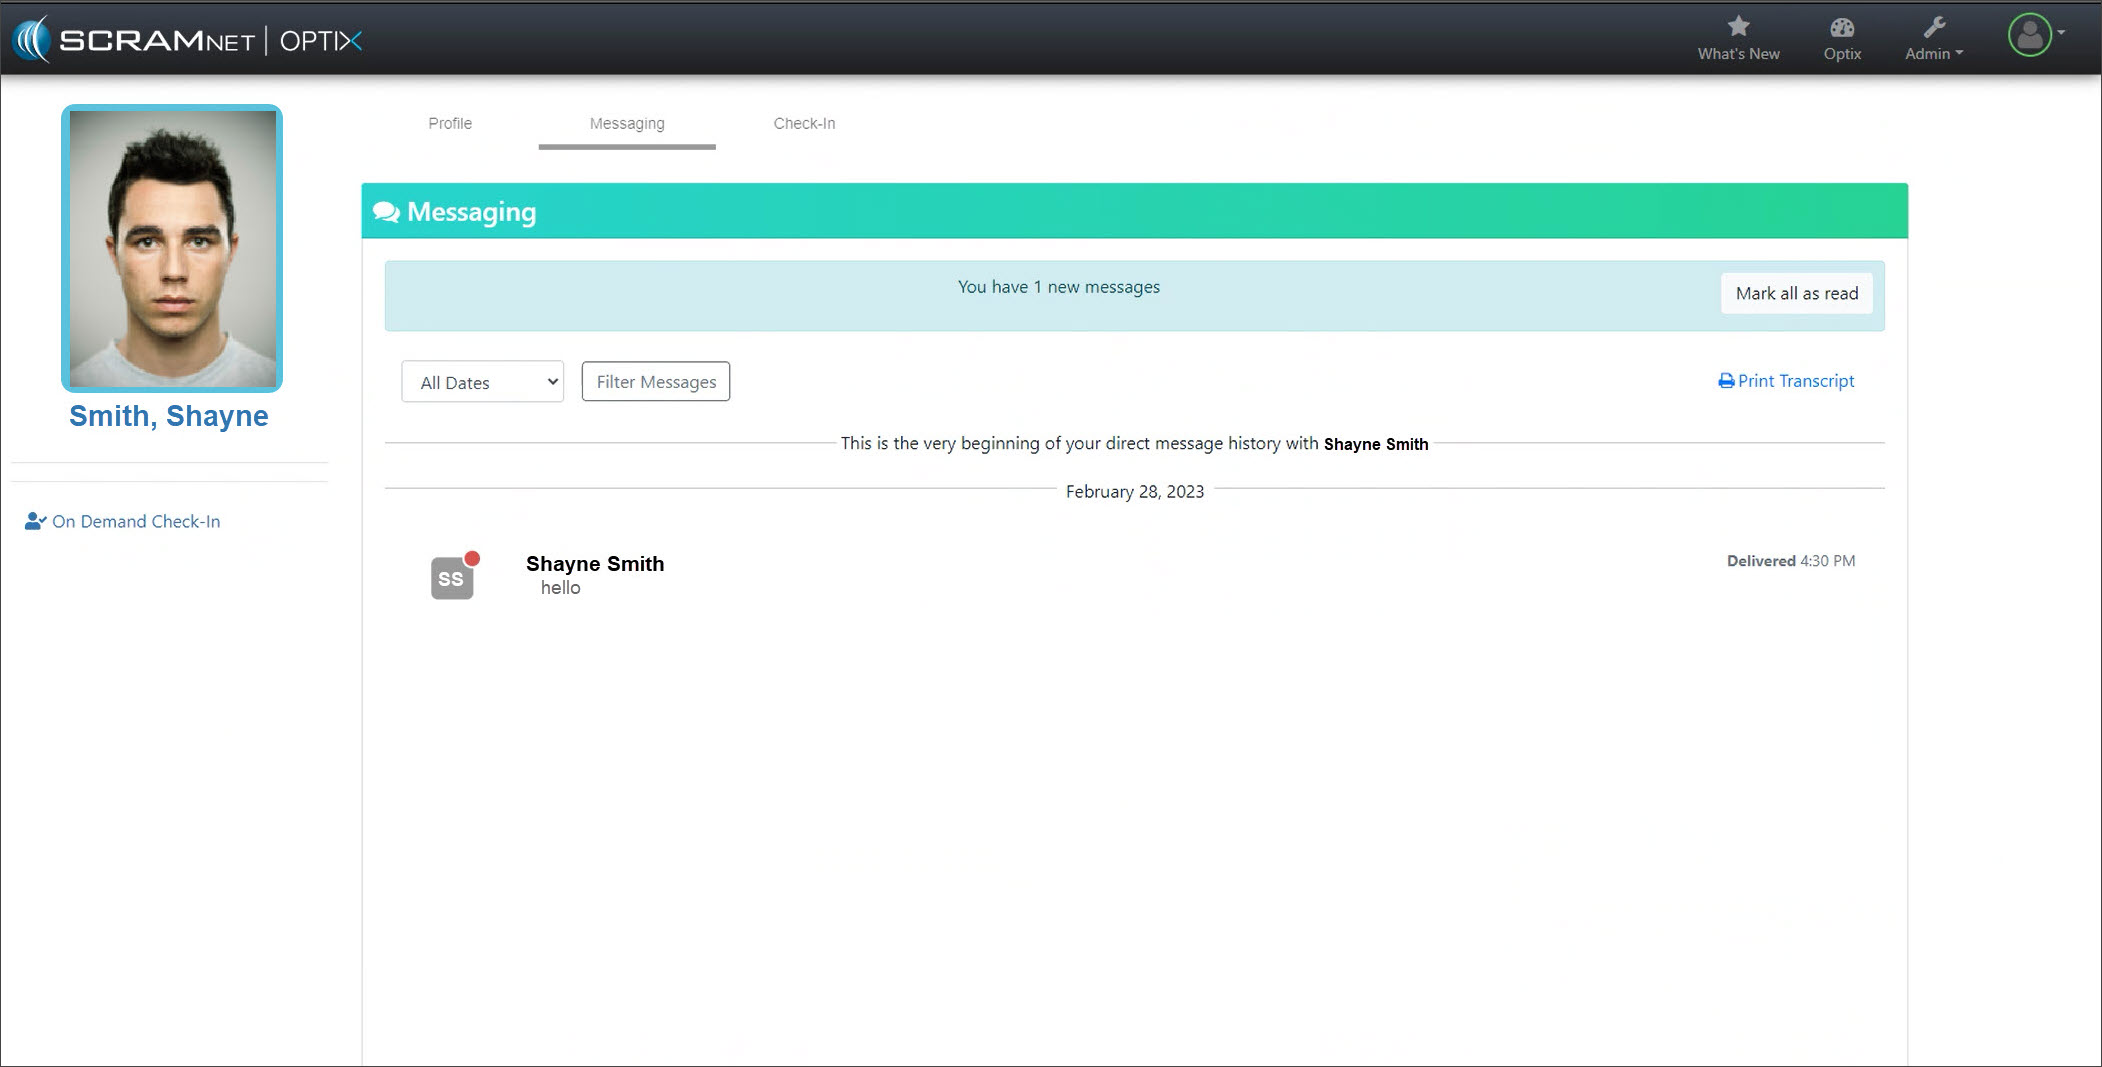
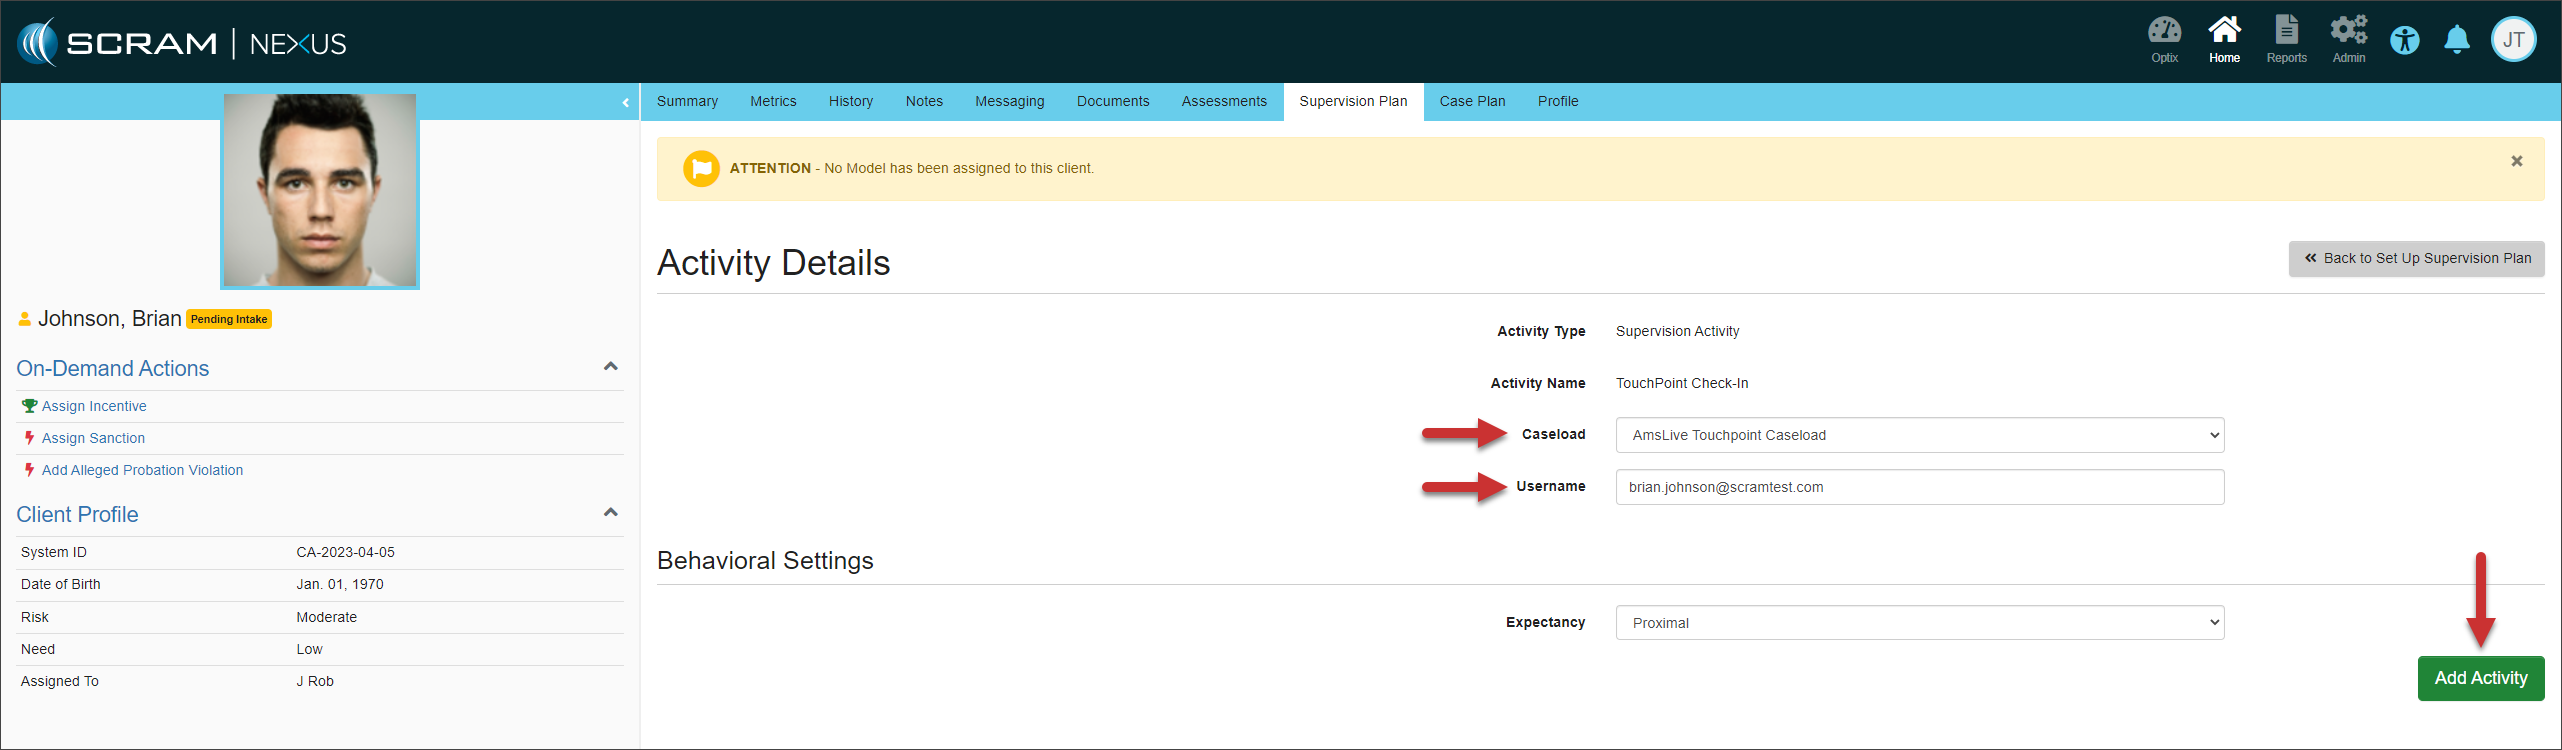
- On the Activity Details page, select the TouchPoint Caseload and enter the client’s Username (email address), and then select the Add Activity button. If this information is unknown at this time, you may continue to set up the supervision plan and add the client information later. However, the client information must be completed before TouchPoint Check-In is active for the client.
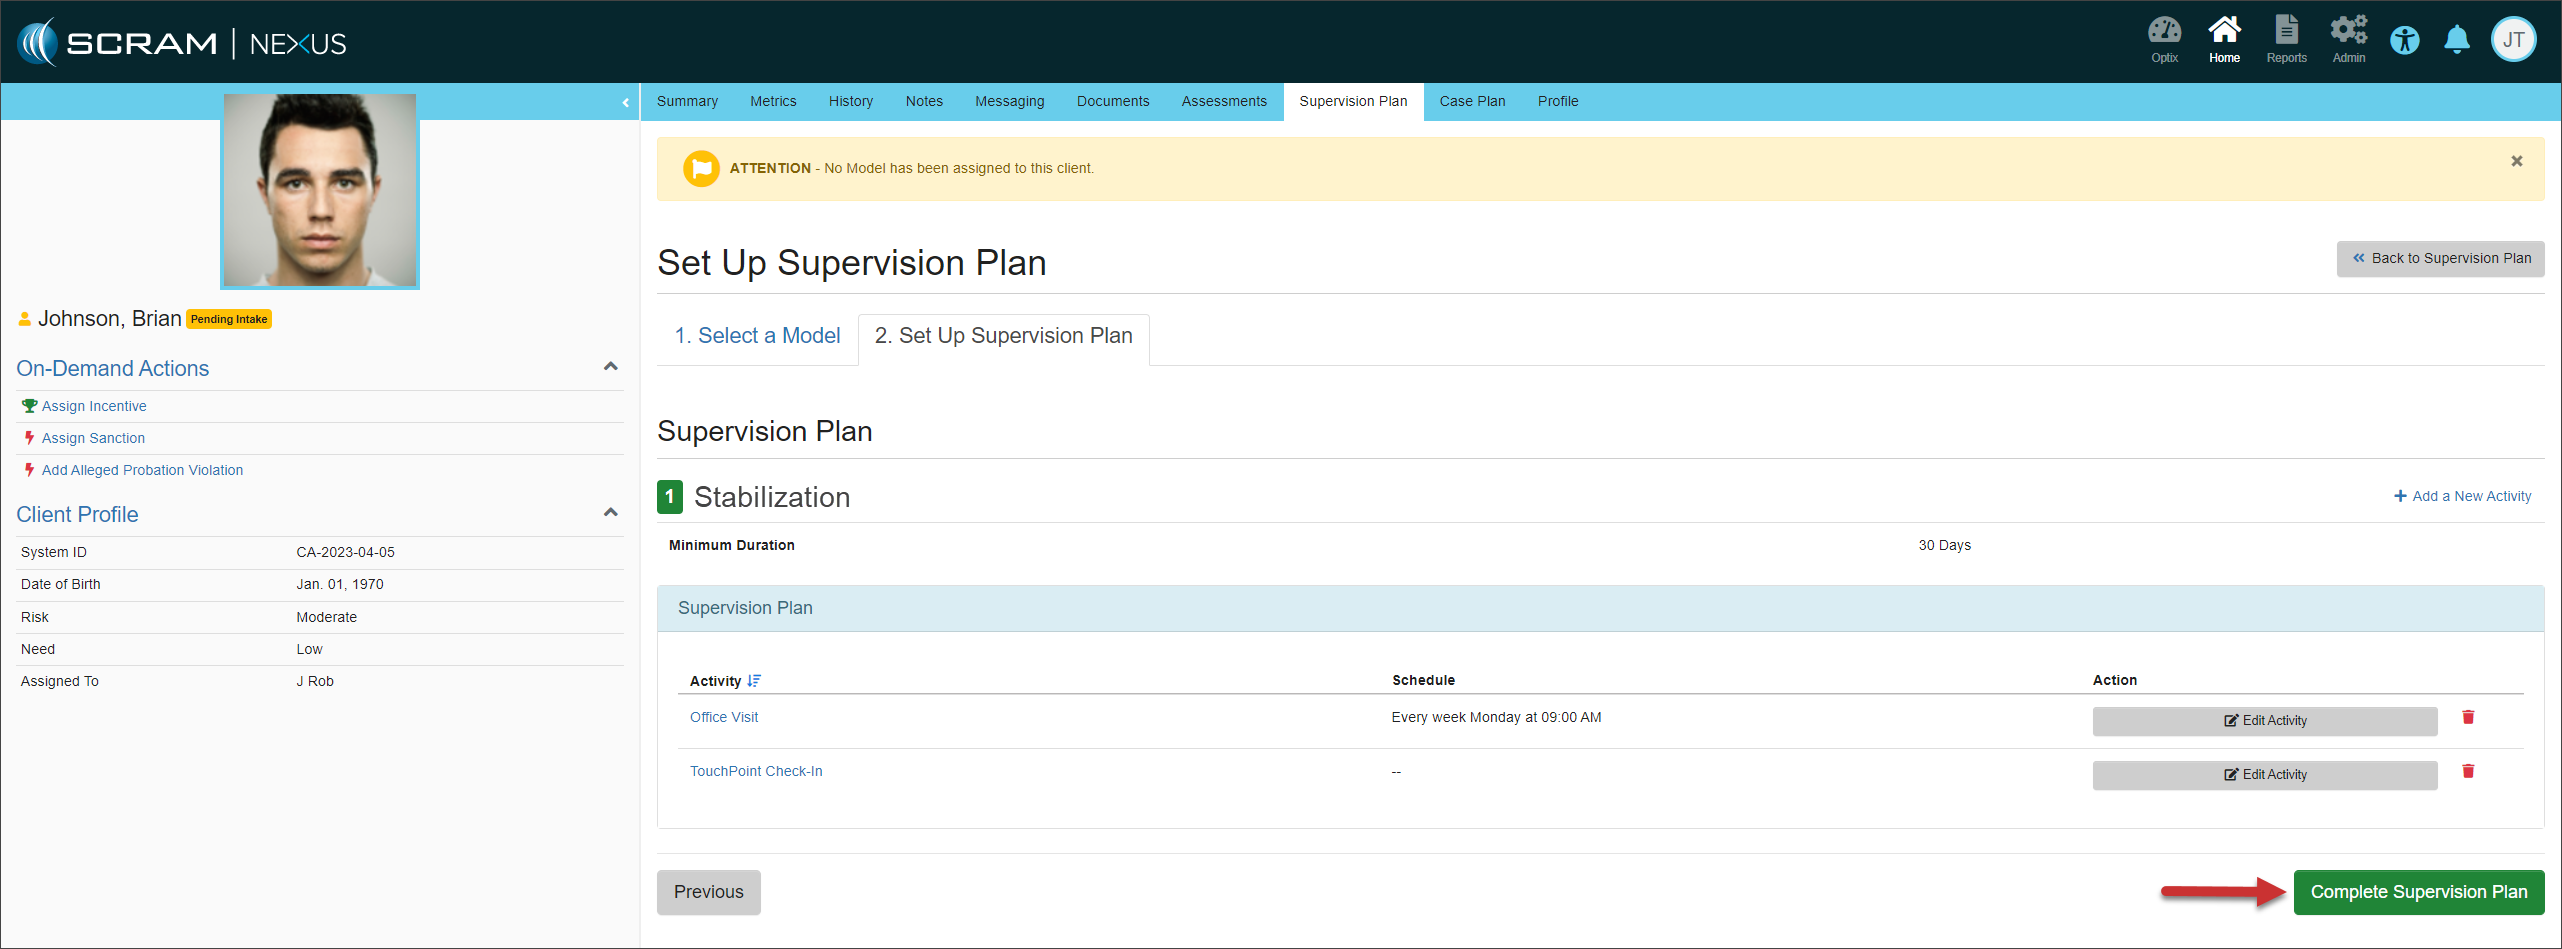
- Once all activities are set up, select the Complete Supervision Plan button to continue.
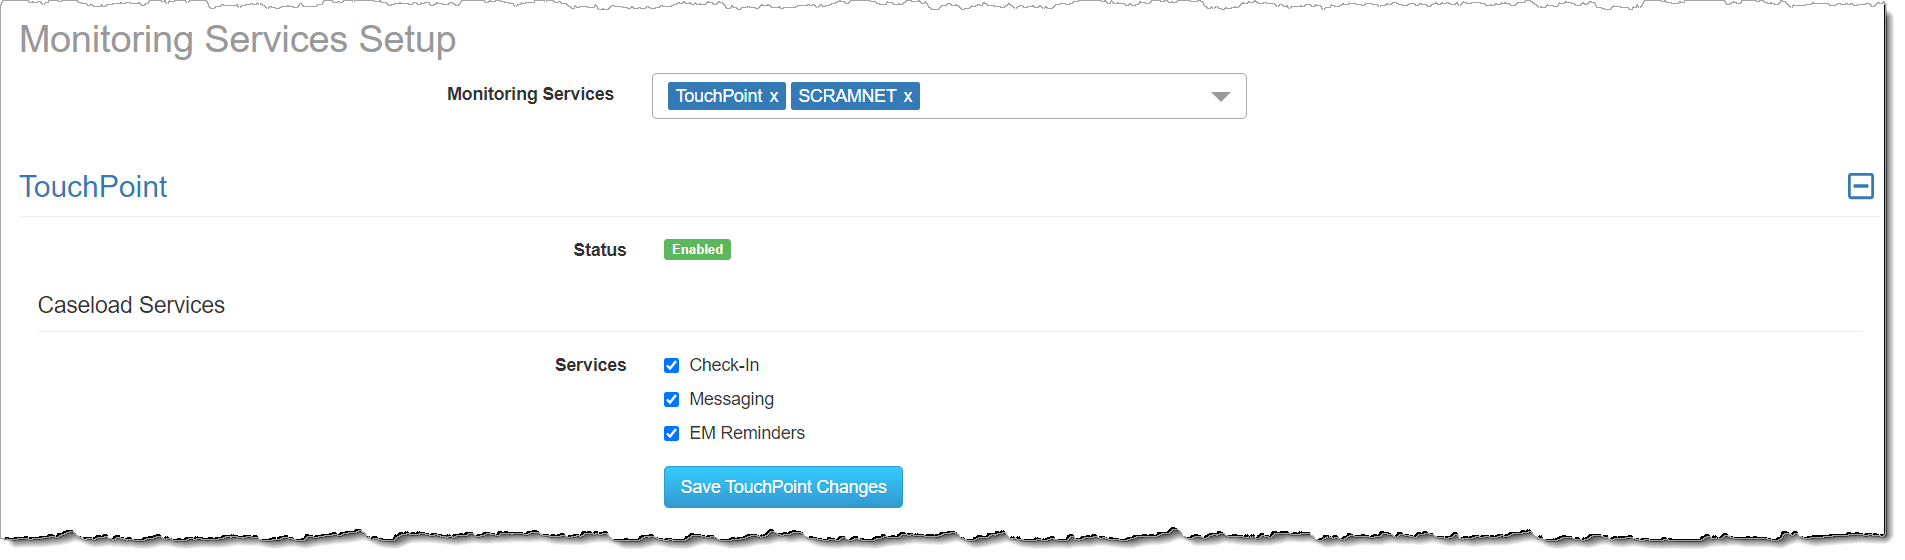
- On the active supervision plan, select the TouchPoint Check-In Continue Set Up hyperlink.
- On the Add a new Activity page, verify the information and then select the Add Activity button.

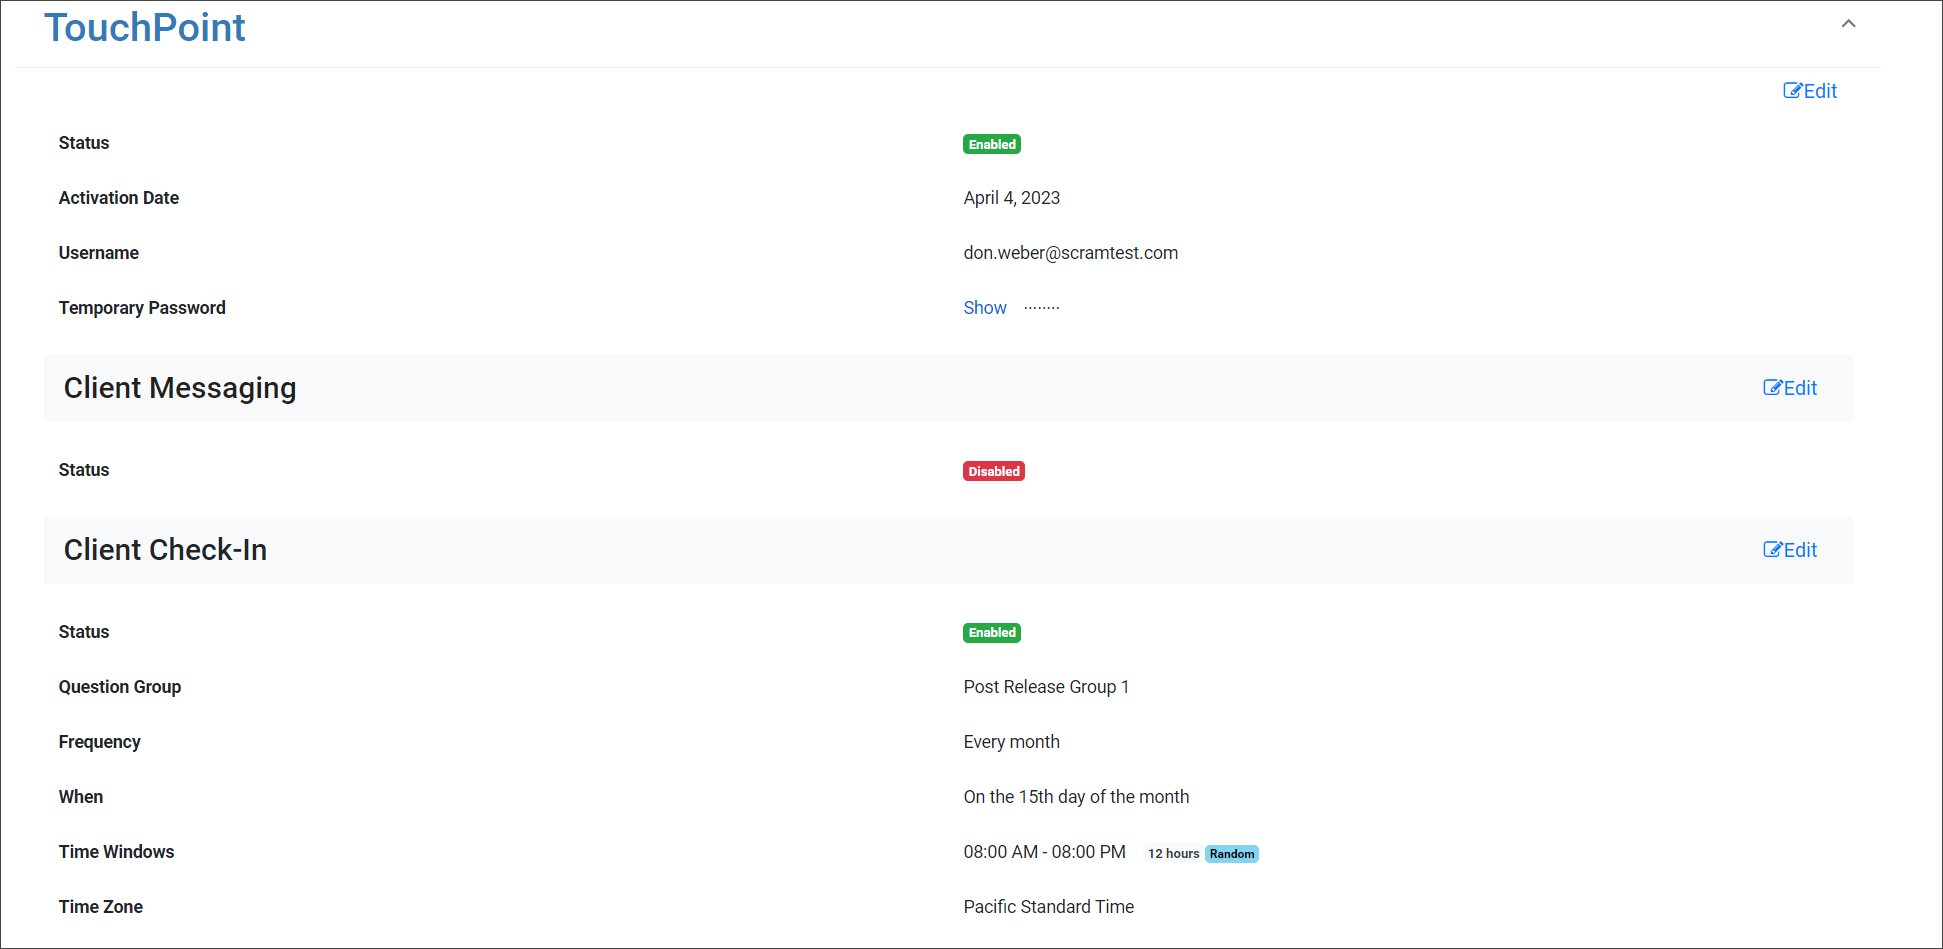
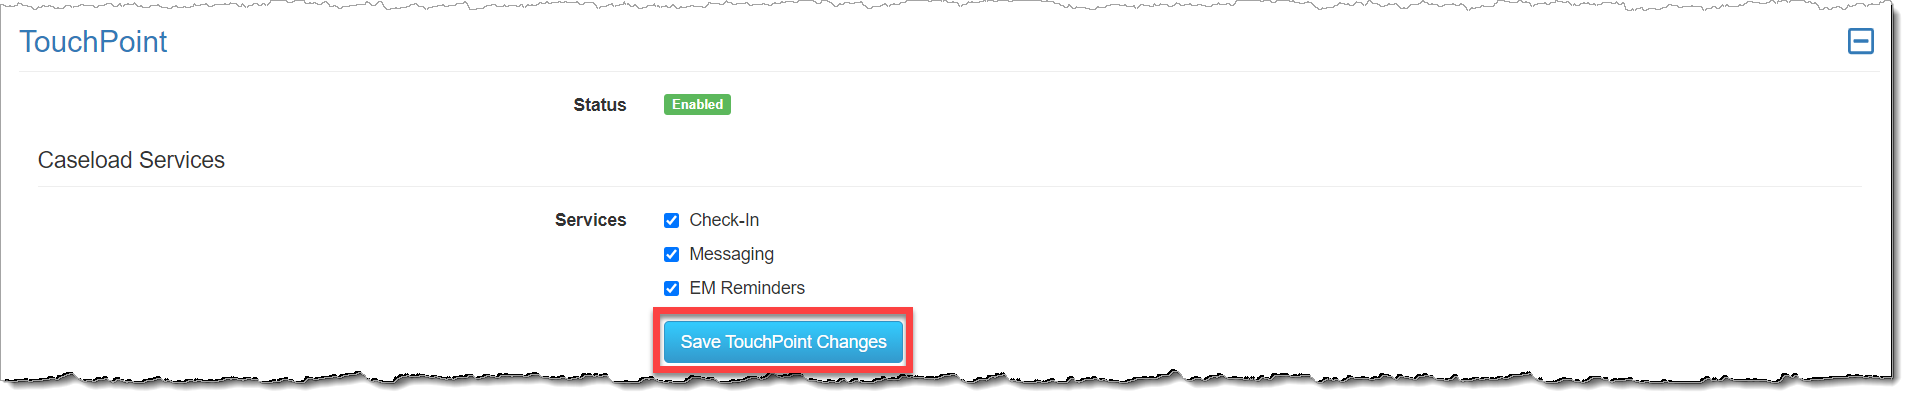
- Select the Client Check-In Edit hyperlink and then select the Enabled button.
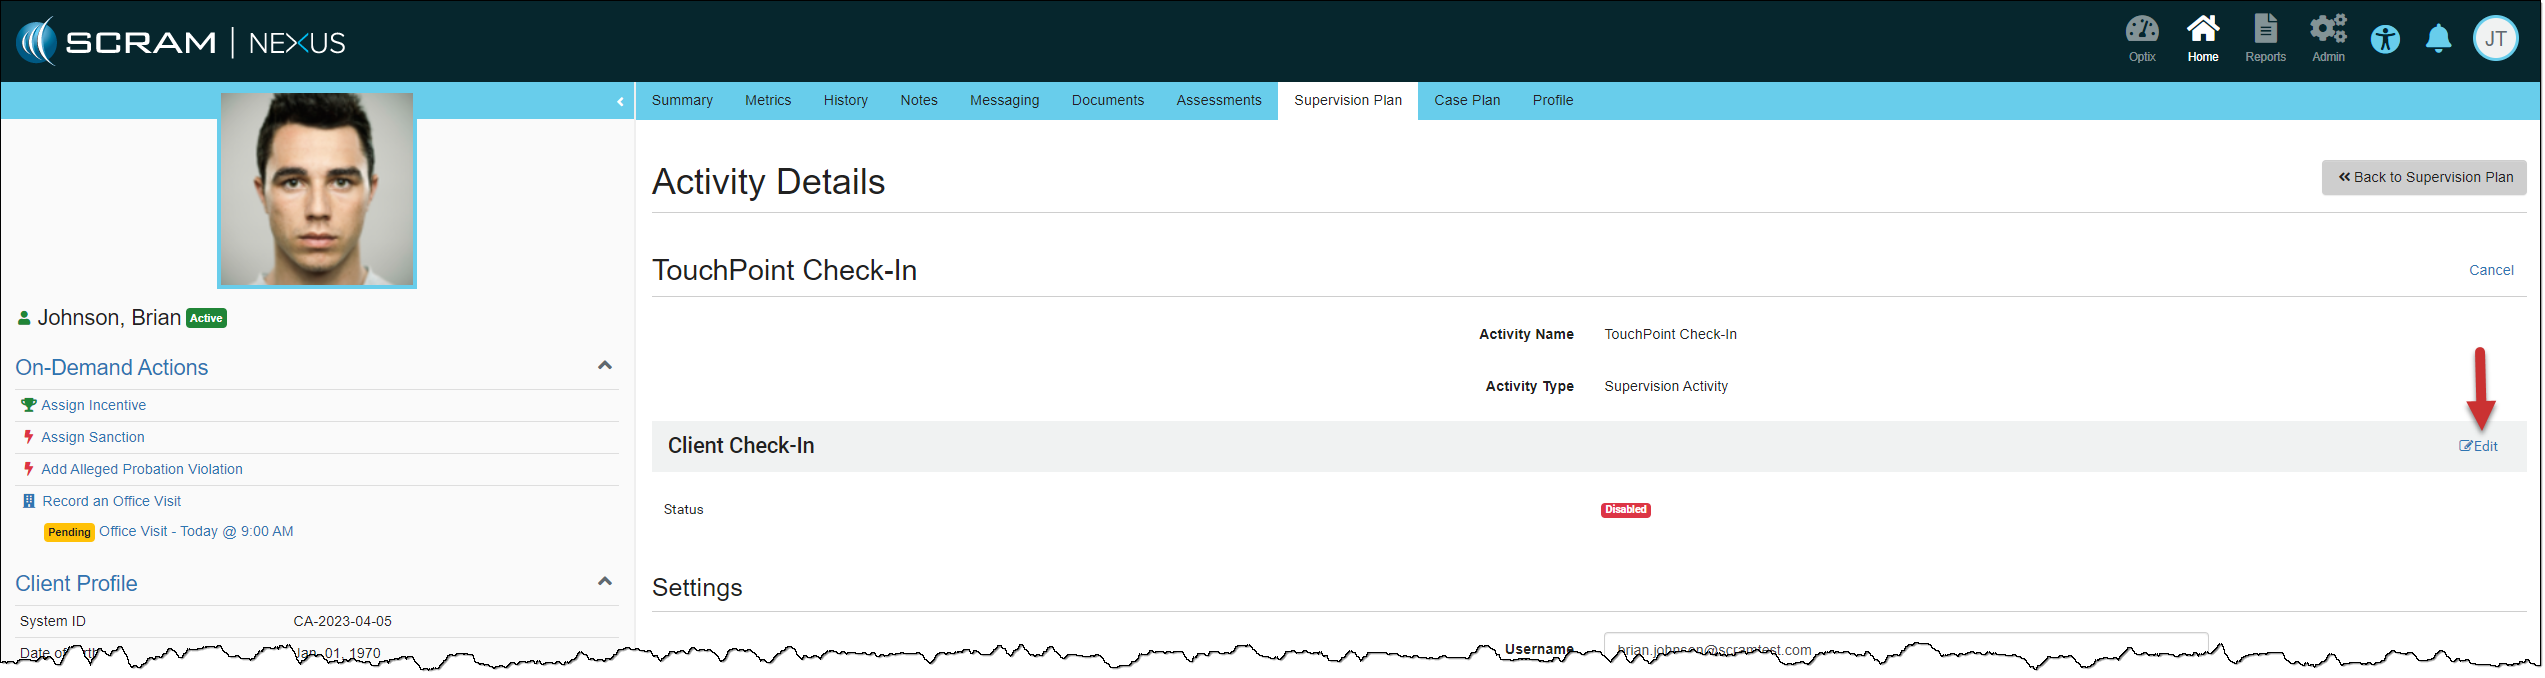
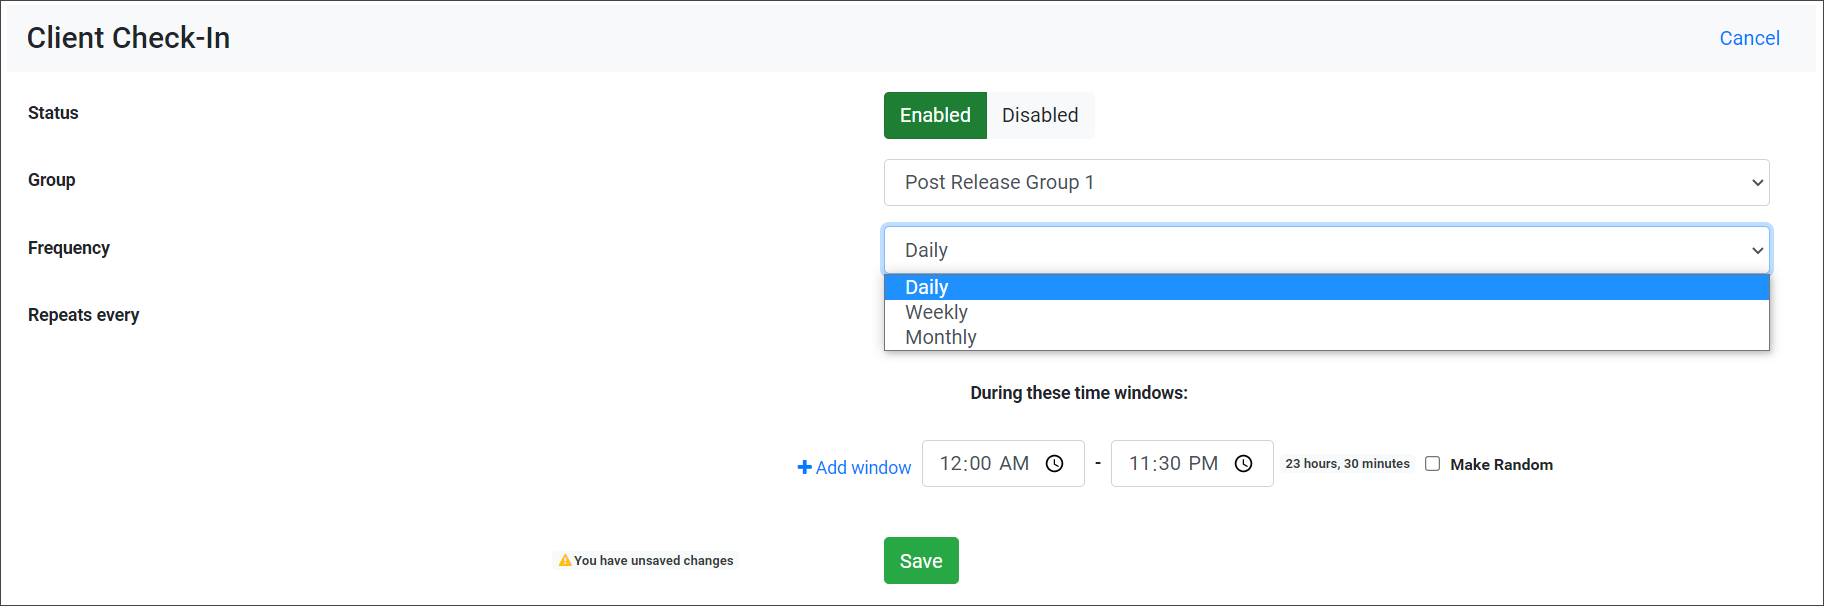
- You will now add the details for the Check-in, starting with the question Group.
- Select one of the Frequency options and then the details.
- Daily: In the Repeats Every field, you will select the number of days the check-in will repeat. You may choose between 1 and 90 days. For example, if you set the option to 1-day, daily check-ins will be required. If you set the option to 5 days, a check-in will be required every 5 days.
- Weekly: In the Repeats Every field, you will select the number of weeks the check-in will repeat. You may choose between 1 and 52 weeks. For example, if you set the option to 1-week, weekly check-ins will be required. If you set the option to 5 weeks, a check-in will be required every 5 weeks. Select the day or days of the Week the check-in will be requested.
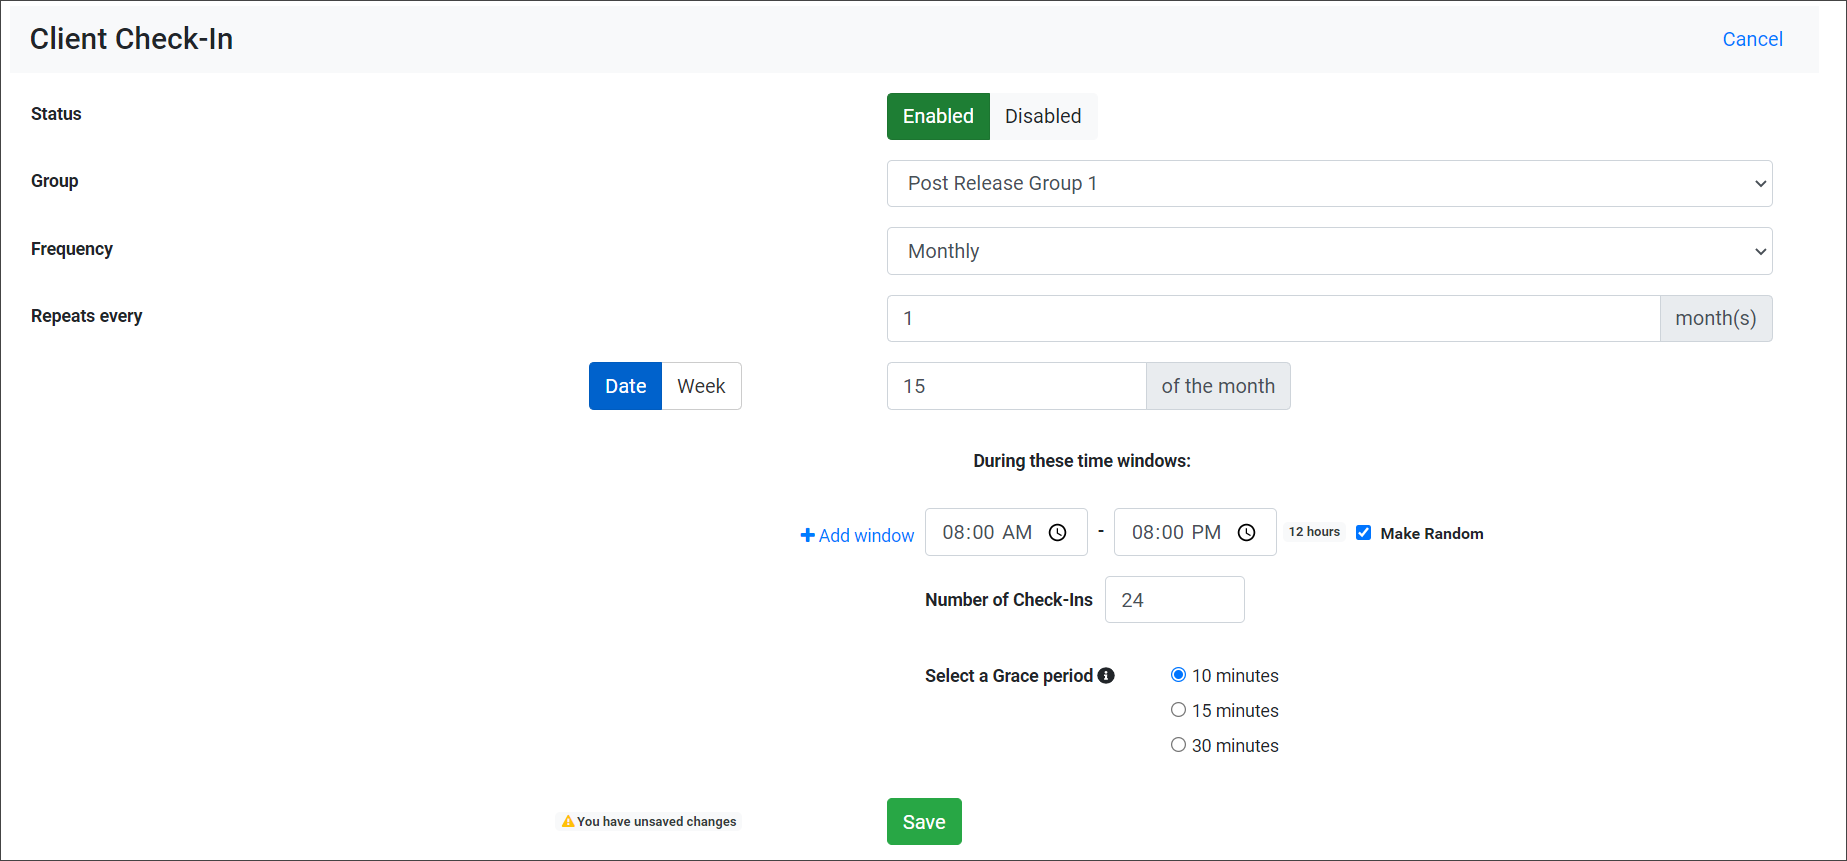
- Monthly: In the Repeats Every field, you will select the number of months the check-in will repeat. You may choose between 1 and 12 months. For example, if you set the option to 1 month, a check-in will be required every month. If you set the option to 5 months, a check-in will be required every 5 months. Next, you may select a specific Date of the month. For example, select the date between 1-28 (this date range takes into account leap years and months that do not have 31 days), or select the Week (1st Week to the last Week) and day of the Week (Sunday to Saturday) the check-in will be requested.
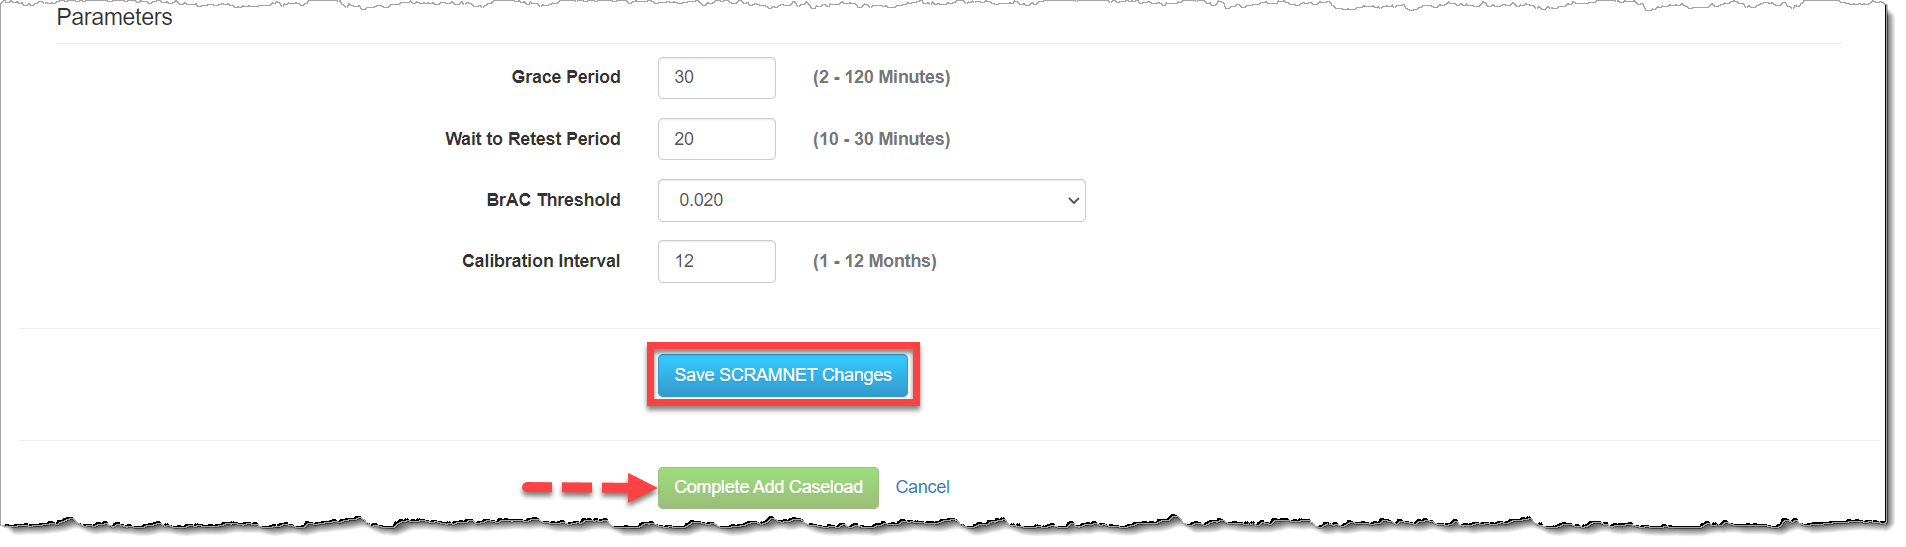
- Set the check-in Window or add multiple check-in Windows for the client.
- For a single check-in per window, add the desired number of check-in windows and their associated timeframes, then go to step 10.
- To add multiple check-ins during a check-in window, select the Make Random checkbox. You will then set the number of check-ins the client must complete during the window and the Grace Period the client has to complete each check-in when prompted. There is a maximum number of random check-ins allowed during each window. This calculation is based on 30-minute intervals plus the grace period. An error message will display if you try to enter more check-ins than allowed during a window.
- Select the Save button.

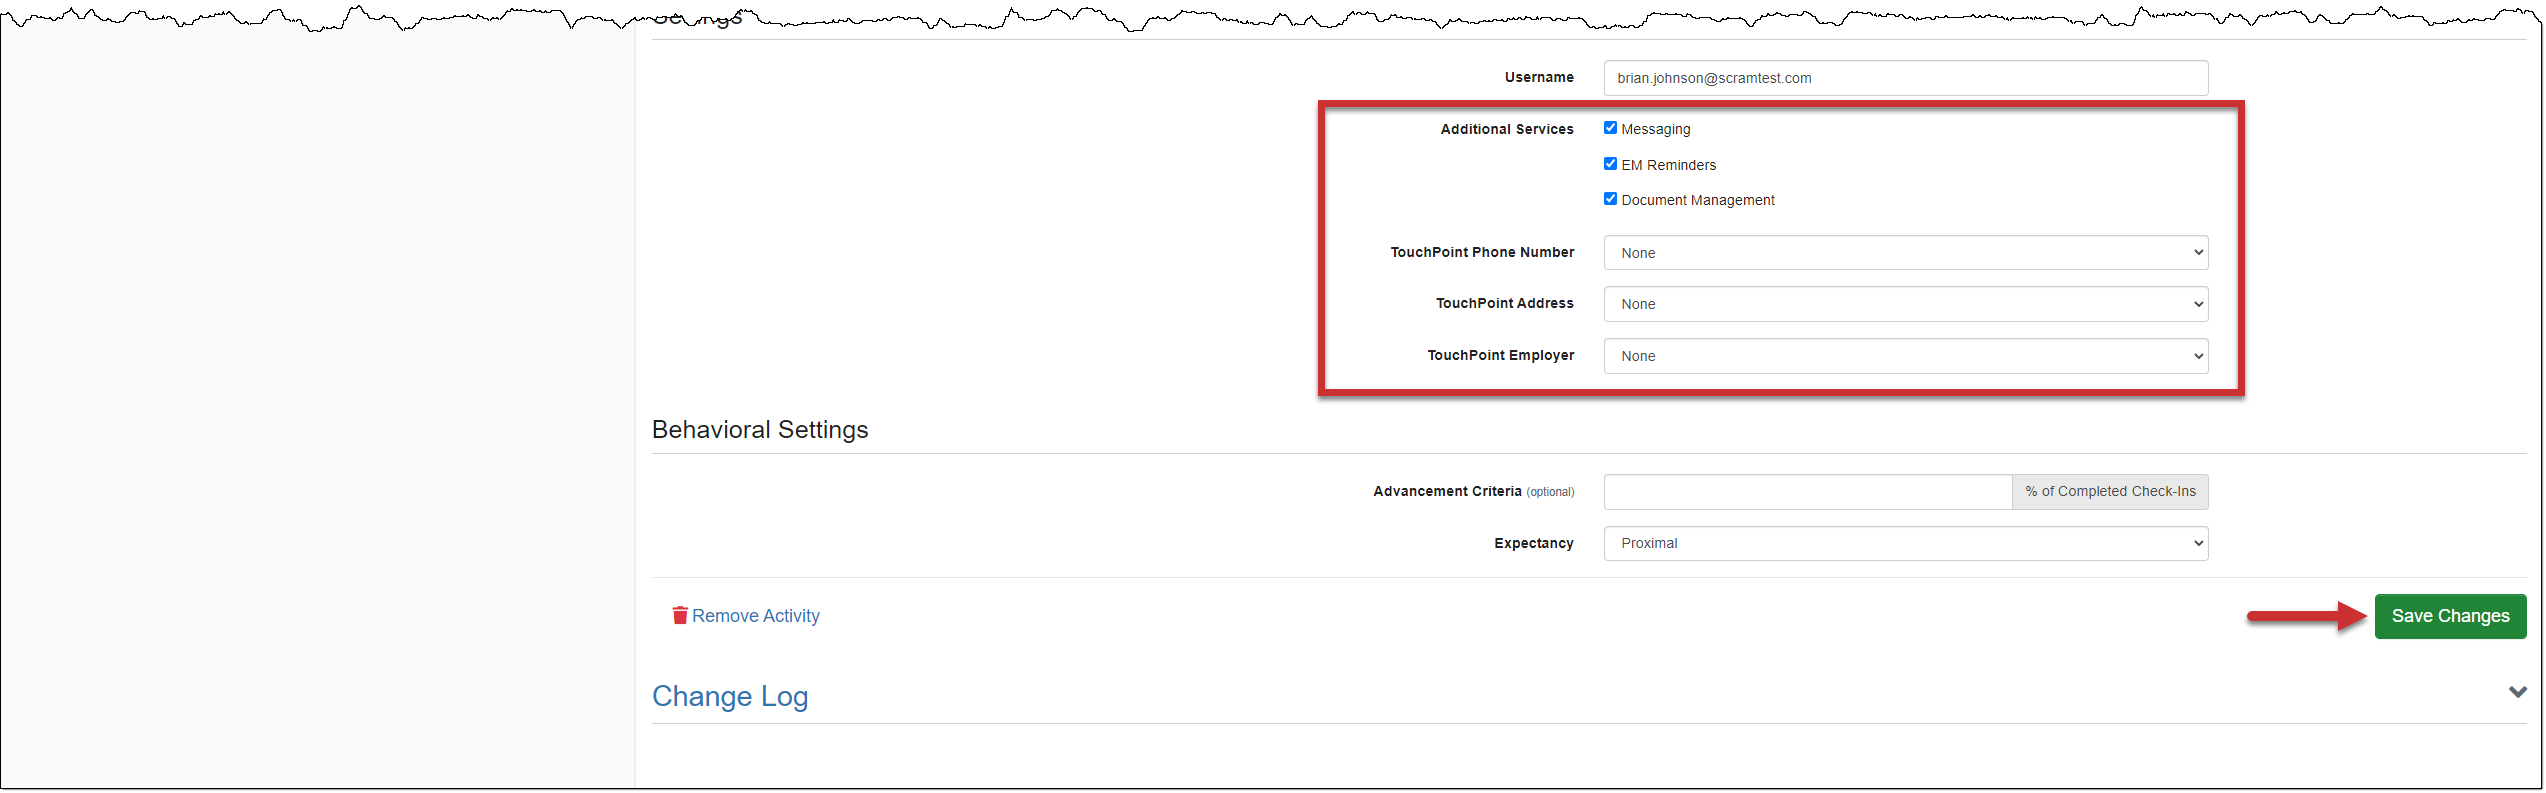
- In the Settings section, add any additional Services and information.
- Select the Save Changes button to complete the set up.