TouchPoint Messaging gives you the ability to send text-style messages to an individual client or a group of clients with the Text to All feature. The client can then respond to messages directly in the TouchPoint app, and their responses will appear on the Messaging page, under the client’s Communications tab.
Any active client can be enabled for this service. Some of the benefits include:
- System generated messages vs messages sent by individual agents’ cellphones.
- Messages can be viewed by all agents that have access to the client, thereby improving caseload management.
- Links can be added to the message. One example of a link you can send might be to a payment portal.
- The client will receive a notification on their cellphone when a new message has been sent.
- A notification on the Optix Dashboard Messages tile, as well as the Clients tab, will display any new messages received from a client.
- The Messaging page for the client will display a date and time stamp for all sent and read messages.
- A Print Transcript link is available to print the message history.
Enable Client Messaging
Start by navigating to the Clients tab in Optix.
- Select the +Add TouchPoint Client button and complete the setup process. For help, visit Add a TouchPoint Client.
- If your client is already an active TouchPoint participant, select their name from the list.
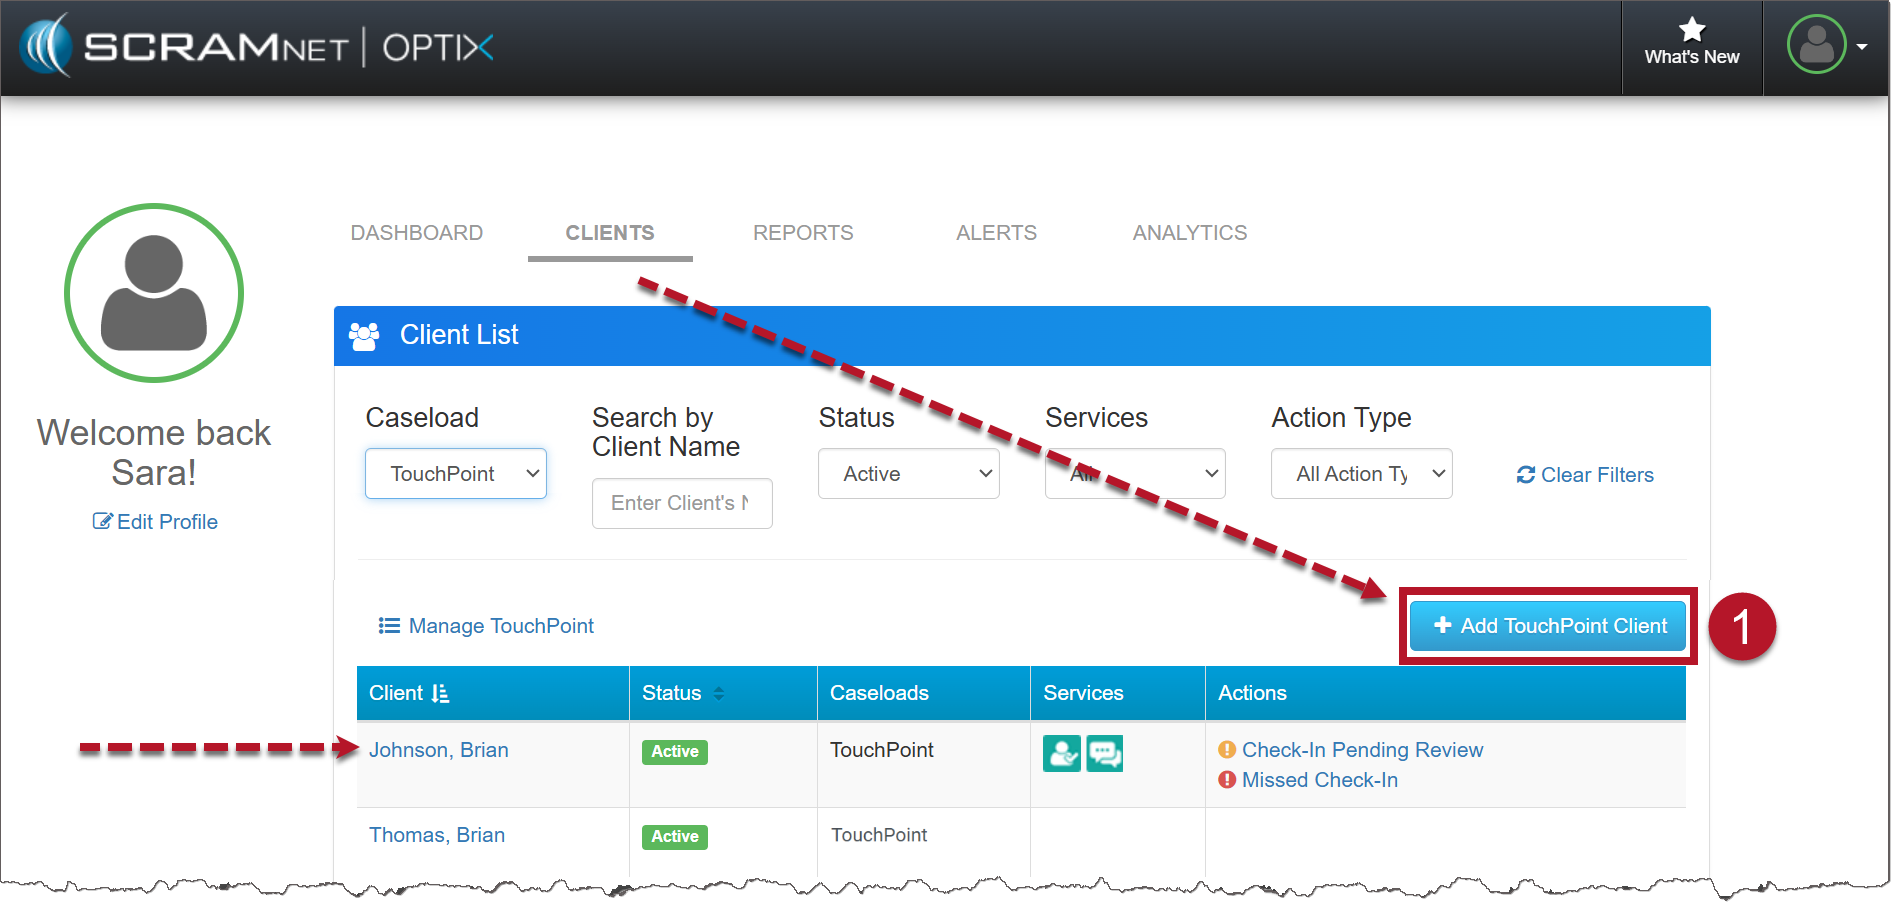
Optix Client page (click to enlarge)
- Locate the Edit link in the Client Messaging section.
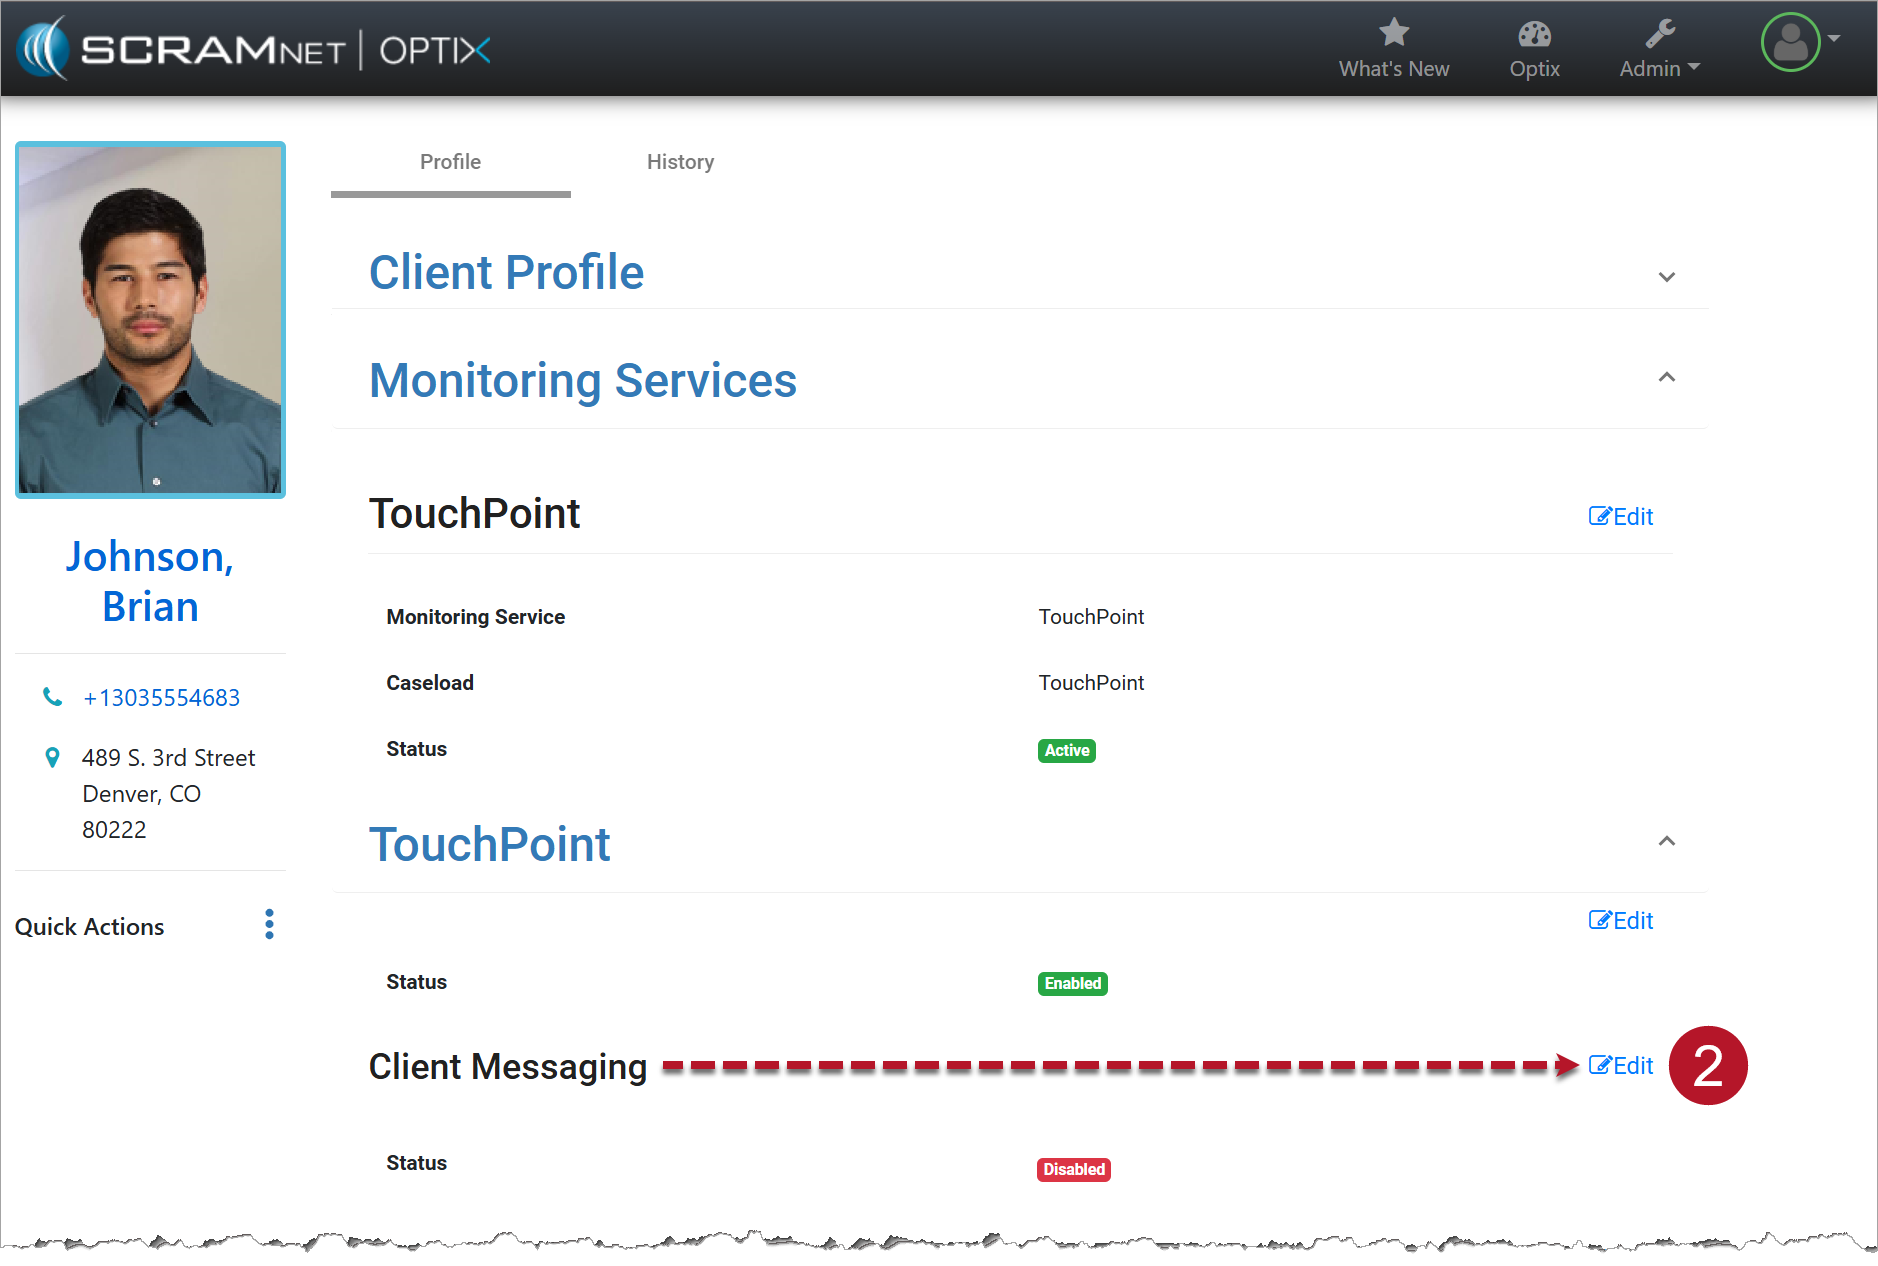
TouchPoint Client Profile page (click to enlarge)
- Toggle the status from Disabled to Enabled.
- Select the Save Changes button.
- Once the page is refreshed, a Communications tab is displayed at the top of the client’s Profile page.
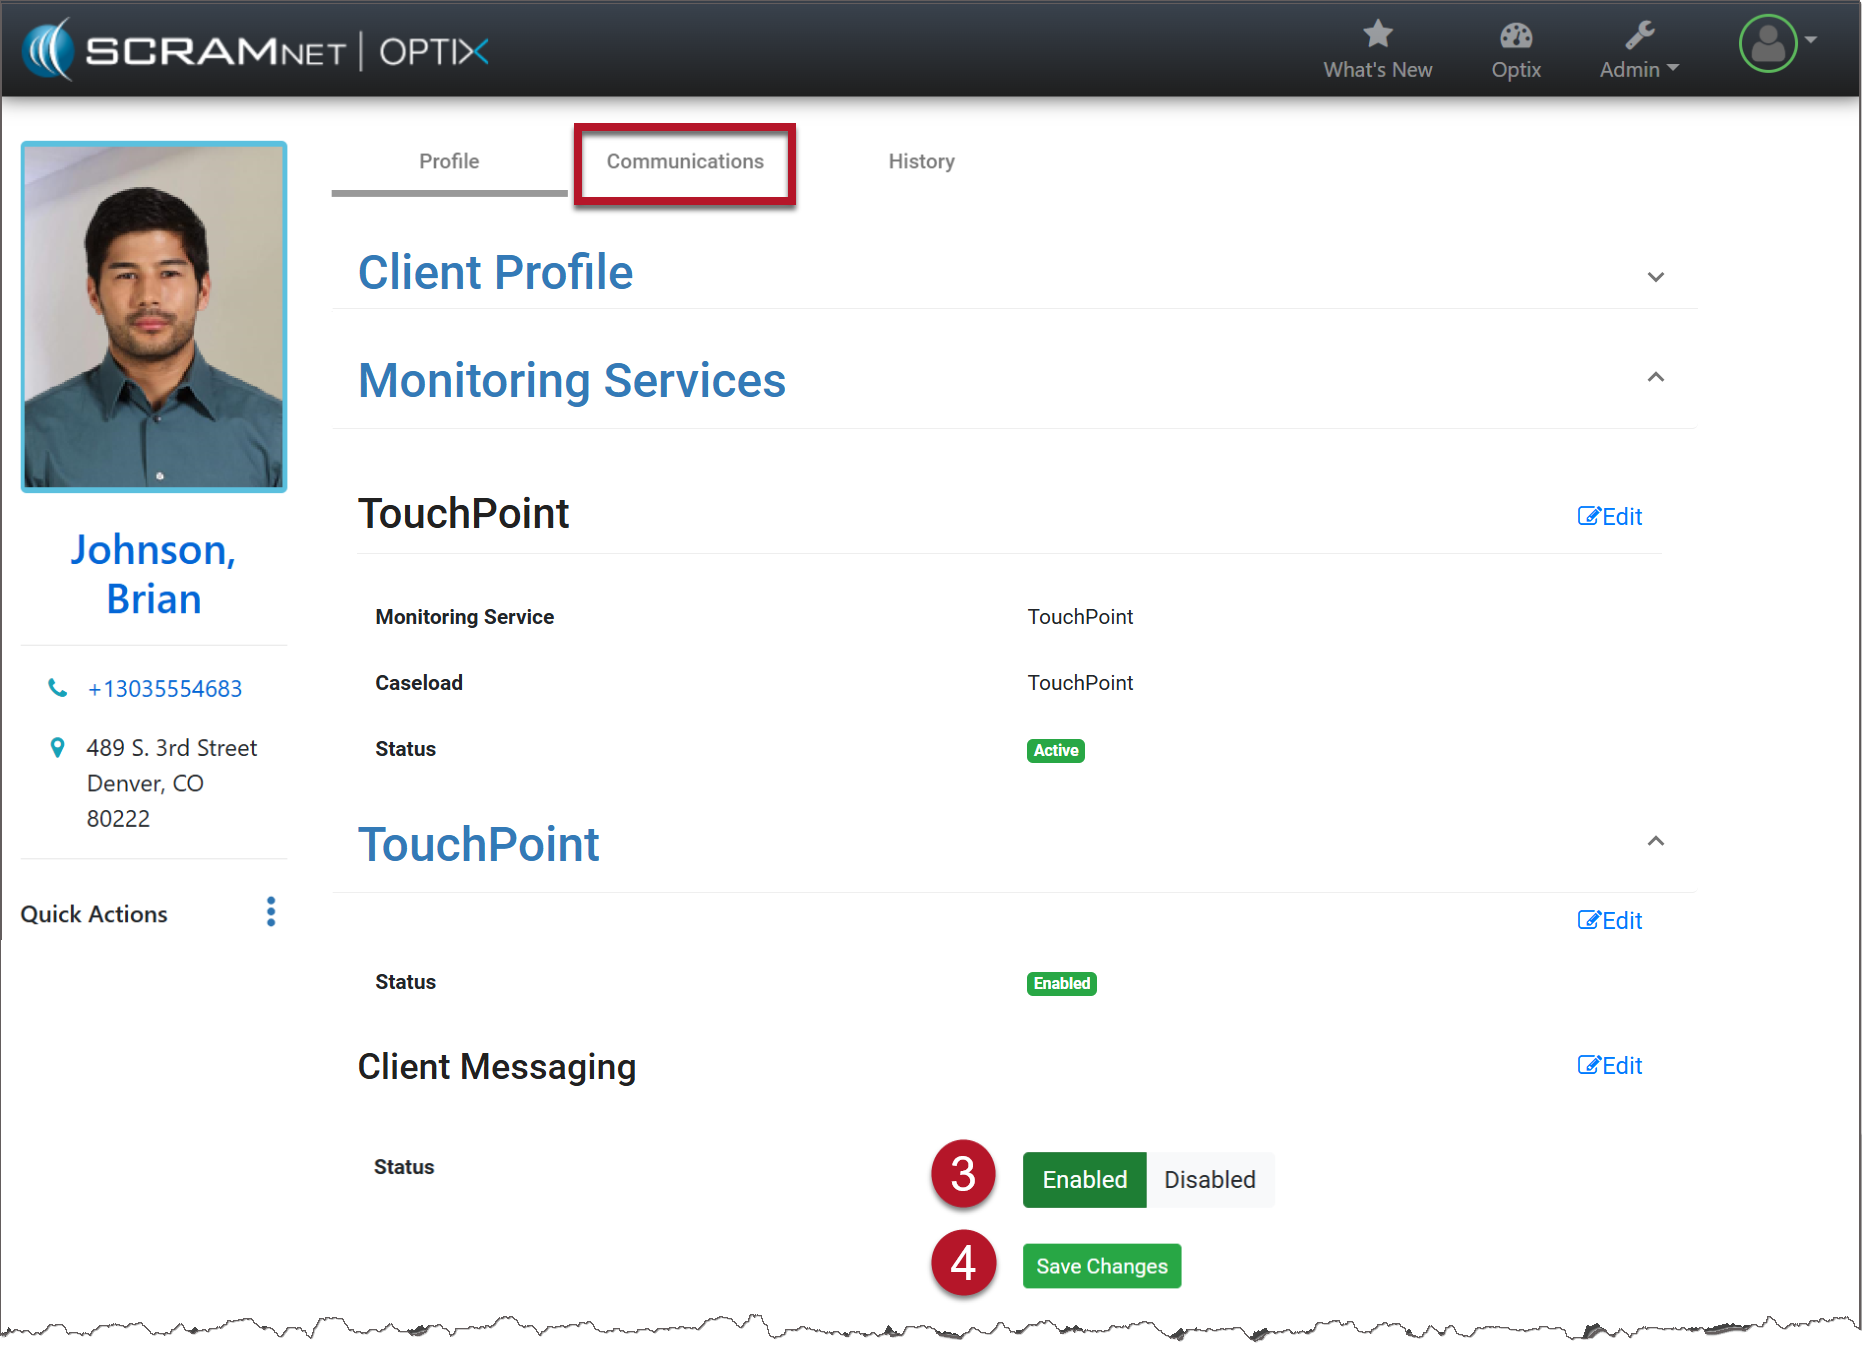
Communications Tab on the Client Profile Page
Instruct the client to download the TouchPoint app on their smartphone. For help, view Client Instructions video and document.
To disable the Client Messaging service for the client, select the Edit link and toggle the button from Enabled to Disabled.