As the Administrator or a user with Manage Caseload permissions, once your program has been enabled for SCRAM TouchPoint, you are able to create additional TouchPoint caseloads with specific monitoring services available for the clients on your program.
This article will cover:
- How to Navigate to the Manage Caseloads Page
- How to Add a New TouchPoint Caseload
- Edit/Update a Current TouchPoint Caseload
- How to Add TouchPoint to a Current Electronic Monitoring Caseload
Navigate to the Manage Caseloads Page
Option One
From the SCRAM Optix Dashboard, locate the TouchPoint tile and click the Go To TouchPoint button.
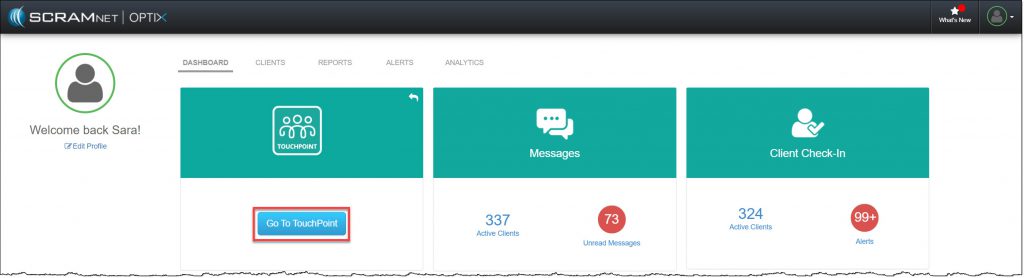
SCRAM Optix Dashboard (click to enlarge)
On the Manage TouchPoint page, select the Admin icon and then the Manage Caseloads option from the menu.
Manage TouchPoint page (click to enlarge)
Option Two
Navigate to an Optix Client Profile page, select the Admin icon and then the Manage Caseloads option from the menu.
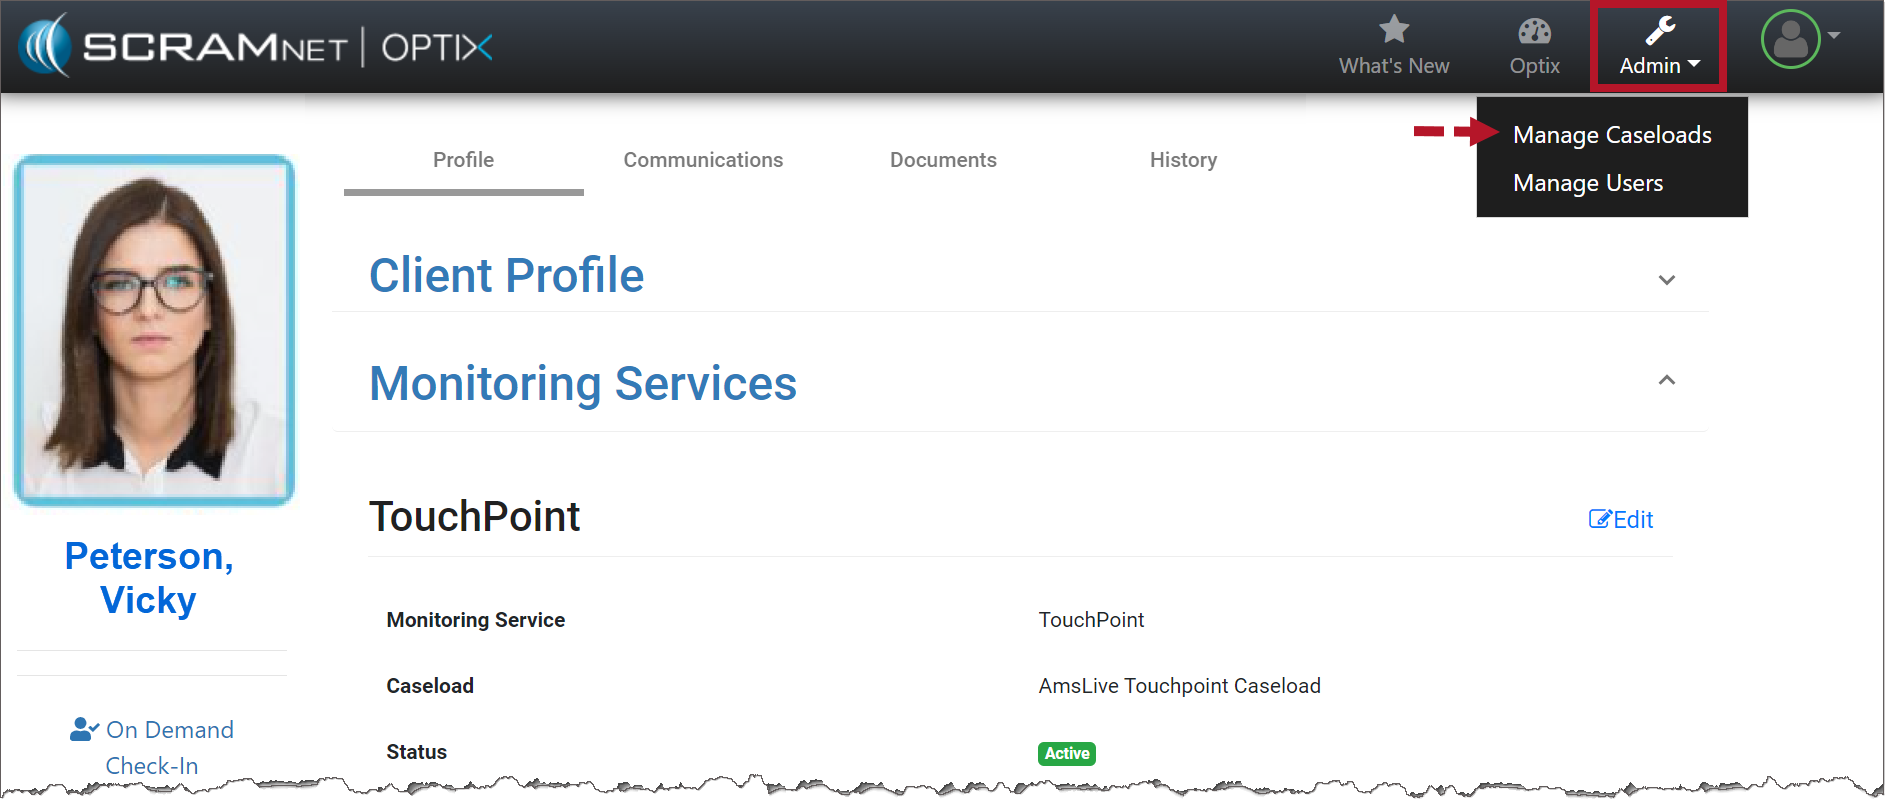
Optix Client Profile page (click to enlarge)
On the Manage Caseloads page, you will see a list of all caseloads for which you have Manage Caseload permissions to add or edit SCRAM TouchPoint, SCRAMNET and/or SCRAMNET GPS.
Click on the caseload’s name to view the Caseload Detail page.
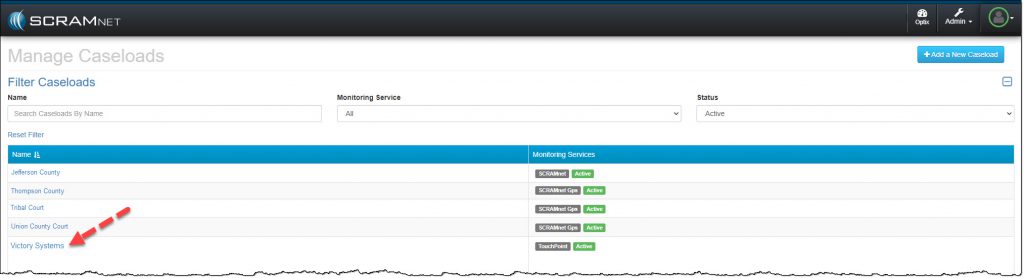
Manage Caseload page (click to enlarge)
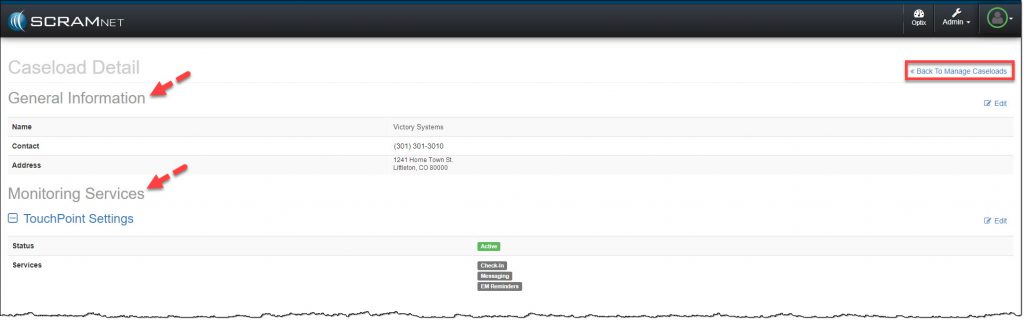
Caseload Details page (click to enlarge)
Click the <<Back to Manage Caseloads link to return to the Manage Caseload page.
Add a New Caseload
Starting on the Manage Caseloads page, click the +Add a New Caseload button.

Manage Caseloads page (click to enlarge)
- On the Add Caseload page enter in the General information for the new caseload. All fields are required.

Add Caseload page General Information Section (click to enlarge)
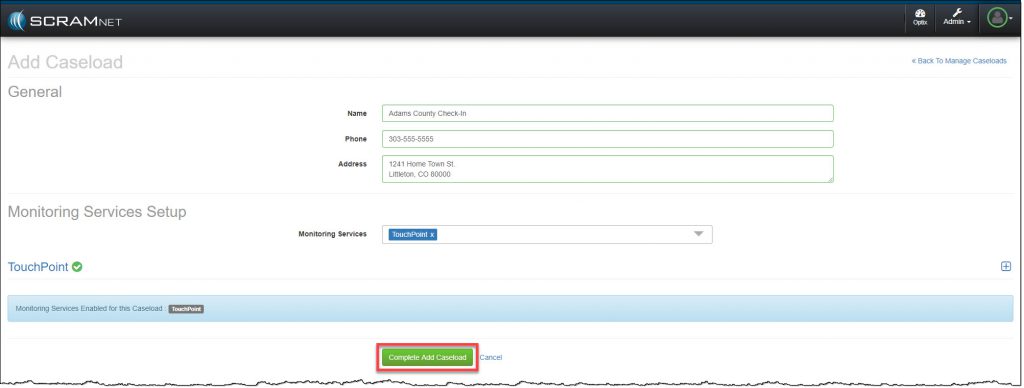
- In the Monitoring Service Setup section, select the TouchPoint option from the Monitoring Services menu.

Add New Caseload page (click to enlarge)
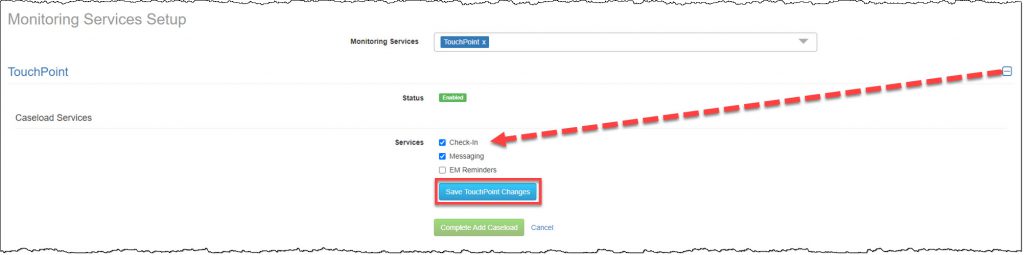
- Expand the TouchPoint node and select the client Services that will be utilized for this caseload.
Note: As a best practice, SCRAM Systems recommends you enable all TouchPoint services for all of your TouchPoint caseloads. Keeping the services consistent across all caseloads ensures there will not be any issues when you transfer a client to a different TouchPoint caseload for monitoring.
- Once all selections have been made, click the Save TouchPoint Changes button.
Add New Caseload page (click to enlarge)
- Finally, click the Complete Add Caseload button.
Add New Caseload page (click to enlarge)
On the Caseload Detail page, the general information for the new caseload will be displayed, and the Monitoring Services section will display a message of, Processing Request. This may take a few minutes. Once the request completes, the Monitoring Services status will update to Active and the selected services will be displayed.
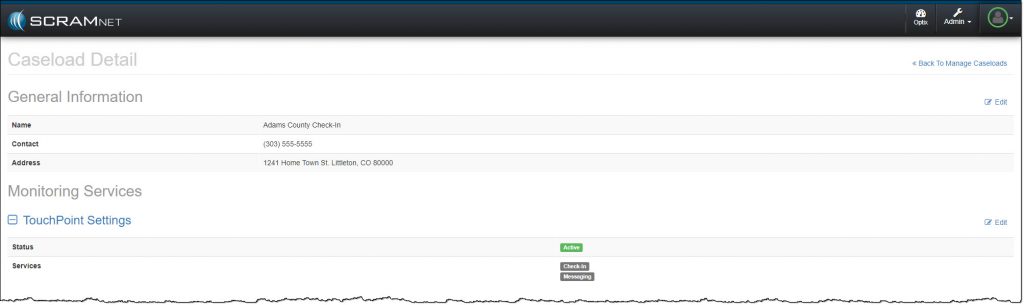
Caseload Detail page (click to enlarge)
Note: The Documents service is available as a default on all TouchPoint caseloads.
Edit/Update a Current TouchPoint Caseload
Starting on the Manage Caseloads page, click on the caseload you wish to edit or update.
Manage Caseload page (click to enlarge)
On the Caseload Detail page,
- To update the General Information displayed, select the Edit link to the right of that section.
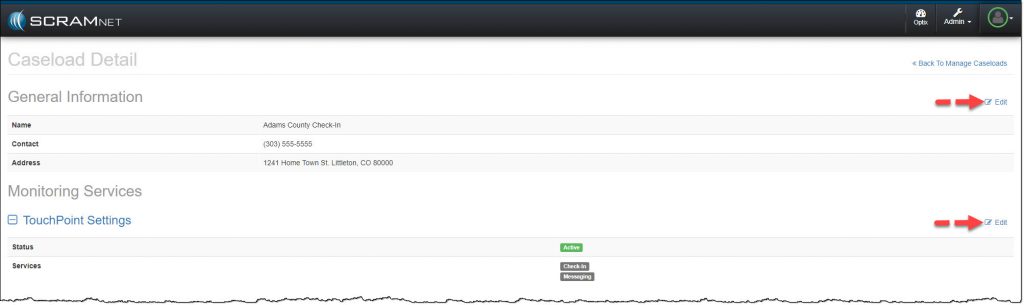
Caseload Detail page (click to enlarge)
- Make any changes and select the Save Changes button.
Caseload Detail page General Section (click to enlarge)
- To update the Monitoring Services section, select the Edit link to the right of that section.
- To disable the TouchPoint caseload, toggle the status button to Disabled.
- To edit the list of services available for the caseload, uncheck or check the desired services.
- After all changes have been completed, click the Save TouchPoint Changes button.
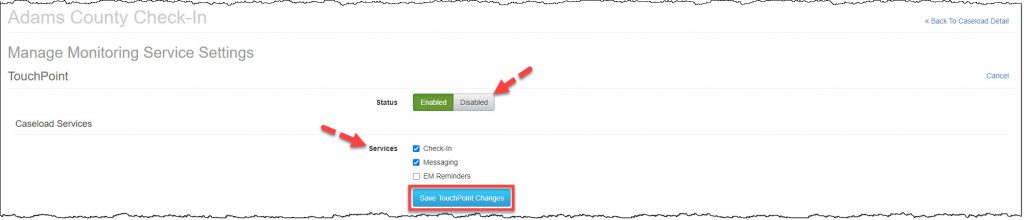
Caseload Detail page (click to enlarge)
Note:
- If the caseload has active clients, the Disabled button will not display. In addition, you will not be able to remove any services associated to an active client. You may add additional services to a caseload at any time.
- As a best practice, SCRAM Systems recommends you enable all TouchPoint services for all of your TouchPoint caseloads. Keeping the services consistent across all caseloads ensures there will not be any issues when you transfer a client to a different TouchPoint caseload for monitoring.
Add TouchPoint to a Current Electronic Monitoring (EM) Caseload
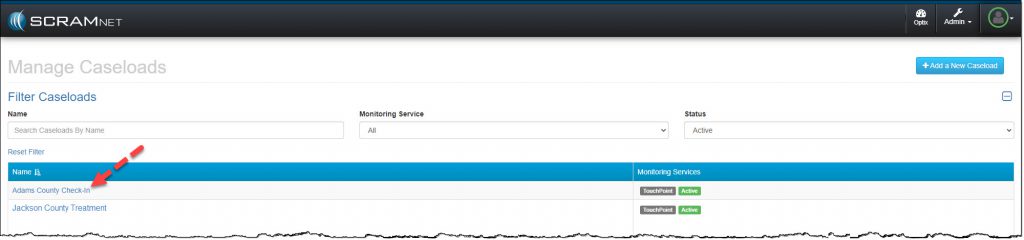
On the Manage Caseloads page, you will see a list of all caseloads you have Manage Caseload permissions to add or edit for SCRAM TouchPoint, SCRAMNET and SCRAMNET GPS.
Click on the caseload’s name, to view the Caseload Detail page. In this example, a SCRAMNET Caseload is selected.
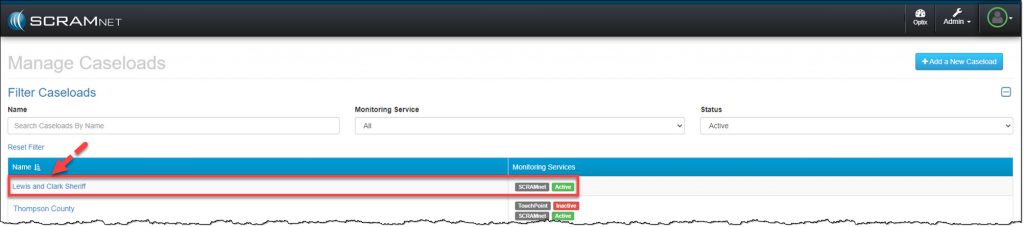
Manage Caseload page (click to enlarge)
For a user with Admin and Manage Caseload permissions, when you select the Edit link next to the General Information section or the Edit link next to the SCRAMNET Settings, you are navigated to the Monitoring page for that caseload in SCRAMNET.
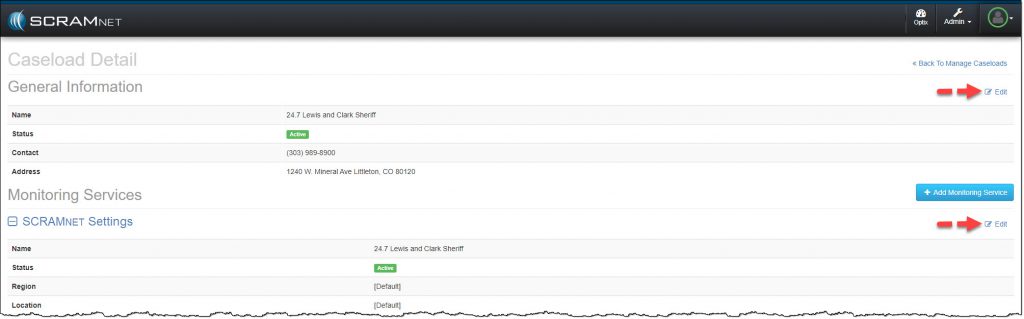
Caseload Detail page (click to enlarge)
From here, update the SCRAMNET caseload’s information and services.
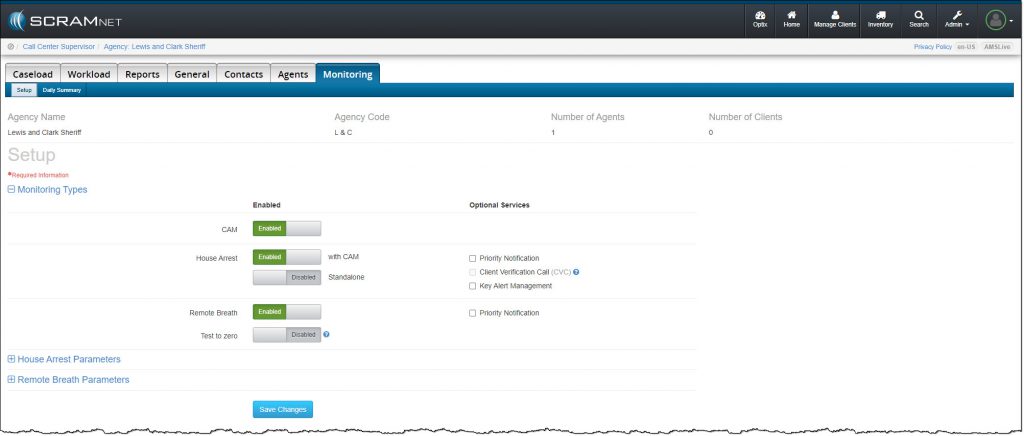
SCRAMNET Agency Monitoring Tab (click to enlarge)
To add TouchPoint as a monitoring service to this EM caseload,
- Click the +Add Monitoring Service button.
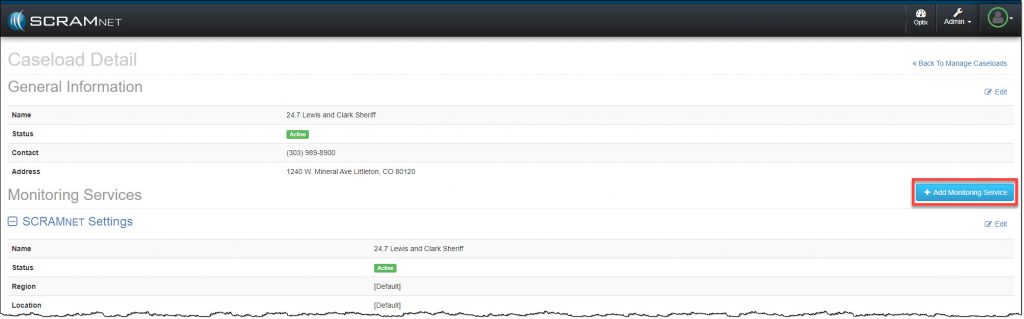
Caseload Detail page (click to enlarge)
- From the Monitoring Services menu, select the TouchPoint option.
Caseload Detail page Monitoring Services (click to enlarge)
- Expand the TouchPoint information node.

Caseload Detail page (click to enlarge)
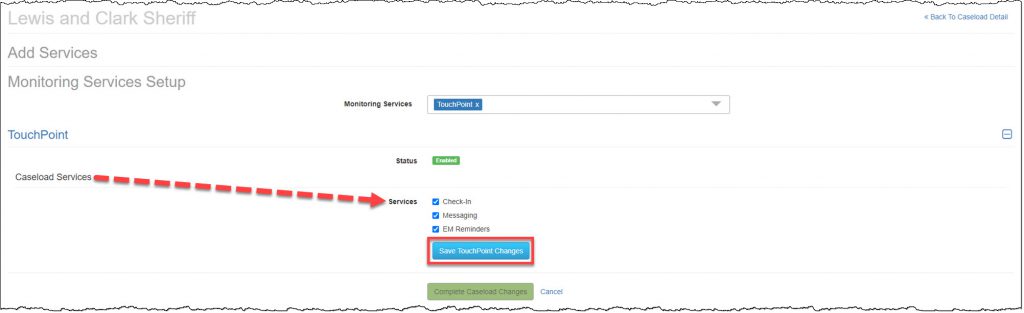
- Select the Caseload Services.
Note: As a best practice, SCRAM Systems recommends you enable all TouchPoint services for all of your TouchPoint caseloads. Keeping the services consistent across all caseloads ensures there will not be any issues when you transfer a client to a different TouchPoint caseload for monitoring.
- Click the Save TouchPoint Changes button.
Caseload Detail page (click to enlarge)
- Once all selections have been made, click the Complete Caseload Changes button.
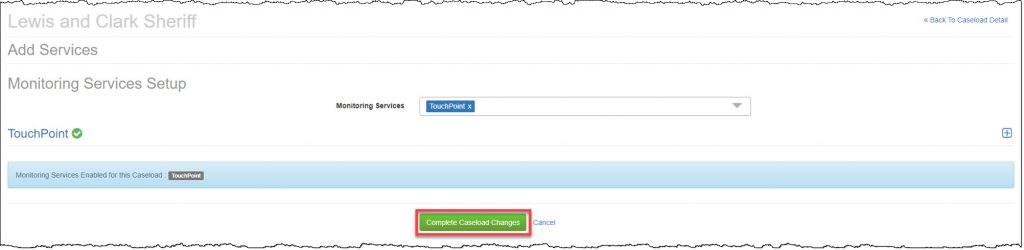
Caseload Detail page (click to enlarge)
You will see a banner stating, Processing Request. This may take a few minutes.

Caseload Detail page
Once the request has been processed, the TouchPoint Settings will be displayed on the Caseload Detail page and the Manage Caseloads page.
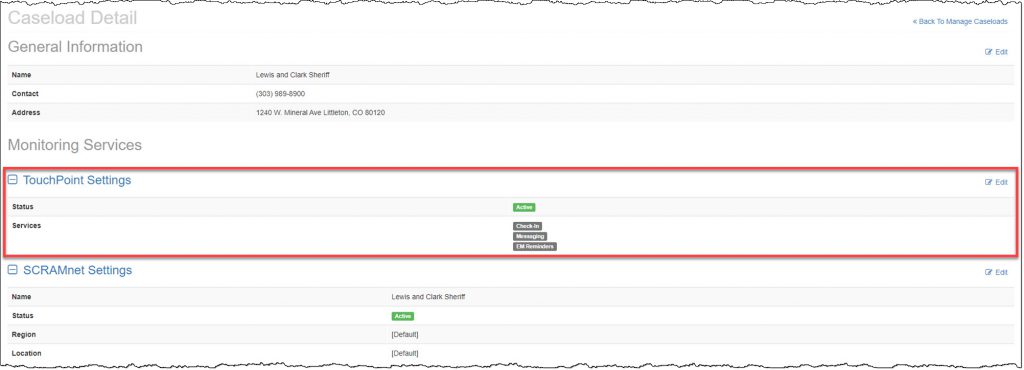
Caseload Detail page (click to enlarge)
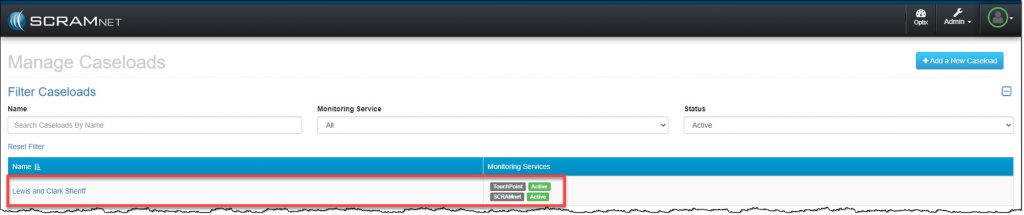
Manage Caseloads page (click to enlarge)