Once a client completes a check-in, the system will display the Status of that check-in. From the client’s Profile page, select the History tab, then the Check-In tab.
The status will display as:
- Successful. No further action is needed.
- New. Further action is needed because:
- The client missed the check-in.
- The system was unable to match the photo taken to the baseline image or gallery.
- Response(s) to question(s) from the client requires acknowledgement.
- No GPS location information was provided during the check-in.
- A failed Biometric Verification occurred.
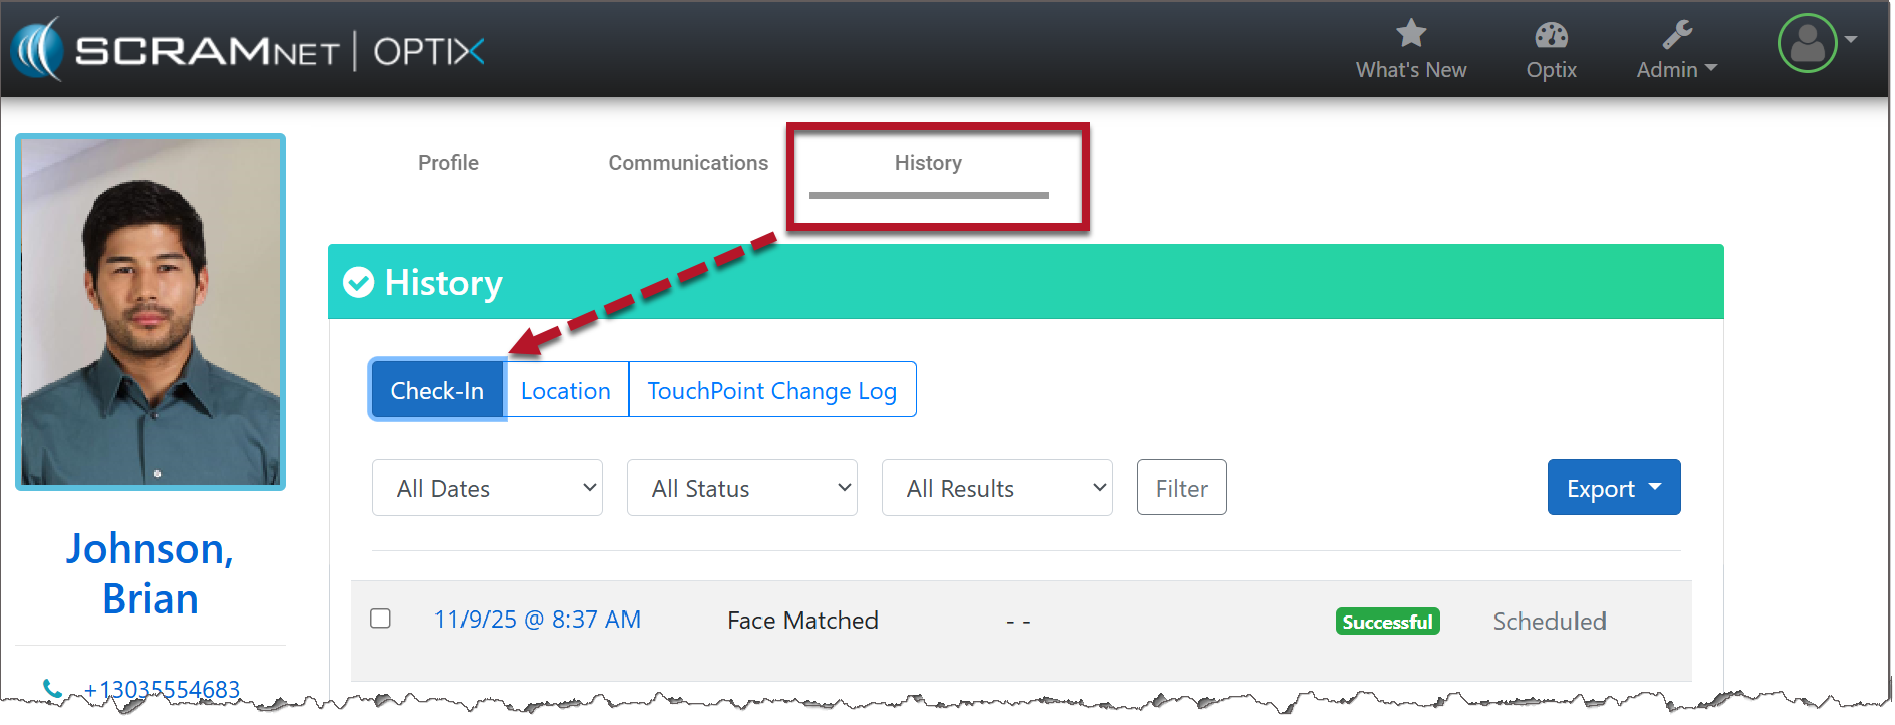
TouchPoint Client Check-In History page (click to enlarge)
Notification
There are two areas in Optix that will alert you to a check-in that requires further action or has been missed by your client.
- The Check-In tile on the Optix Dashboard.
-
- This tile will display the number of Active Clients enabled for Client Check-In and the number of Alerts that need your attention.
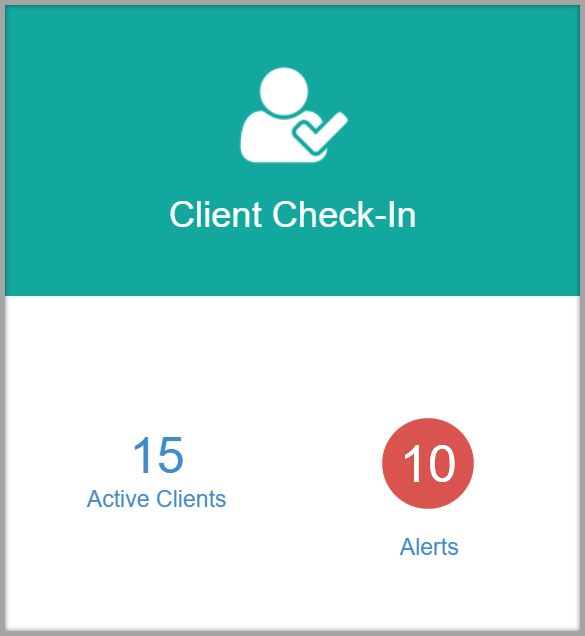
Optix Dashboard Client Check-In tile (click to enlarge)
- The Clients tab in Optix.
-
- Under the Actions column, a Missed Check-In or Check-In Pending Review notification will indicate further review is needed.
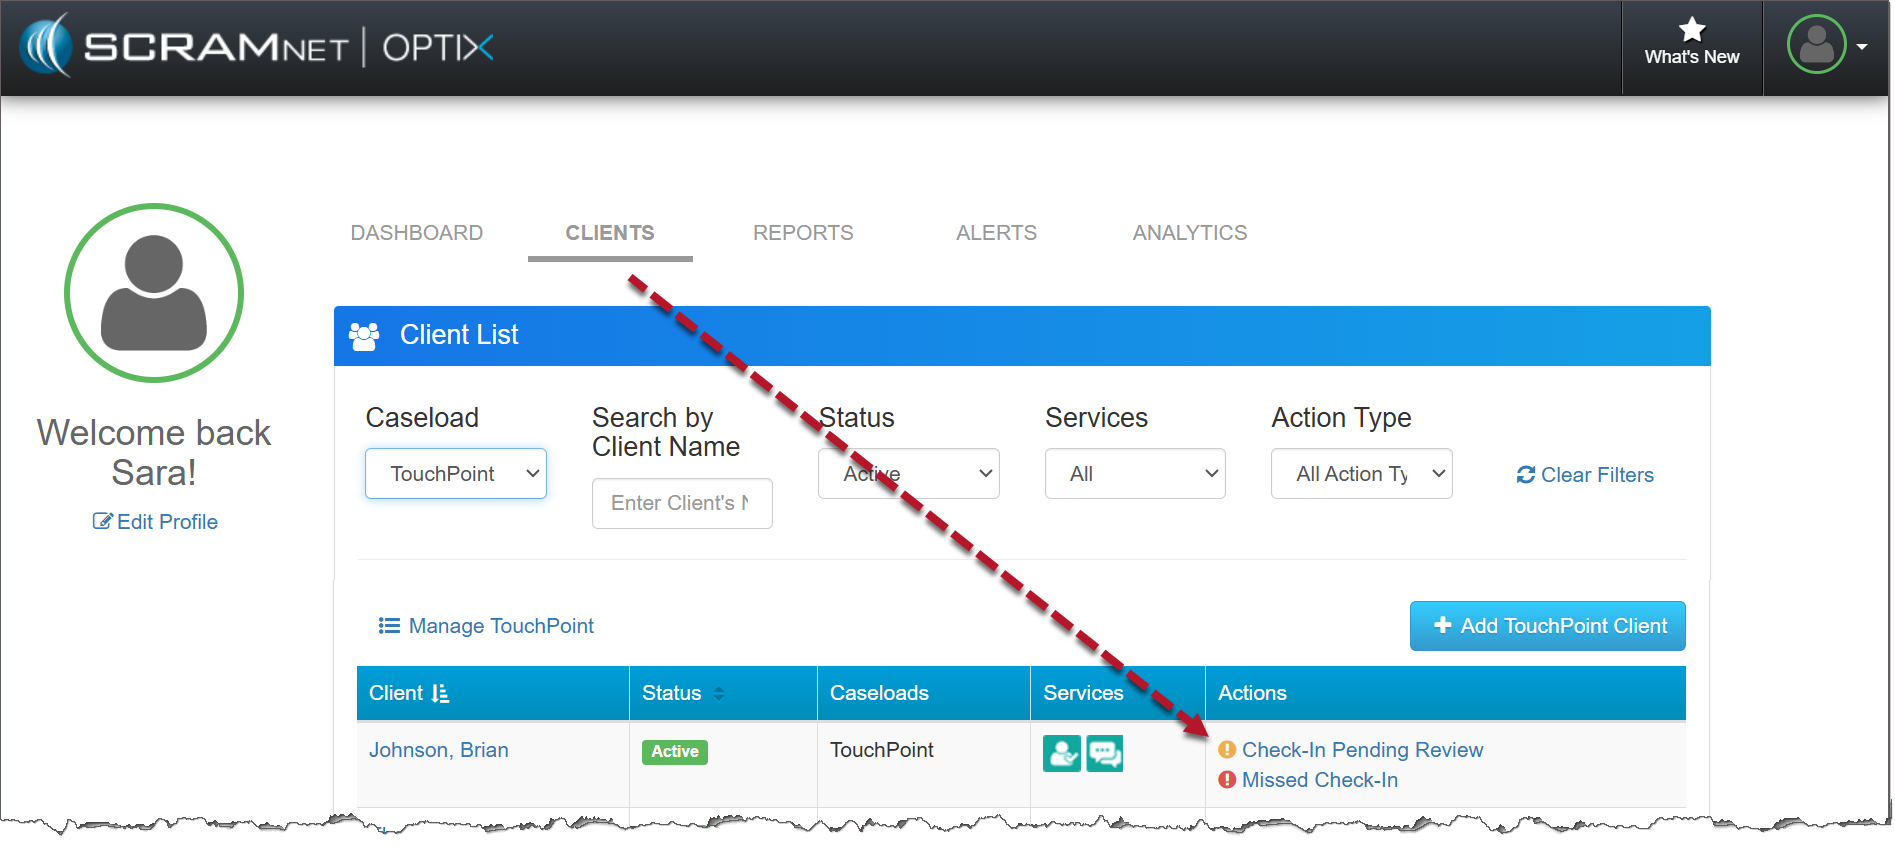
Optix Clients page (click to enlarge)
Navigate to the Client’s Check-In History Page
Start by either selecting the Alerts link on the Check-In tile or simply navigate directly to the Clients tab.
Next, select the Missed Check-In or Check-In Pending Review link under the Actions column to navigate directly to the client’s Check-In History page.
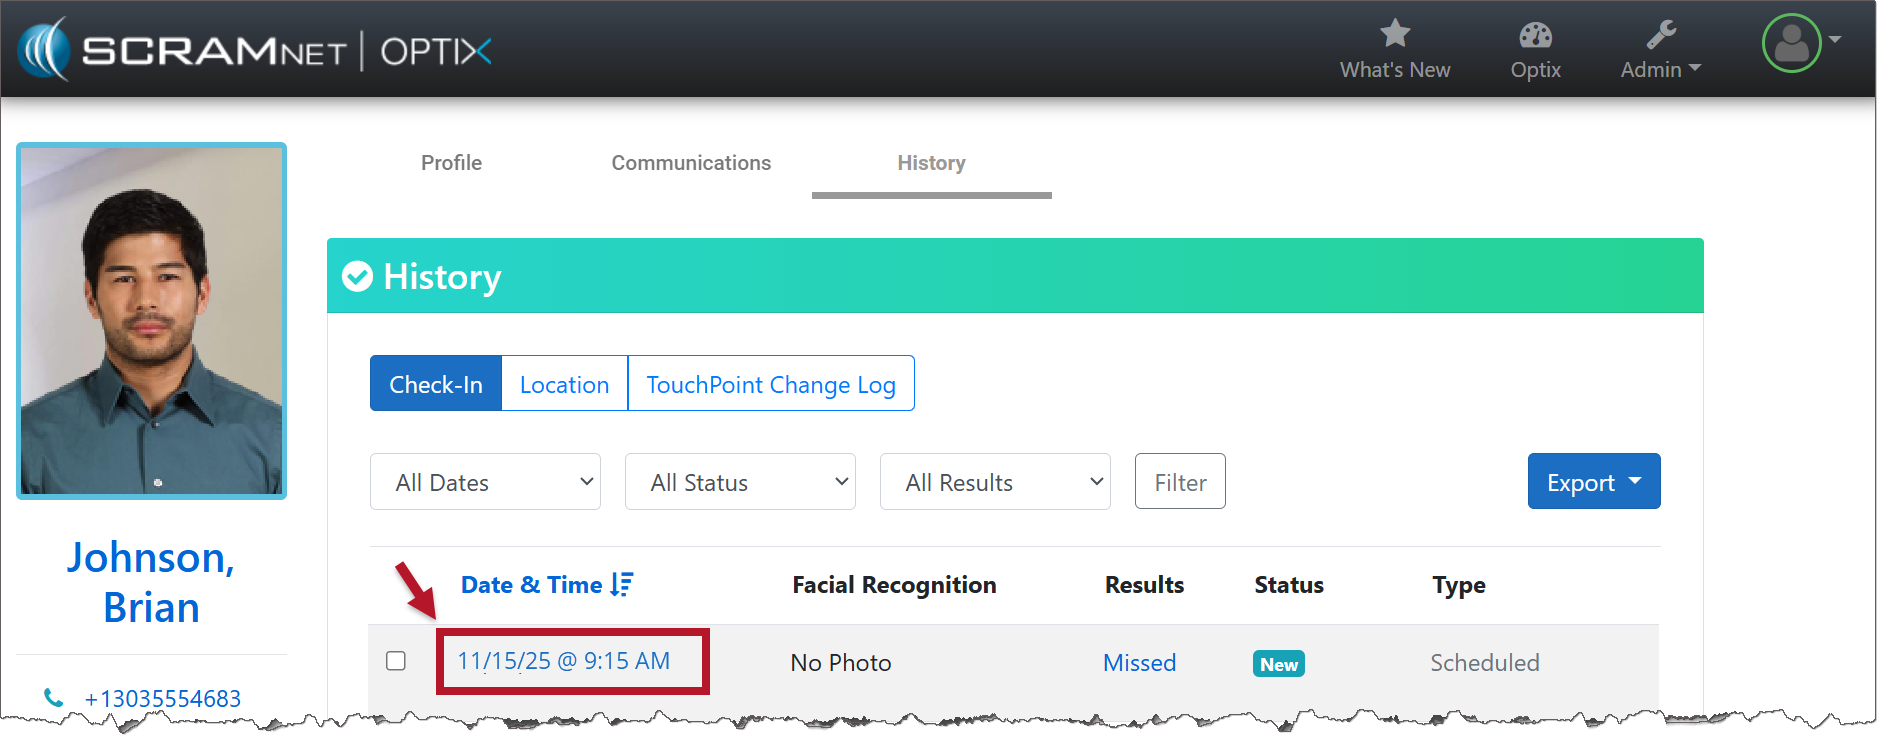
The Check-In History page displays the:
- Date and Time stamp for each check-in
- Facial Recognition results
- Face Matched
- No Photo
- AFI Pending Review
- Baseline Photo Set
- Results of the Check-In
- Missed
- Pending Photo Review
- Response to Questions
- No GPS Location
- Biometric Verification Unsuccessful
- Status
- New
- Successful
- In Process
- Resolved
- Type Of Check-In
- Scheduled
- Client Initiated
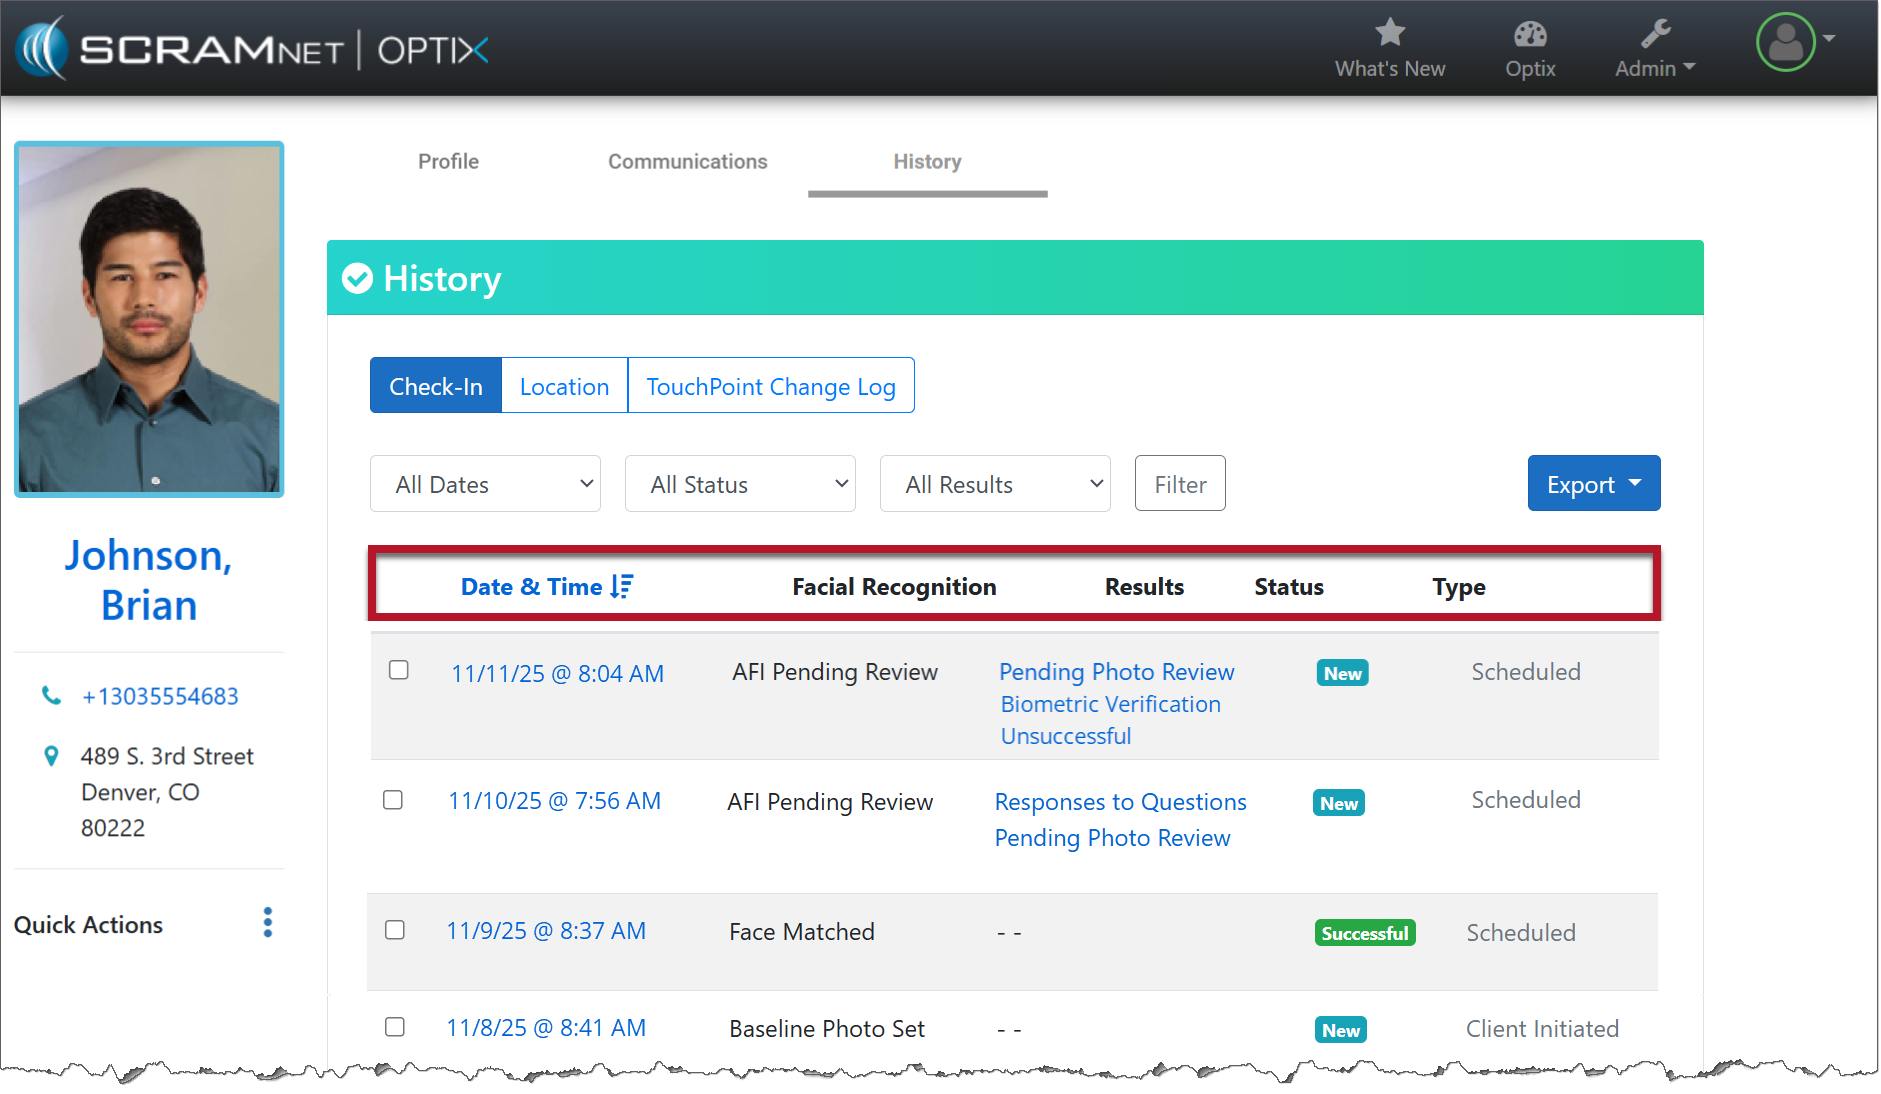
TouchPoint Client Check-In History page (click to enlarge)
Managing a Missed Client Check-In
A Missed Check-In indicates the client did not complete the check-in within the scheduled check-in window.
To manage the Missed Check-In, select the Date & Time hyperlink.
TouchPoint Client Check-In History page (click to enlarge)
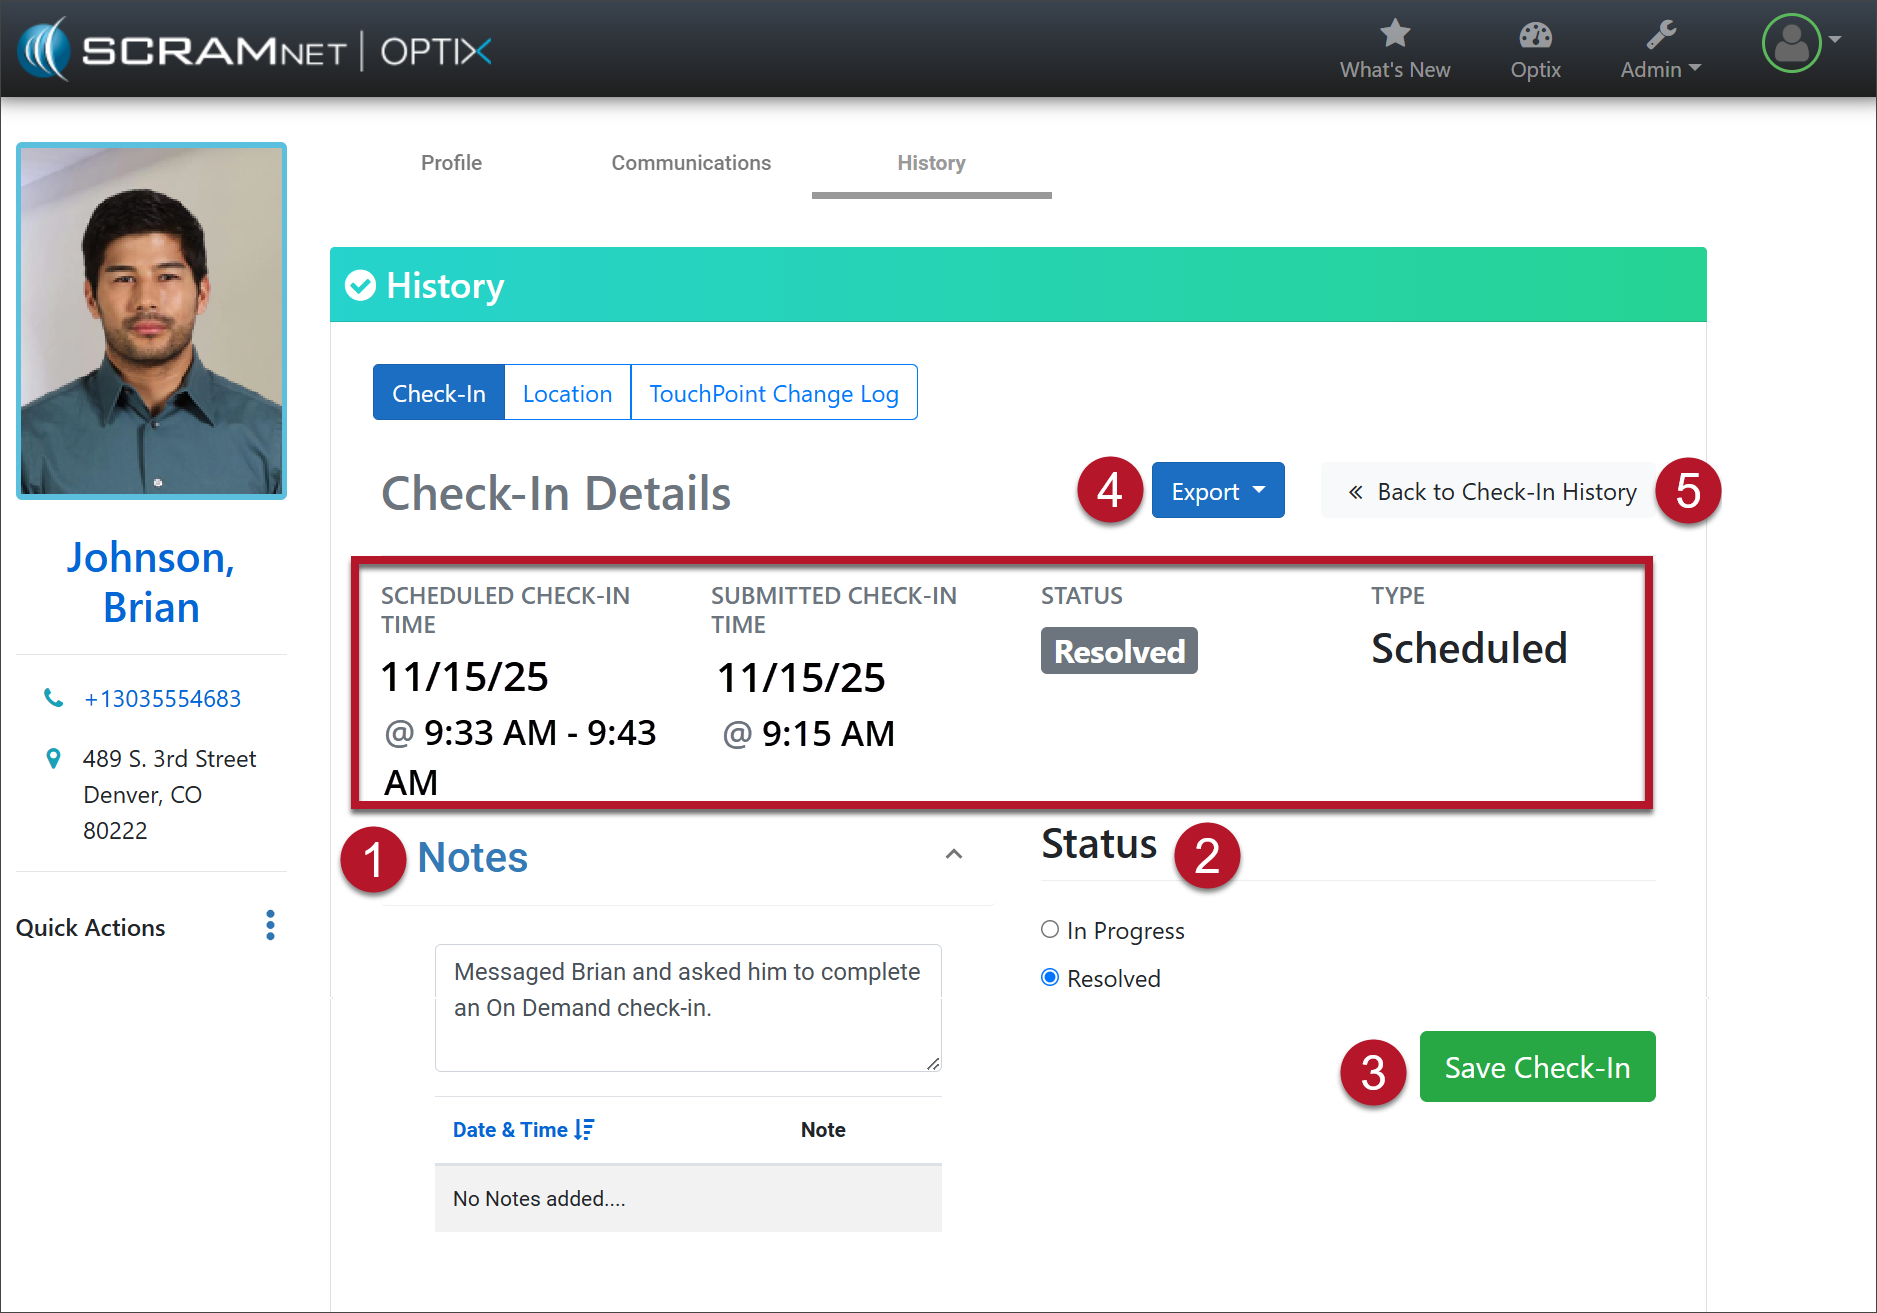
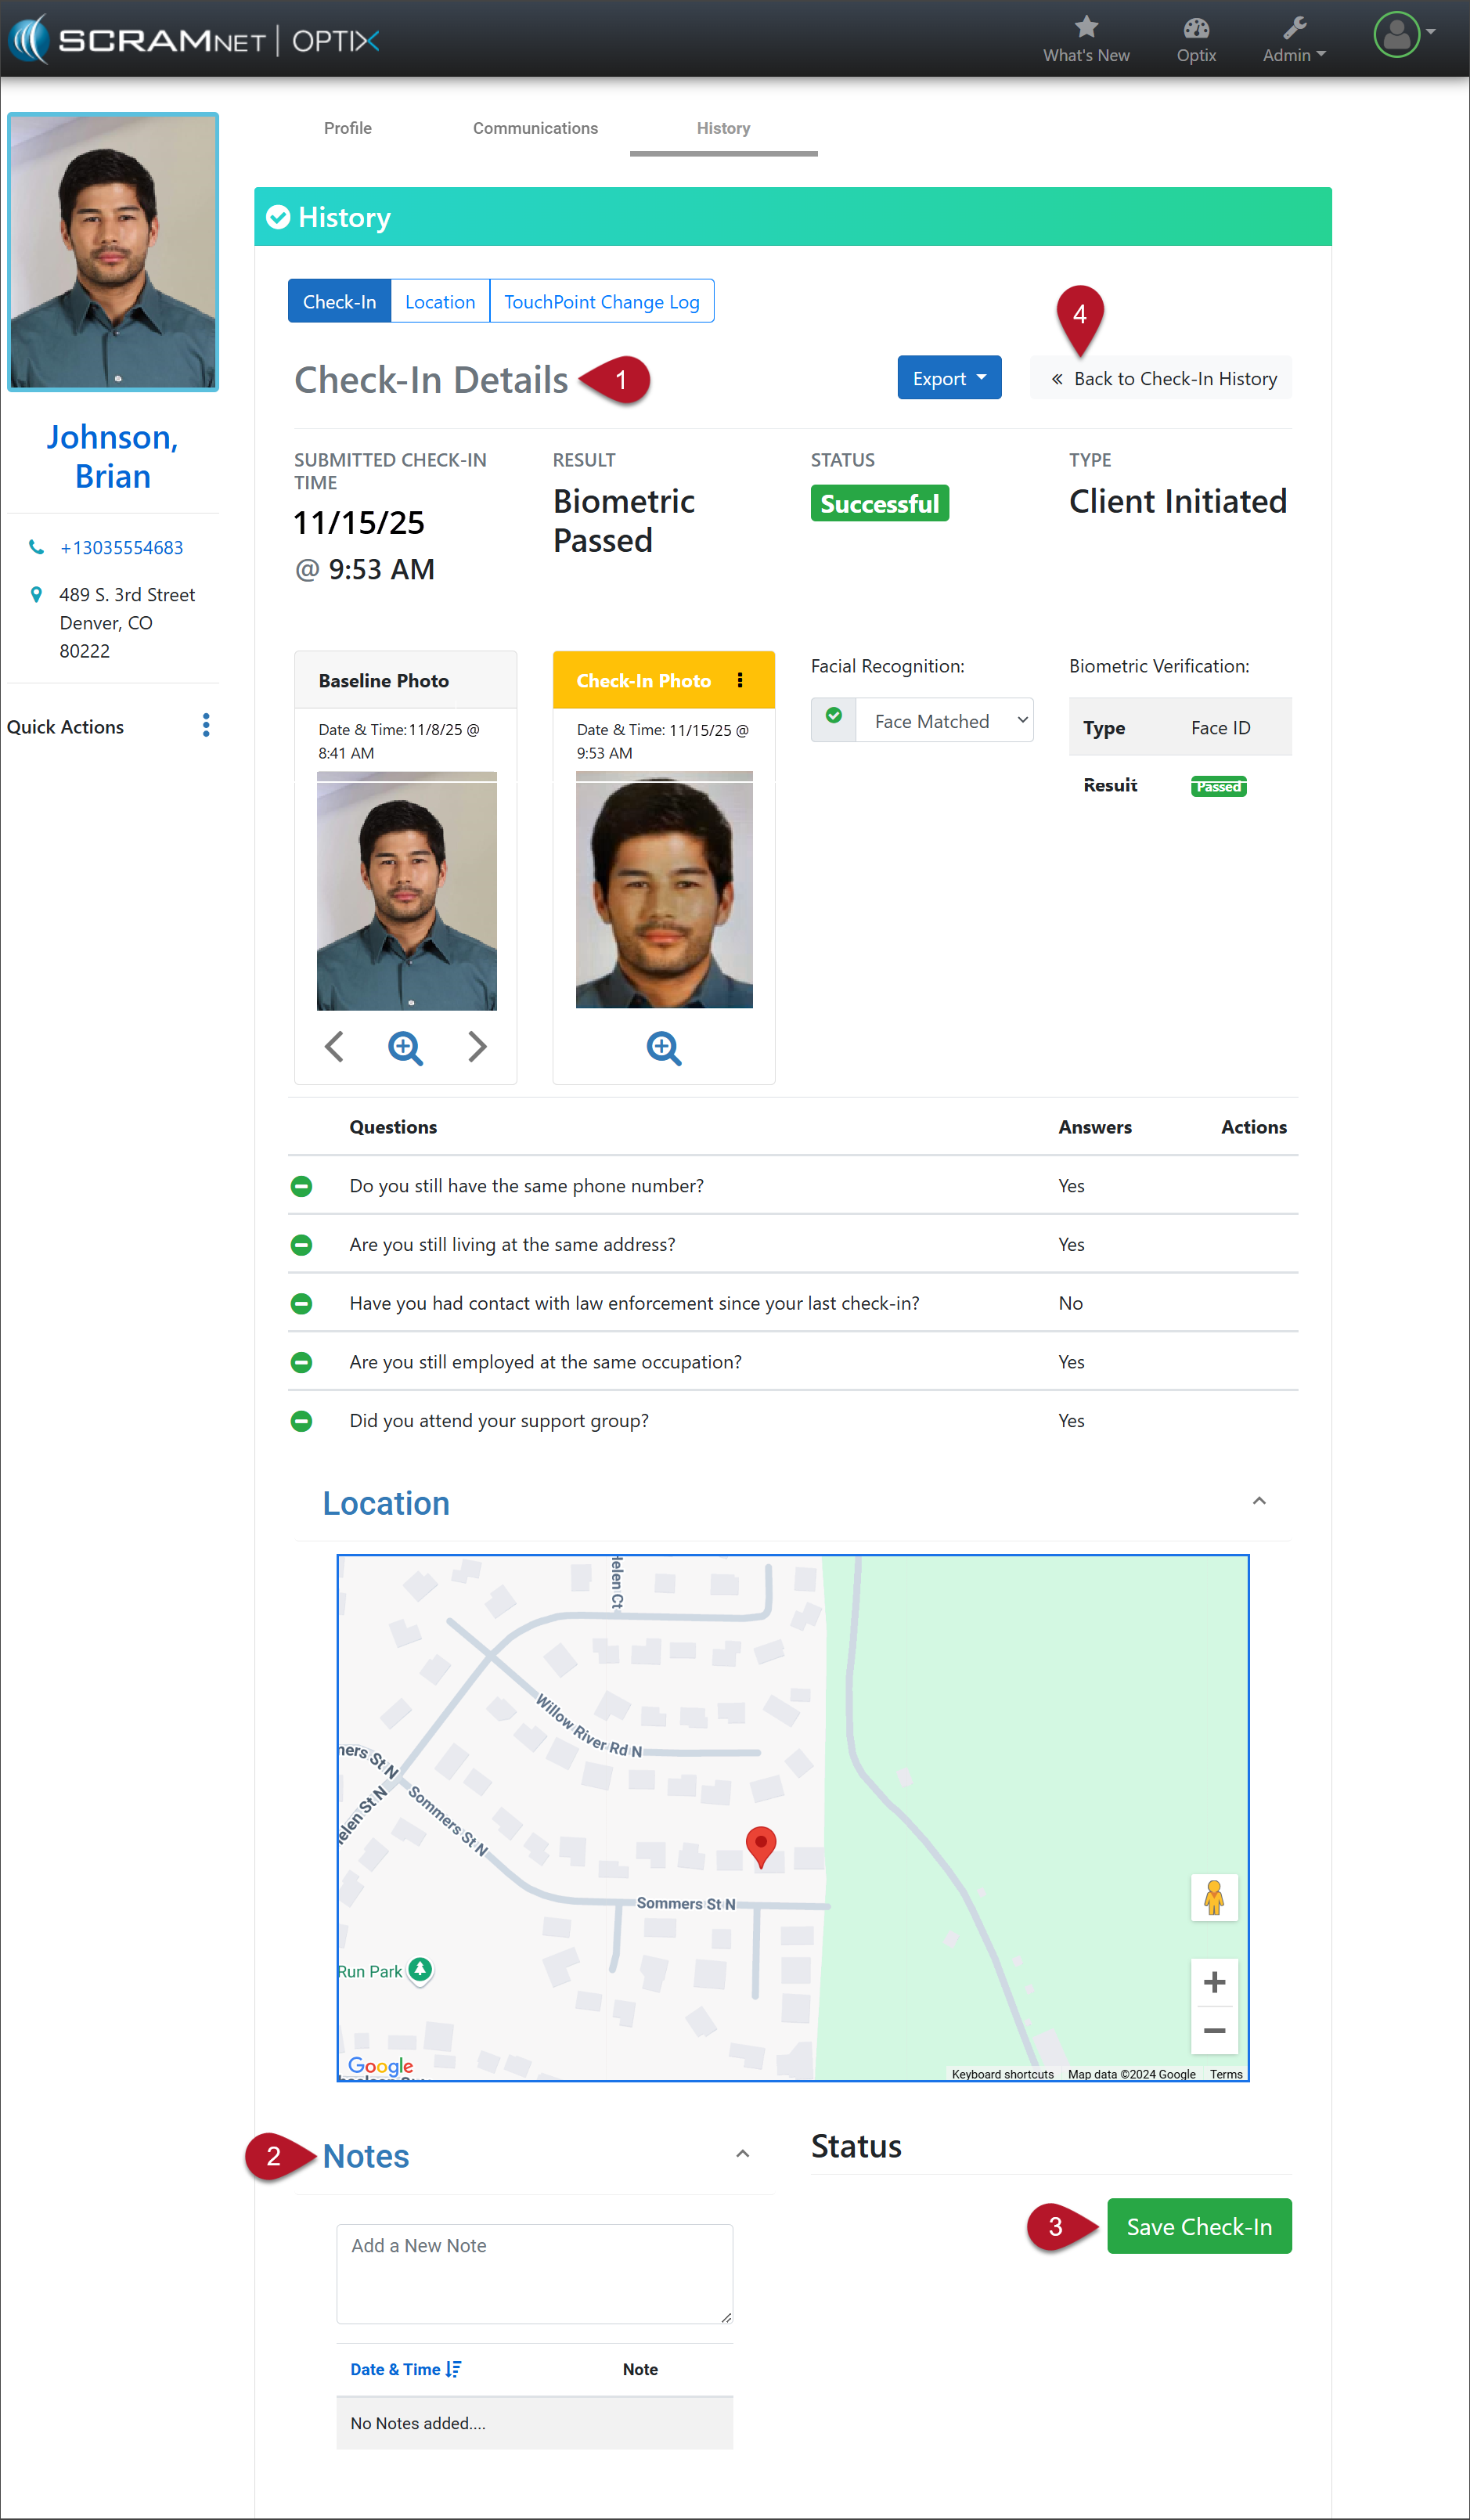
Check-In Details
View the details for the check-in:
- Scheduled Check-In Time
- Submitted Check-In Time (Displays the end of the check-in window time frame)
- Status
- Type of Check-In
Final Steps
- Add any Notes.
- Update the Status to:
- In Progress (Additional actions are required either by the client or agent.)
- Resolved (No further action is required.)
- Select the Save Check-In button.
- To save a copy for your records, choose Export, then PDF or Print.
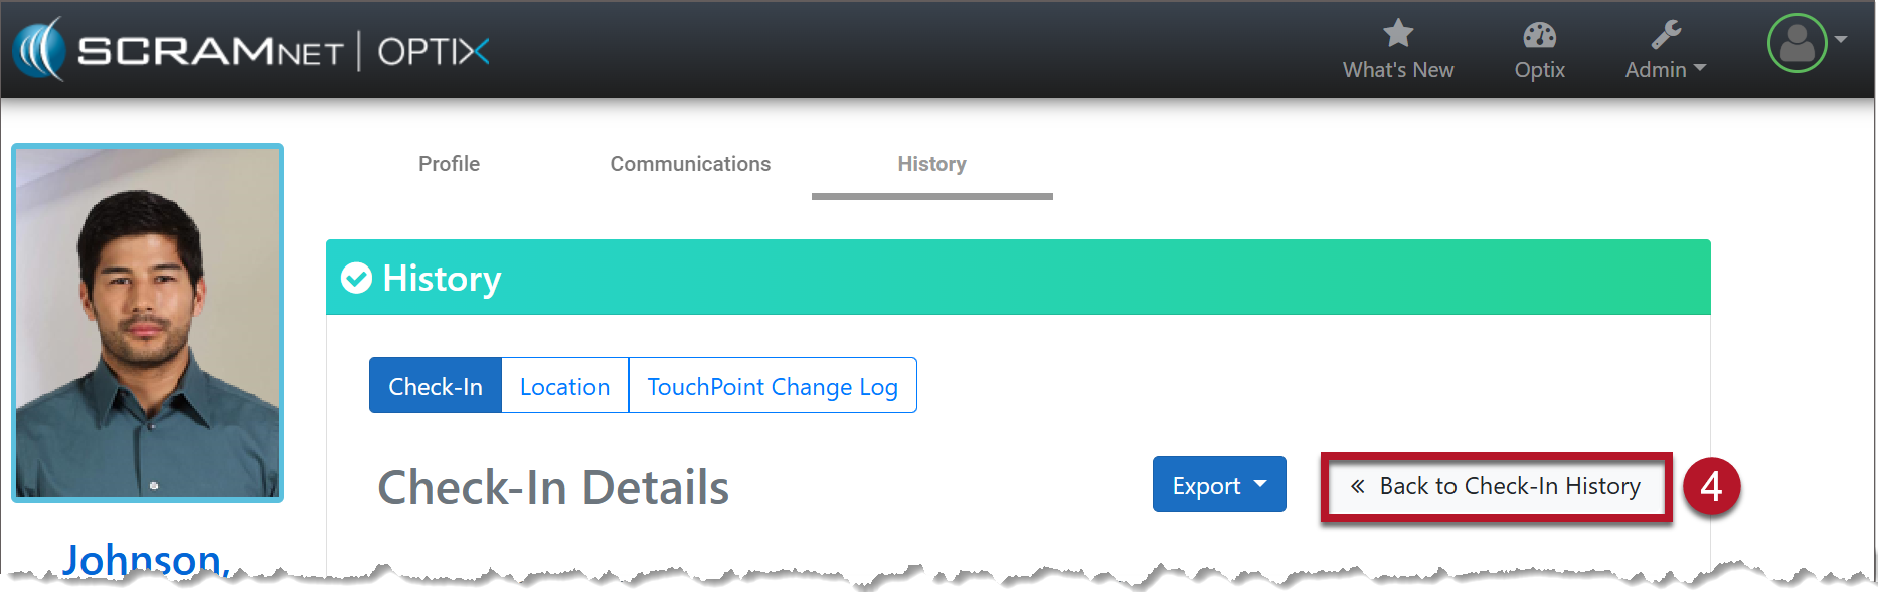
- Select <<Back to Check-In History.
TouchPoint Check-in Details page (click to enlarge)
The Check-In History page will reflect the updated status. Updating the status also removes the alerts from the Optix Dashboard Client Check-In tile and Actions column on the Clients tab.
Managing a Check-In Pending Review
When managing a Check-In Pending Review alert, begin by viewing the specific alert results under the Results column. It is possible to have multiple alert results for one check-in.
Next, select the Date & Time hyperlink for the check-in.
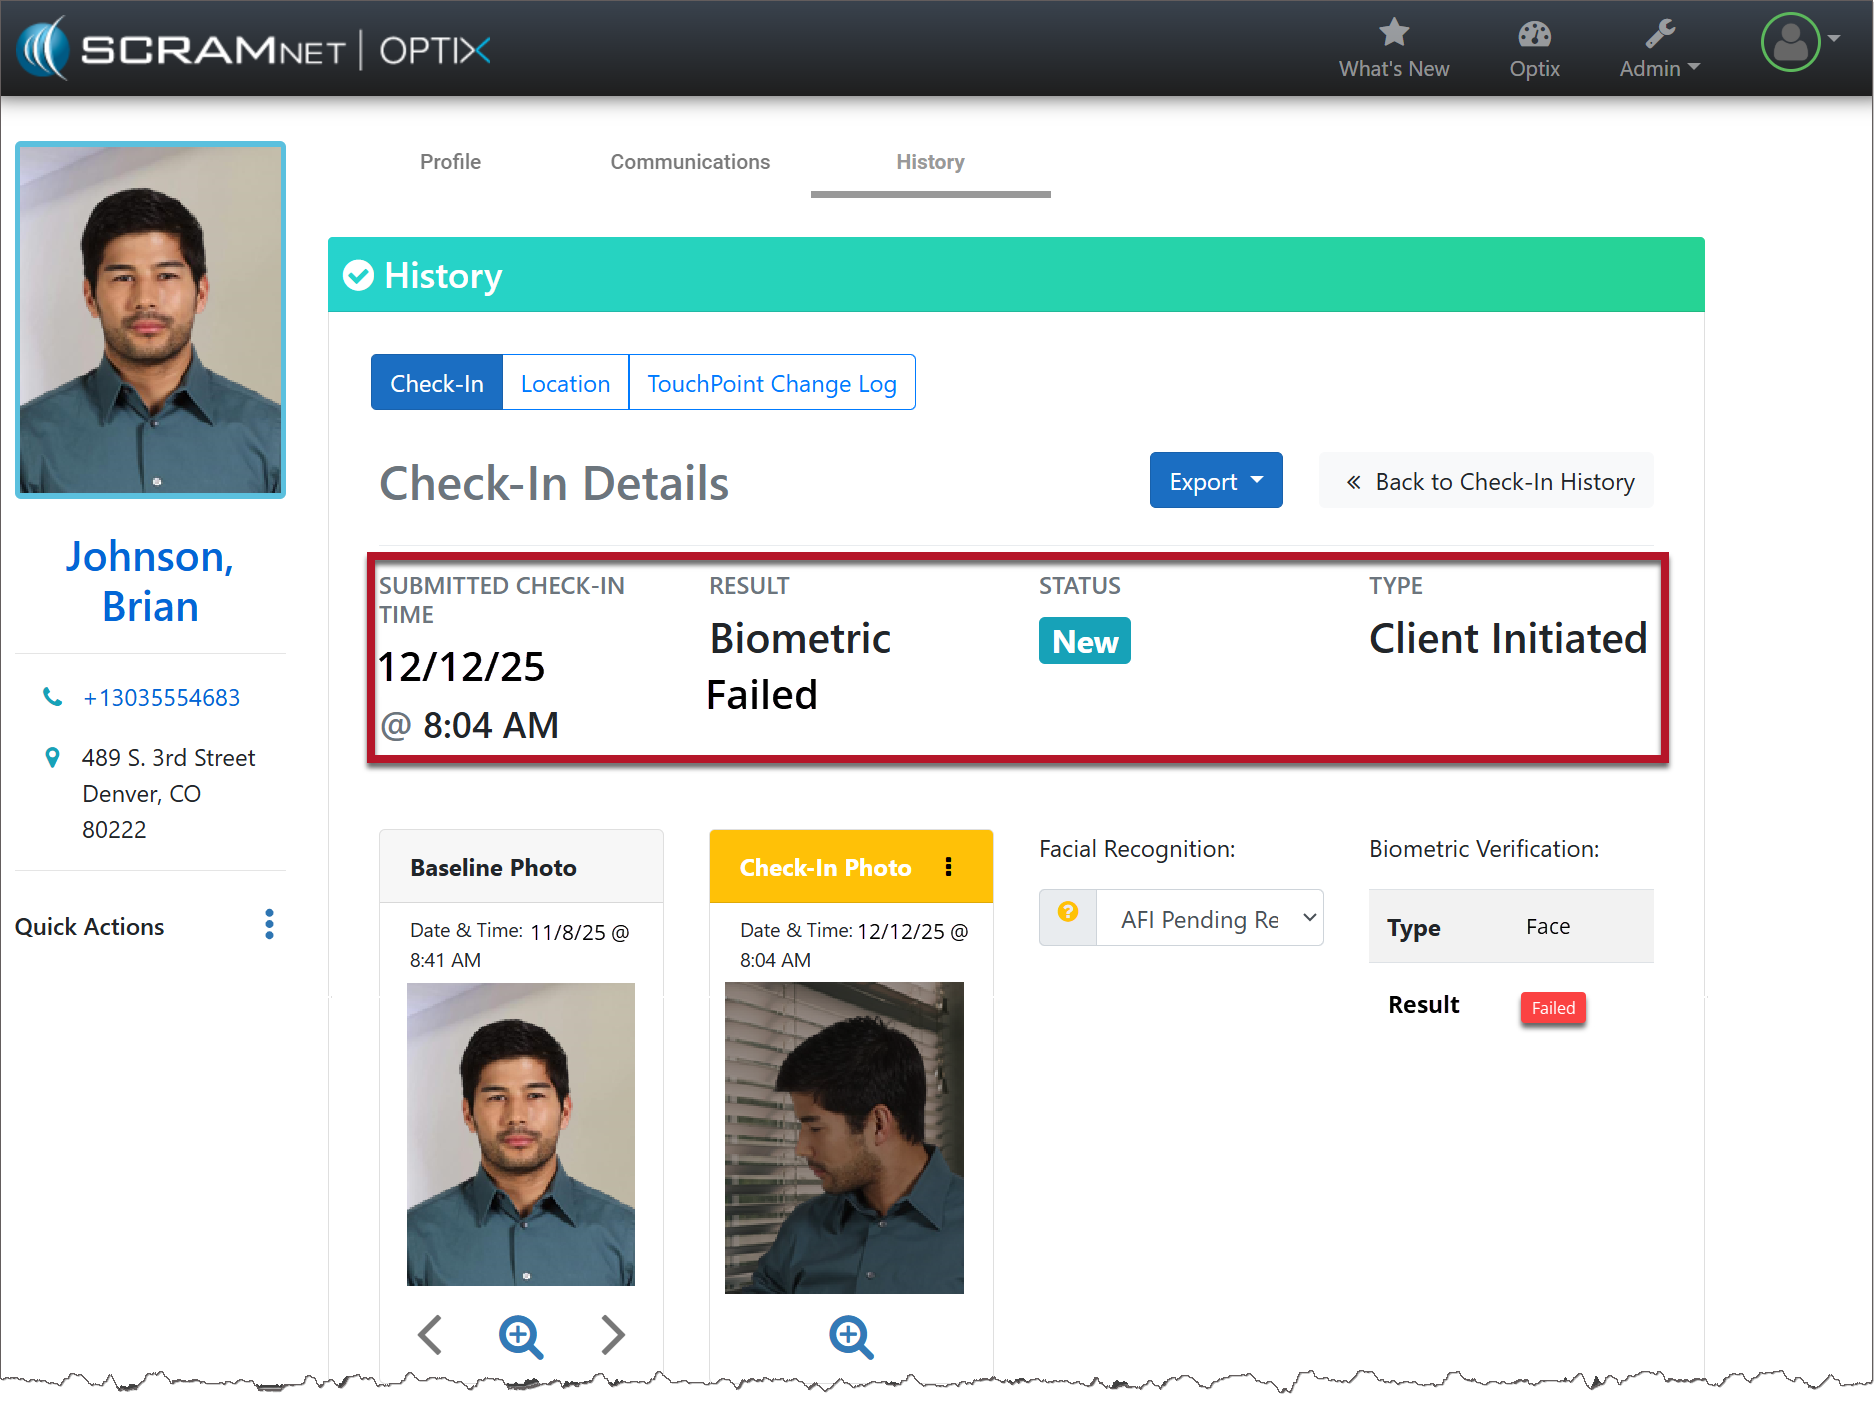
Section One: Check-In Details
View the details for the Check-In.
| Scheduled Check-In Time (if applicable) | Submitted Check-In Time |
| Status | Type of Check-In |
TouchPoint Client Check-In Details page (click to enlarge)
Section Two: Enrollment/Check-In Photo and Biometric Verification Results
Review the Enrollment Photo and Check-In photo, and then update the Facial Recognition status.
- Select the dropdown menu.
- Select the option of either Face Matched or Circumvention Identified.
Review the Biometric Verification information. The type of biometric verification is identified, as well as the results.
- Face ID
- Touch ID
If the client’s smartphone does not support Biometric Verification, you will see a message of Not Enabled.

TouchPoint Client Check-In Details page (click to enlarge)
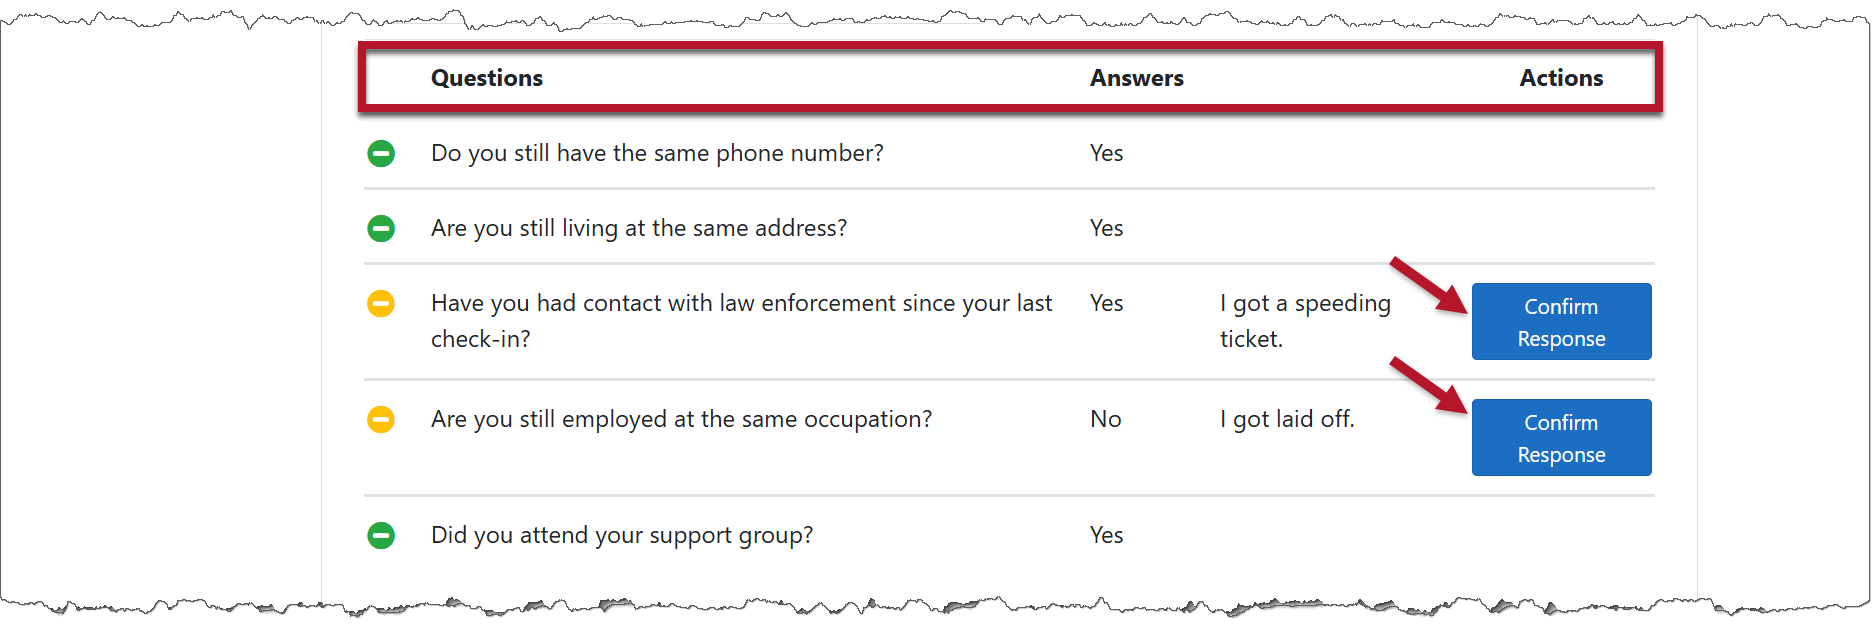
Section Three: Questions
The responses selected by the client during the check-in are displayed under the Answers column. When a question is not answered as anticipated and/or the client does not provide additional information when prompted, the supervising authority will need to acknowledge the information was received.
To acknowledge the information as received, select the Confirm Response button under the Actions column.
Any updates will need to be recorded manually in the systems of record.
TouchPoint Client Check-In Details page (click to enlarge)
Section Four: Location
The location information displayed on the map is collected by the client’s smartphone at the time of the check-in. If no location information is available, either the client has turned the Location Services off, or the information was not available due to poor cellular connection.
Final Steps
- Add Notes.
- Update the status of the check-in by selecting either:
- In Progress (More information/actions need to be completed.)
- Resolved (No further action is required.)
- Select the Save Check-In button.
- At the top of the page, select << Back to Check-In History.
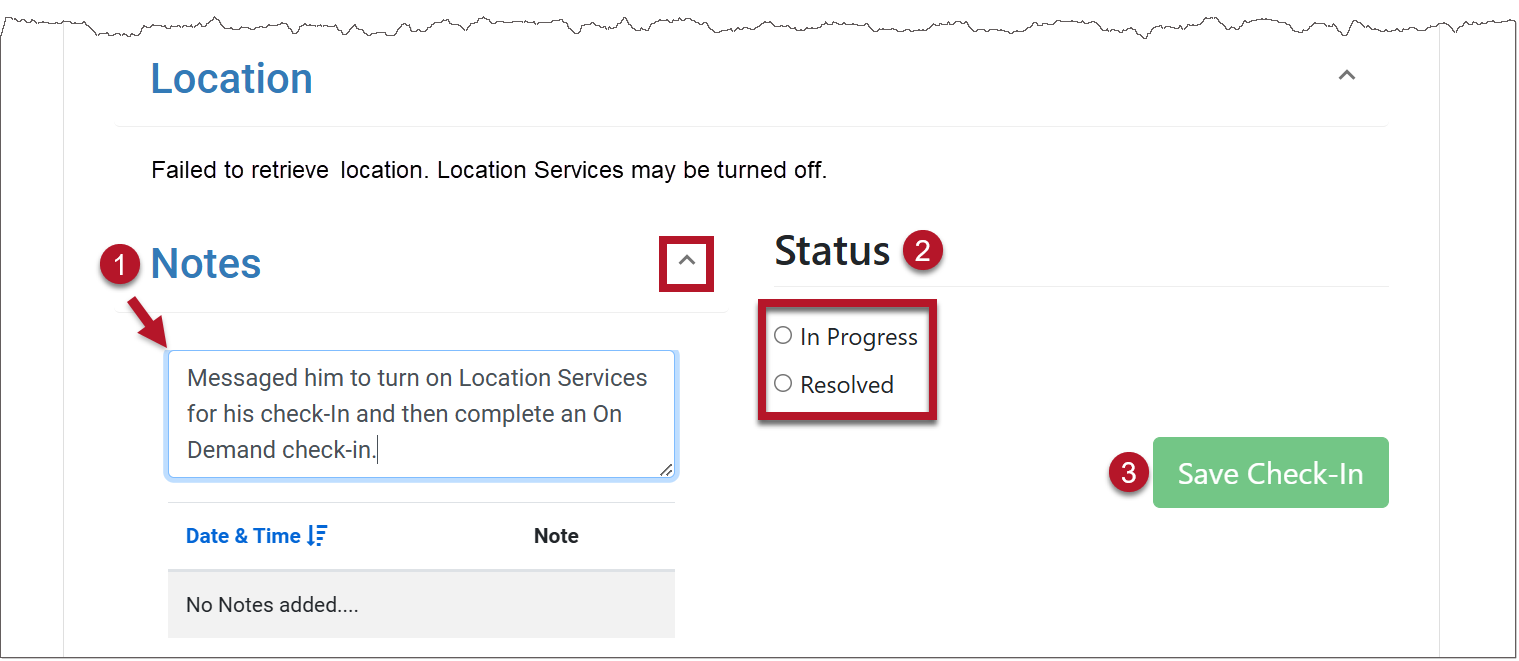
TouchPoint Client Check-in Details page (click to enlarge)
TouchPoint Client Check-In Details page (click to enlarge)
The Check-In History page will reflect the status update. Changing the status to In Progress or Resolved will also remove the notification markers from the Optix Dashboard Client Check-In tile and Actions column on the Clients tab.
Managing a Successful Client Check-In
A Successful Check-In indicates the client completed and passed all verification for the check-in. No further actions are required. You have the option to leave the status set to Successful or you may update the status on the Check-In Details page.
Select the Successful Check-In’s Date & Time hyperlink:
- View the information on the Check-In Details page.
- Add any Notes.
- Select the Save Check-In button to save the changes.
- Select << Back to Check-In History.
Check-In Details
The Check-In History page will reflect the updated status.