TouchPoint Client Check-In is an automated notification and recording service for your clients who participate in a basic question-based check-in monitoring program. It allows your clients to electronically complete their monitoring requirements on a regular cadence. A series of Yes/No questions can be developed for each group of clients based on risk level or caseload designation. For clients, being paperless and the ease of completing a check-in encourages compliance and improved communication.
Any active client can be enabled for this service. Some additional benefits include:
- A client’s Check-In can be viewed by all agents that have access to the client, thereby improving caseload management.
- The client receives a notification on their smartphone when it is time to complete a new Check-In.
- Notification on the Optix Dashboard Check-In tile, as well as the Clients tab will display any Check-Ins received from a client that require your attention or have been missed.
- The service supports scheduled as well as client-initiated check-ins.
- Advanced “machine learning” technology increases the accuracy of the automated face match verification.
- Location information is provided by the client’s smartphone with every check-in.
- Biometric verification is available based on the client’s smartphone and security settings.
Enable Client Check-In
- Start by navigating to the Clients tab in Optix.
Select the +Add TouchPoint Client button and complete the setup process. For help, visit Add a TouchPoint Client.
If your client is already an active TouchPoint participant, select their name from the list.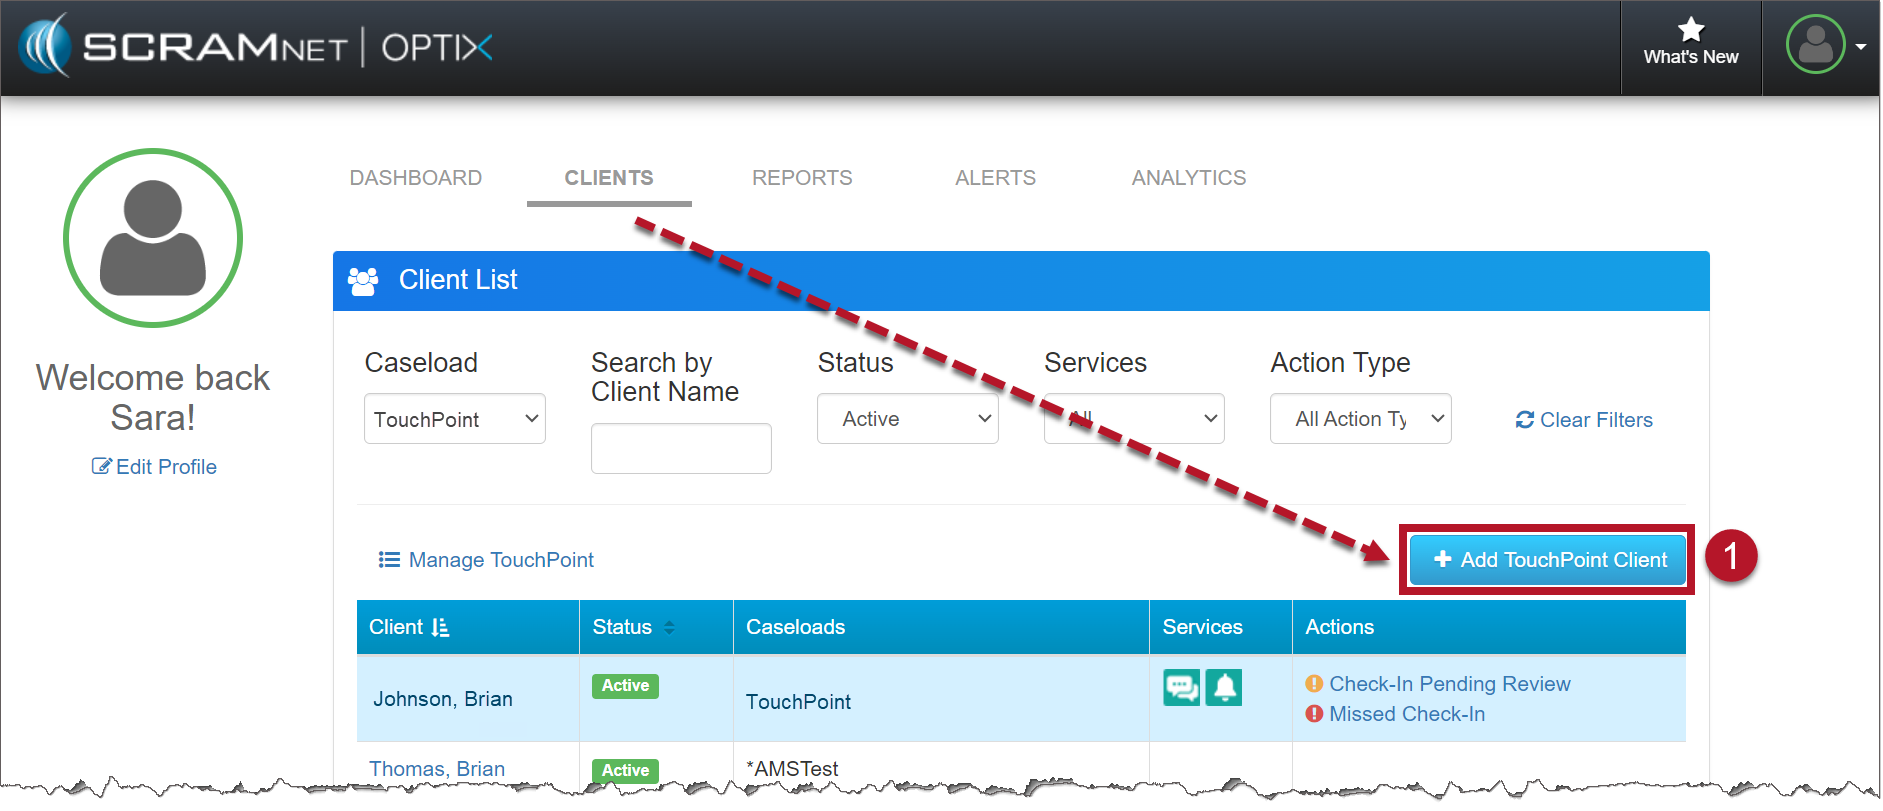
TouchPoint Client List page (click to enlarge)
- Locate the Edit link in the Client Check-In section.
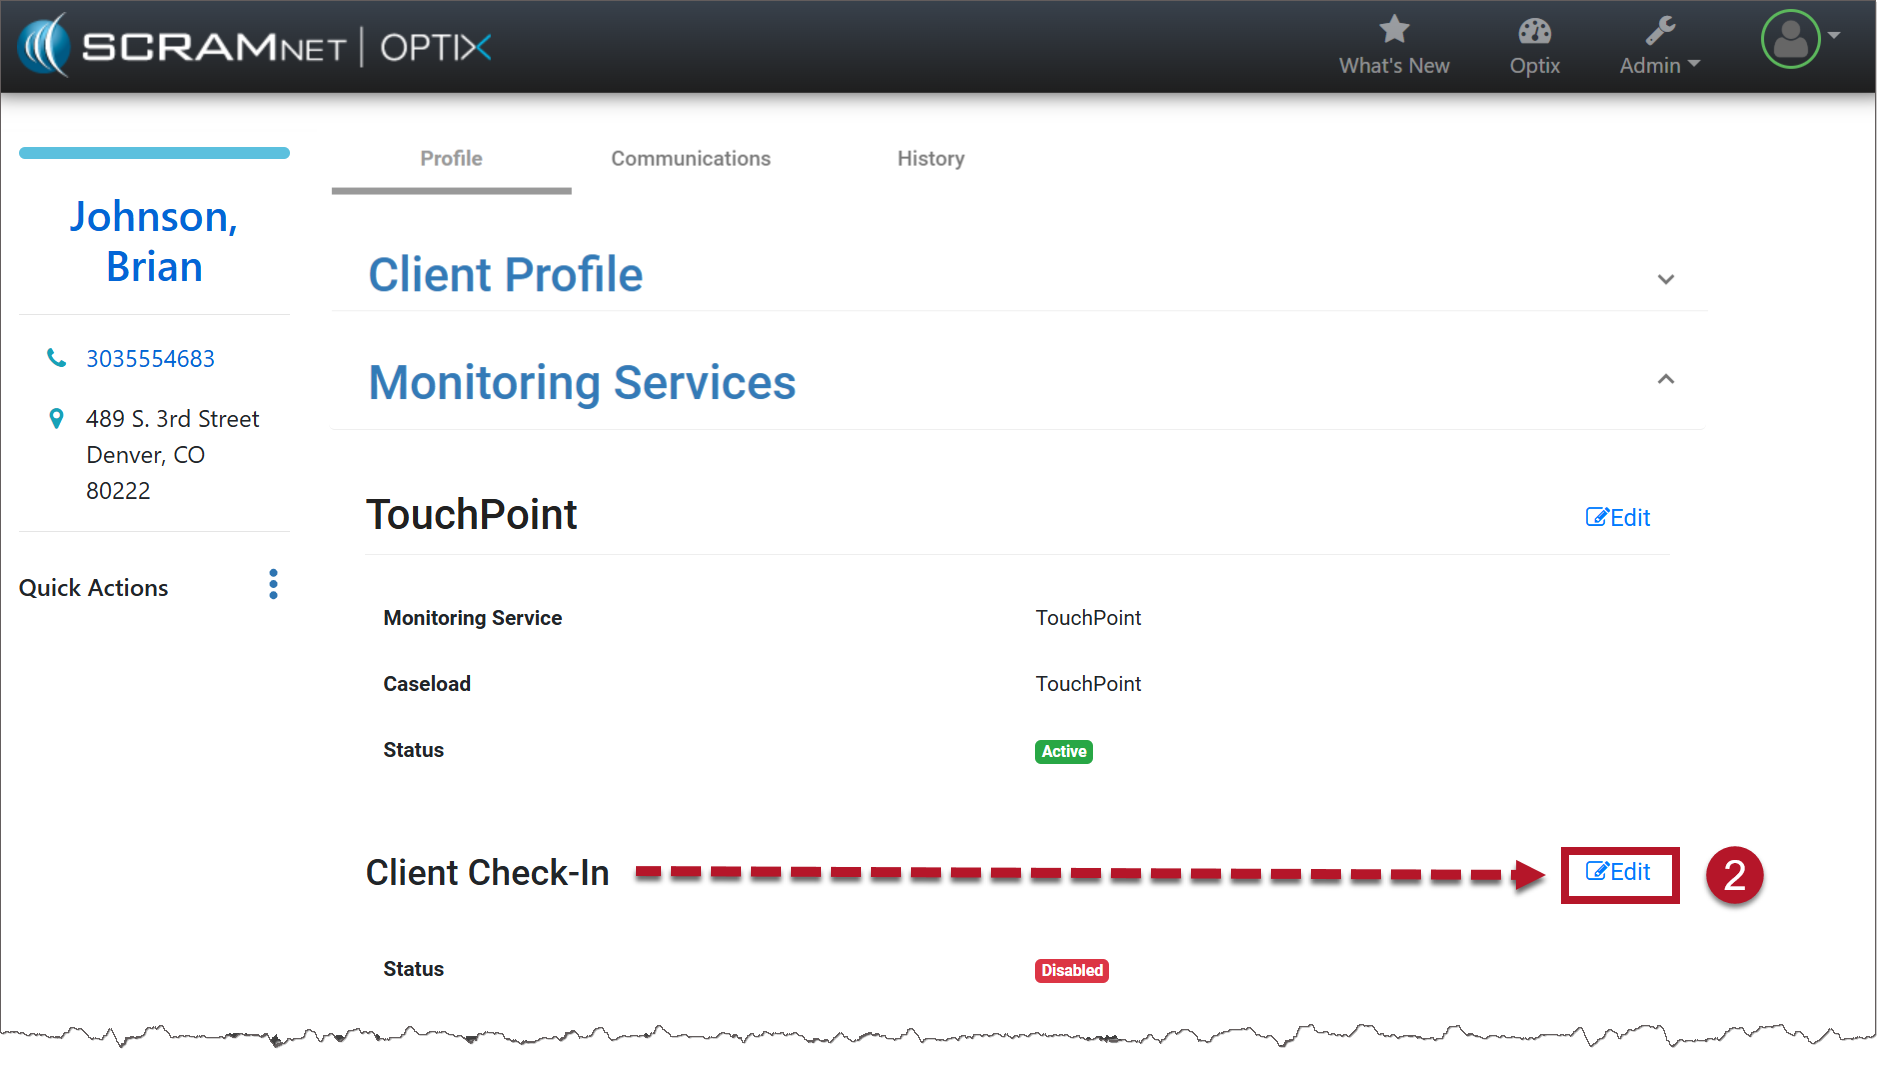
TouchPoint Client Profile page (click to enlarge)
- Toggle the button from Disabled to Enabled.
- If client biometric verification is not required when logging in to TouchPoint, toggle the button from Enabled to Disabled.
- Select the Check-In details:
- Select the Group.
- Schedule the Frequency and the specific day or days of the week or month, if required.
- Set the check-in window or add multiple check-in windows for the client.
- For a single check-in per window, add the desired number of check-in windows and their associated timeframes by selecting +Add a Check-In Window, then go to step 5.
- To add multiple check-ins during a check-in window, select the Make Random checkbox. You will then set the number of check-ins the client must complete during the window and the Grace Period the client has to complete each check-in when prompted. There is a maximum number of random check-ins allowed during each window. This calculation is based on 30-minute intervals plus the grace period. An error message will display if you try to enter more check-ins than allowed during a window.
- Select the Save button.
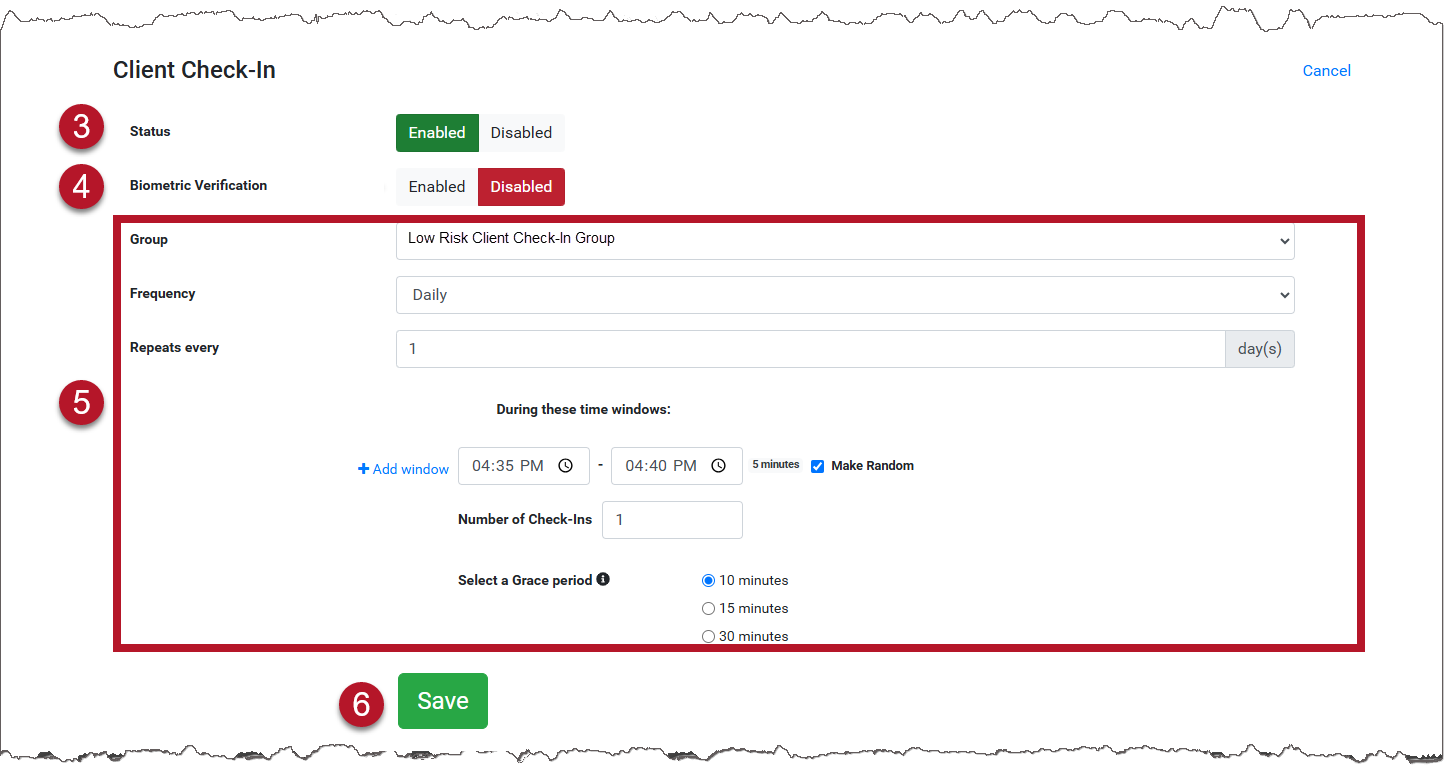
TouchPoint Client Profile Page
- Instruct the client to download the TouchPoint app on their smartphone. For help, view Client Instructions video and document.
- Instruct the client to complete the first check-in. This will establish the base line image for future check-ins.
- From the History tab at the top of the client’s Profile page, select the Check-In tab to see updates.
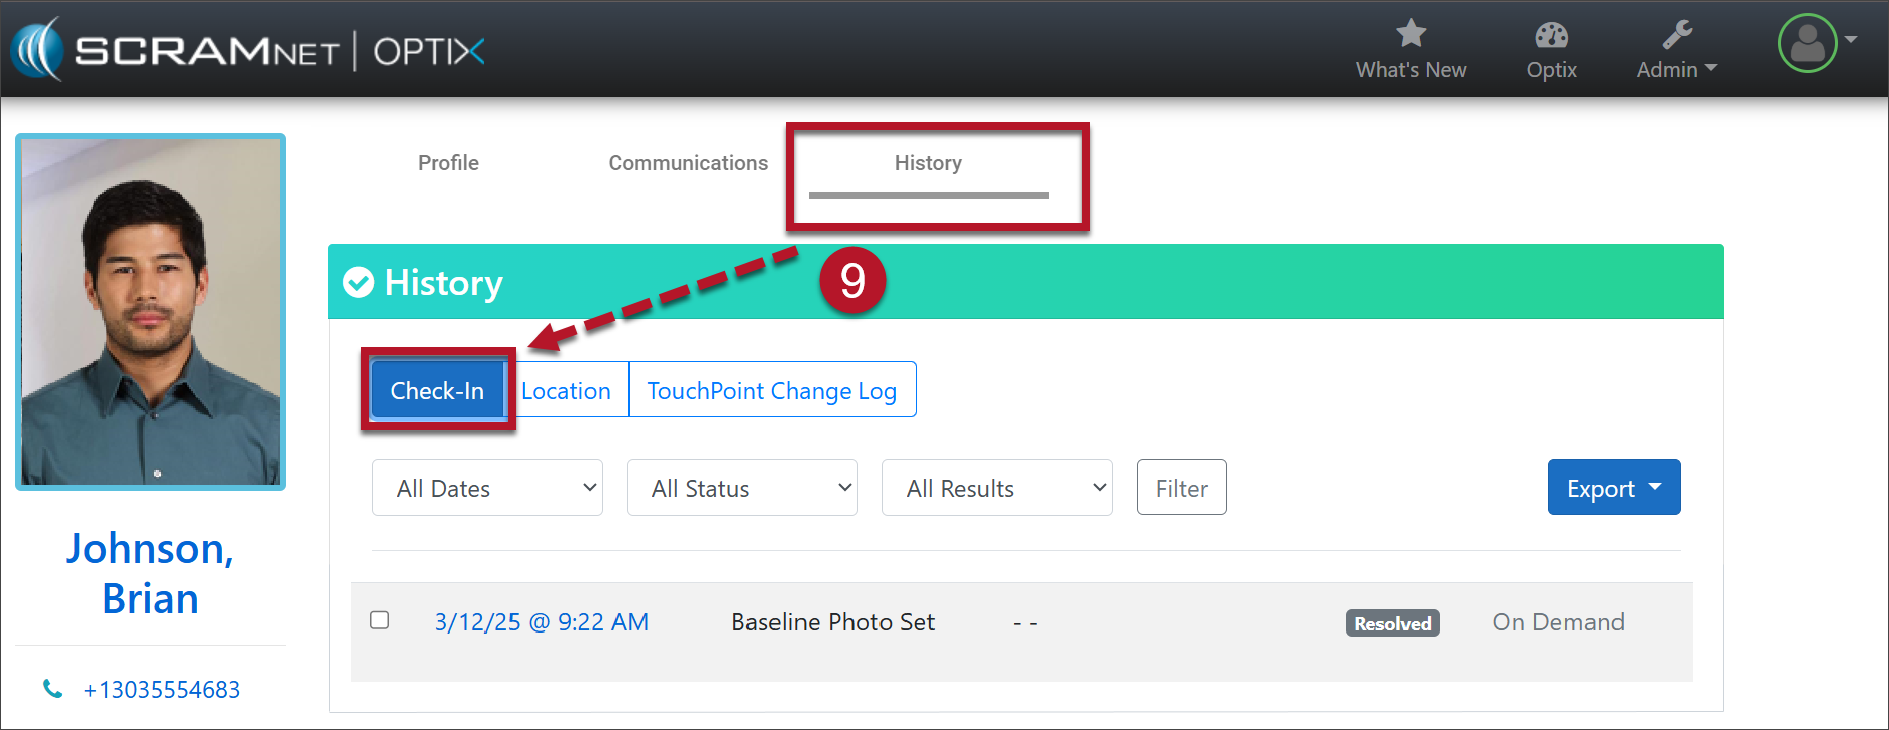
TouchPoint History tab (click to enlarge)
Disable Client Check-In
To disable the Client Check-In service for the client, select the Edit link and toggle the button from Enabled to Disabled.