Manage TouchPoint Client Check-In Questions and Groups
To get started, navigate to the Manage TouchPoint page by selecting the Go To TouchPoint button located on the TouchPoint tile on the Optix Dashboard, or by selecting the Manage TouchPoint link from the Clients tab.
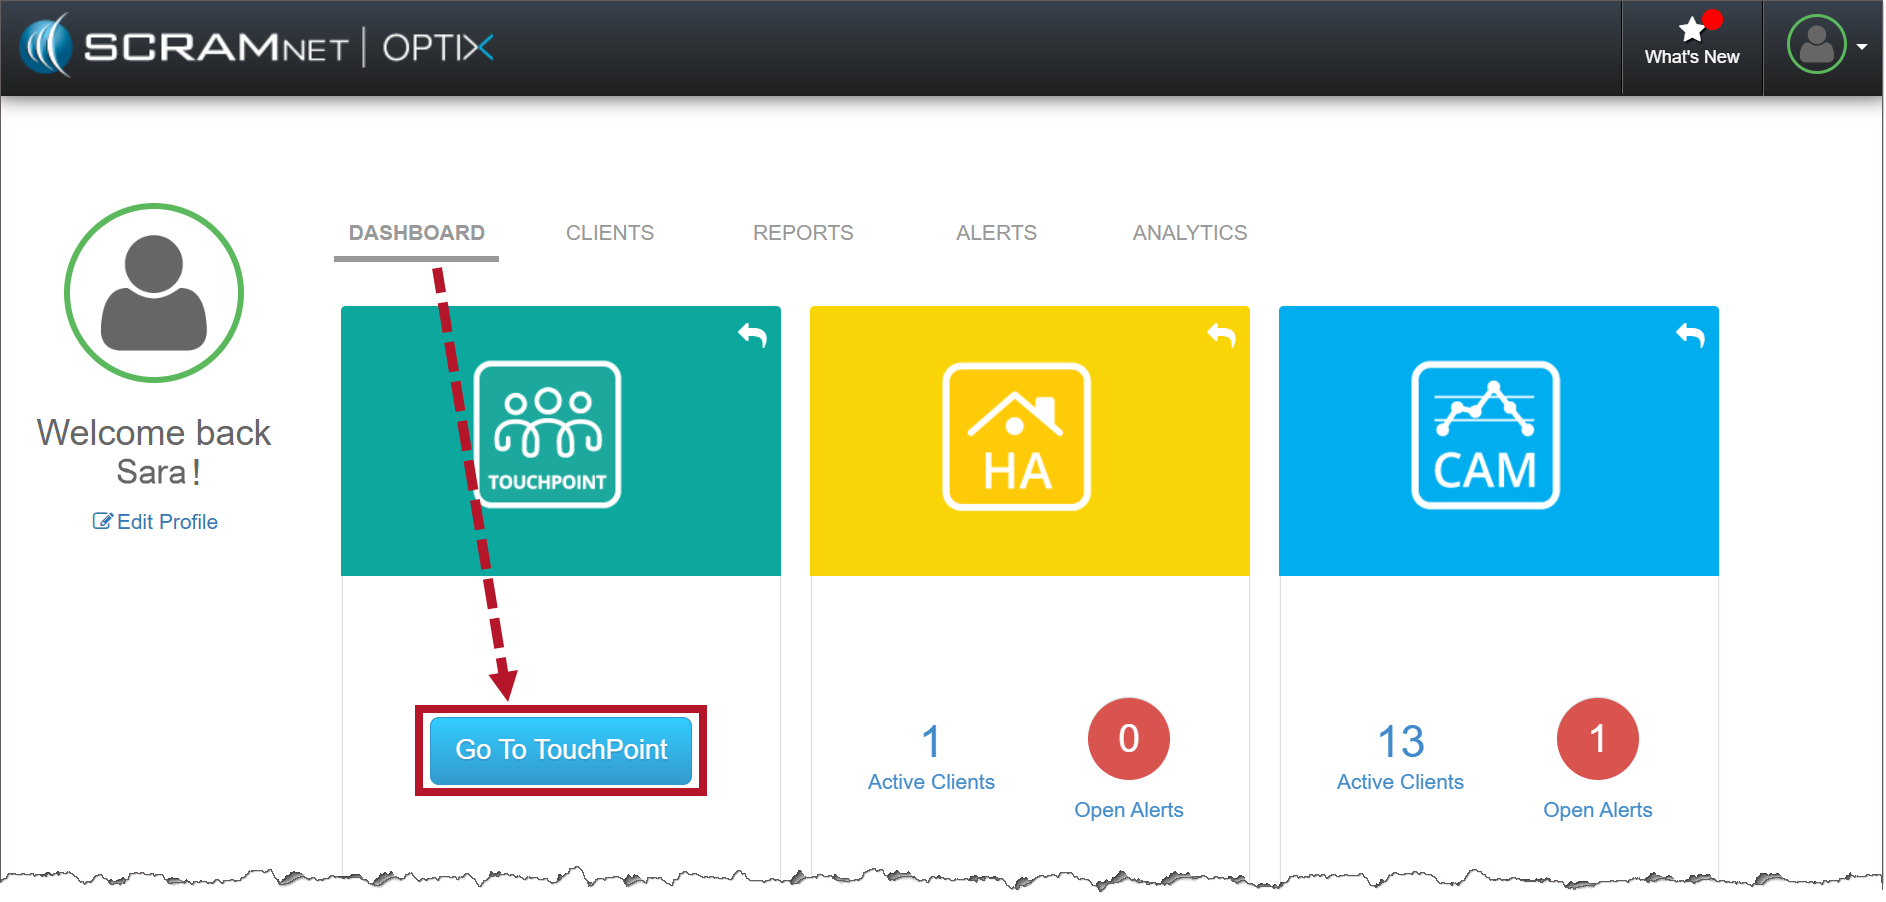
Optix Dashboard (click to enlarge)
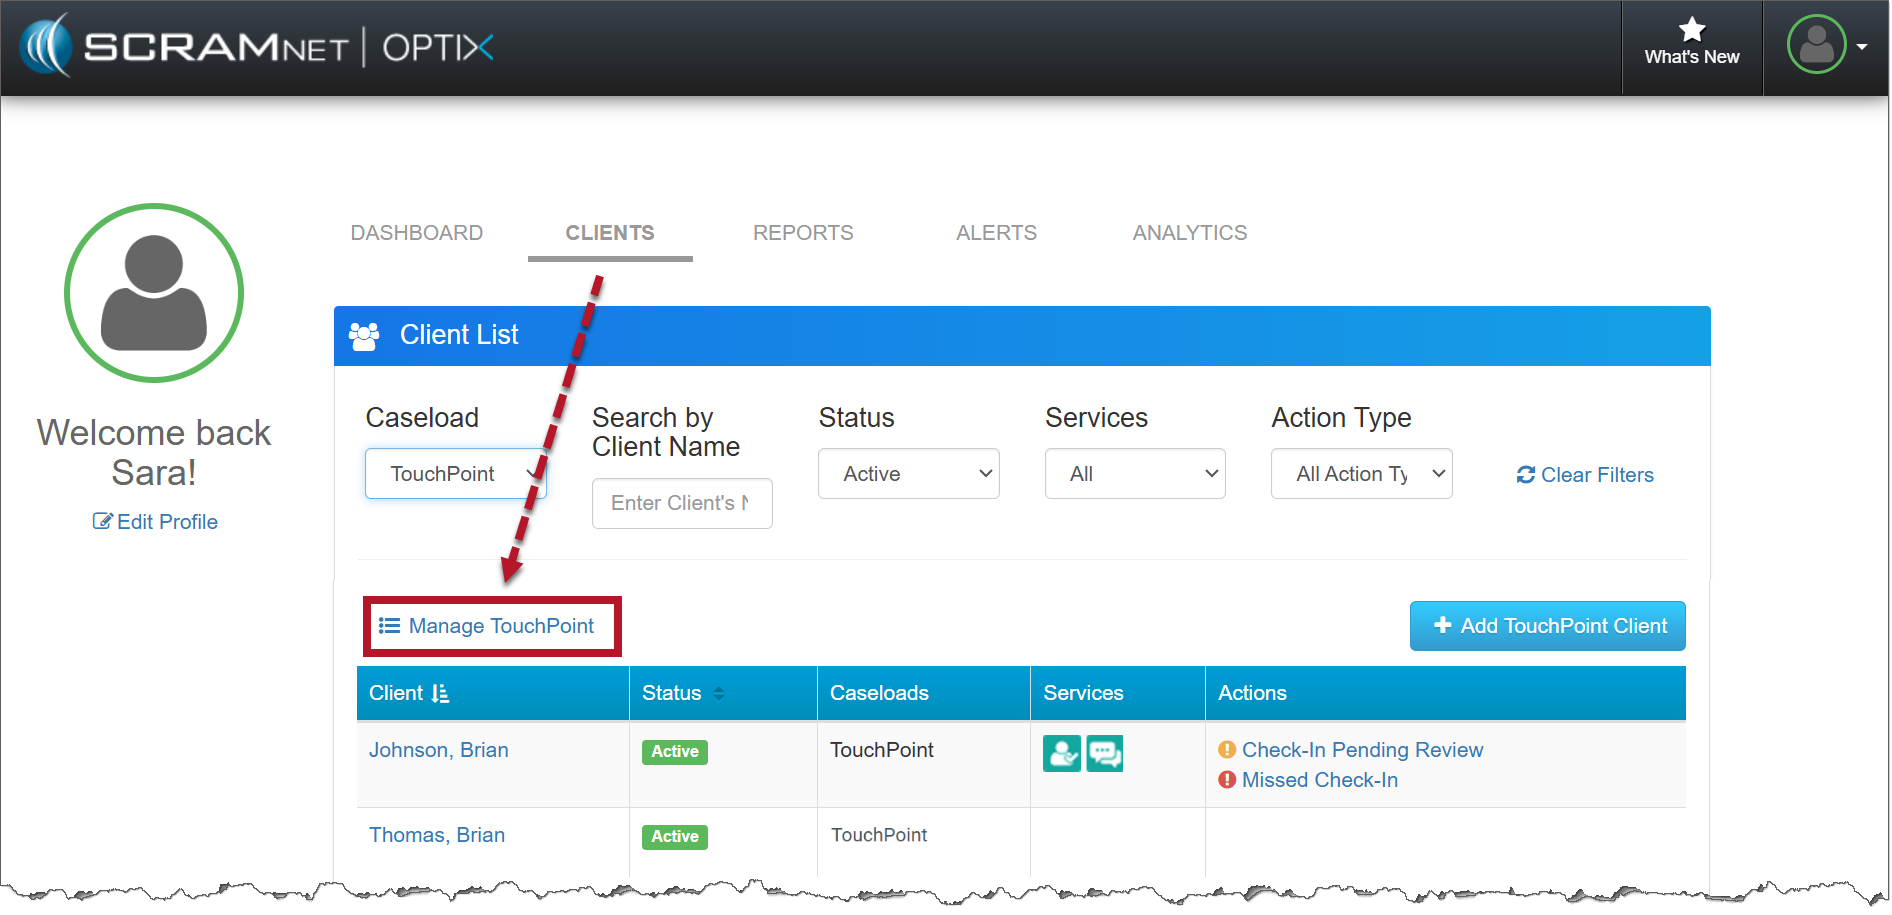
Optix Clients page (click to enlarge)
Add a New Check-In Group
To get started, select the +Add a New Group button.
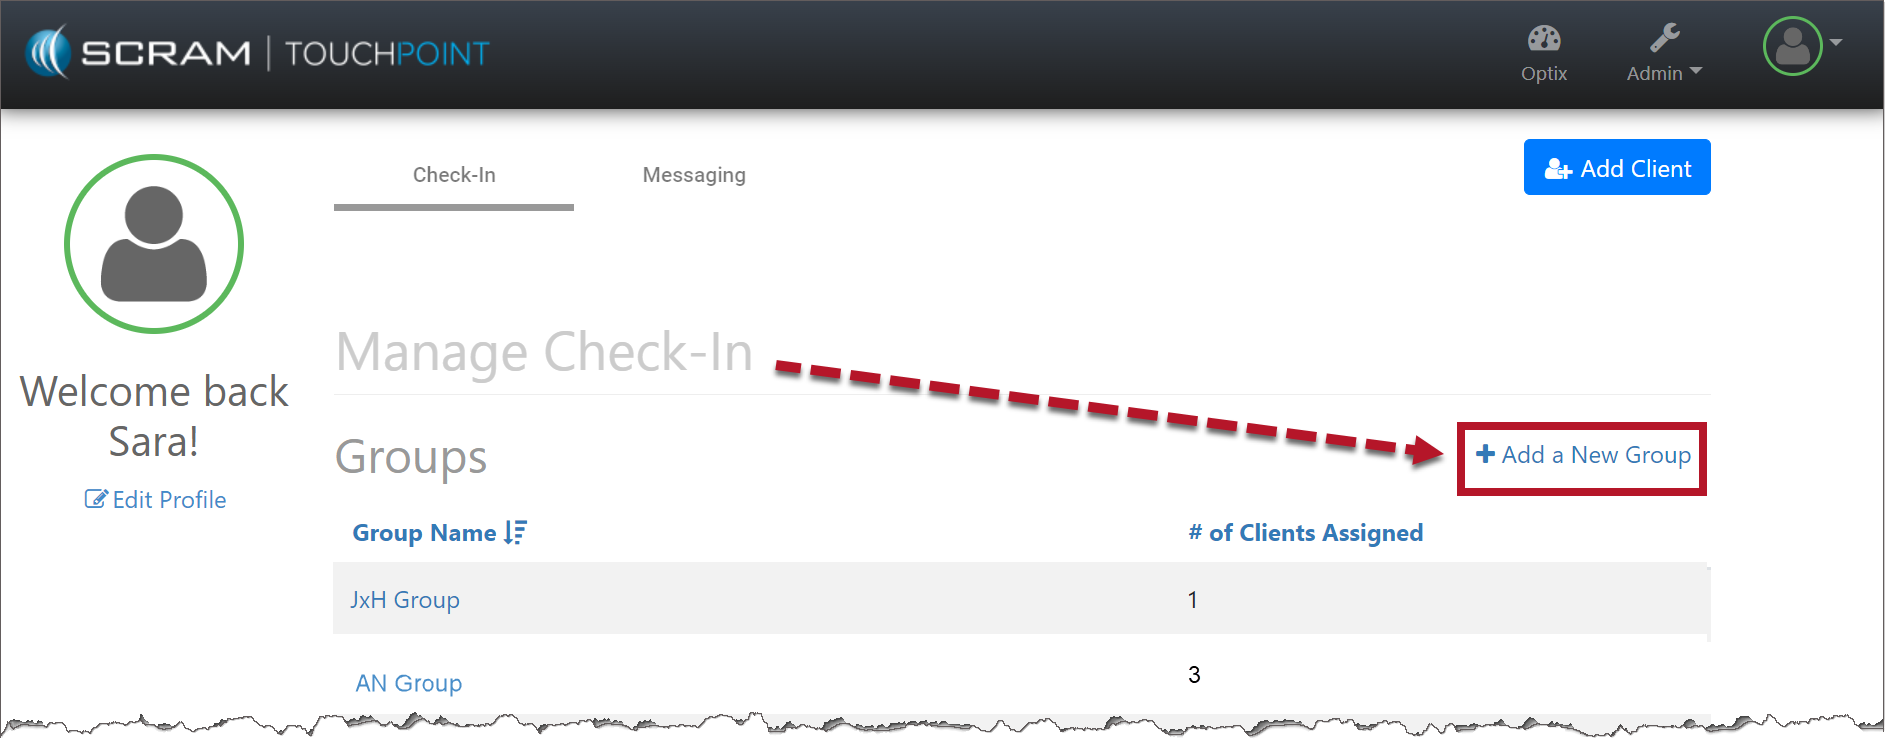
Manage Check-In page (click to enlarge)
This will open the Add New Group page.
- Under the Add New Group section, add the new group’s name.
- In the Group Information section, edit/add questions for this group.
- The list of Standard Questions can be used or select the red trash can icon to remove that question.
- Click the +Add a Custom Question link to add a unique question(s) to this group. When adding a custom question, you may select the Require Check-In Review checkbox. Then select the radio button next for either the Yes or No answer for the question. Depending on your selection, the “Yes” or “No” answer will require additional information from the client and a review of the information by the supervising authority.
- Select the +Add a Client link to add clients already enabled for Client Check-In to this group.
- Click the Save Changes button.
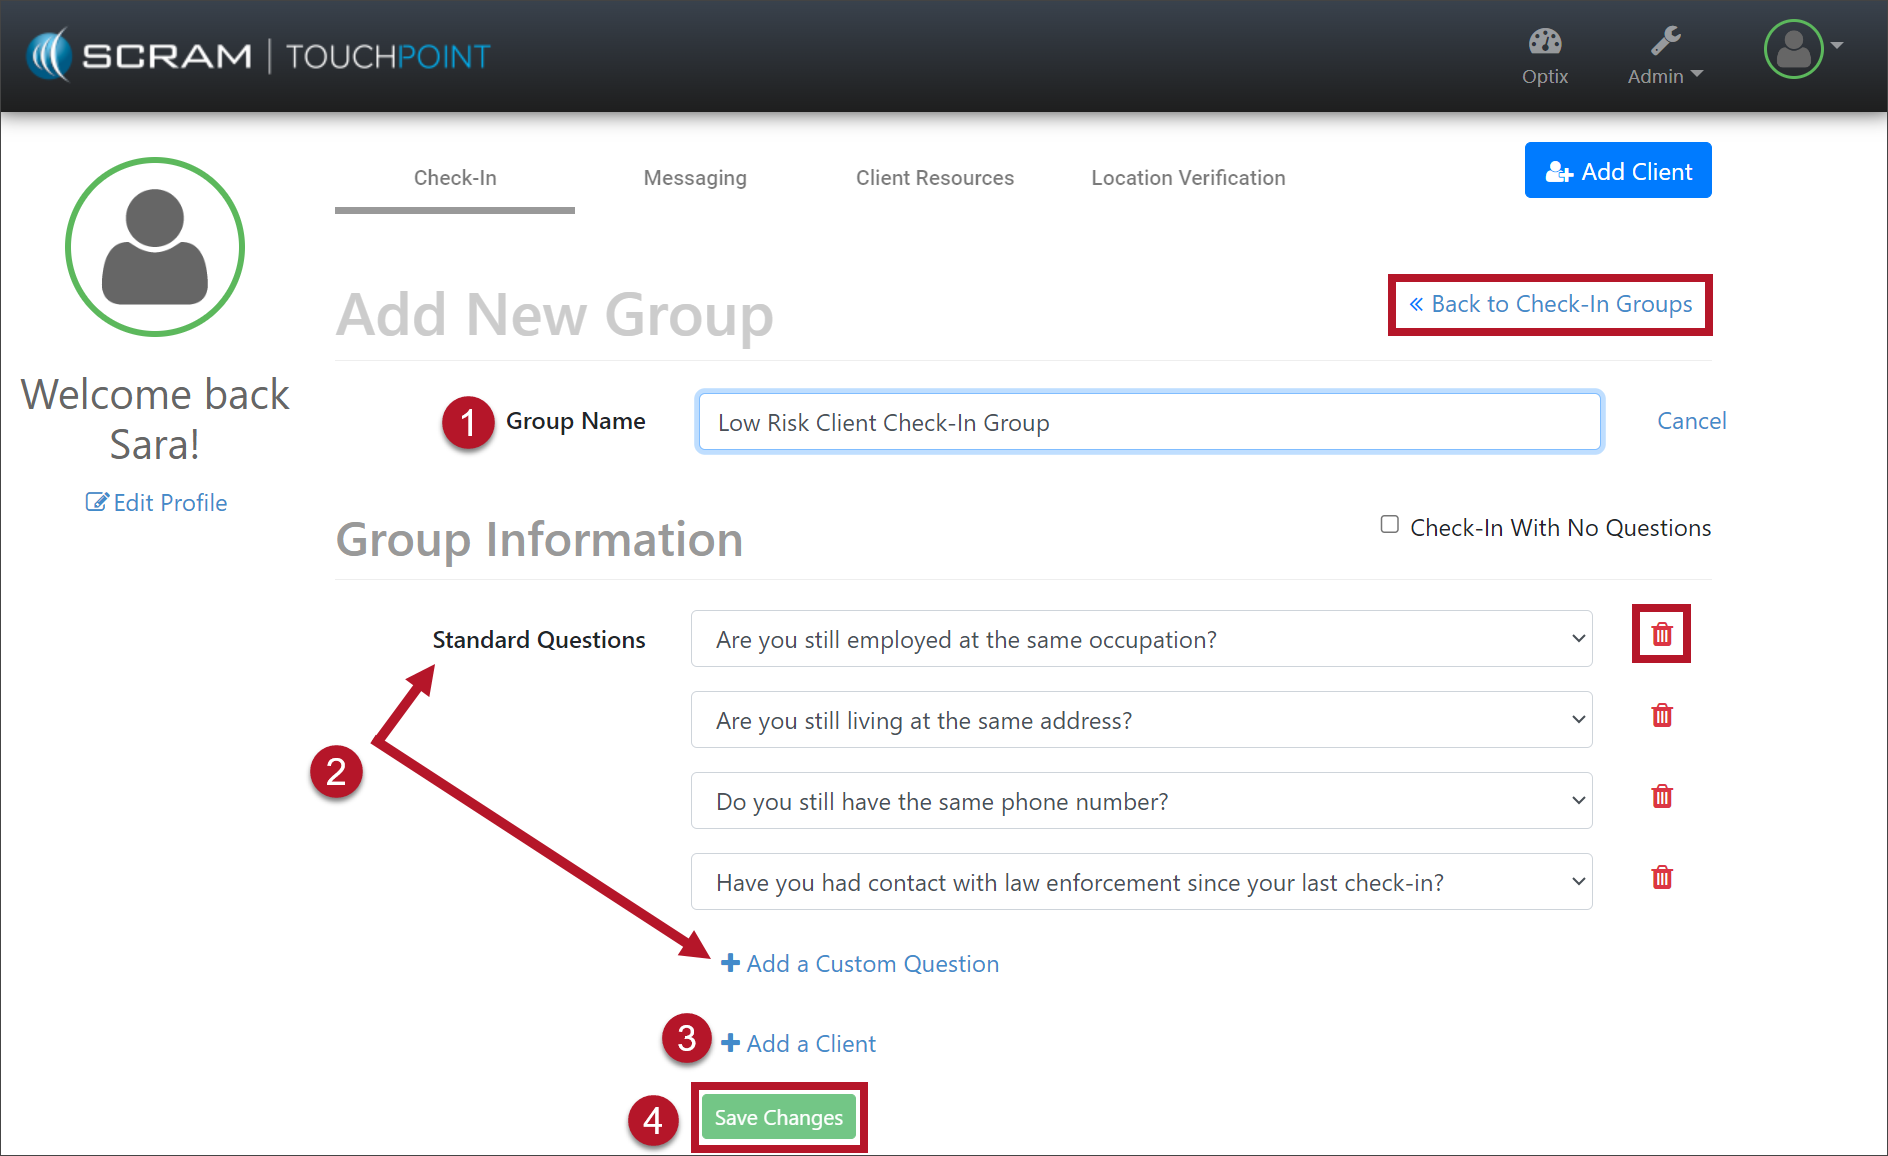
Add New Group page (click to enlarge)
Select the <<Back to Check-In Groups link to navigate back to the Manage Check-In page. The new group is now displayed under the Groups section.
Edit a Check-In Group
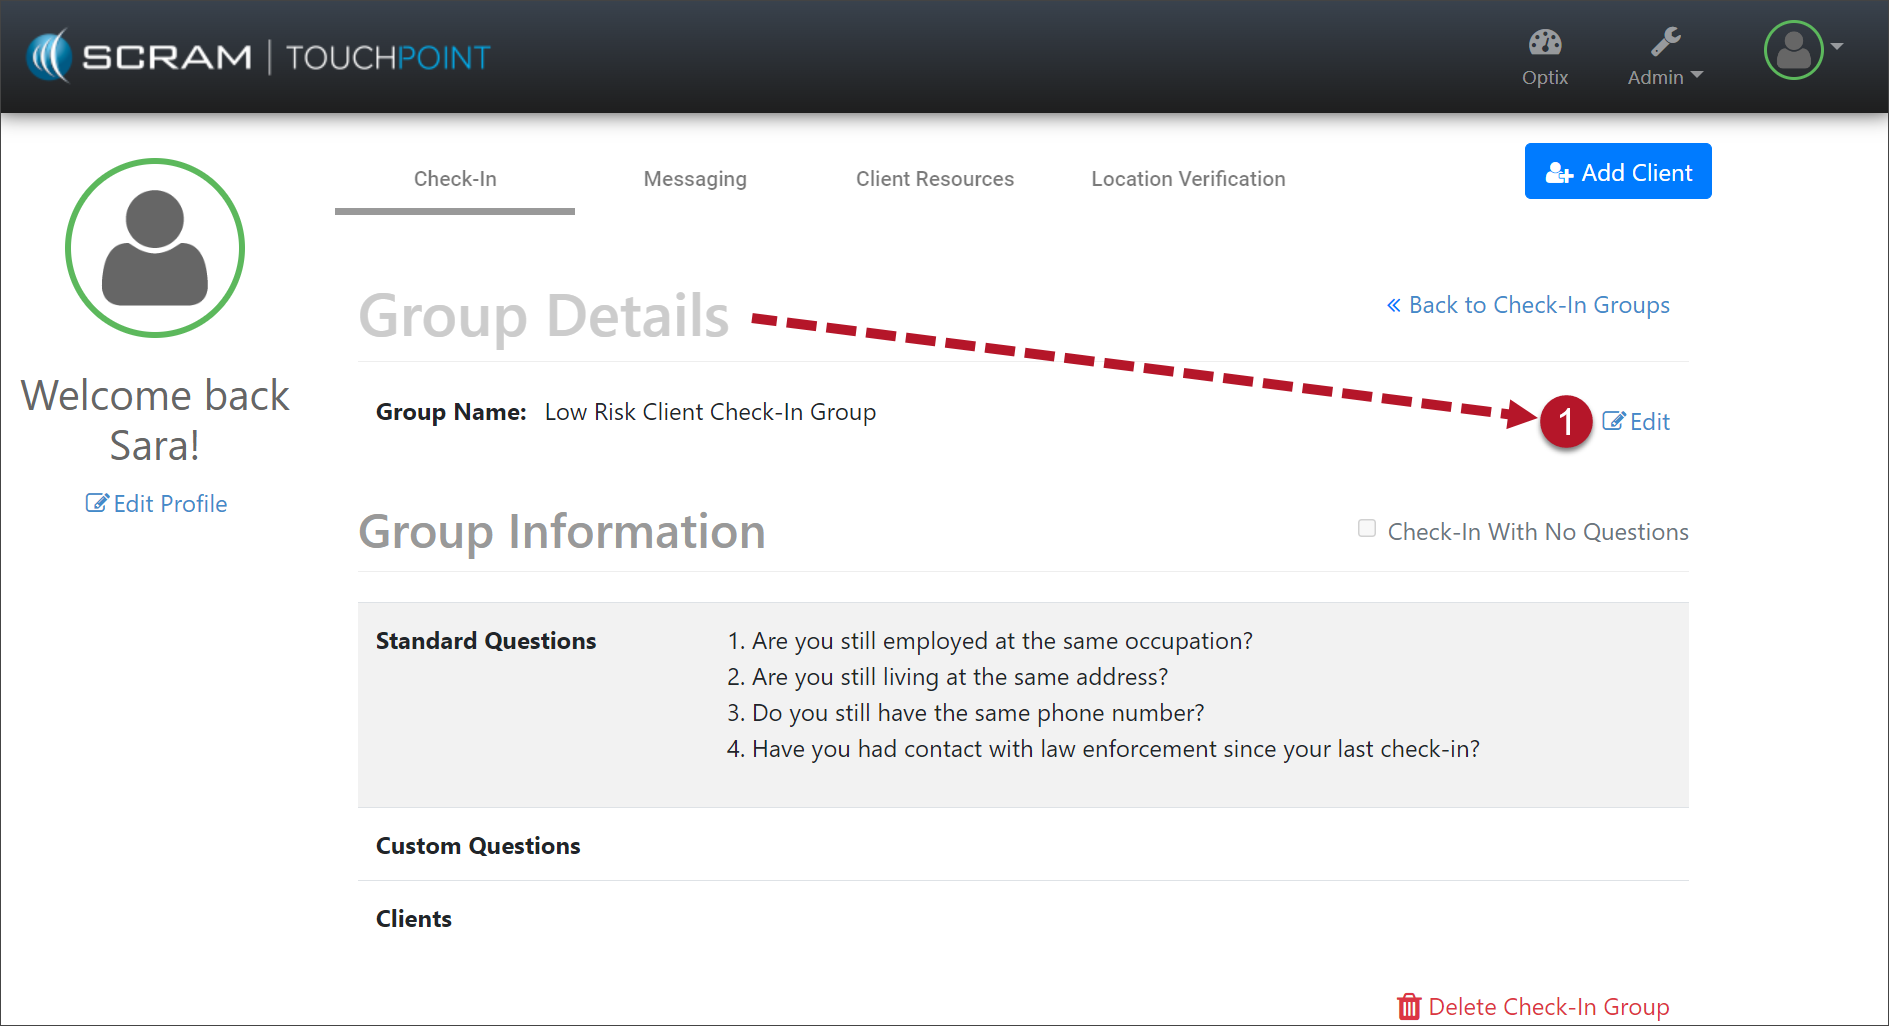
Start by selecting the group’s name from the list. The Group Details page is displayed.

Manage TouchPoint – Manage Check-In page (click to enlarge)
- Select the Edit link.
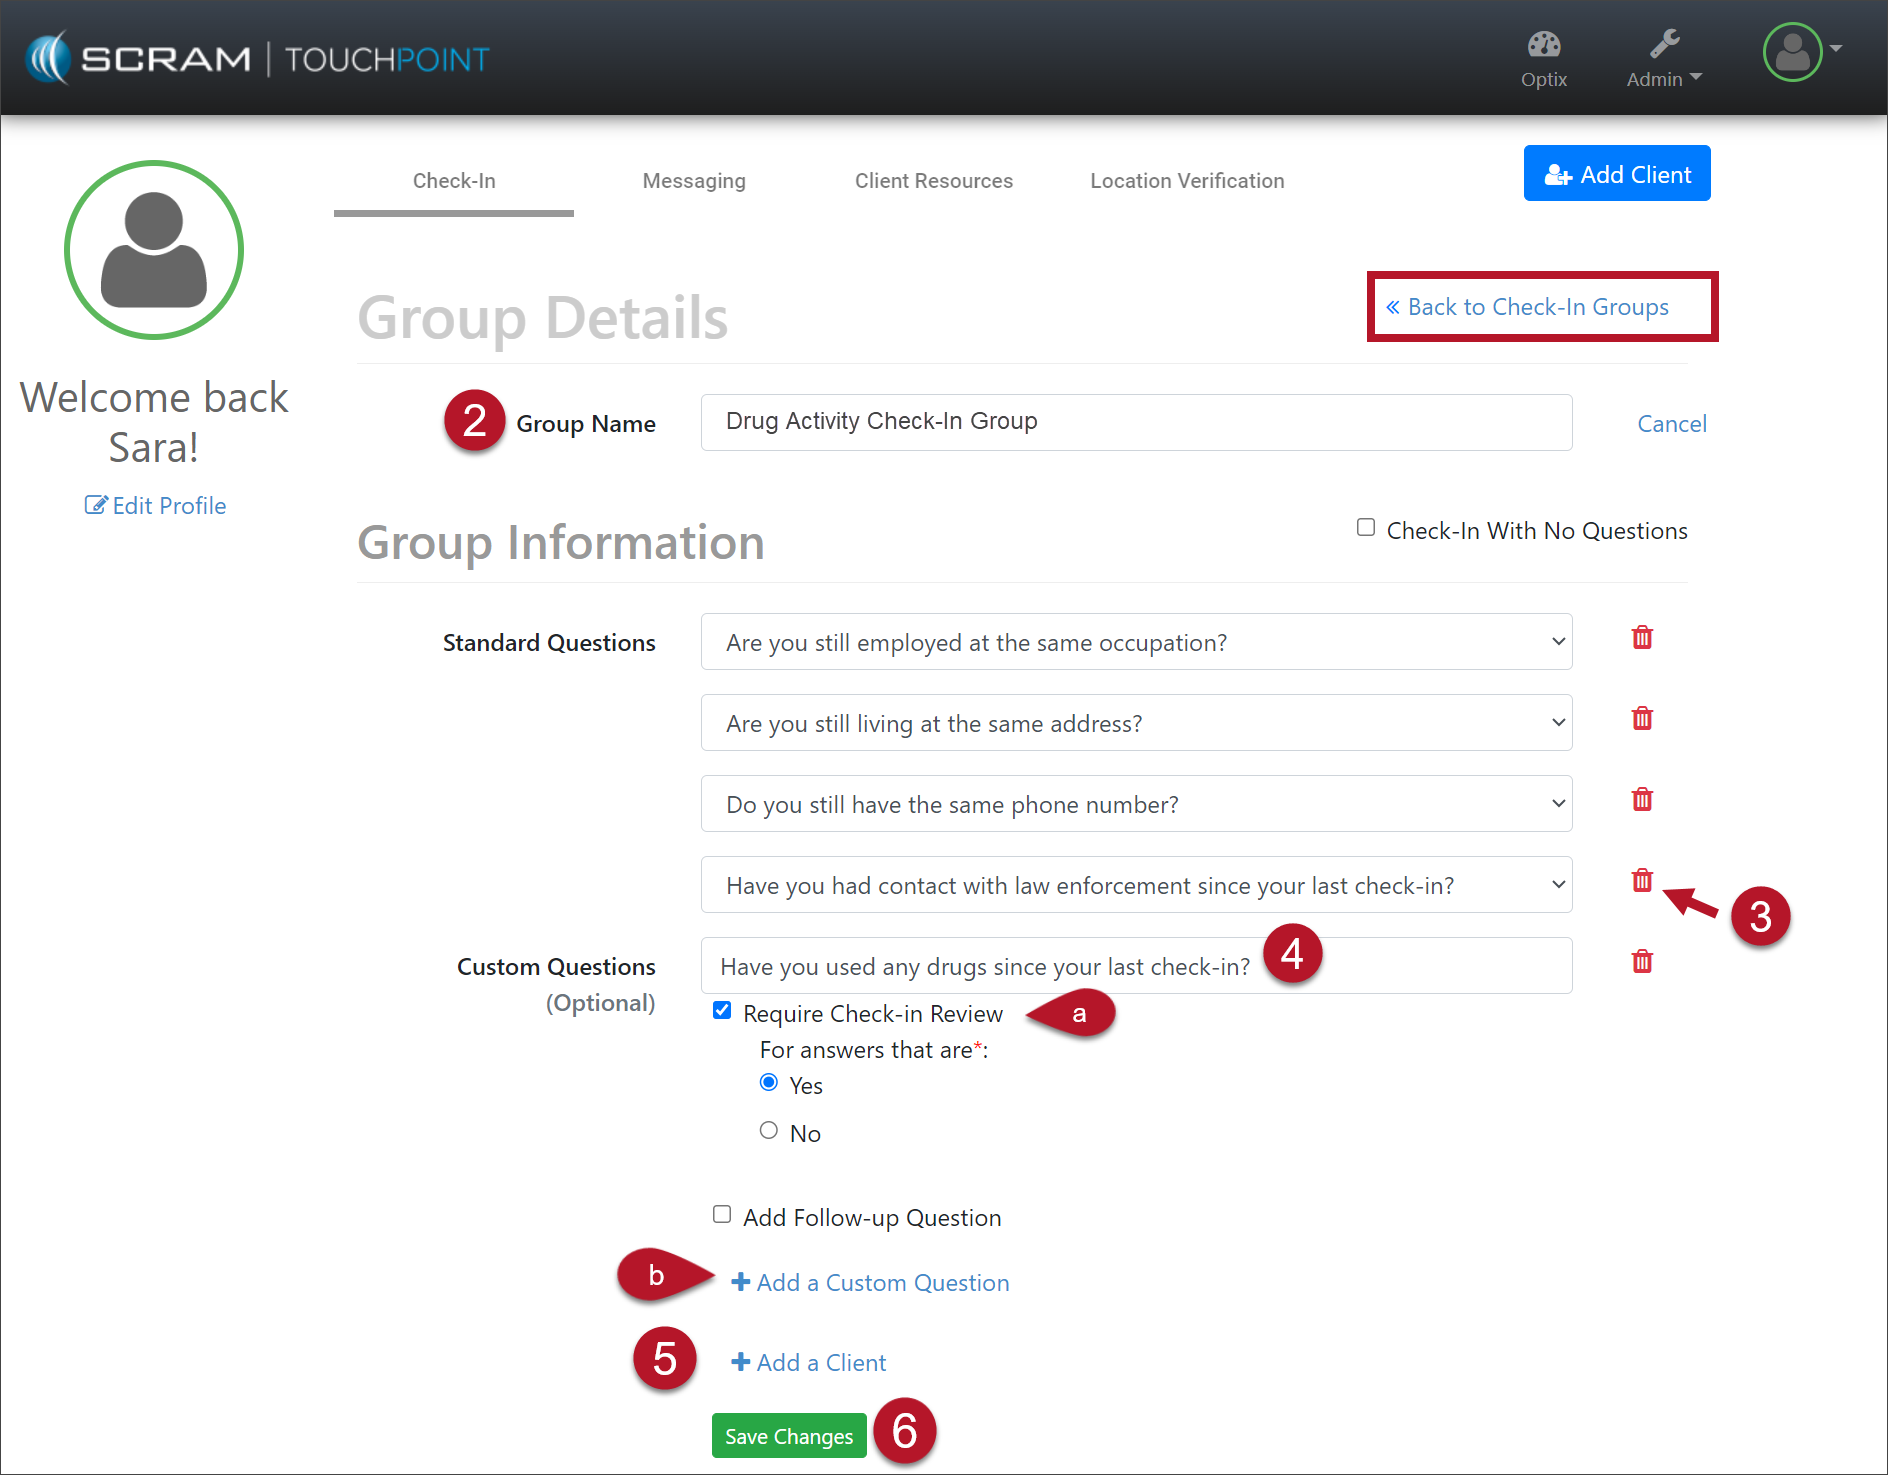
- Update or change the Group Name.
- To remove a question(s), select the red trash can next to the question.
- Edit a Custom Question by clicking in the custom question’s field and make any edits. The Standard Questions cannot be edited, only removed.
- Select the +Add a Custom Question link to add a new question to the group.
- Select the Require Check-In Review checkbox for the custom question, then select the radio button next for either the Yes or No answer for the question. Depending on your selection, the “Yes” or “No” answer will require additional information from the client and a review of the information by the supervising authority.
- Select the +Add a Client link to add a client to this check-in group.
- Click the Save Changes button.
Manage Check-In Group page (click to enlarge)
Manage Group Details (click to enlarge)
Select the <<Back to Check-In Groups link to navigate back to the Manage Check-In page. All changes are reflected in the next check-in for the client(s).
Reassigning a Client(s) to a New Check-In Group
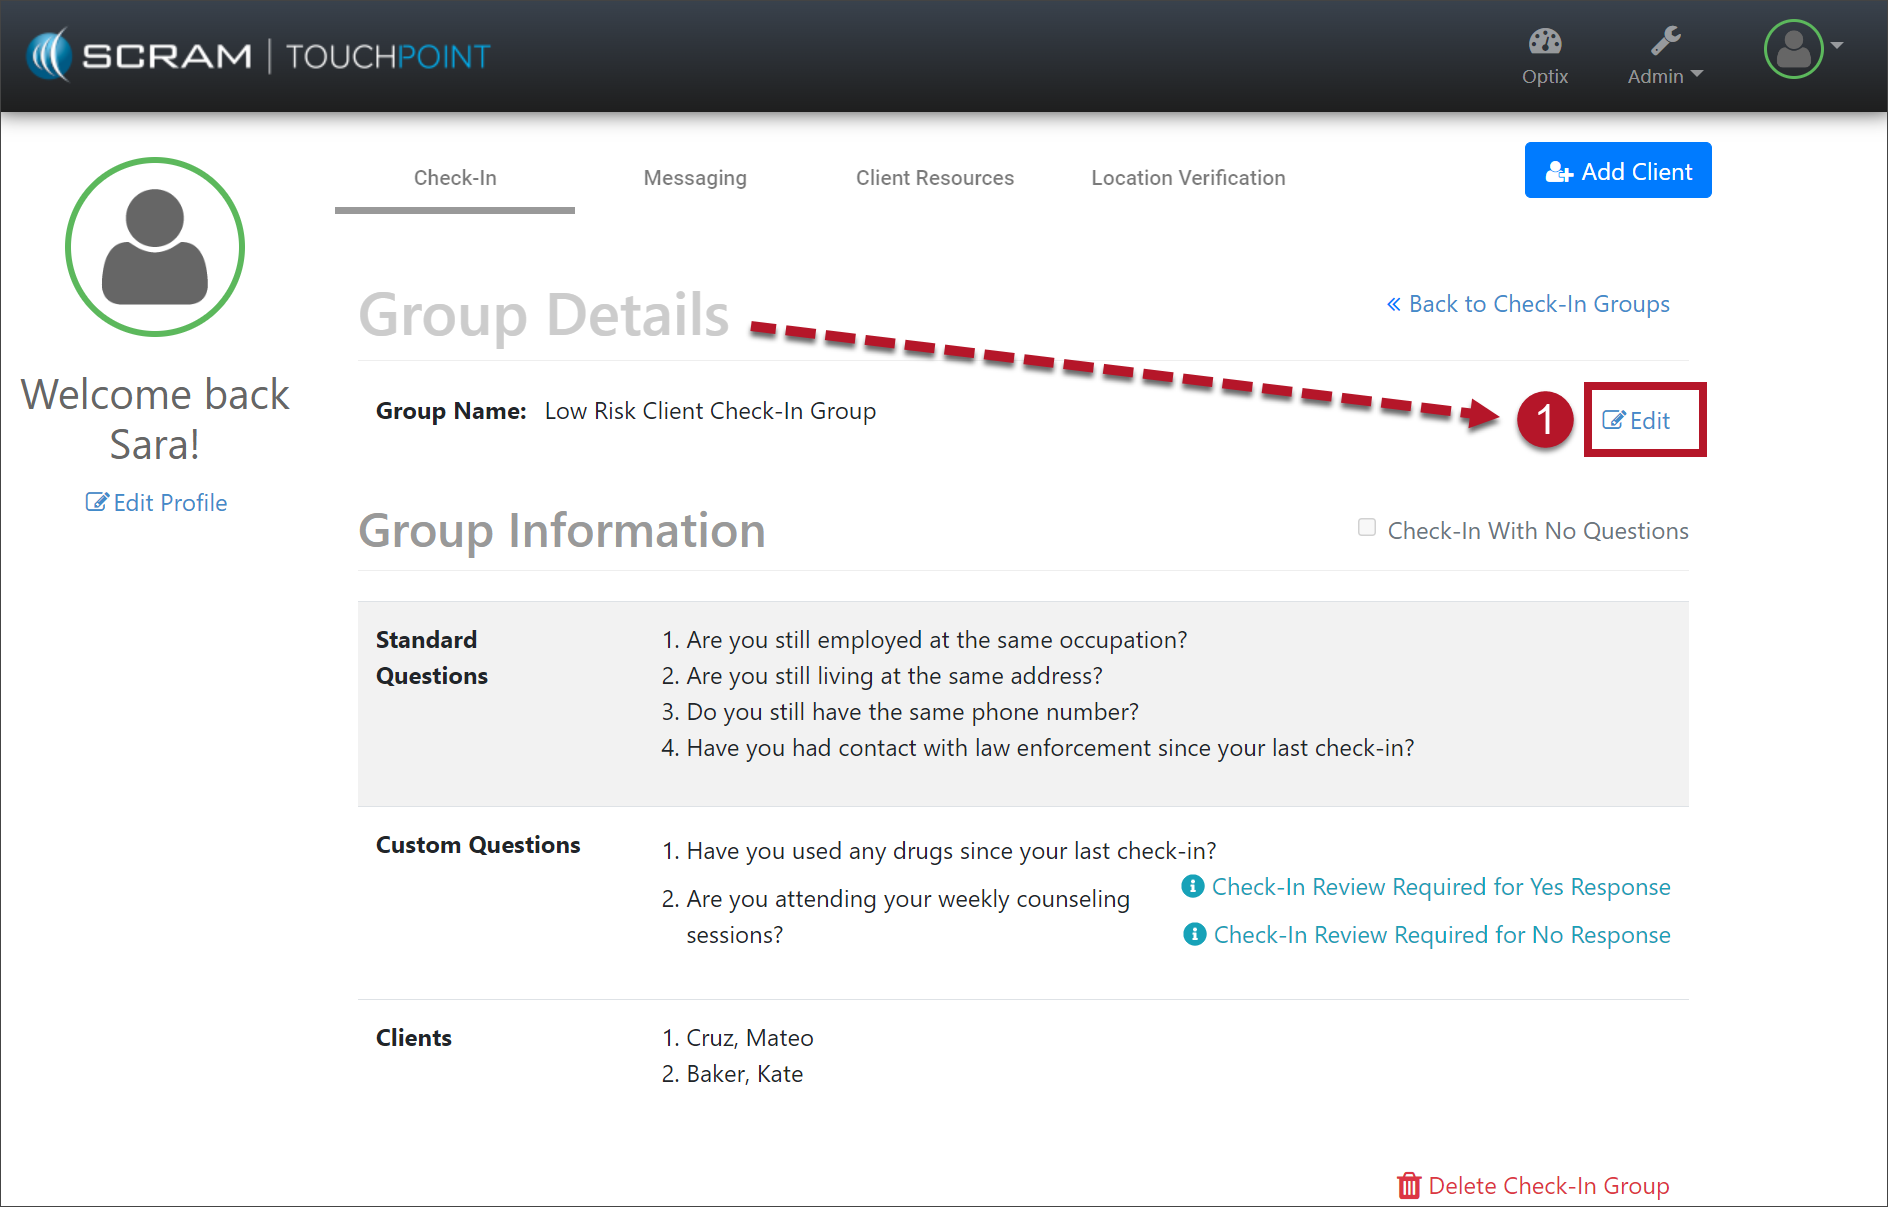
Start by selecting the new Group the client(s) will be transferred into.
Manage TouchPoint – Manage Check-In (click to enlarge)
- Select the Edit link.
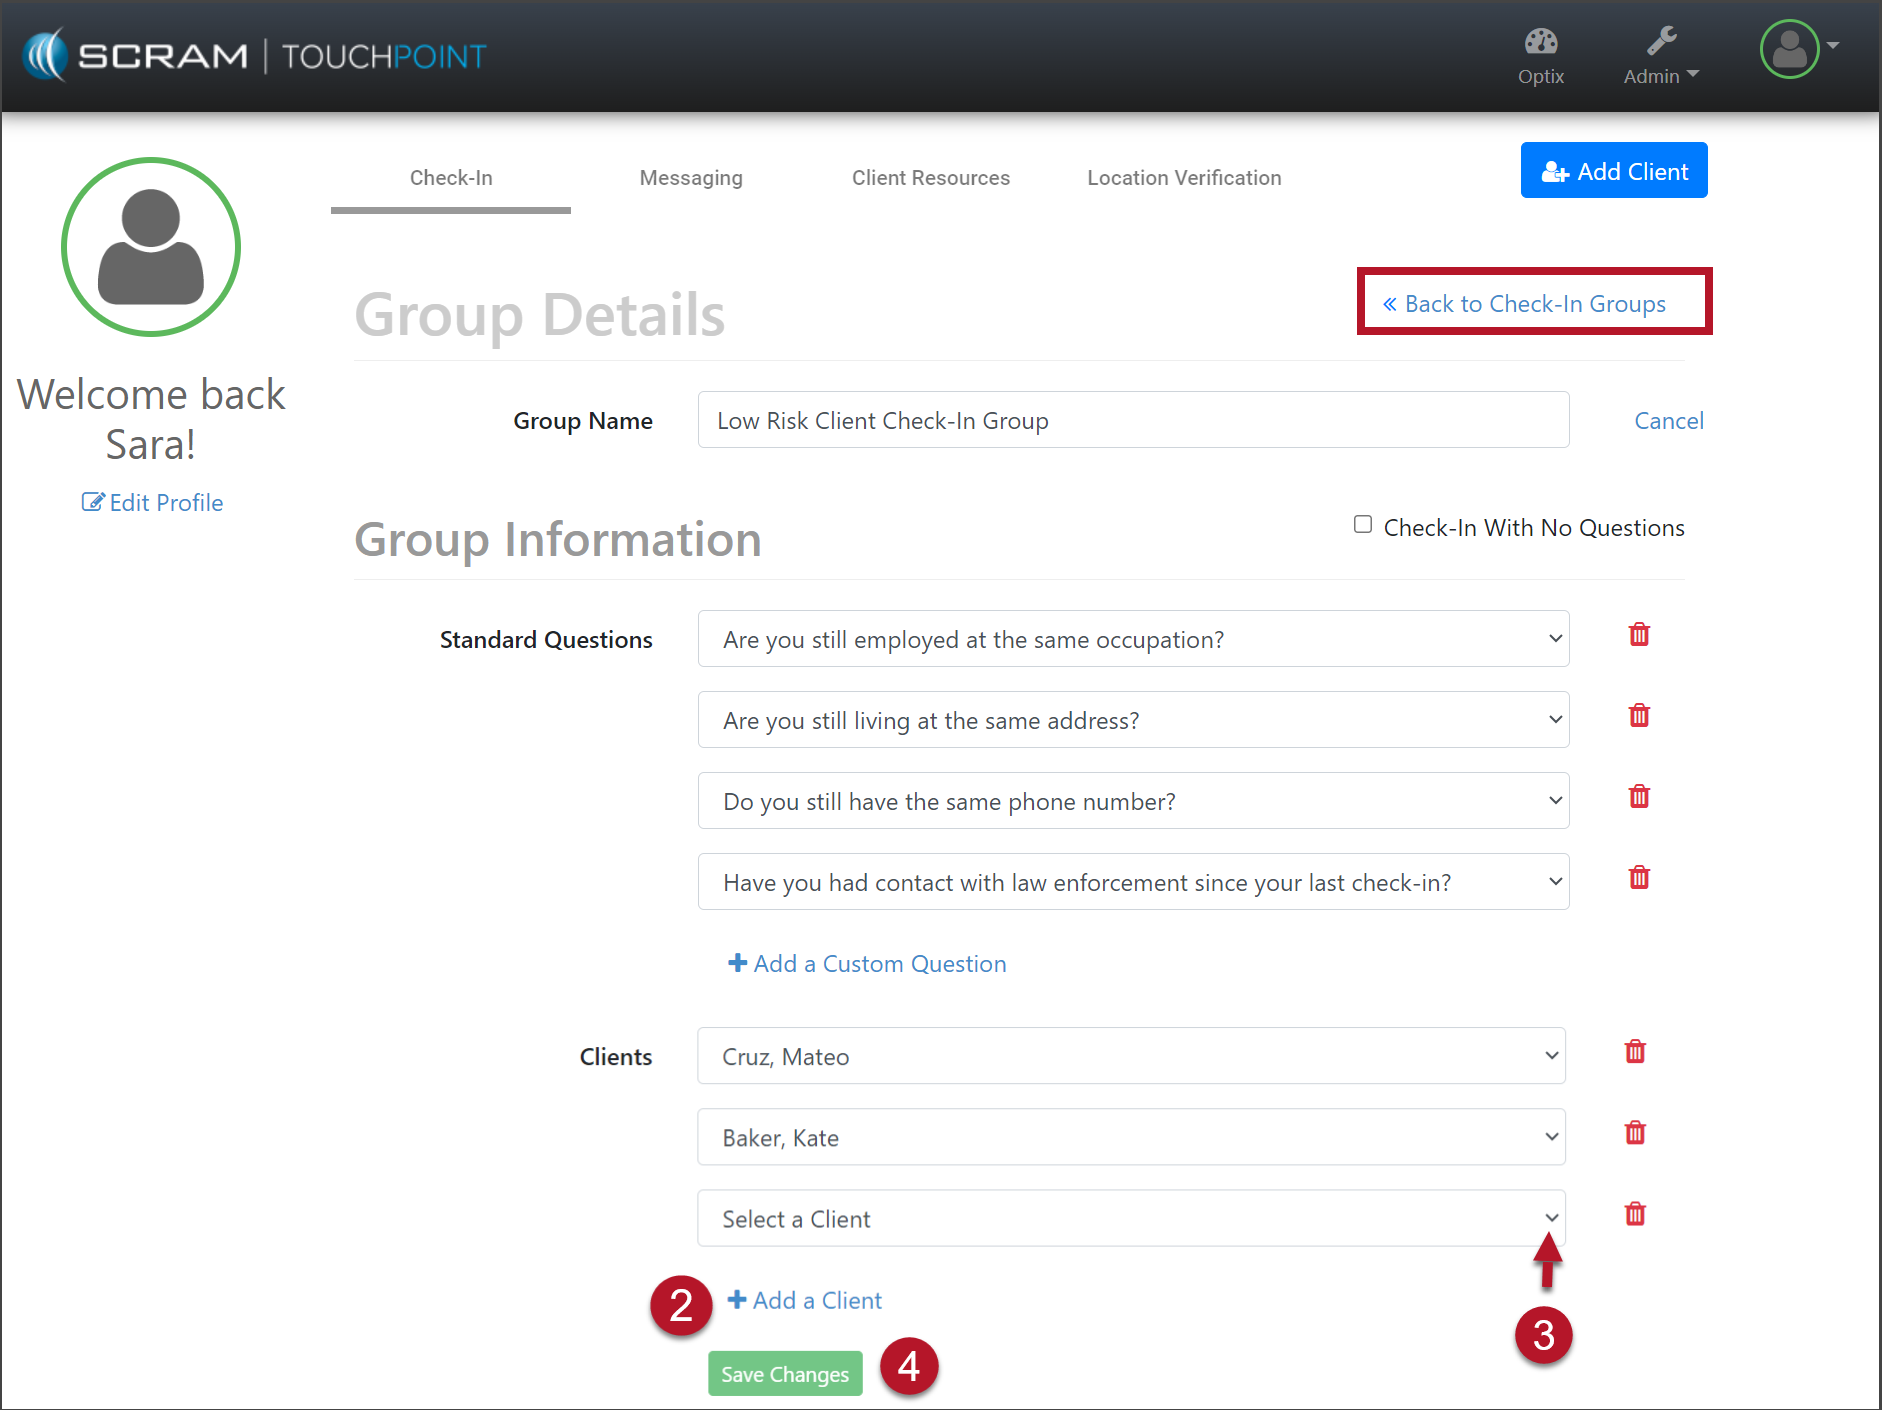
- Select the +Add a Client link.
- Click the menu drop-down and select the client’s name to add them to this Group.
- Click the Save Changes button.
Manage TouchPoint – Check-In Group Details (click to enlarge)
Manage TouchPoint – Check-In Group Details (click to enlarge)
Select the <<Back to Check-In Groups link to navigate back to the Manage Check-In page. All changes are reflected in the next check-in for the client(s).
Delete a Check-In Group
Warning: Before deleting a check-in group, ensure all active clients listed for the group are reassigned to a new check-in group.
Start by selecting the group’s name from the list. The Group Details page is displayed.
Manage TouchPoint – Manage Check-In page (click to enlarge)
- Select the Delete Check-In Group link.
- Confirm the action by clicking the Delete Group button.
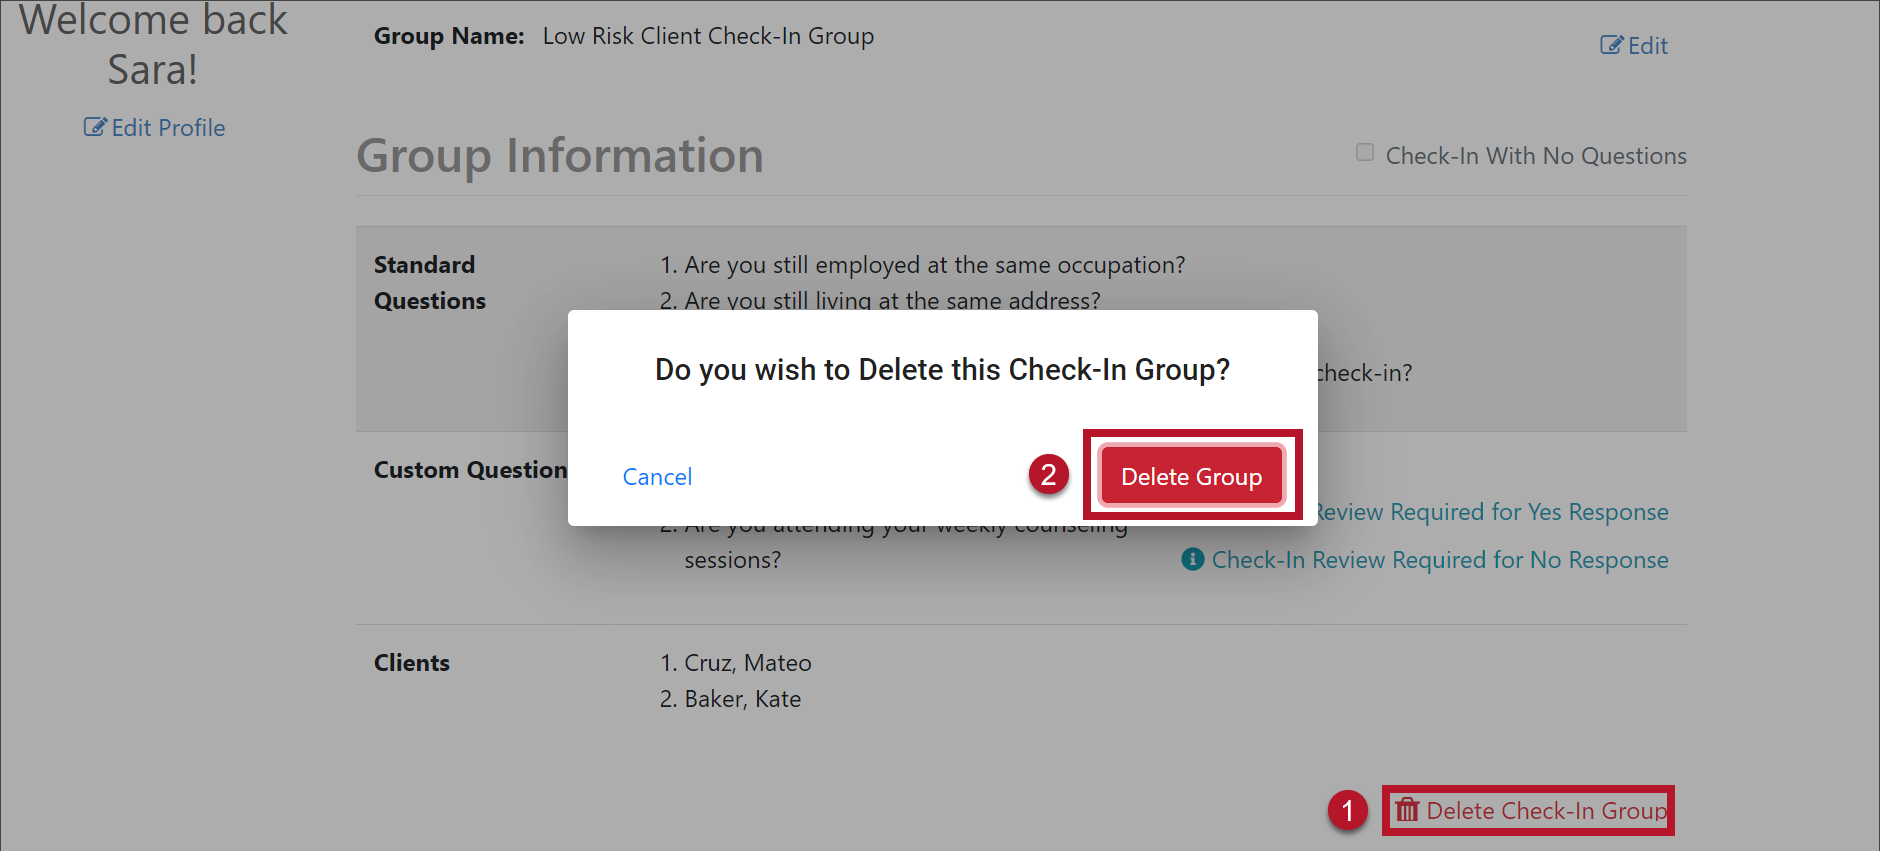
Delete the Check-In Group (click to enlarge)
The group no longer appears under the Groups section.