With an enhancement that goes into effect the afternoon of October 18, 2023, SCRAM Remote Breath caseloads will include a new third-party notification feature, which will allow Agents to designate additional recipients of Remote Breath client notifications, regardless of the recipients’ ability to access the SCRAMNET monitoring system. This feature is especially useful in Family Court scenarios, where spouses, ex-spouses, caretakers, lawyers, or other interested parties require notification of a client’s compliance or non-compliance with the SCRAM Remote Breath Monitoring Program.
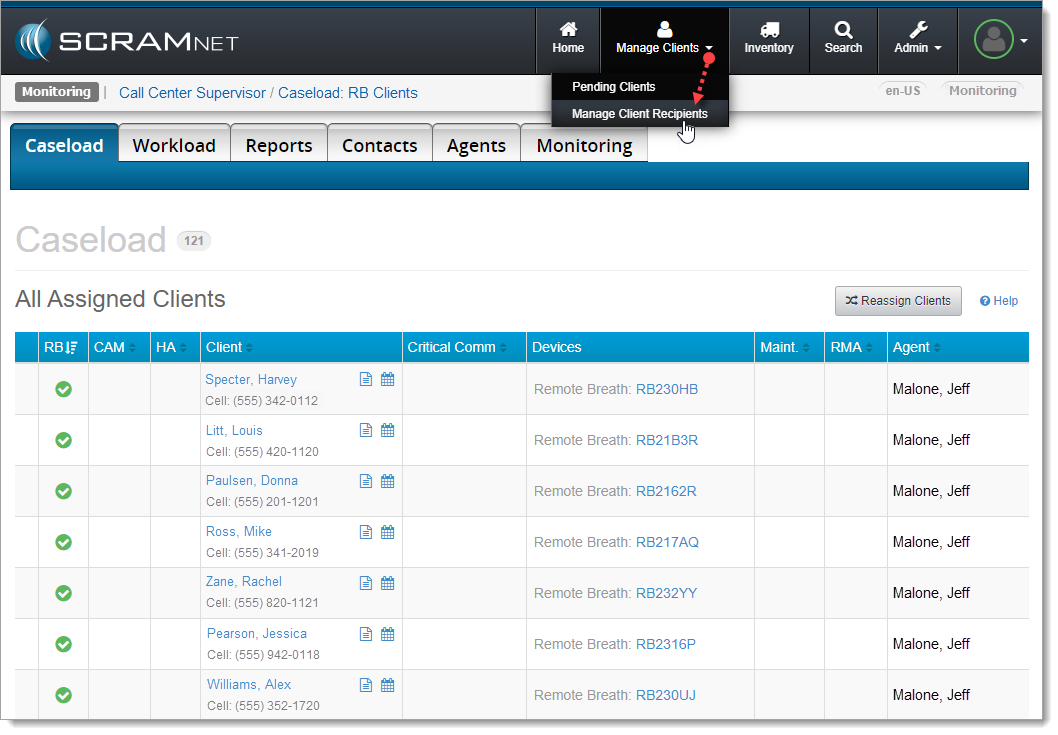
These new notifications may be set up at the Caseload level…
Select New ‘Manage Client Recipients’ Menu Item (click to enlarge)
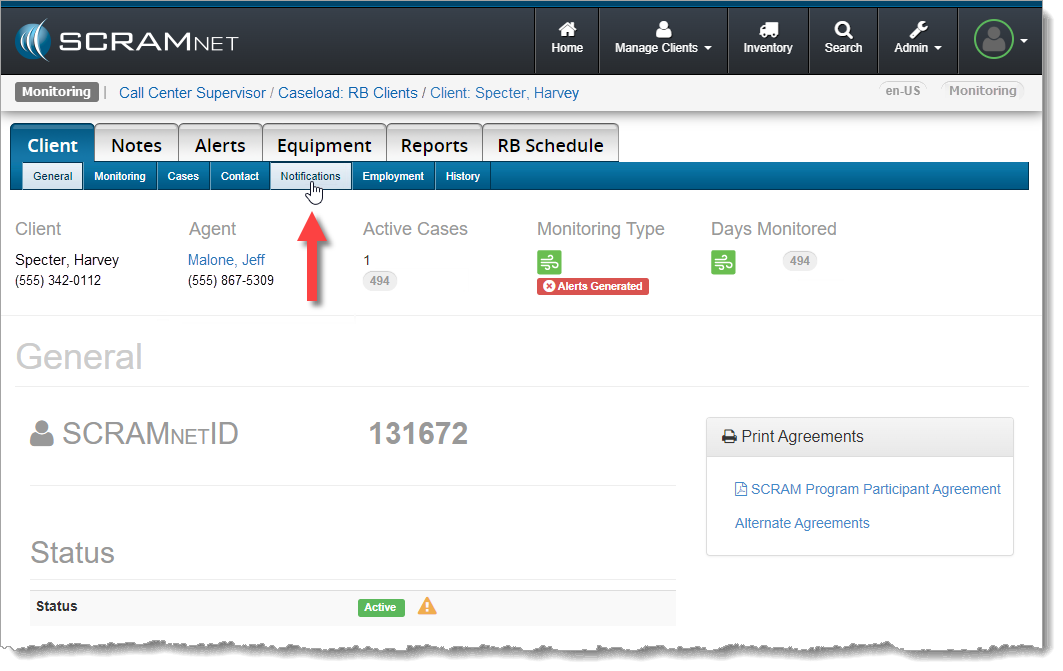
…or at the Client level.
New ‘Notifications’ Sub-tab on the Client Page in SCRAMNET (click to enlarge)
If your client reports that their SCRAM Wireless Base Station (WBS) is beeping incessantly, that is an indicator of one of three possibilities:
The WBS device has been unplugged from its wall outlet
There is a power outage in the client’s home (or a tripped breaker on the WBS wall outlet circuit)
The WBS device has lost its cellular connection to SCRAMNET
Once the power-related possibilities (1 & 2) are eliminated, that means the WBS has lost its connection to the cellular wireless network and SCRAMNET.
Switch to Wi-Fi
If your client’s in-home wireless router supports Wi-Fi Protected Setup (WPS) connections, which is usually indicated by a “WPS” button on the front of the router, you can get the WBS to reconnect to SCRAMNET by instructing your client to switch their WBS from cellular to Wi-Fi connectivity.
Here’s how to instruct your client:
On the front of the base station, repeatedly press-and-release the button to scroll through a list of nearby wireless networks until the Network Name (SSID) of your wireless router appears on the LCD screen.
Once the correct network name is displayed, press-and-hold the button until the base station’s LCD screen displays: PRESS WPS BUTTON ON ROUTER AND WAIT
Press the WPS button on your router and then check the LCD display on the front of the base station. After a few minutes the LCD screen on the base station should update from NONE to WIFI.
Your client may need to repeat these steps a couple of times before the WBS connects to the router successfully.
If your client’s WBS is connected to the cellular network, but you or your client would like to switch to Wi-Fi anyway (for a more reliable connection, e.g.), have your client visit the SCRAM CAM Client Help Portal and download the printable Wi-Fi setup instructions for clients.
Once the Wi-Fi connection is successfully established, the WBS display will show “MONITORING” and the device will begin relaying stored data from the SCRAM CAM bracelet. Notifications and alerts will then begin populating in SCRAMNET for the client.
SCRAM Systems® will be moving to QR code-based “Help” cards for nearly all of its products and services by the end of this week. The switch from static instruction cards to QR codes helps to ensure that customers – and clients – always have the most up-to-date instructions for their SCRAM Systems devices at their fingertips.
There will be two separate QR code-driven Help cards:
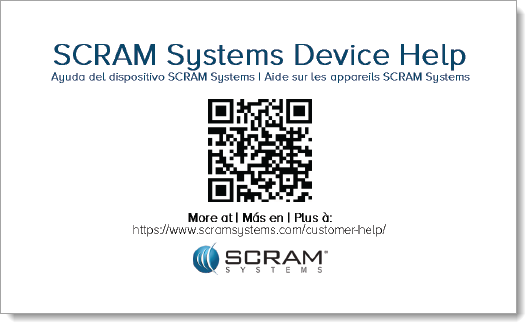
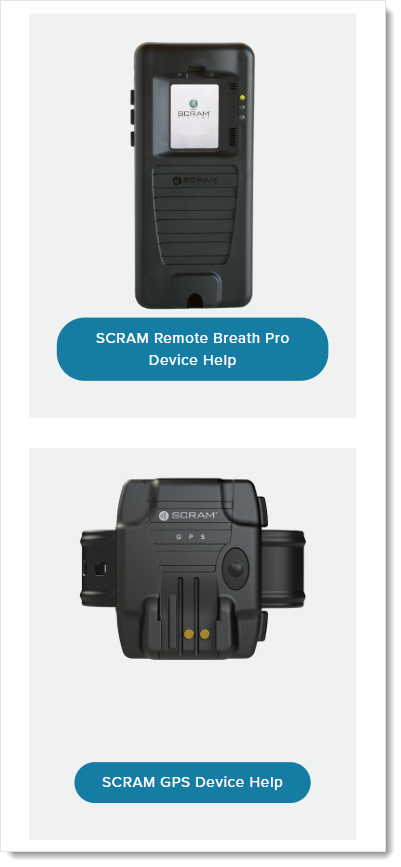
SCRAM Systems Device Help for customers (Service Providers and Agencies) – the blue card
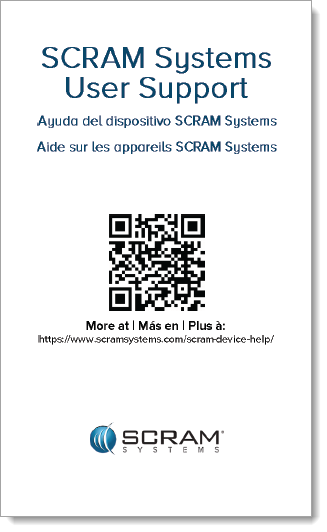
SCRAM Systems User Support for clients – the white card
Quick Reference Guides will still continue to be printed for all SCRAM Systems products.
What’s a QR Code?
A QR code is a type of two-dimensional matrix barcode consisting of an array of black and white squares. QR codes are typically used for storing web addresses (URLs), which can be read by the camera on a smartphone to open a web page.
QR Code Example
How Will SCRAM Systems Use QR Codes?
Rather than including device-specific instruction cards in the boxes we ship to you, we will instead include two packs of 25 business-card-sized Help cards – one pack of customer Help cards and one pack of client Help cards – in each of our Customer Care Kits. Additional 25-card packs of each type will be available for purchase on the SCRAMNET Equipment Order Form if needed.
Help for Service Providers and Agencies
You and the other Officers, Agents, and Case Managers who are responsible for monitoring clients in your SCRAM Systems Program, can carry one of the blue customer cards with you, or post them around the office. Then whenever you need help installing or removing a device, for example, you may simply pull out the SCRAM Systems Device Help card and scan it with your smartphone:
SCRAM Systems Device Help Card – Front
SCRAM Systems Device Help Card – Back
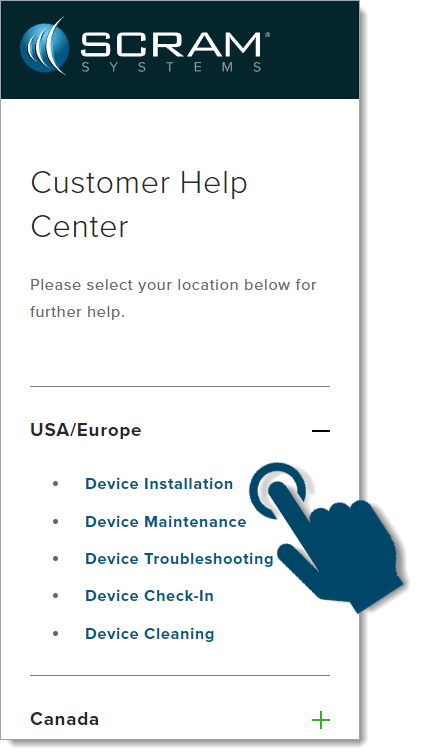
Once you scan the QR code on the card, your smartphone will launch the SCRAM Systems Customer Help Center (www.scramsystems.com/customer-help/), where you will tap on your location, and then tap on the type of Help you need:
Scan the card with your smartphone and then select your location:
Select Your Geographical Location (USA/Europe Shown)
Select the type of device help you seek:
Select the Type of Help (Device Installation Shown)
Login with your SCRAM monitoring system credentials:
Login with SCRAM Credentials
Requiring a login ensures that nobody except SCRAM Systems customers can access SCRAM Device Help.
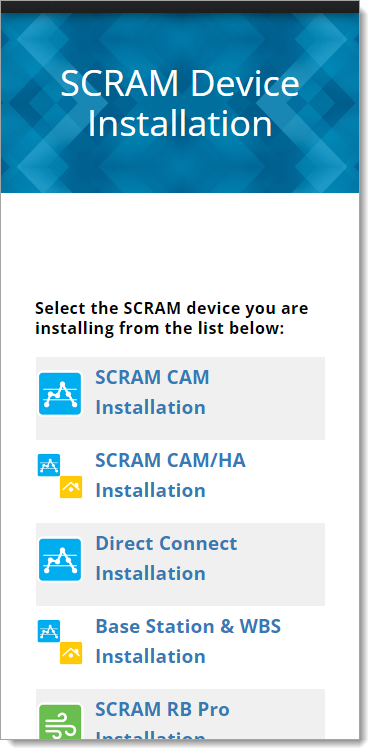
Select the specific SCRAM Systems product for which you want help:
Select the Appropriate Product (Installation Help Example)
Help for Clients
SCRAM Systems will also be eliminating most product-specific client instruction cards, and will instead make QR code-driven SCRAM Systems User Support help cards available:
SCRAM Systems User Support Help Card – Front
SCRAM Systems User Support Help Card – Back
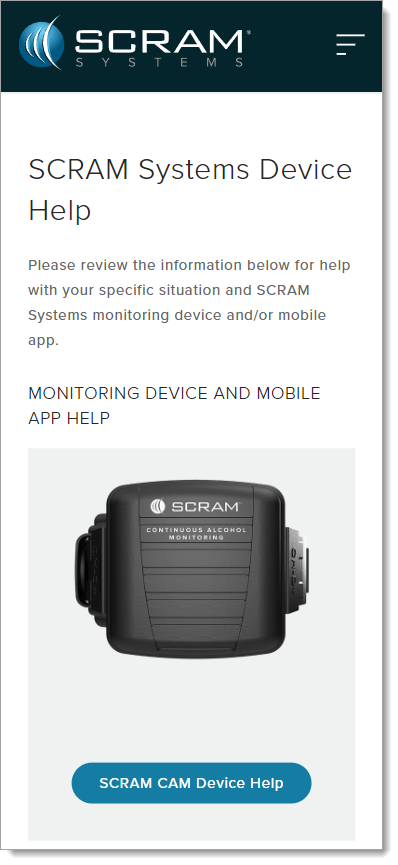
Once the client scans the QR code on the white card, their smartphone will launch SCRAM Systems Device Help for clients (www.scramsystems.com/scram-device-help/), where they may scroll through a list of SCRAM Systems devices, mobile apps, and FAQs, and simply tap on the type of help they need:
SCRAM Systems Device Help for Clients – SCRAM CAM
SCRAM Systems Device Help for Clients – SCRAM RB Pro & GPS
On the afternoon of August 9, 2023, SCRAM Systems® released two Participant Agreement-related enhancements in the SCRAMNET® monitoring system.
A new Participant Agreement Acknowledgement during device assignment
Updated language in the SCRAM CAM, SCRAM HA, and SCRAM CAM+HA Participant Agreements
These enhancements are designed to better protect your organization and its agents.
SCRAMNET Device Assignment Enhancement
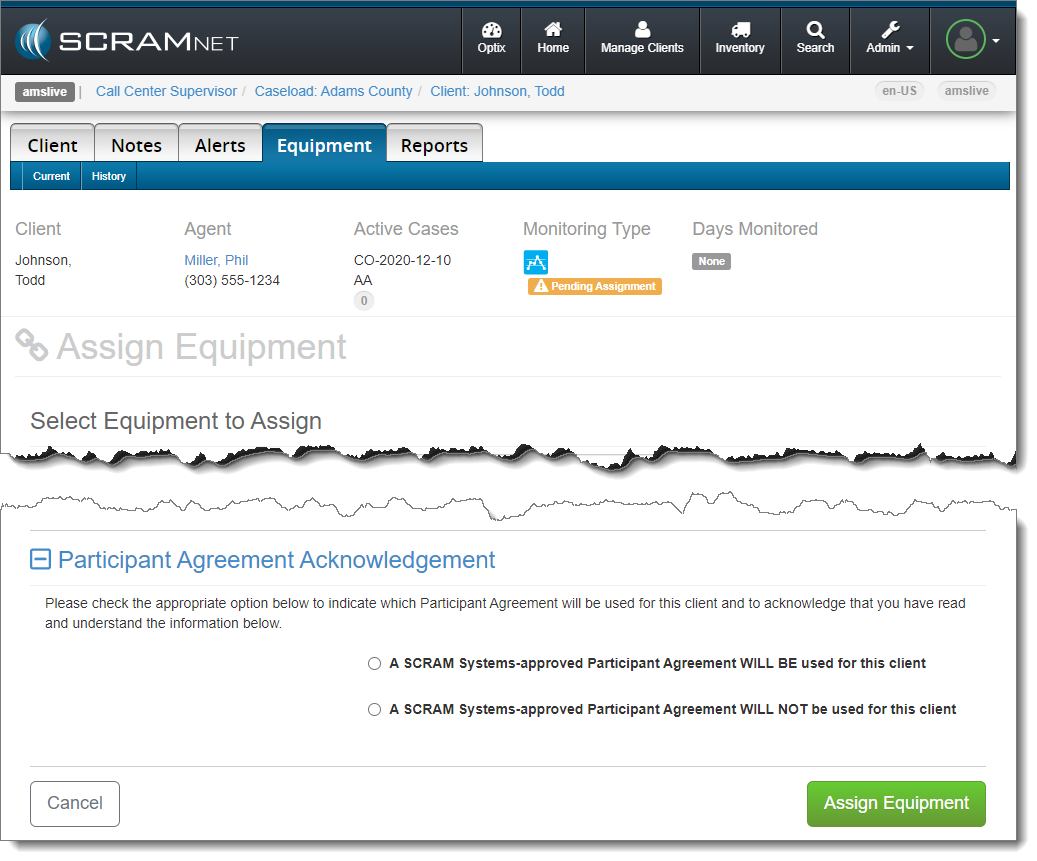
When it is time to assign equipment after adding your client to SCRAMNET, before you may continue with the assignment process, you will have to make a “Participant Agreement Acknowledgement.” The addition of this acknowledgement to the enrollment process grew out of a need for better recordkeeping. It is simply a record of which Agreement was used at the time of enrollment and does not impact the support you receive from SCRAM Systems.
You will be presented with two choices:
A SCRAM Systems-approved Participant Agreement WILL BE used for this client
A SCRAM Systems-approved Participant Agreement WILL NOT be used for this client
Participant Agreement Acknowledgement on the SCRAMNET Assign Equipment Page – click to enlarge
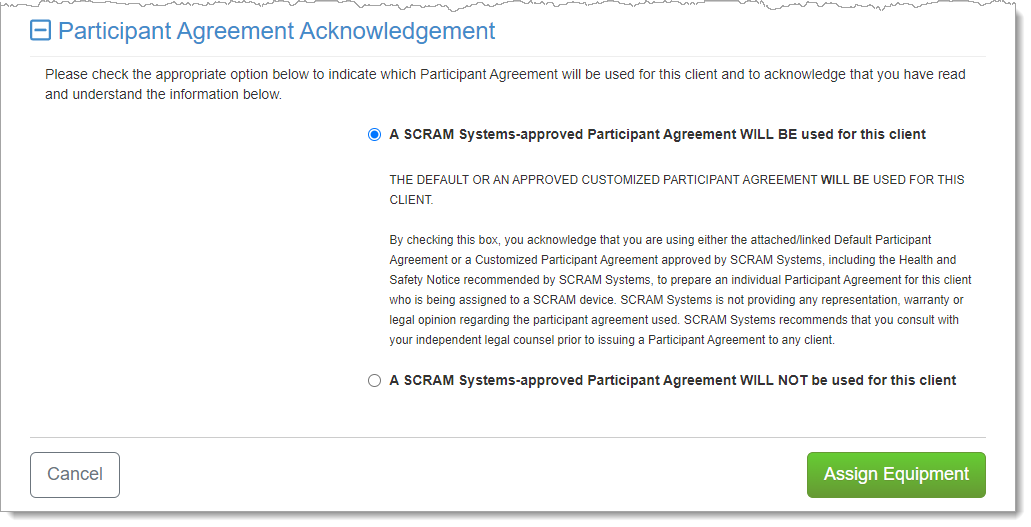
“The vast majority of SCRAM Systems customers will choose the first option…”
The vast majority of SCRAM Systems customers will choose the first option, “A SCRAM Systems-approved Participant Agreement WILL BE used for this client.” This option indicates that you are using a Participant Agreement that is currently available to you as a link in the SCRAMNET monitoring system.
Once you have chosen an option, a more detailed explanation of the choice you have made will appear:
First PA Acknowledgement Chosen – click to enlarge
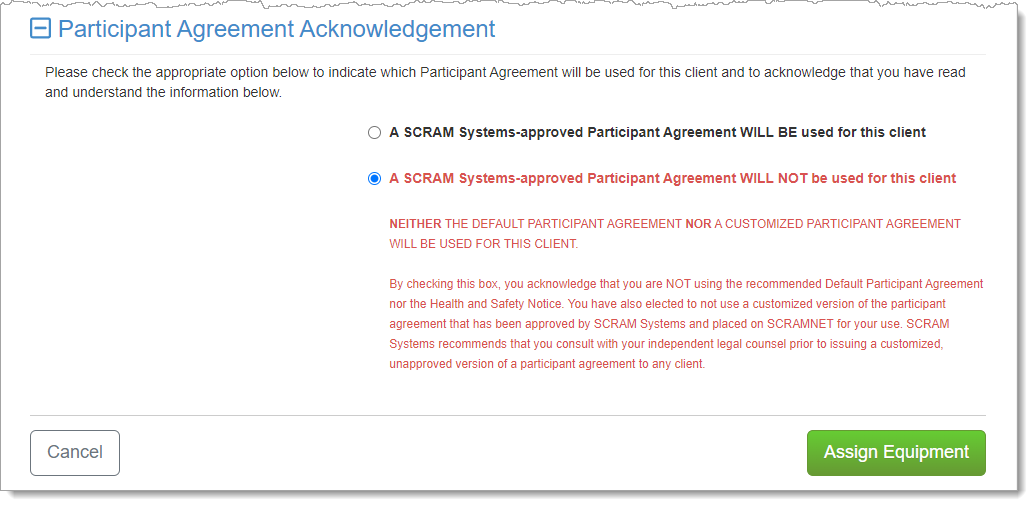
Customers who use their own monitoring program participation agreements, which they have developed in-house, independent of SCRAM Systems, and are NOT stored on or accessed from SCRAMNET, should choose the second option:
Second PA Acknowledgement Chosen – click to enlarge
If you are unsure about the type of monitoring program participation agreement used by your organization, ask your supervisor or program administrator.
Completing the Device Assignment – Option 1
If you chose the “SCRAM Systems-approved” Participant Agreement Acknowledgement (first option), then a page with links to the available Agreements will appear, as per the established process.
Complete Assignment Page with Participant Agreement Links – click to enlarge
Print two copies (one for your records and one for the client) of the Participant Agreement and then select Complete Assignment.
Completing the Device Assignment – Option 2
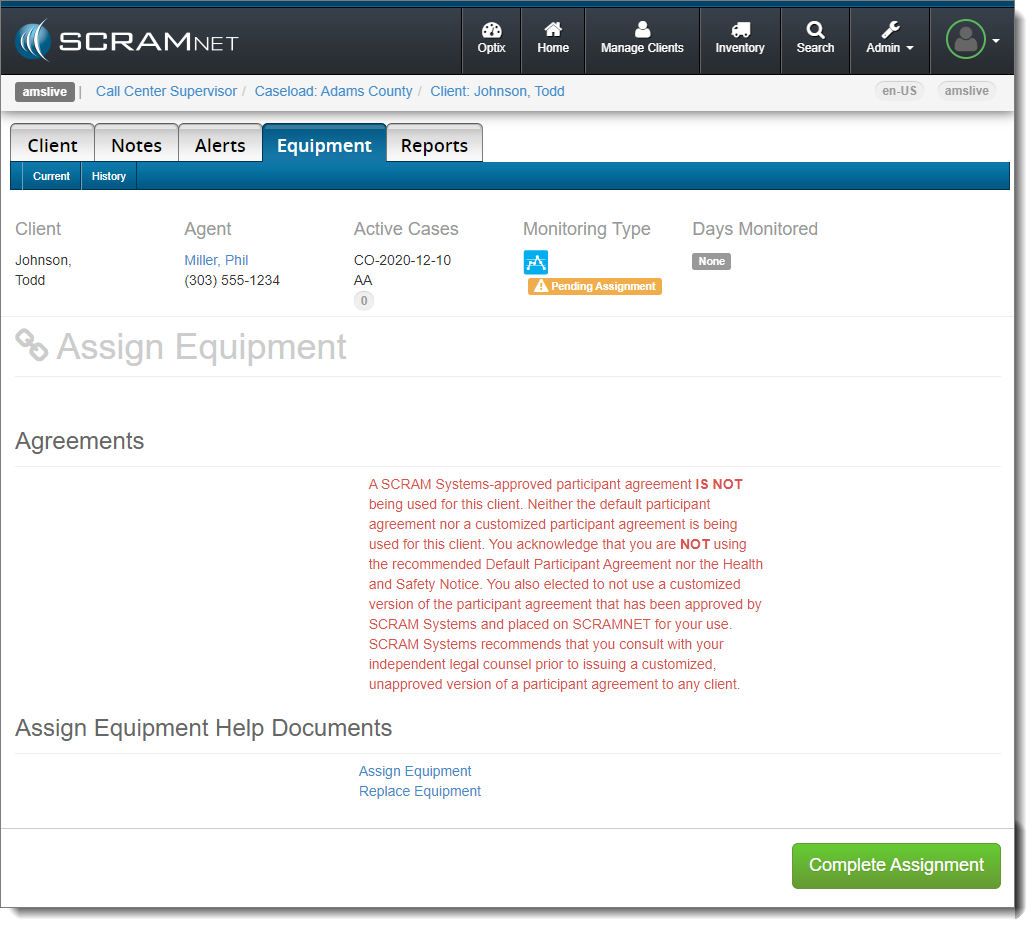
If you chose the “NOT SCRAM Systems-approved” Participant Agreement Acknowledgement (second option), then the following page will not include links to any Agreements, and will instead display language that confirms your choice to NOT use a SCRAM Systems-approved Agreement.
Complete Assignment Page With Participant Agreement Disclaimer – click to enlarge
Provide the client with a copy of your program’s participation agreement from wherever it is housed in your organization’s internal storage resource as you normally would, and then select the Complete Assignment button to continue with the device assignment.
Participant Agreement Updates
In addition to the Participant Agreement Acknowledgement enhancement, the SCRAM CAM, SCRAM House Arrest (HA), and SCRAM CAM+HA Program Participant Agreements have been updated. Feedback from customers as well as our own Judicial Services team led us to make the following improvements in our Agreements:
Terminology used throughout the Agreements is more clearly defined in the opening paragraphs.
The description of how the Device monitors your Program Participants was clarified throughout.
Language that explicitly requires clients to maintain Internet service in their homes if required for Base Station operation was added.
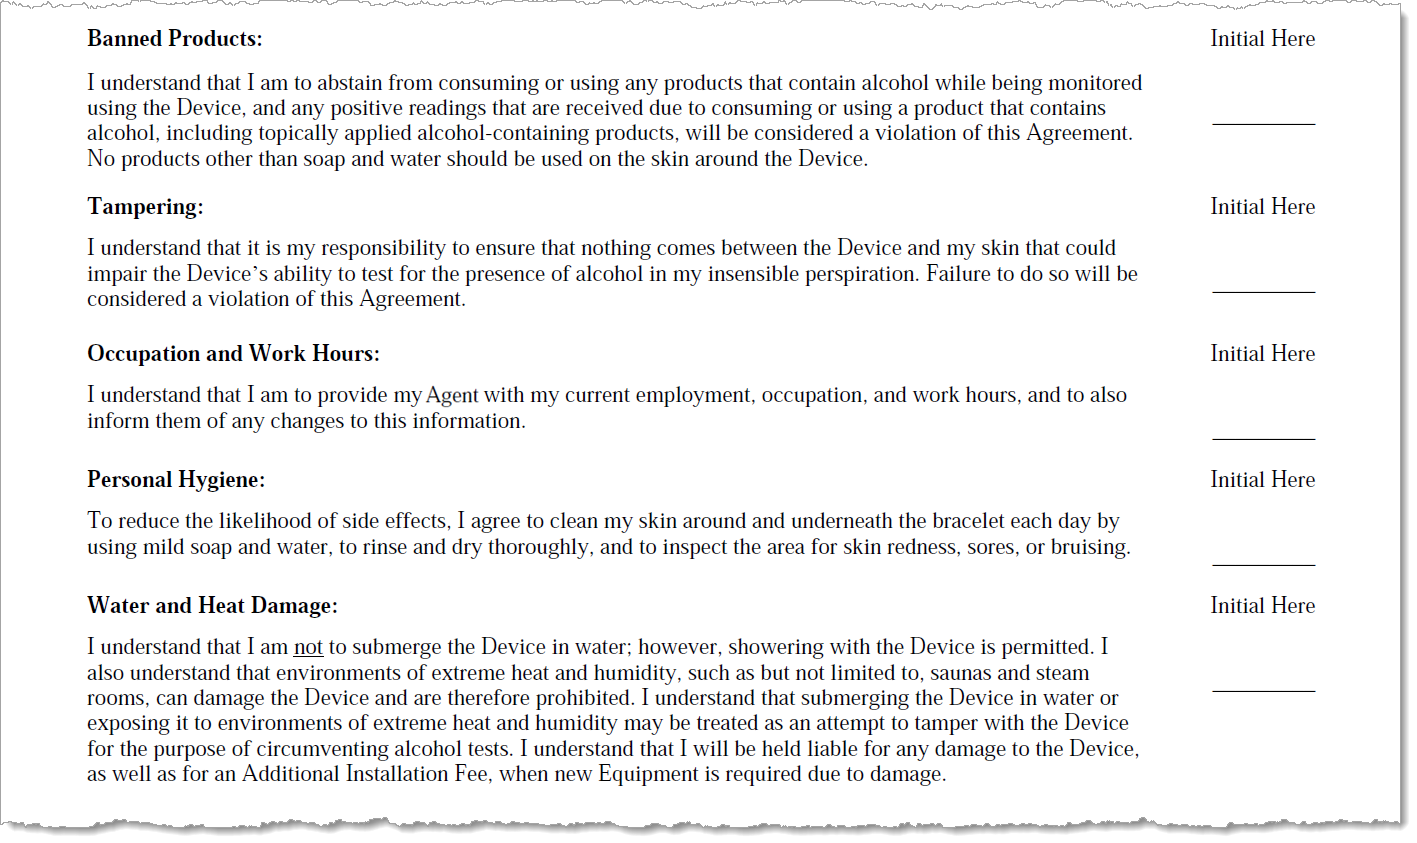
Language that explicitly describes what qualifies as “Tampering” and how it is a violation of the Agreement has been clarified.
The “Swimming and Bathing” section has been replaced by a “Water and Heat Damage” section, which now also includes prohibitions regarding saunas and steam rooms.
New and Updated Participant Agreement Language – CAM Examples (click to enlarge)
Customers who have made minor customizations to their Agreements (equipment pricing only, e.g.) will see the new language appear in their custom Participant Agreements automatically.
Customers who have worked with SCRAM Systems to make material changes to the language within their Participant Agreements (altered or added new paragraphs with specific language) will need to work with their SCRAM Systems Account Managers or Sales Managers to request the updates; they will NOT occur automatically.
If you feel that a piece of SCRAM Systems equipment may pose a specific health hazard, and you decide it is not worth the risk to clean or reuse the device, please:
Contact SCRAM Systems Customer Service at 303.785.7879 or support@scramsystems.com with the serial number of the device being removed and/or decremented from your inventory.
In a message dated June 24, 2022 and in a follow-up message delivered June 20, 2023, SCRAM Systems notified its SCRAM Remote Breath Classic (RB Classic) customers that SCRAM RB Classic devices and SCRAM Remote Breath LTE Adapters (“RB LTE Adapters”) would be decommissioned. The purpose of this message is to remind you that:
As of July 1, 2023, RB Classic devices – with or without RB LTE Adapter – will no longer be supported by SCRAM Systems.
Please dispose of or recycle all RB Classic devices and RB LTE Adapters on or afterJuly 1, 2023, in accordance with e-waste disposal guidelines in your area. There is no need to return the equipment to SCRAM Systems.
Please contact your SCRAM Systems Sales Manager to discuss upgrading to SCRAM Remote Breath Pro. Clients still assigned to RB Classic devices willno longer be monitored.
You may recall that on Monday, May 22, 2023, SCRAM Systems released a new firmware package (226/200) to SCRAM Remote Breath Pro (RB Pro) devices. Among the many enhancements and improvements included in this new firmware package was the ability to detect fuel-cell contaminants in the breath testing flow path. This enhancement helped to reduce occurrences of “0.999 BrAC” test results.
When an excess of Volatile Organic Compounds (VOCs) is detected – usually picked up from the device’s surroundings – the RB Pro device prevents breath tests from being performed. When this occurs, the device displays, “PLEASE WAIT,” generates a descending arpeggio (“uh-oh”) sound, and then goes back into sleep mode. Such an event also generates the alert, “Unable to Test – Contaminated” in SCRAMNET.
Beginning this afternoon, June 21, 2023, when RB Pro detects an excess of VOCs and prevents a client from taking a breath test, the device will now generate the new alert, “Ambient VOC Detected.” When this occurs, advise the client to take the following steps to help clear the device’s breath testing flow path.
How long should I charge the device before starting an enrollment?
SCRAM Systems recommends charging the device for at least 90 minutes prior to starting an enrollment.
Should I power on the device before or after entering the serial number into SCRAMNET?
Do not power on the RB Pro device until after you have entered the the device serial number into SCRAMNET. This will prevent a firmware download from delaying the enrollment process.
What are best practices for enrollment photos?
The tester should be positioned in a moderately well-lit area away from direct sunlight.
Tester should remove any hat, sunglasses, and any hair hanging over the face.
Ensure there is nothing in the tester’s mouth during testing.
Tester should stand with the back to a wall, hold head upright, and look directly forward.
Tester should hold the device up to their mouth with eyes centered in the mirror if using SCRAM Remote Breath, or display screen if using SCRAM Remote Breath Pro, and remain in that position while delivering a breath sample.
How many initial enrollment photos can be taken?
After providing the enrollment photo, the device will provide feedback regarding the quality of the photo. If the enrollment photo is poor, the client can provide two additional enrollment photos. Once three enrollment photos have been taken, the system will select the best enrollment photo to use as the baseline photo.
How many practice tests can be taken?
As many as needed for the client to get comfortable with taking a breath test.
How do I complete the enrollment process?
To end enrollment and practice tests, access the menu and select the “End Enrolment” option.
At 5:00 AM MDT on Thursday, March 30, 2023, SCRAM Systems is introducing a new indicator in SCRAMNET GPS that will inform you when an Exclusion Zone does NOT have a daily 24/7 schedule associated with it.
During the 15-minute deployment, you may not be able to access SCRAMNET GPS, but messages from the SCRAM GPS device continue to be processed uninterrupted.
Indicate On Zones Page When Exclusion Zone Doesn’t Have a Daily 24/7 Schedule
By default, all exclusion zones automatically have a 24/7/365 schedule associated with it. Users can now adjust these schedules as needed. For example, perhaps an area is an exclusion zone only after work hours.
A notice indicator has been added to the Zones page when an exclusion zone does not have a 24/7/365 schedule. No action is required; this indicator is for informational purposes only.
This image shows that the exclusion zone does not have a 24/7 schedule. (click to enlarge)
At 5:00 AM MDT Tuesday, March 14, 2023, SCRAM Systems deployed several new features in SCRAMNET GPS. Enhancements include:
Schedules for Exclusion Zones
Users May Use a Filter to Distinguish Between Case Notes and Event Notes
New Location Accuracy Report
During the 15-minute deployment, you may not have been able to access SCRAMNET GPS, but messages from the SCRAM GPS device continued to be processed uninterrupted.
Schedules for Exclusion Zones
Users can now create schedules to indicate specific times clients are not allowed in an exclusion zone. The ability to create schedules for exclusion zones could be useful in scenarios where a client is allowed to be in a location during the day for business reasons, but not allowed in the location at night because the area becomes a party spot.
For exclusion zones that are always off limits, no
action is needed. Exclusion zones will continue to work as expected. By
default, all exclusion zones create a 24/7 schedule.
Create / Modify a Schedule for an Exclusion Zone
By default, there is no need to create a schedule
for an exclusion zone. When an exclusion zone is created, a 24/7 schedule is
automatically created. To modify the schedule:
Open
the Zones and Schedule dialog
Select
“Exclusion Zone” from the Zone Type dropdown
Select
the exclusion zone from the Zone/Beacon dropdown
Double-click the schedule to open the Schedule Details dialog (click to enlarge)
Double-click the schedule to open the Schedule Details dialog. Note if the current day is selected, the schedule must be ended to modify the time.
The schedule must be ended to modify the time. (click to enlarge)
Set the time and recurrence the client is not allowed in the zone. The following schedule indicates the client is not allowed in the “Buckhead Bar Area”, every day, between 6:30 PM and 5:00 AM.
Set the time and recurrence the client is not allowed in the zone. (click to enlarge)
Overlapping Schedules
Although it’s possible to create overlapping
schedules for exclusion zones, it should not be necessary because, unlike
schedules for inclusion zones, schedules for exclusion zones cannot be
prioritized. All overlapping schedules are treated equally. However, only one
zone violation will be generated.
Create a Schedule Exception for an Exclusion Zone
To create an exception, drag or click in the timeframe slot to open the Schedule Exceptions Details dialog.
To create an exception, drag or click in the timeframe slot to open the Schedule Exceptions Details dialog. (click to enlarge)
Verify Type is set to “Exception”, and that Zone/Beacon is the Exclusion Zone for which you want to create an exception. Set the exception start Date, Start Time, End Time, and Recurrence Type. The time is when the client is allowed in the Exclusion Zone, without generating an Exclusion Zone Violation. Click Save to confirm the exception.
The Schedule Exception is shown on the calendar. Hover over the exception to see the details.
The Schedule Exception is shown on the calendar. Hover over the exception to see the details. (click to enlarge)
Users Can Filter Between Case Notes and Event Notes
The Notes dialog can be filtered on Case Notes or
Event Notes. This can be useful to present specific note types to court.
The Notes dialog can be accessed from multiple entry
points:
Dashboard
> [Client name] > Context Menu > Notes
Client Profile Summary dialog > Notes
Client Profile page > Notes
Client Events dialog > Notes
Location Maps > Notes
Device Assignment page > Notes
New Client Profile page > Notes
From the Notes dialog, select the drop down to filter on Case Notes or Event Notes.
From the Notes dialog, select the drop down to filter on Case Notes or Event Notes. (click to enlarge)
Click the Print Notes icon to print the Event and Case Notes Report. The printed report follows the filter settings.
Click the Print Notes icon to print the Event and Case Notes Report. The printed report follows the filter settings. (click to enlarge)
New Location Accuracy Report
To help comply with Indiana Senate
Bill 9, a new “Location Accuracy Report” has been added to SCRAMNet GPS. This
report shows the total number of location points that fall above or below a
given threshold for determining each location point’s accuracy.
To run the report, select Location Accuracy Report from the Reports menu:
To run the report, select Location Accuracy Report from the Reports menu (click to enlarge)
Select the date range for the report. The date range can span up to three months (to allow for quarterly reporting). The Start Date can go back one year.
Select the Accounts and Client(s) to include in the report. The Client(s) list contains clients who were active during the selected timeframe
Set the threshold values for determining when a point is considered NOT accurate. In the example above, any point with an accuracy greater than 150 feet AND six or less satellites, is considered not accurate.
Click the View Report button. Depending on the report time frame, and number of clients selected, the report could potentially analyze hundreds of millions of location points. For this reason, the report could take several minutes to generate.
Depending on the report time frame, and number of clients selected, the report could potentially analyze hundreds of millions of location points. For this reason, the report could take several minutes to generate. (click to enlarge)
The report shows 23 clients
monitored during the 4th quarter 2022. Of 930,983 location points
collected, 5,011 had an accuracy greater than or equal to 150 feet AND used six
or fewer satellites.