Stop Monitoring and Remove the Equipment from a Subject
This guide is designed to provide you with step-by-step instructions to stop monitoring and remove the equipment from a subject in SCRAMNET.
Locate the Subject
To begin, Log into SCRAMNET.

SCRAMNET Login (click to enlarge)
Next, locate the subject’s profile in SCRAMNET. There are two options.
Option One
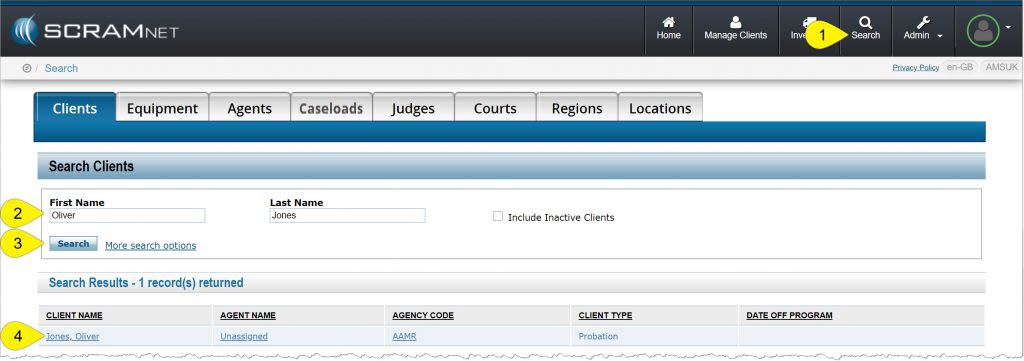
- Select Search from the top menu.
- Input the subject’s information.
- Click the Search button.
- Select the subject’s name from the list.
SCRAMNET Search page (click to enlarge)
Option Two
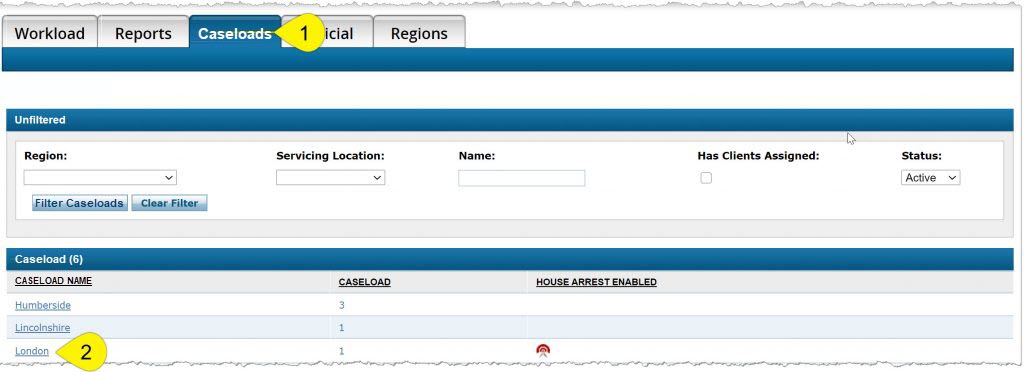
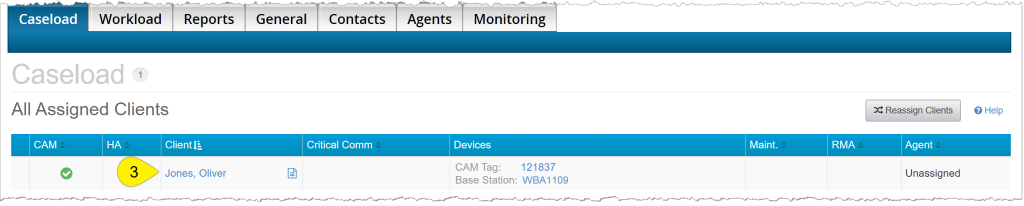
- Click the Caseloads tab.
- Select the required Caseload (location).
- Select the subject’s name on the Caseload page.
SCRAMNET Caseloads tab (click to enlarge)
SCRAMNET Caseload page (click to enlarge)
Stop Monitoring
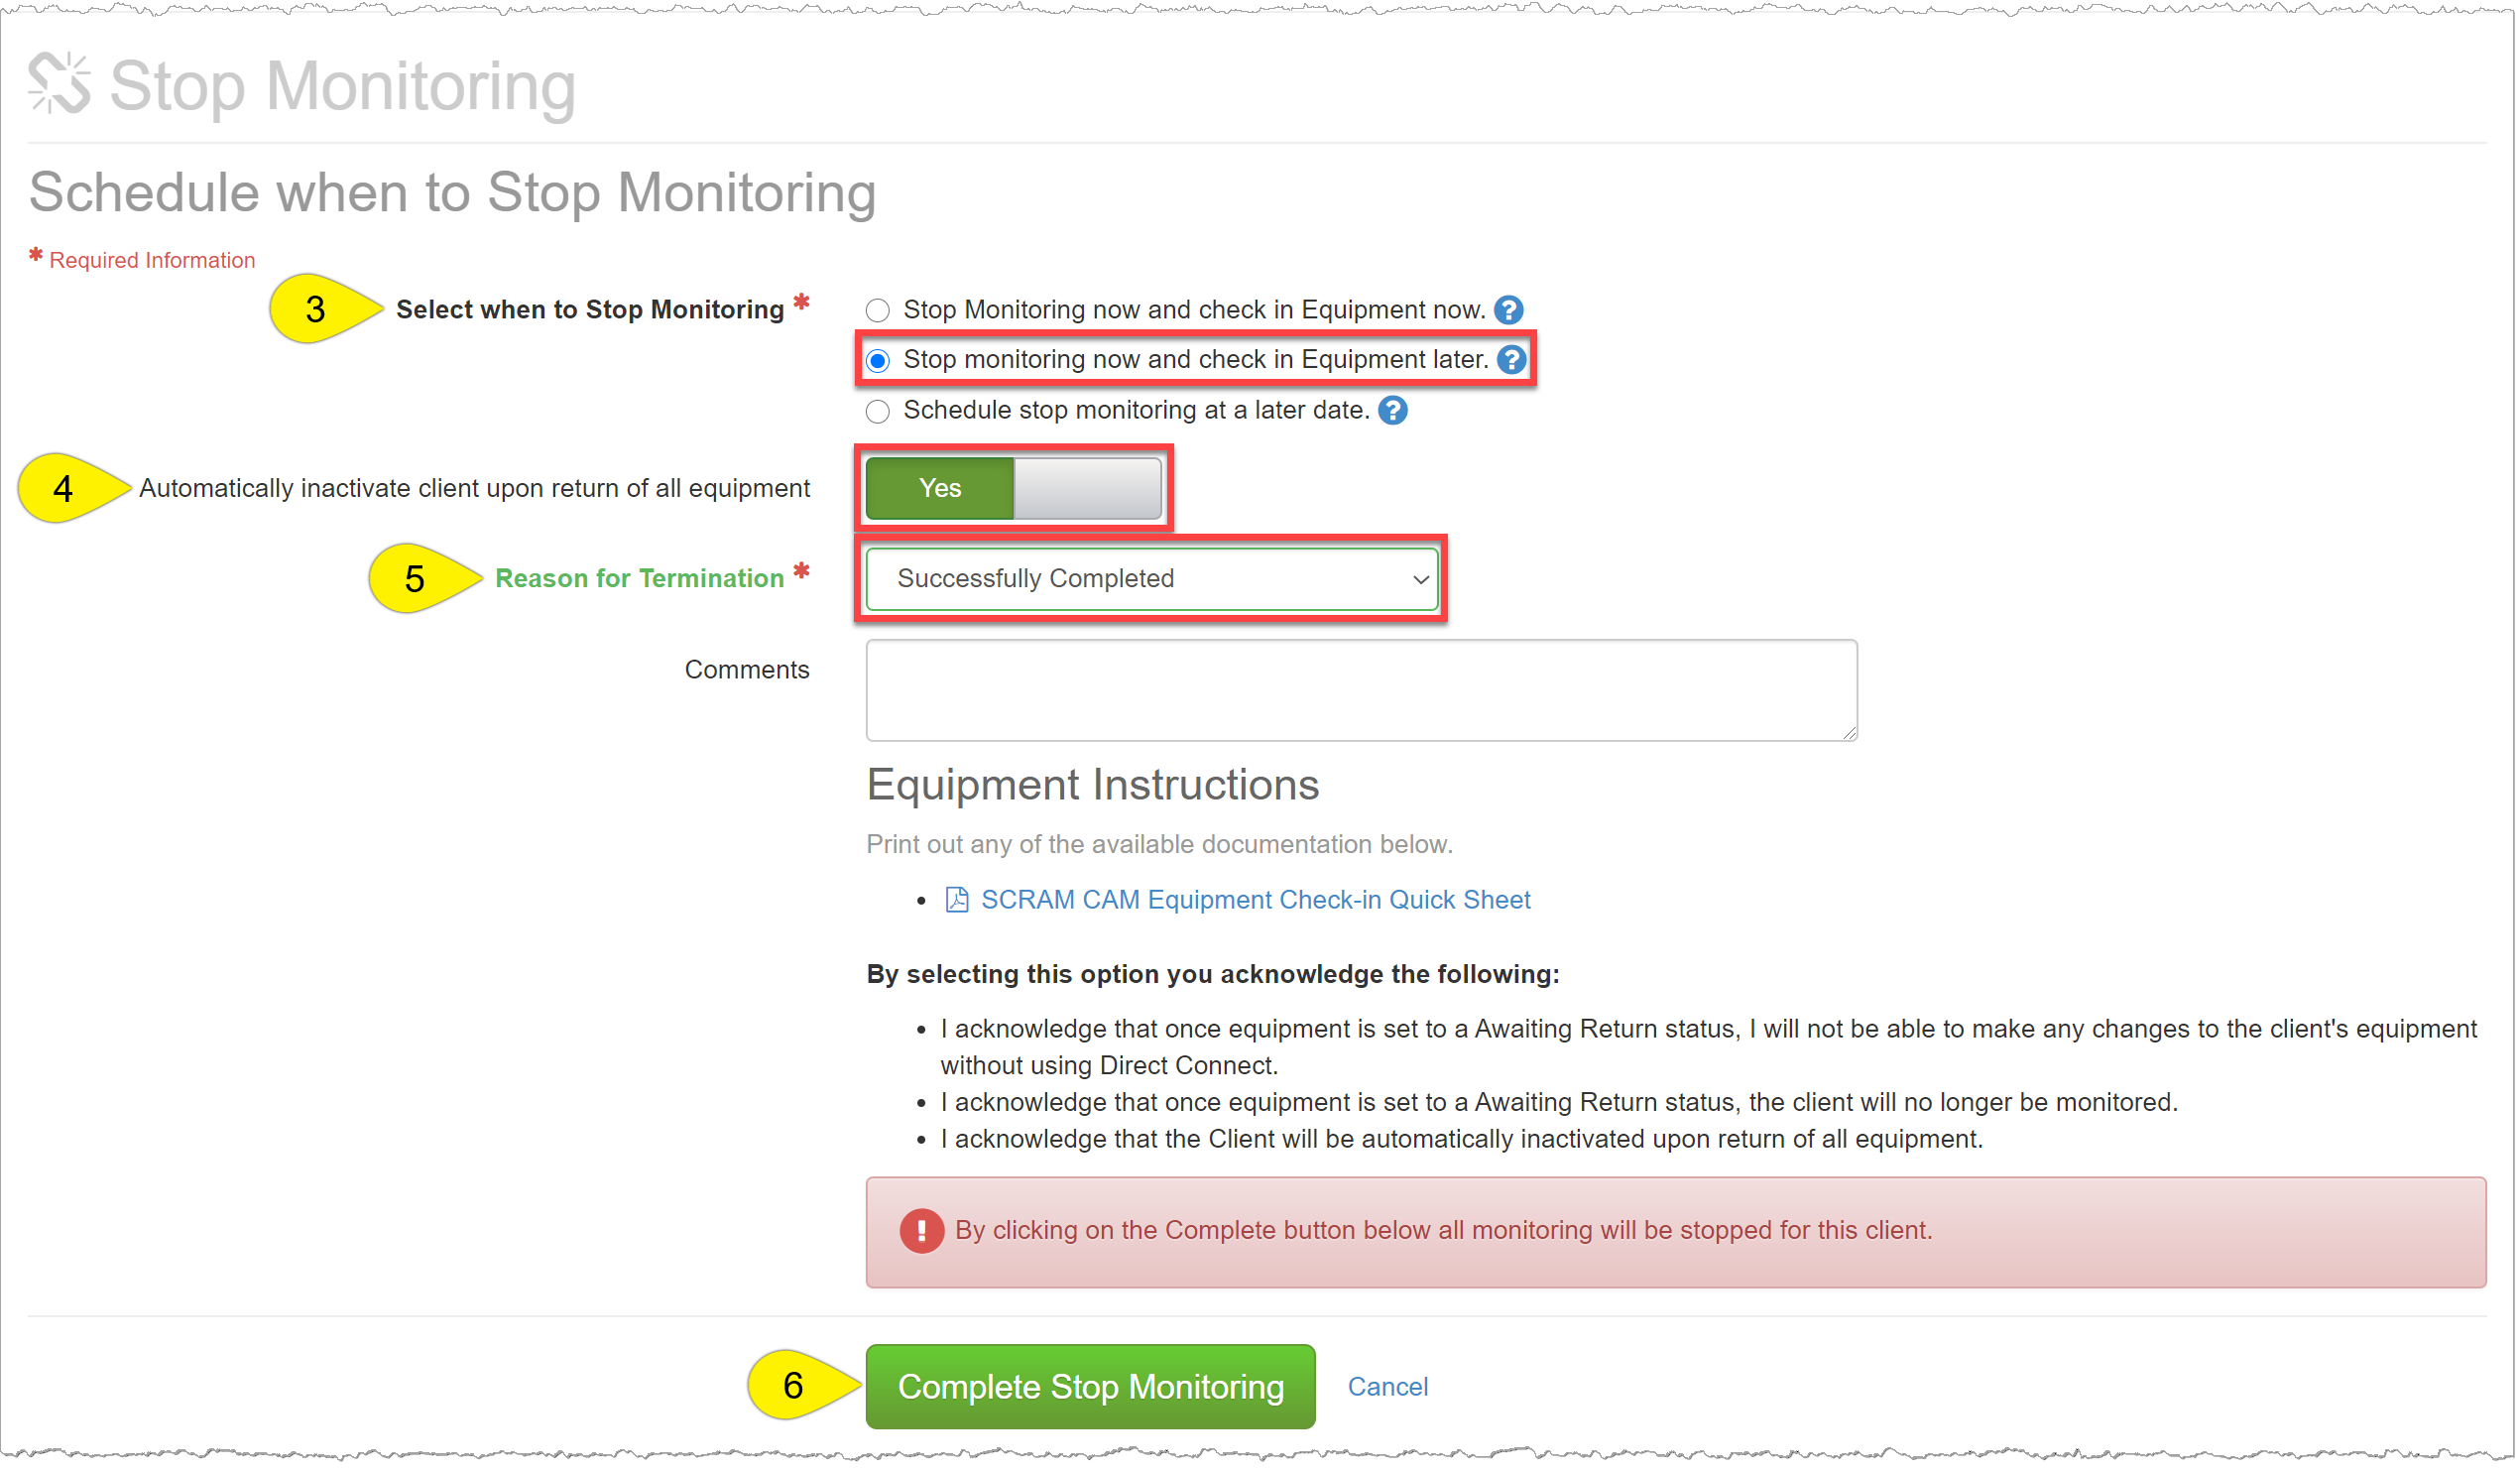
To stop monitoring the subject in the system,
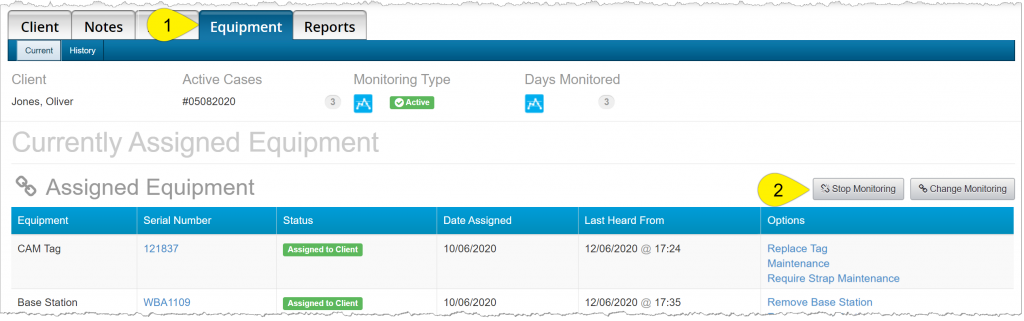
- Navigate to the subject’s Equipment tab.
- Click the Stop Monitoring button.
- In the Select when to Stop Monitoring section, only select the Stop monitoring now and check in Equipment later radio button.
- In the Automatically inactivate the client upon return of all equipment section, toggle the No option, to Yes.
- Select the appropriate Reason for Termination from the dropdown menu.
- Click the Complete Stop Monitoring button.
SCRAMNET Subject’s Equipment page (click to enlarge)
SCRAMNET Subject’s Equipment page (click to enlarge)
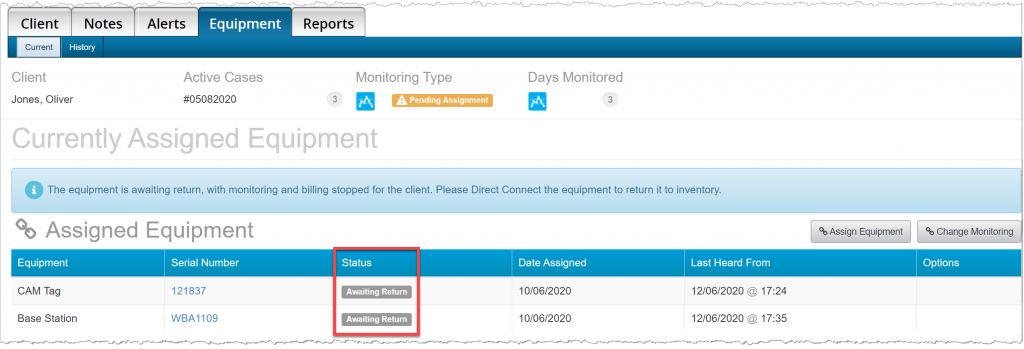
The equipment page will display the updated equipment status of Awaiting Return and the status update is communicated to the Wireless Base Station.
SCRAMNET Subject’s Equipment page (click to enlarge)
Check in the Equipment and Remove the Tag
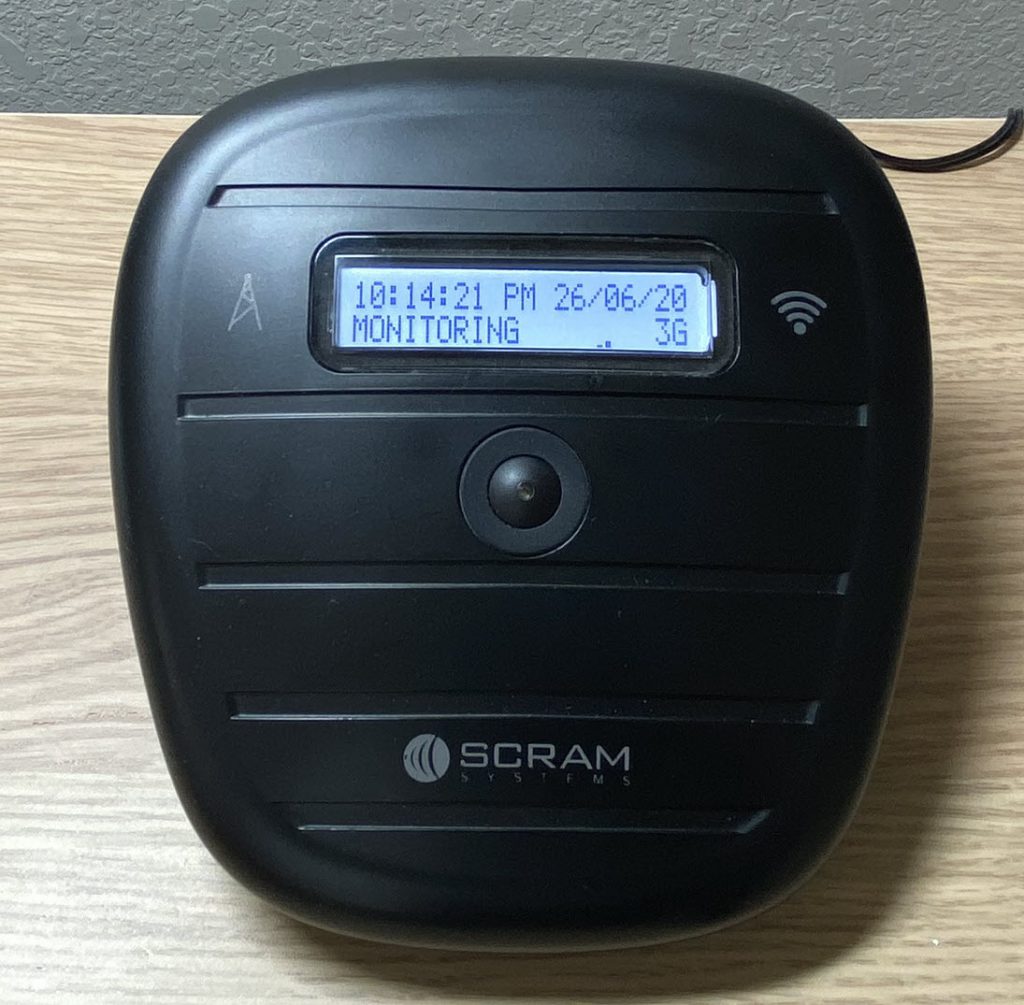
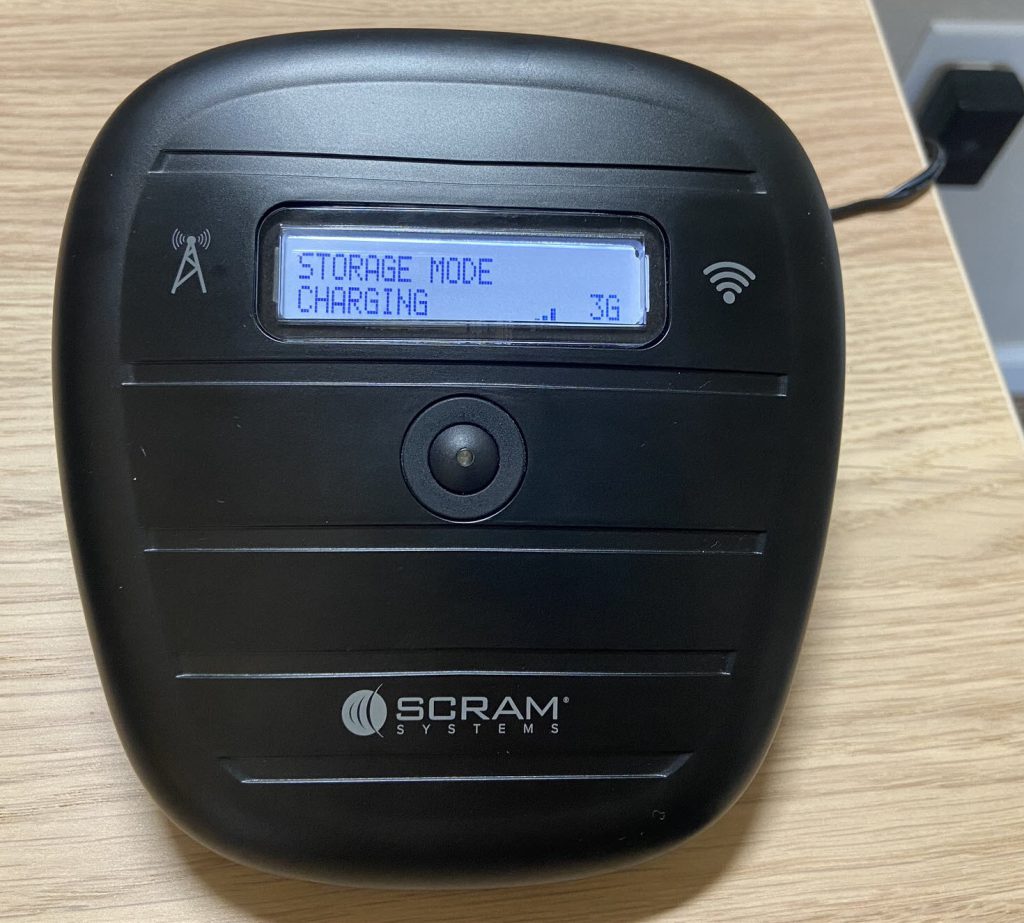
The Wireless Base Station
To check in the Wireless Base Station, ensure the Wireless Base Station is plugged into a power socket and can communicate via the cellular network or Wi-Fi connection. Once the information is received by the Wireless Base Station, the inventory status will update to In Inventory and the display on the base station will change from Monitoring to Storage mode.
SCRAM Wireless Base Station (click to enlarge)
SCRAM Wireless Base Station (click to enlarge)
The SCRAM CAM Tag
Direct Connect the Tag
To check-in the tag, start by using Direct Connecting to update the tag’s inventory status and transfer any stored data in the tag to the system.
Open the Direct Connect application on your computer. On the Direct Connect application, the term Tag and Bracelet are interchangeable.
- Connect the Direct Connect cable and device to the computer.
- Plug the large (A type) USB connector into a USB port on the computer.
- Plug the small (mini B type) USB connector into the device. The red and blue lights will turn solid.
- The Communication Status on the Direct Connect application will now display, Waiting for Bracelet.
- Attach the Direct Connect device to the top of the tag.
- Slide the Direct Connect device down the tag, until it clicks into place. The device will fit snug against the tag.
- Place the magnet provided by SCRAM over the Direct Connect device where the word Magnet appears.
- The red light on the device turns off.
- The status on the Direct Connect application updates to, “Communicating”.
- At this time, any stored data is transferred to the system and the inventory status is updated. The inventory status will display, “Awaiting Return”. Do not disconnect the device from the tag.
- Once the process is complete, the blue light on the device will turn off. After approximately 10 seconds both lights turn back on.
- The status on the Direct Connect application updates to, “Communication Complete” and the inventory status will display, In Inventory. It is now safe to disconnect the device from the tag.
Navigate back to SCRAMNET and refresh the subject’s Equipment page. The equipment information is no longer displayed on the page.
SCRAMNET Subject’s Equipment page (click to enlarge)
Remove the Tag from the Subject
It is now time to remove the tag from the subject.
Notice two small holes where the tamper clips meet on the tag’s buckle. Carefully insert the shear cutter points into the holes on the tamper clips and press in firmly until the points break through the plastic.
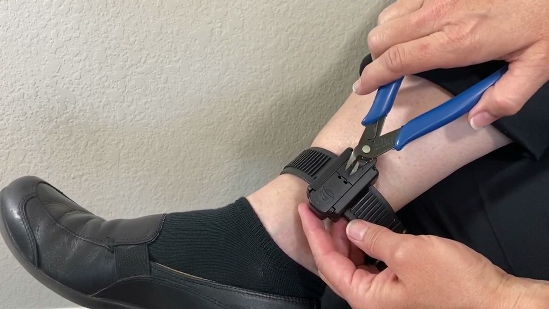
Removing the Tag (click to enlarge)
Next, squeeze the shear cutter’s handles until the plastic center is cut and the two pieces separate on the buckle cover. You will hear a soft click. Remove the broken tamper pieces and discard appropriately.
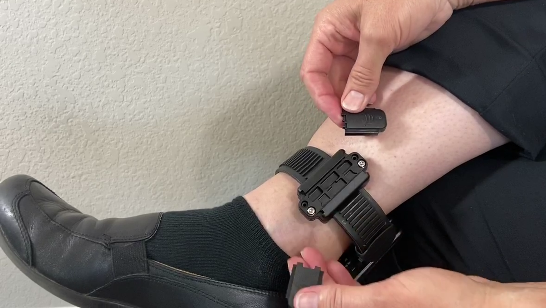
Removing the Tamper Clips (click to enlarge)
The tamper clips are designed for single use only.
Use the screwdriver to loosen the two retaining screws until you can pull the long strap free and remove the tag from the subject’s leg.
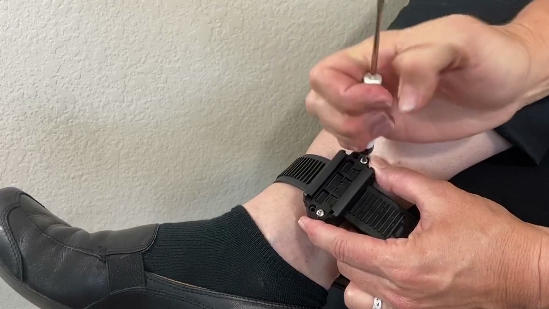
Removing the retaining screw (click to enlarge)
Clean and Disinfect the Equipment
It is essential to clean and disinfect the equipment after each subject. For specific instructions, view the quick sheet entitled, Recommended SCRAM Bracelet Cleaning Instructions products, or watch the SCRAM CAM Tag Cleaning video, both of which are located on the Help page.