A proper fit of the SCRAM CAM Bracelet on the client is essential to the bracelet’s ability to take accurate readings. If you suspect that the bracelet is not fitted correctly or receive a Daily Action Plan (DAP) that instructs you to refit a bracelet, perform these steps.
Complete Bracelet Maintenance
To complete the fit adjustment:
Start by navigating to the client’s General page in SCRAMNET.
- Access the client’s Equipment page.
- Click the Maintenance link.
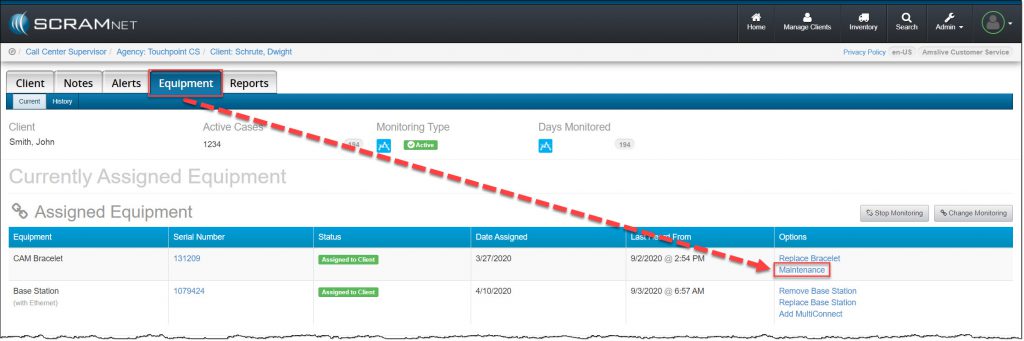
Client’s Equipment Page (click to enlarge)
On the Bracelet Maintenance Page:
- Enter today’s date.
- Select the Fit Adjusted check box.
- Click the Complete Bracelet Maintenance button.
The bracelet re-initialization, which must be performed each time the bracelet is removed, will begin the next time that the bracelet communicates with SCRAMNET®.
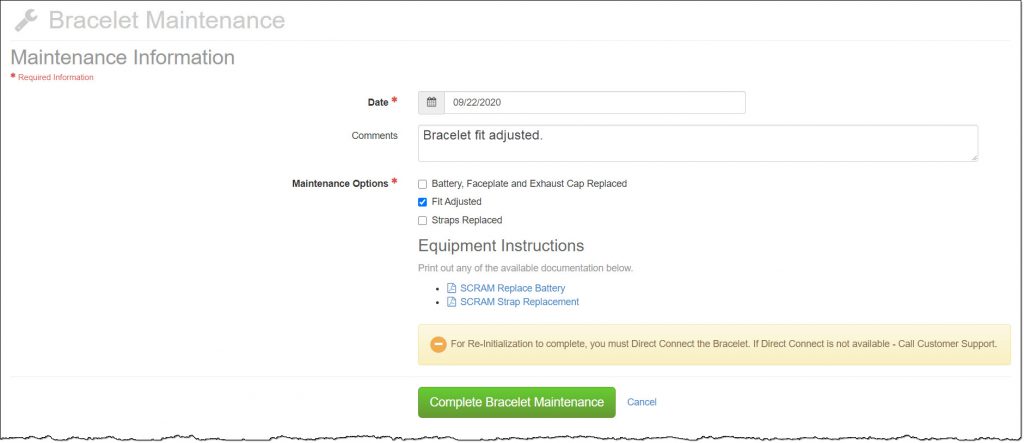
Client’s Maintenance Page (click to enlarge)
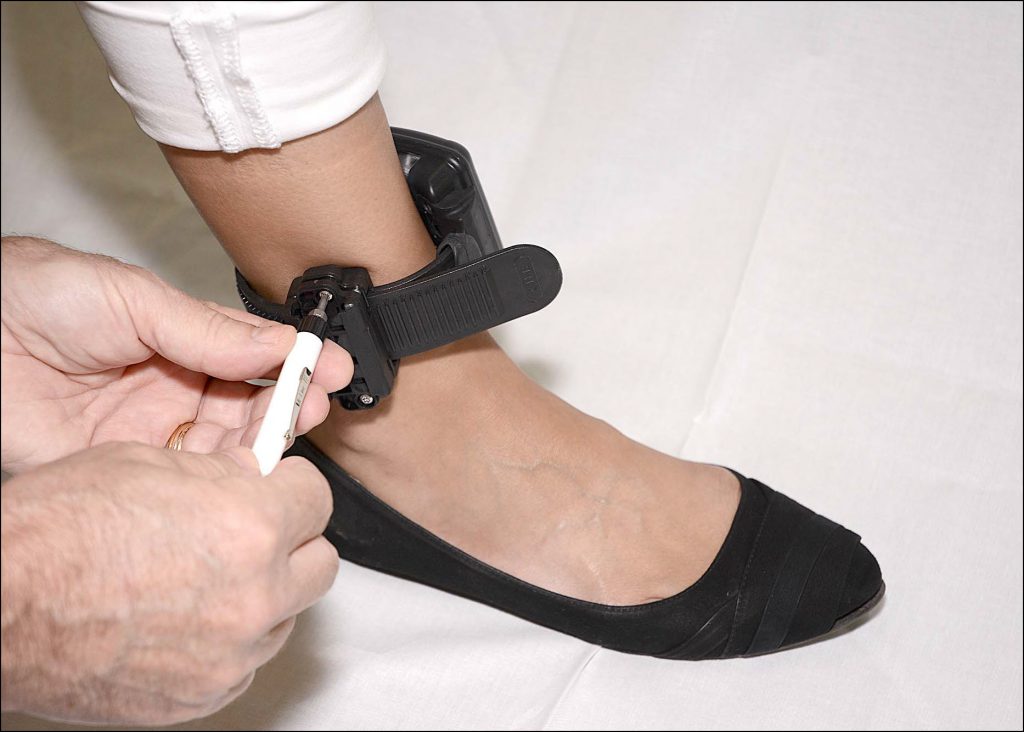
Loosen Bracelet
- Place the shear cutter on the center line where the two pieces of the tamper clip meet.
- Press down firmly with one point of the shear cutter until the point breaks through the
plastic. - Press down firmly with the other point of the shear cutter until that point breaks through the
plastic. - Squeeze the shear-cutter handles until the plastic center breaks and the two pieces
separate from the buckle cover. - Using the T10 Screwdriver, loosen the two retaining screws.
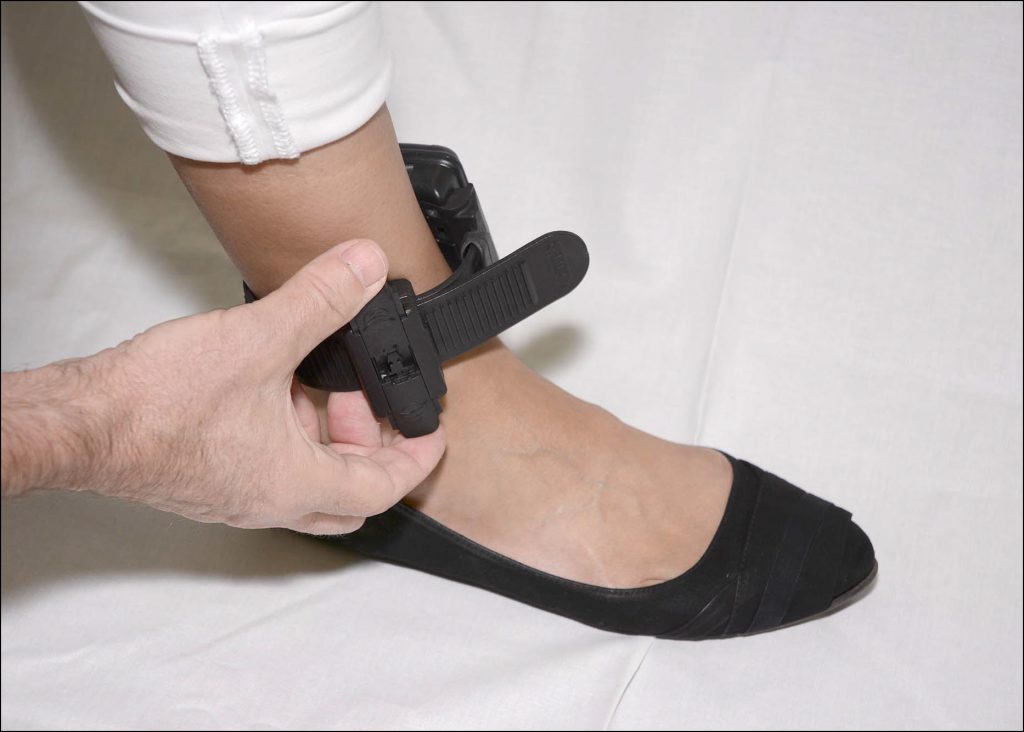
Adjust Bracelet Fit
After ensuring that the serial number is facing up, readjust the fit so the device can to be rotated slightly, but not past the shin bone.
Tighten Bracelet
Important Note – To properly align the bracelet strap, ensure that the tooth alignment tab is positioned between two teeth when the buckle is tightened. An “Open Strap Detected”
event will be generated if the strap is not properly aligned.
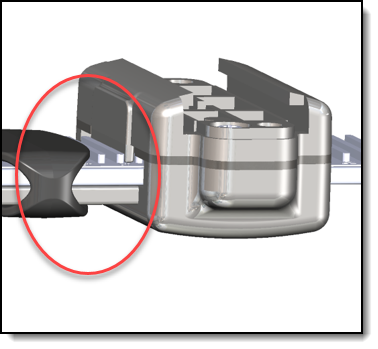
Proper Alignment
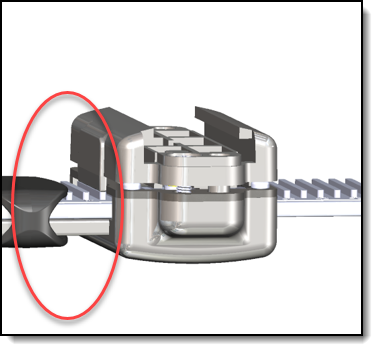
Improper Alignment
-
- Tighten the retaining screws until the two sides of the buckle are flush.
Tighten Buckle
- Ensure that the tamper clip parts being installed are free of cracks or fractures.
Note: Never reuse locking clips! - Insert both tamper clip parts into the buckle slots, squeeze the two parts together, and listen for an initial click followed by a second click.
Squeeze Tamper Clips

Tamper Clips Snapped in Place
Note: You may have to press hard to get the second click. You must hear a second click for the snap lock to be engaged. After proper engagement, you should not be able to pull the locking clip apart.
When the locking clips are engaged, the two pieces should be against each other as shown below.
Direct Connect the Bracelet
- Open the Direct Connect application.
- Connect Direct Connect Device with Your Computer.
- Plug the small (mini-B type) USB connector into the Direct Connect device.
- Plug the large (A type) USB connector into a USB port on your computer.
The red and blue lights on the Direct Connect device blink for approximately 5 seconds then both remain on.
Bracelet status in Direct Connect Application: Waiting for Bracelet
- Attach Direct Connect Device to Bracelet
- Align the Direct Connect device with the top of the bracelet.
- Slide the Direct Connect device down over the bracelet.
- Wake Up Bracelet.
- Momentarily place the magnet on the Direct Connect device where the word “magnet” appears.
- Bracelet status in Direct Connect Application: Communicating
On the Direct Connect device, the red light turns off while the blue light remains on.
At this time:- The bracelet initialization process begins.
- The initial alcohol reading is uploaded to SCRAMNET.
Once Communication is omplete:
-
- The blue light on the Direct Connect device turns off for approximately 10 seconds then both lights turn back on.
- Bracelet status in Direct Connect Application: Communication Complete
Note: After 1 minute, the status changes to: Waiting for Bracelet
- Remove the Direct Connect device from the bracelet.
- Verify Re-initialization Started.
- In SCRAMNET, access the client’s Reports page.
- Click the Communication sub-tab.
- Verify by looking at the top Date/Time link that the base station has recently communicated with SCRAMNET.
- Open the communication and verify that an “Initial Baseline Reading Taken” message appears.
- If the message does NOT appear, contact AMS Customer Services.