RB Pro Wi-Fi Menu Options
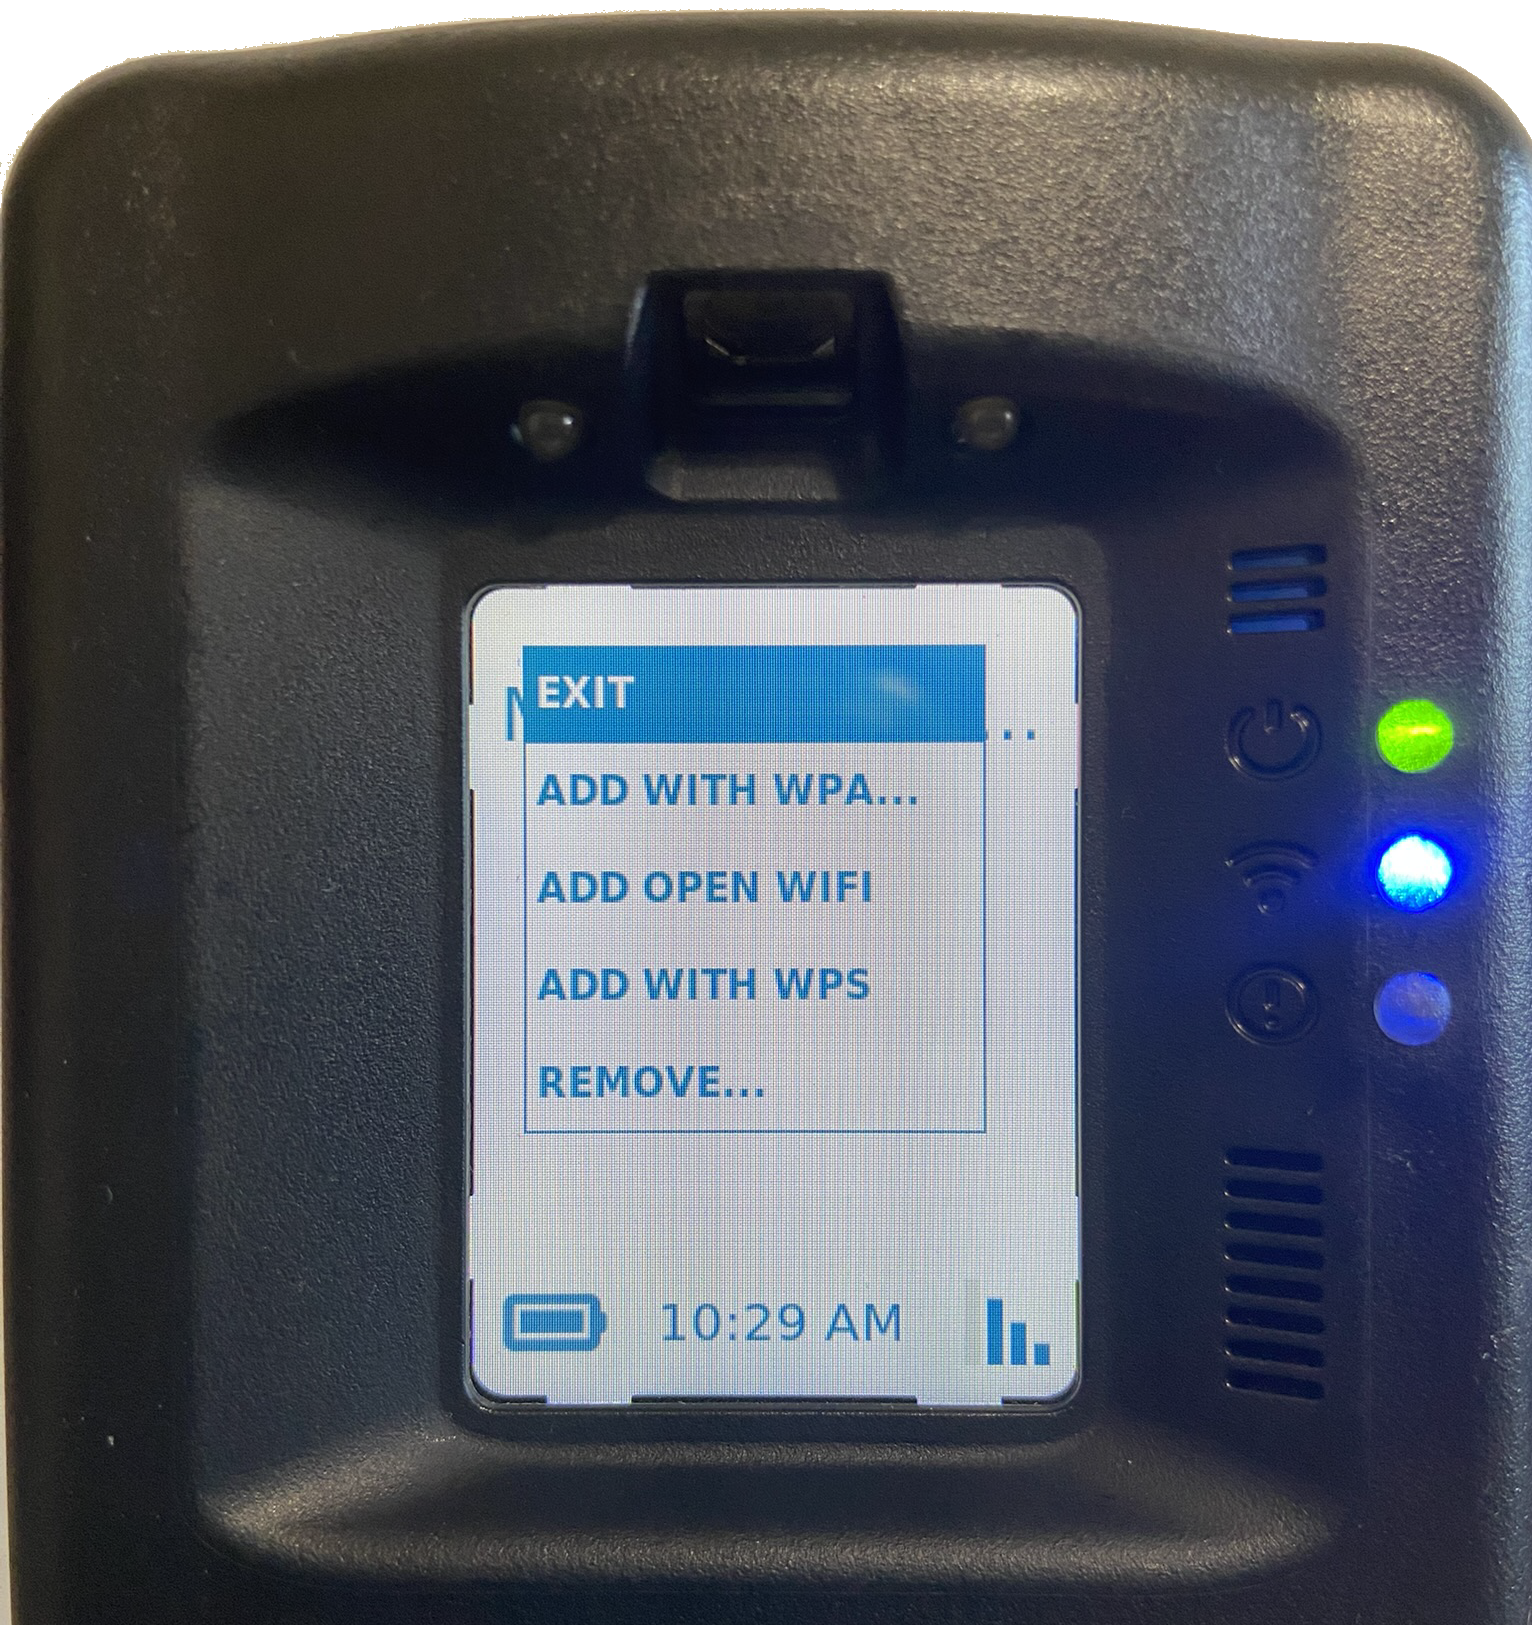
The client may access Wi-Fi setup options in the RB Pro’s Wi-Fi Setup menu. On the Wi-Fi setup menu, the client may select :
-
- Add with WPA (Wireless Protected Access)
- Add Open WiFi (Unprotected Wireless Access)
- Add with WPS (Wireless Protected Setup)
- Remove (remove a client-added Wi-Fi network)
|
Connect to a Client’s Wi-Fi Network:
Start by accessing the RB Pro Menu.
- Use the up/down buttons on the RB Pro to highlight the WIFI SETUP option and then press the select button.
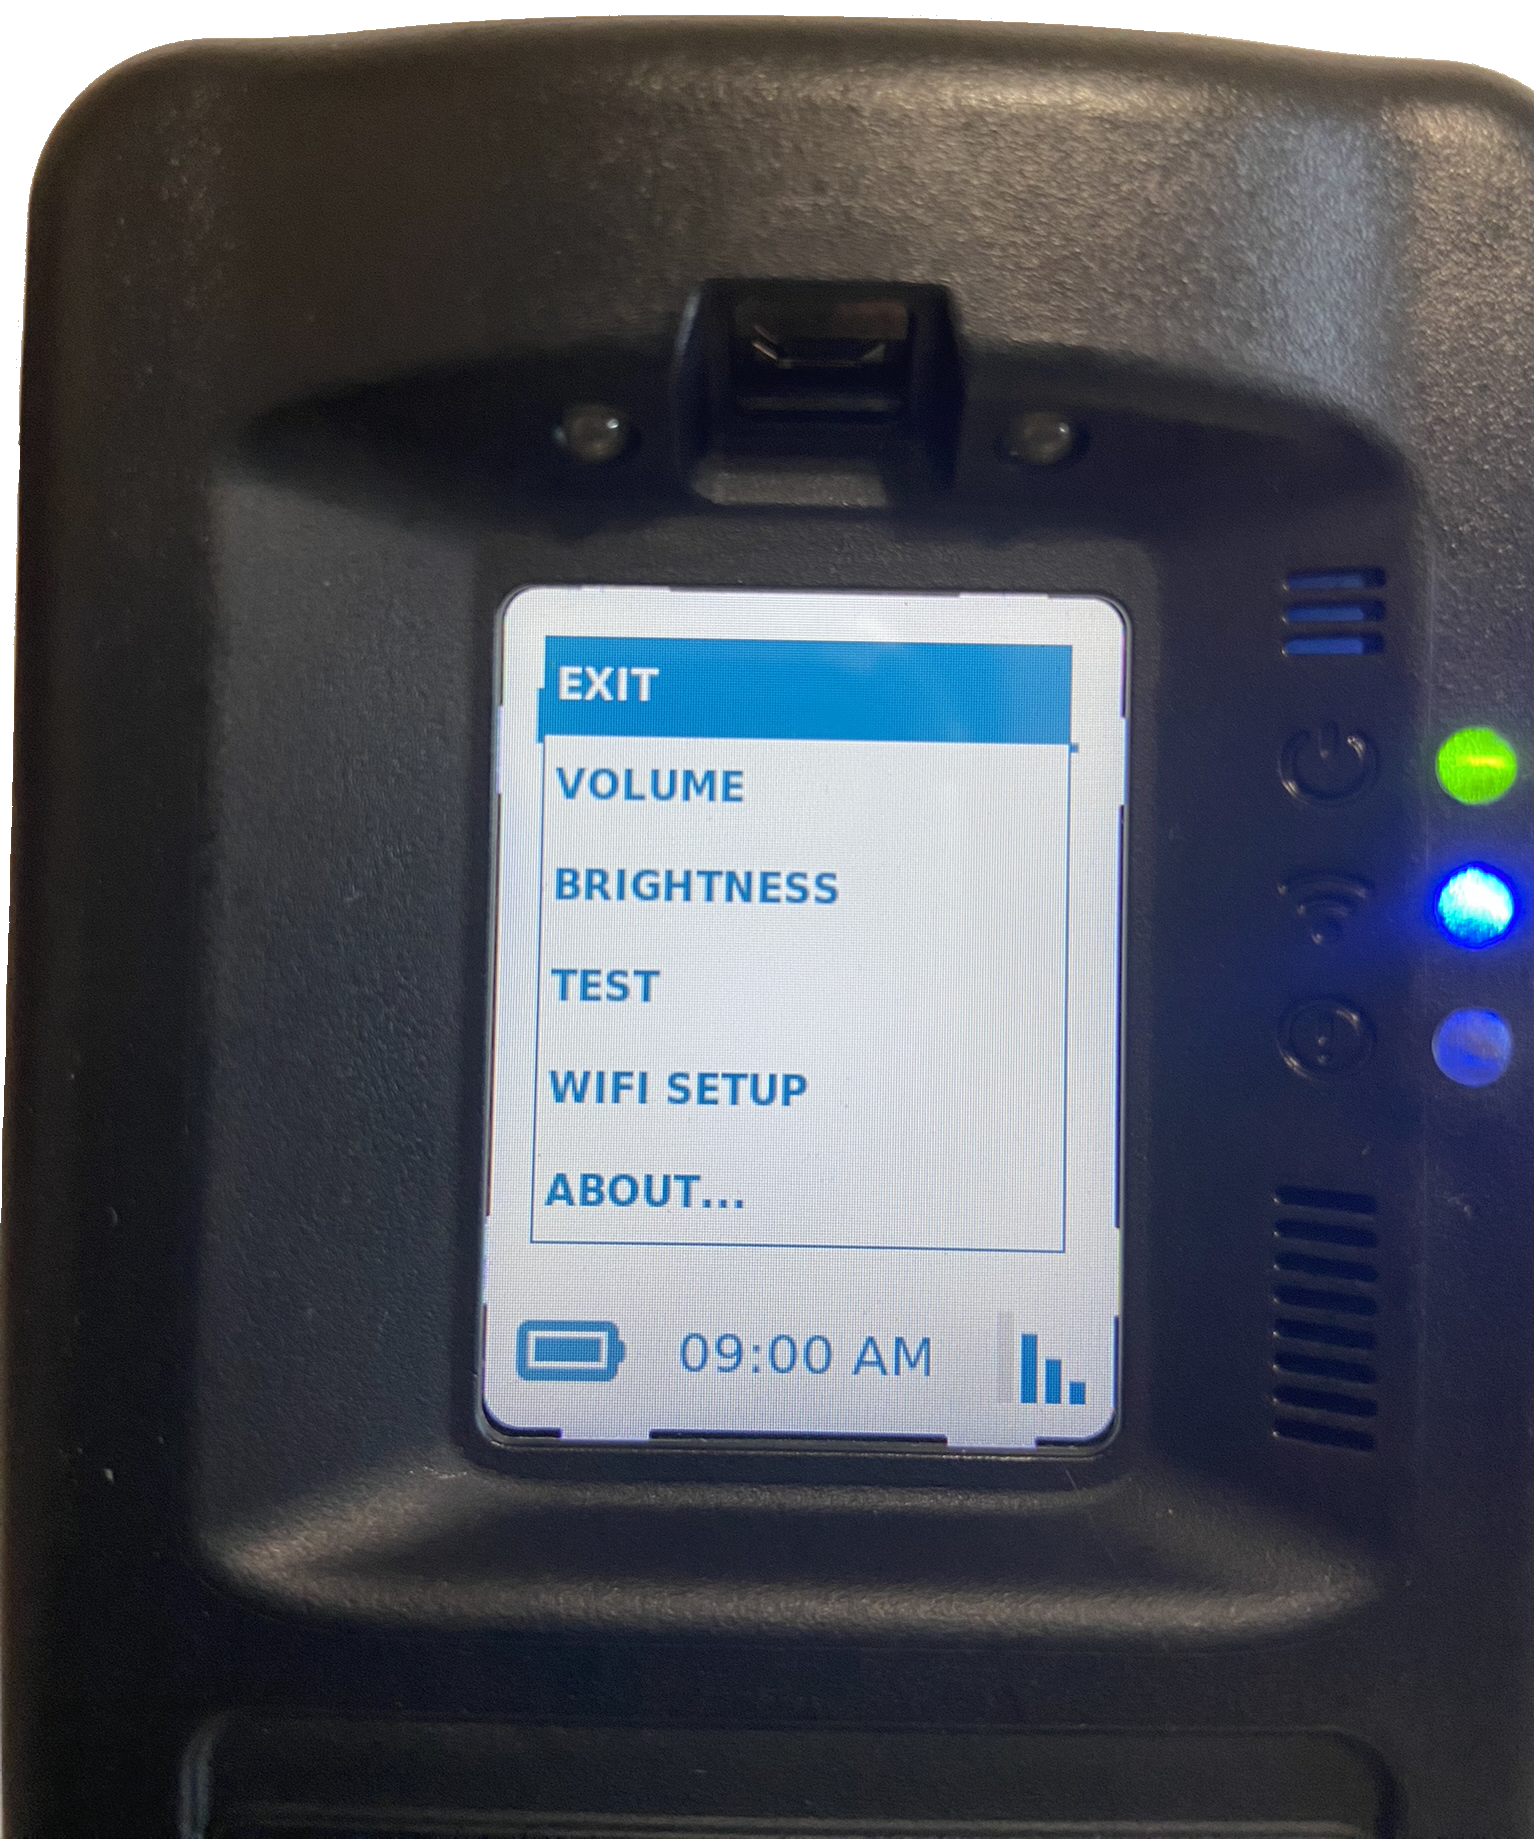
RB Pro Menu Options – click to enlarge

Wi-Fi Setup Option – click to enlarge
- On the Wi-Fi option screen, select one of the options available and follow the instructions for connecting.
Connect using the “Add with WPA” Option
- Once the “Add With WPA” option is selected on the RB Pro, the screen will display instructions for accessing the wifisetup.scramsystems.com by either entering in the web address or using the QR code displayed.
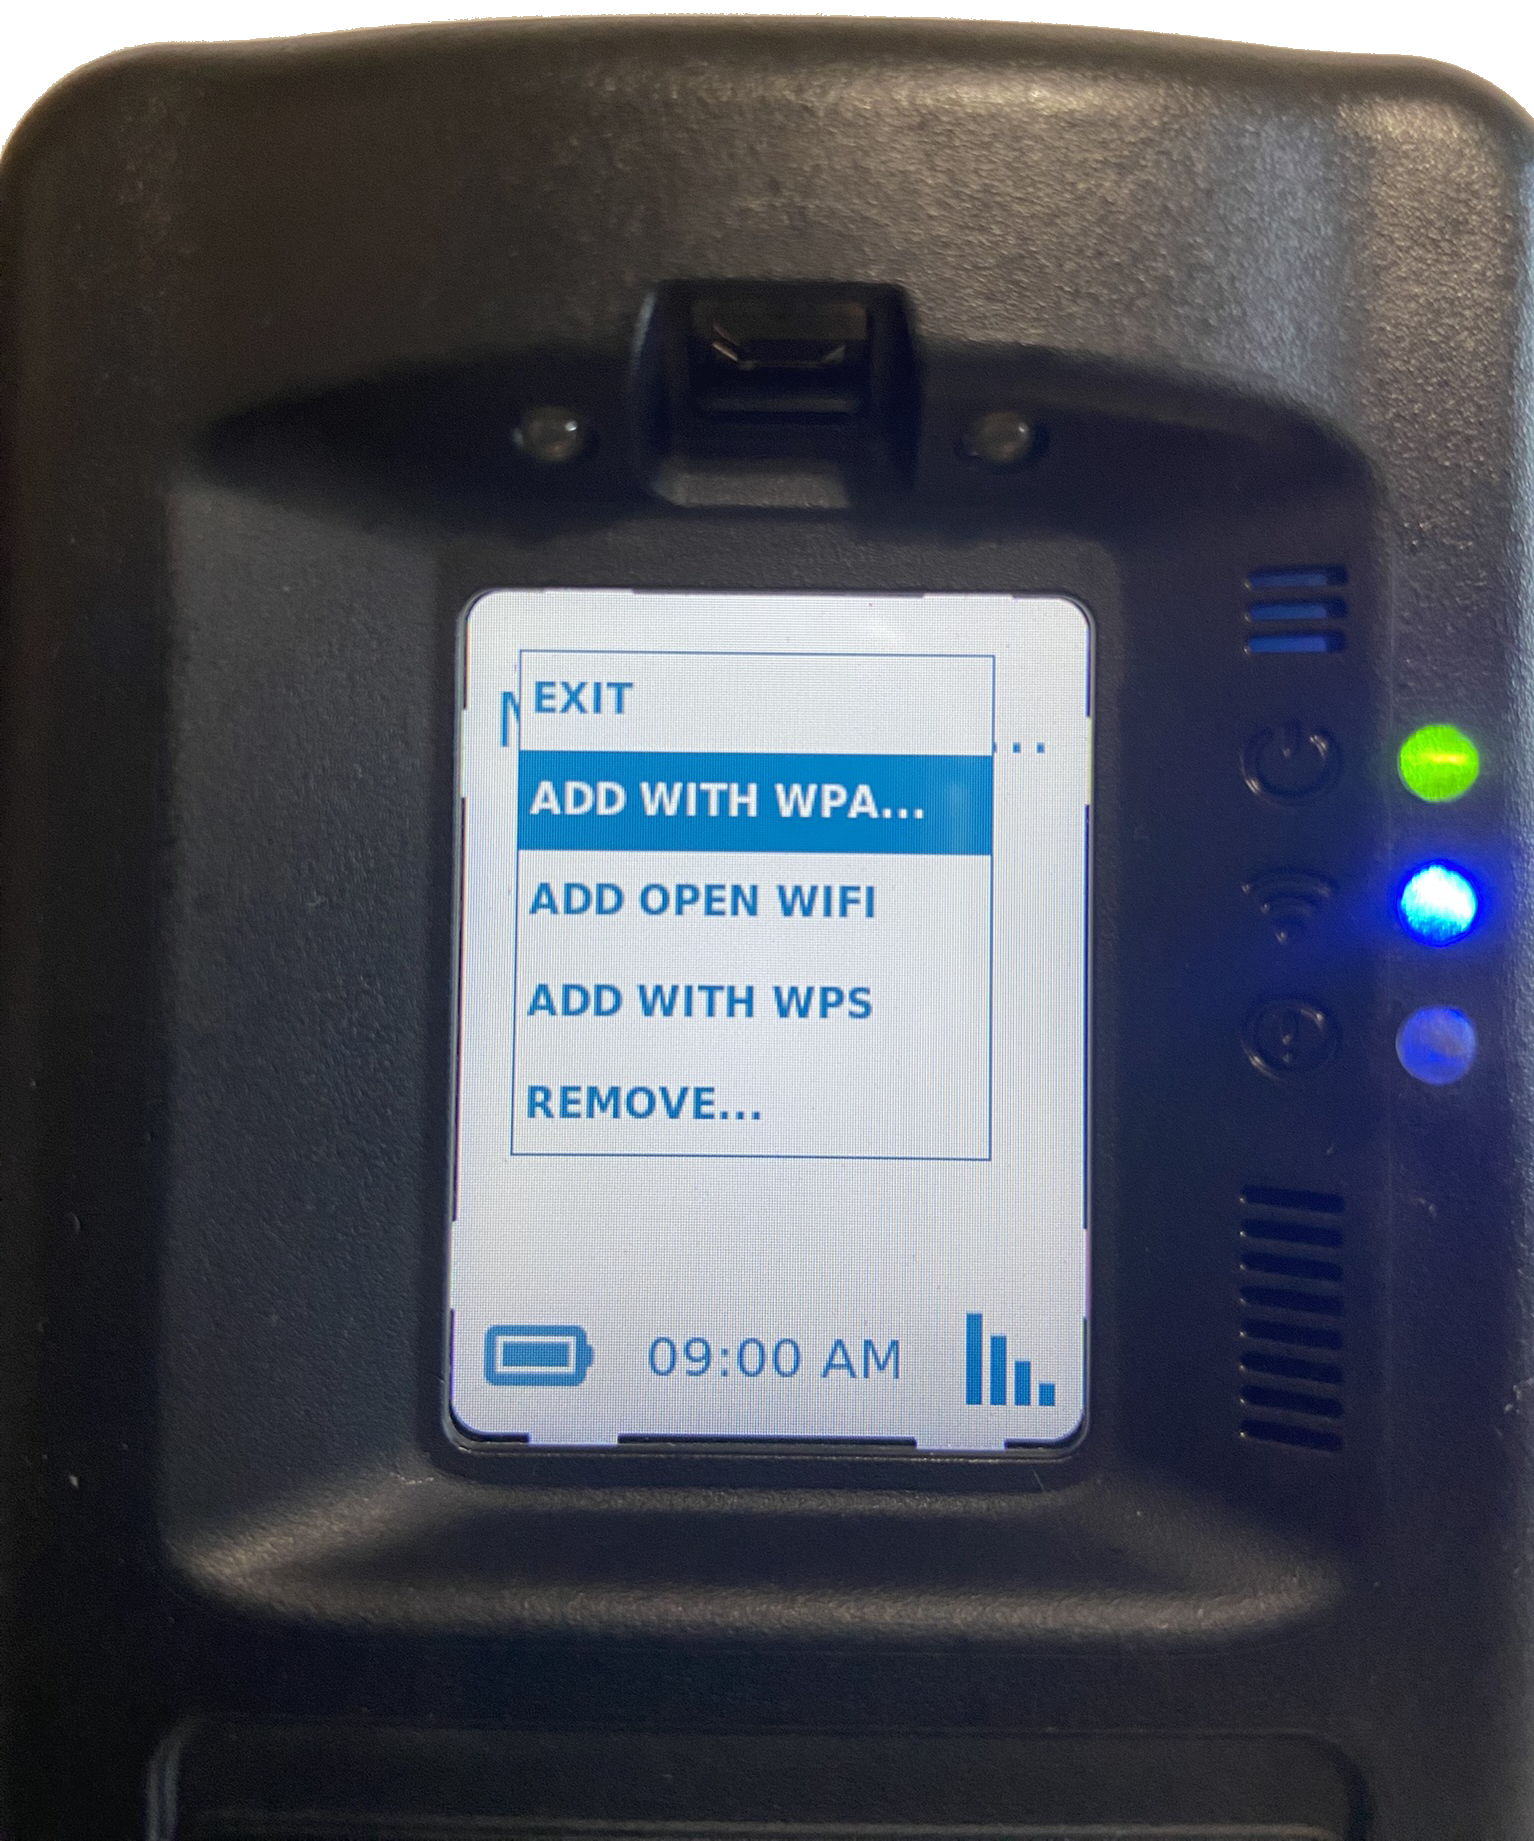
Add With WPA Option Highlighted – click to enlarge
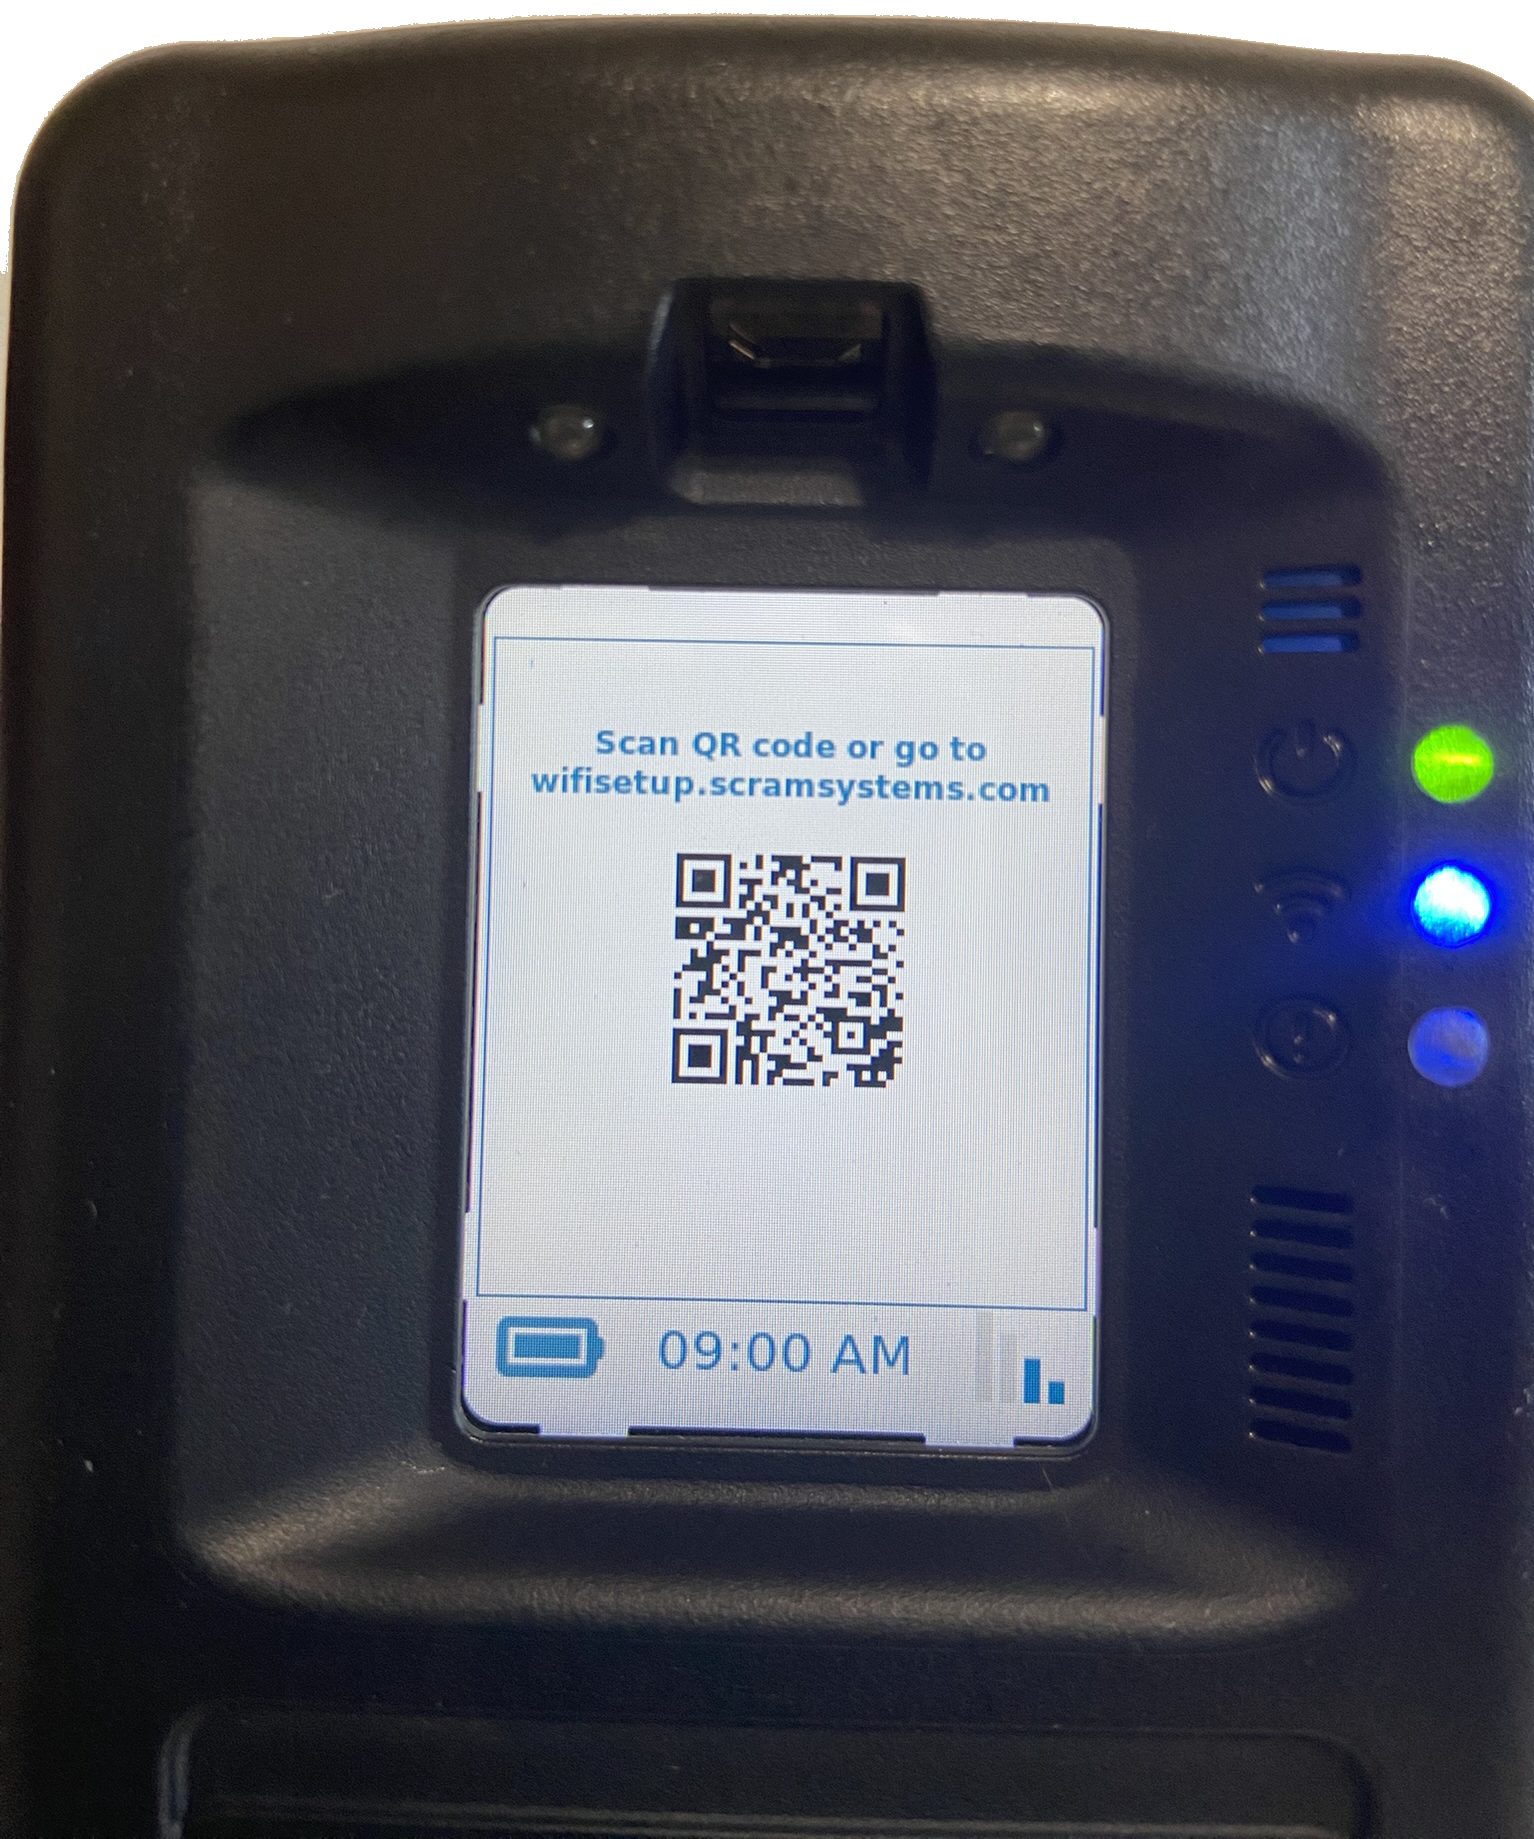
QR Code for Wifisetup.scramsystems.com – click to enlarge
Connect using the QR code:
- Using a smartphone, open the camera option and bring the QR code into the photo frame.
- On the smartphone’s screen, tap the revealed hyperlink for “scramsystems.com.”
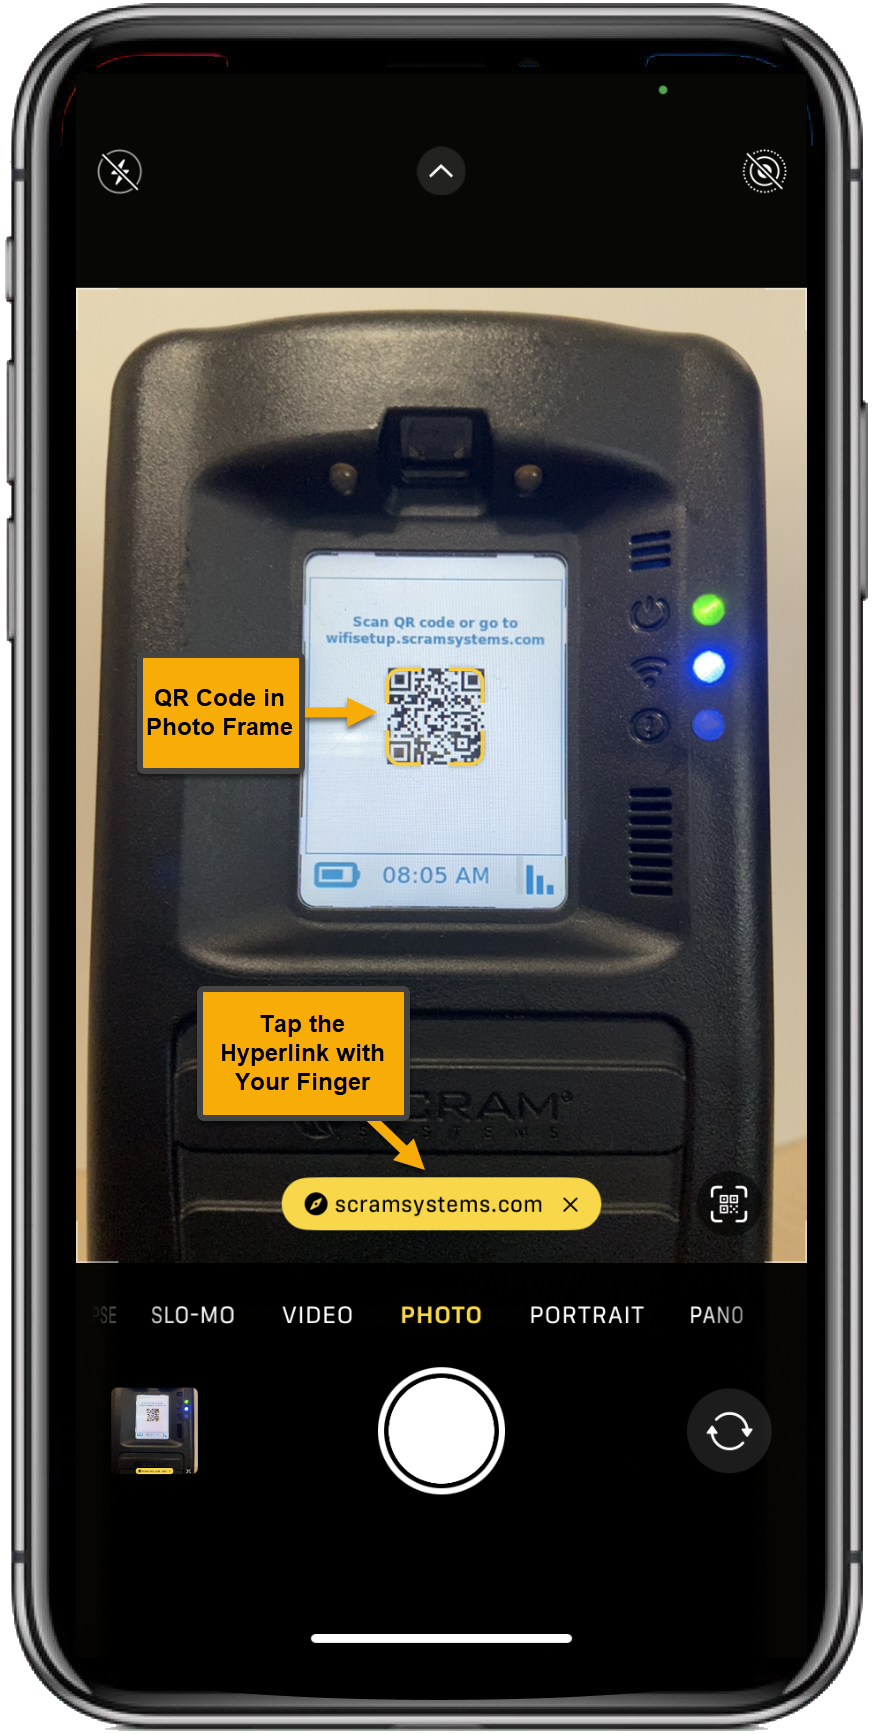
Viewing RB Pro’s Screen and QR Code – click to enlarge
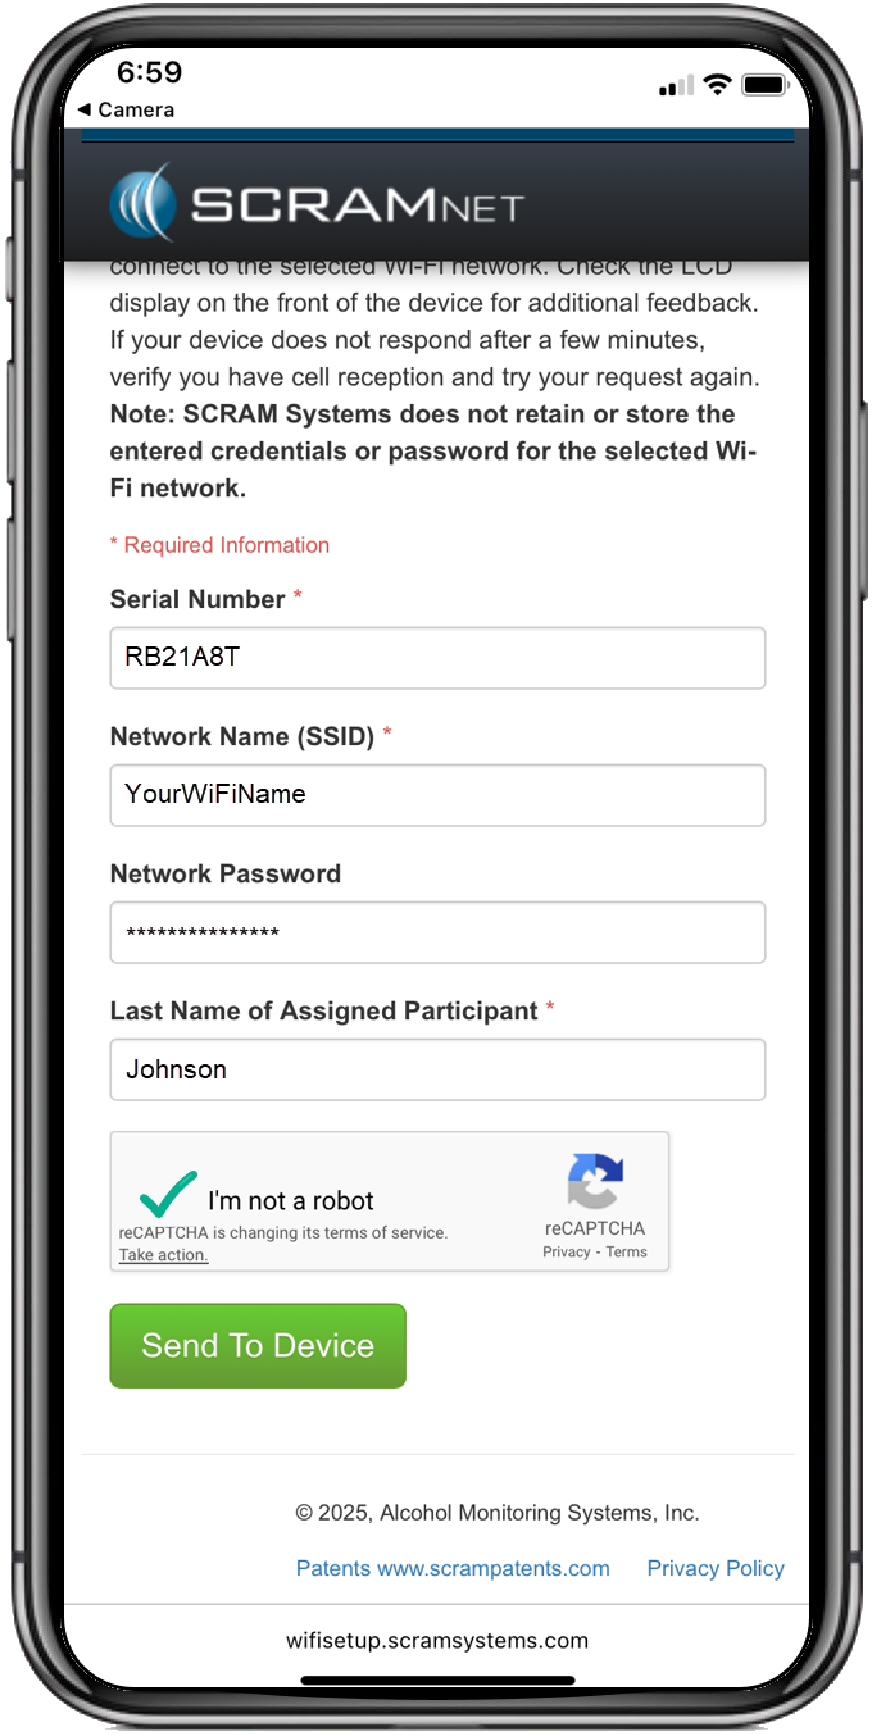
- An internet page for SCRAM System Wi-Fi Setup will open on the smartphone. Enter the required information and complete the captcha requirement.
Wi-Fi Setup Web Page- click to enlarge
Wi-Fi Setup Details Entered and Captcha Completed – click to enlarge
- Tap the Send to Device button.
A Successfully Sent banner will be displayed on the smartphone’s screen.
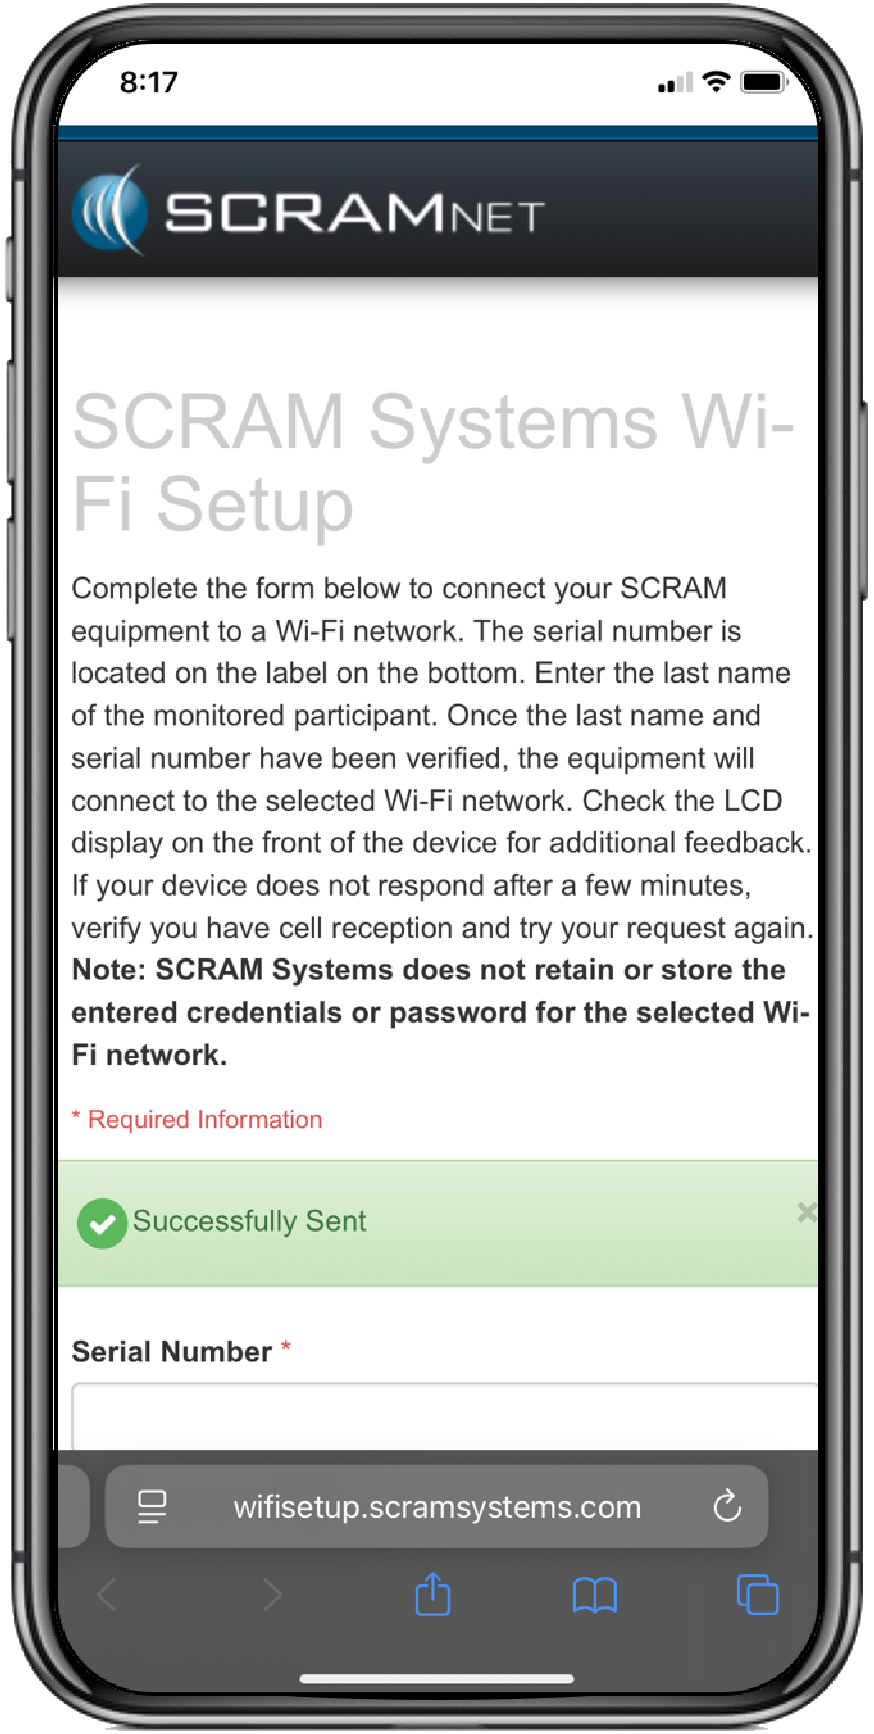
Wi-Fi Setup Successfully Banner – click to enlarge
Once the Wi-Fi’s information has been communicated to the RB Pro over a cellular network connection, the RB Pro’s screen will display the Wi-Fi icon in the lower right corner. After 60 minutes, it will automatically switch back to a cellular network, regardless of the cellular network’s signal strength. Moving forward, the device will only connect to the Wi-Fi network when it cannot communicate data over the cellular network.
| For the RB Pro device to receive Wi-Fi network information, it must first connect to the cellular network. It may be necessary for a client to relocate the device to an area with a cellular network connection. |
Connect using the “Add Open WiFi” Option
- Using the up/down buttons on the RB Pro device, highlight the “Add Open Wi-Fi” network you wish to connect to.
- Once highlighted, press the “select” button on the RB Pro device.

Add Open Wi-Fi Option Highlighted – click to enlarge
Open Wi-Fi Screen and Available Options – click to enlarge
After a few minutes, the RB Pro’s screen will display the Wi-Fi connection in the lower right corner. After 60 minutes, it will automatically switch back to a cellular network, regardless of the cellular network’s signal strength. Moving forward, the device will only connect to the Wi-Fi network when it cannot communicate data over the cellular network.
|
Connect using the “Add With WPS” Option
- Once the “Add With WPS” option is selected on the RB Pro device, instruct the client to locate the WPS button on their modem or router and press that button.
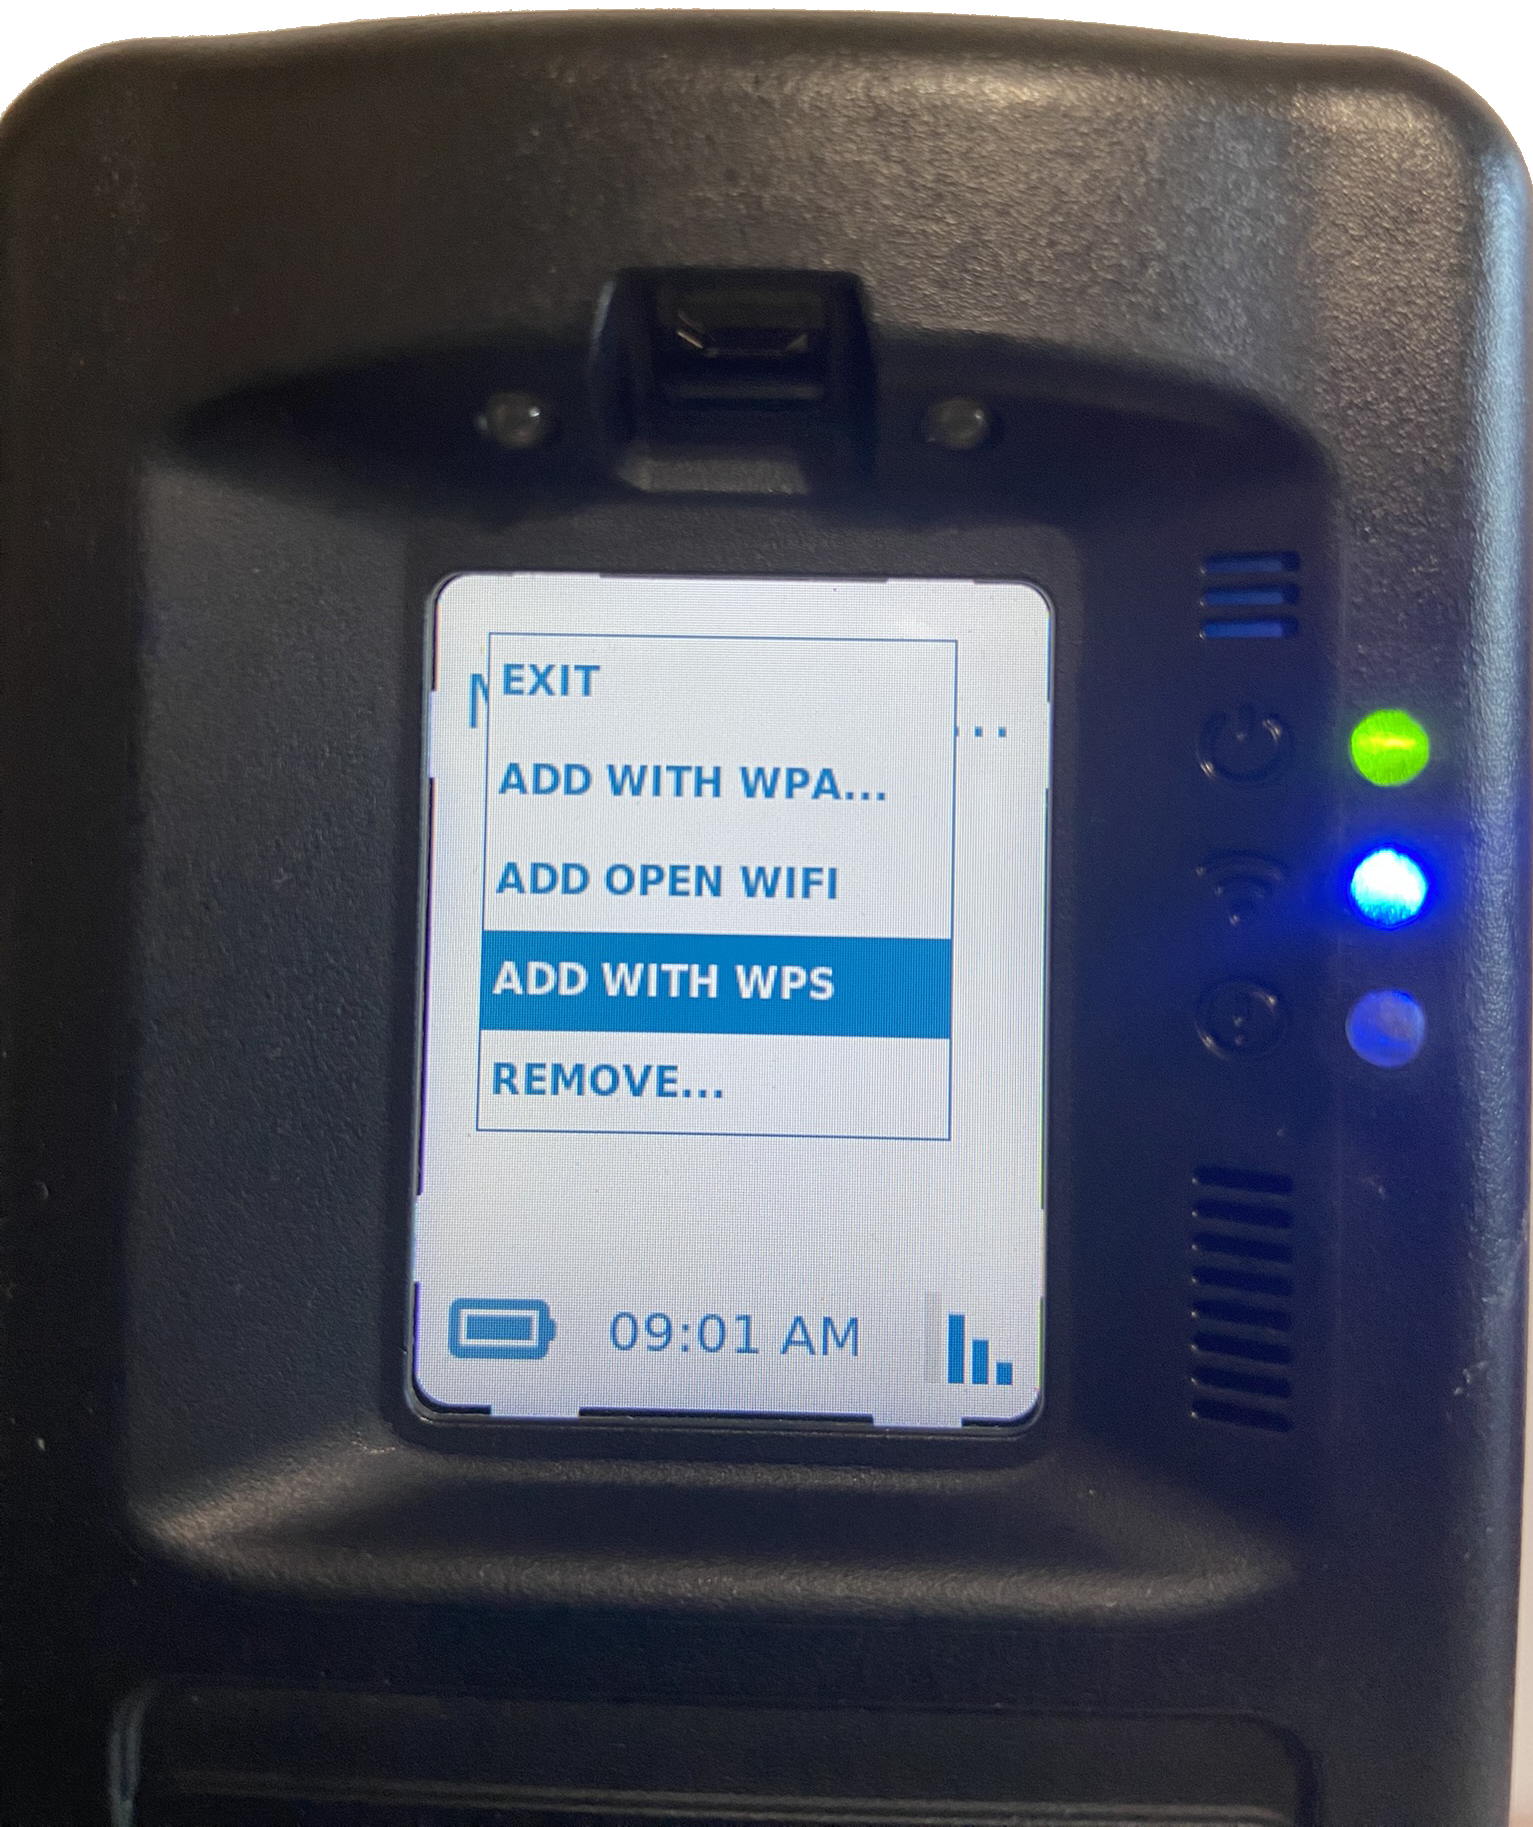
Add with WPS Option Highlighted – click to enlarge
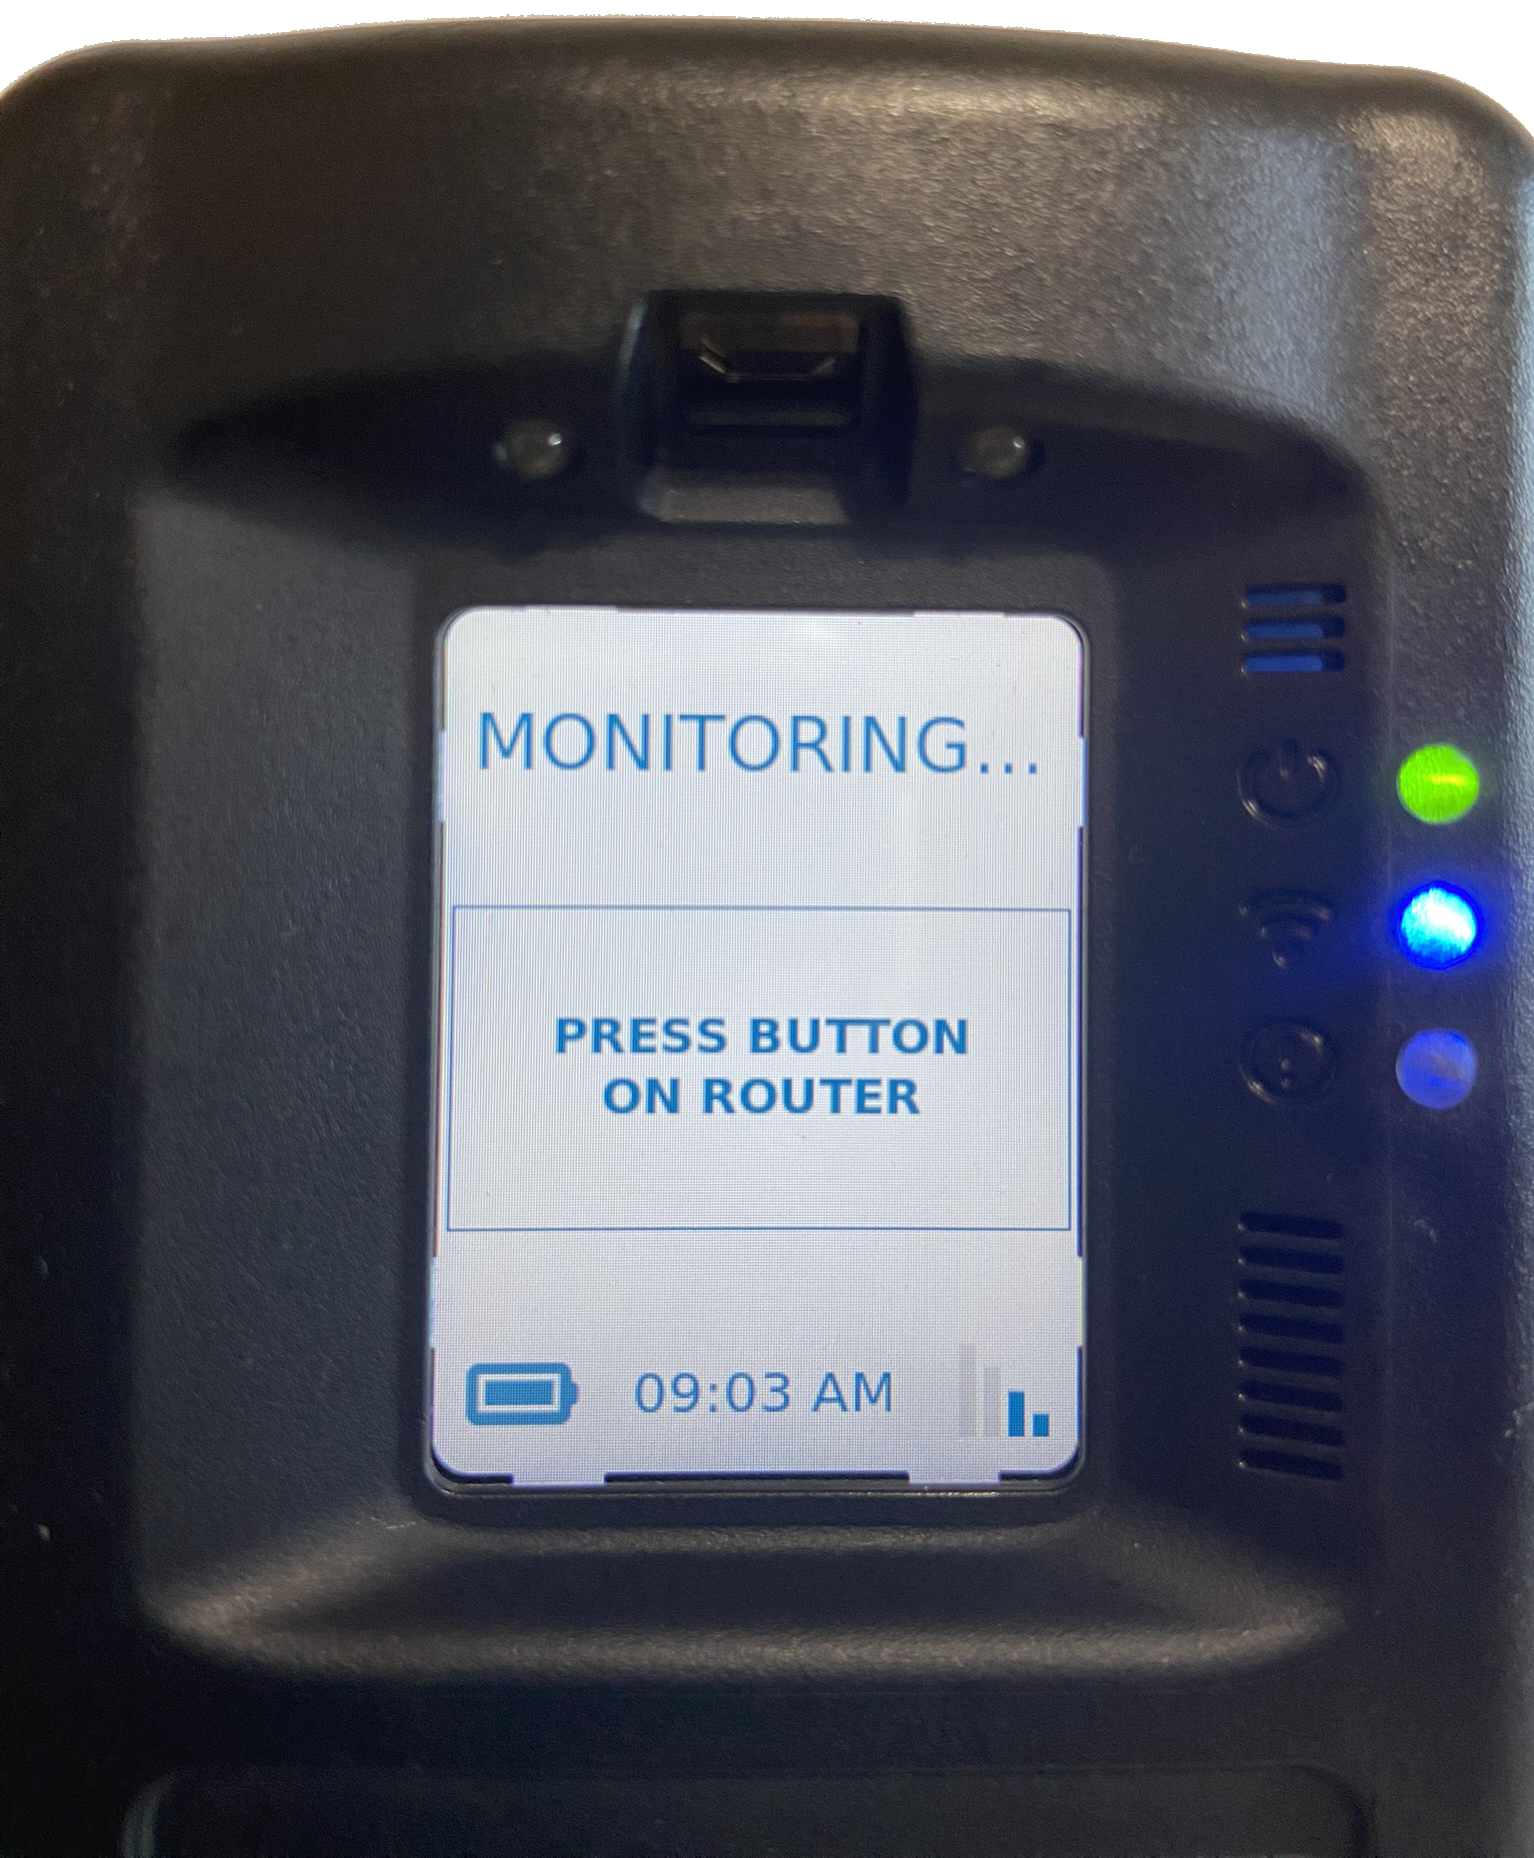
WPS Set Up On Screen Instruction – click to enlarge
After a few minutes, the RB Pro’s screen will display the Wi-Fi connection in the lower right corner. After 60 minutes, it will automatically switch back to a cellular network, regardless of the cellular network’s signal strength. Moving forward, the device will only connect to the Wi-Fi network when it cannot communicate data over the cellular network.
|
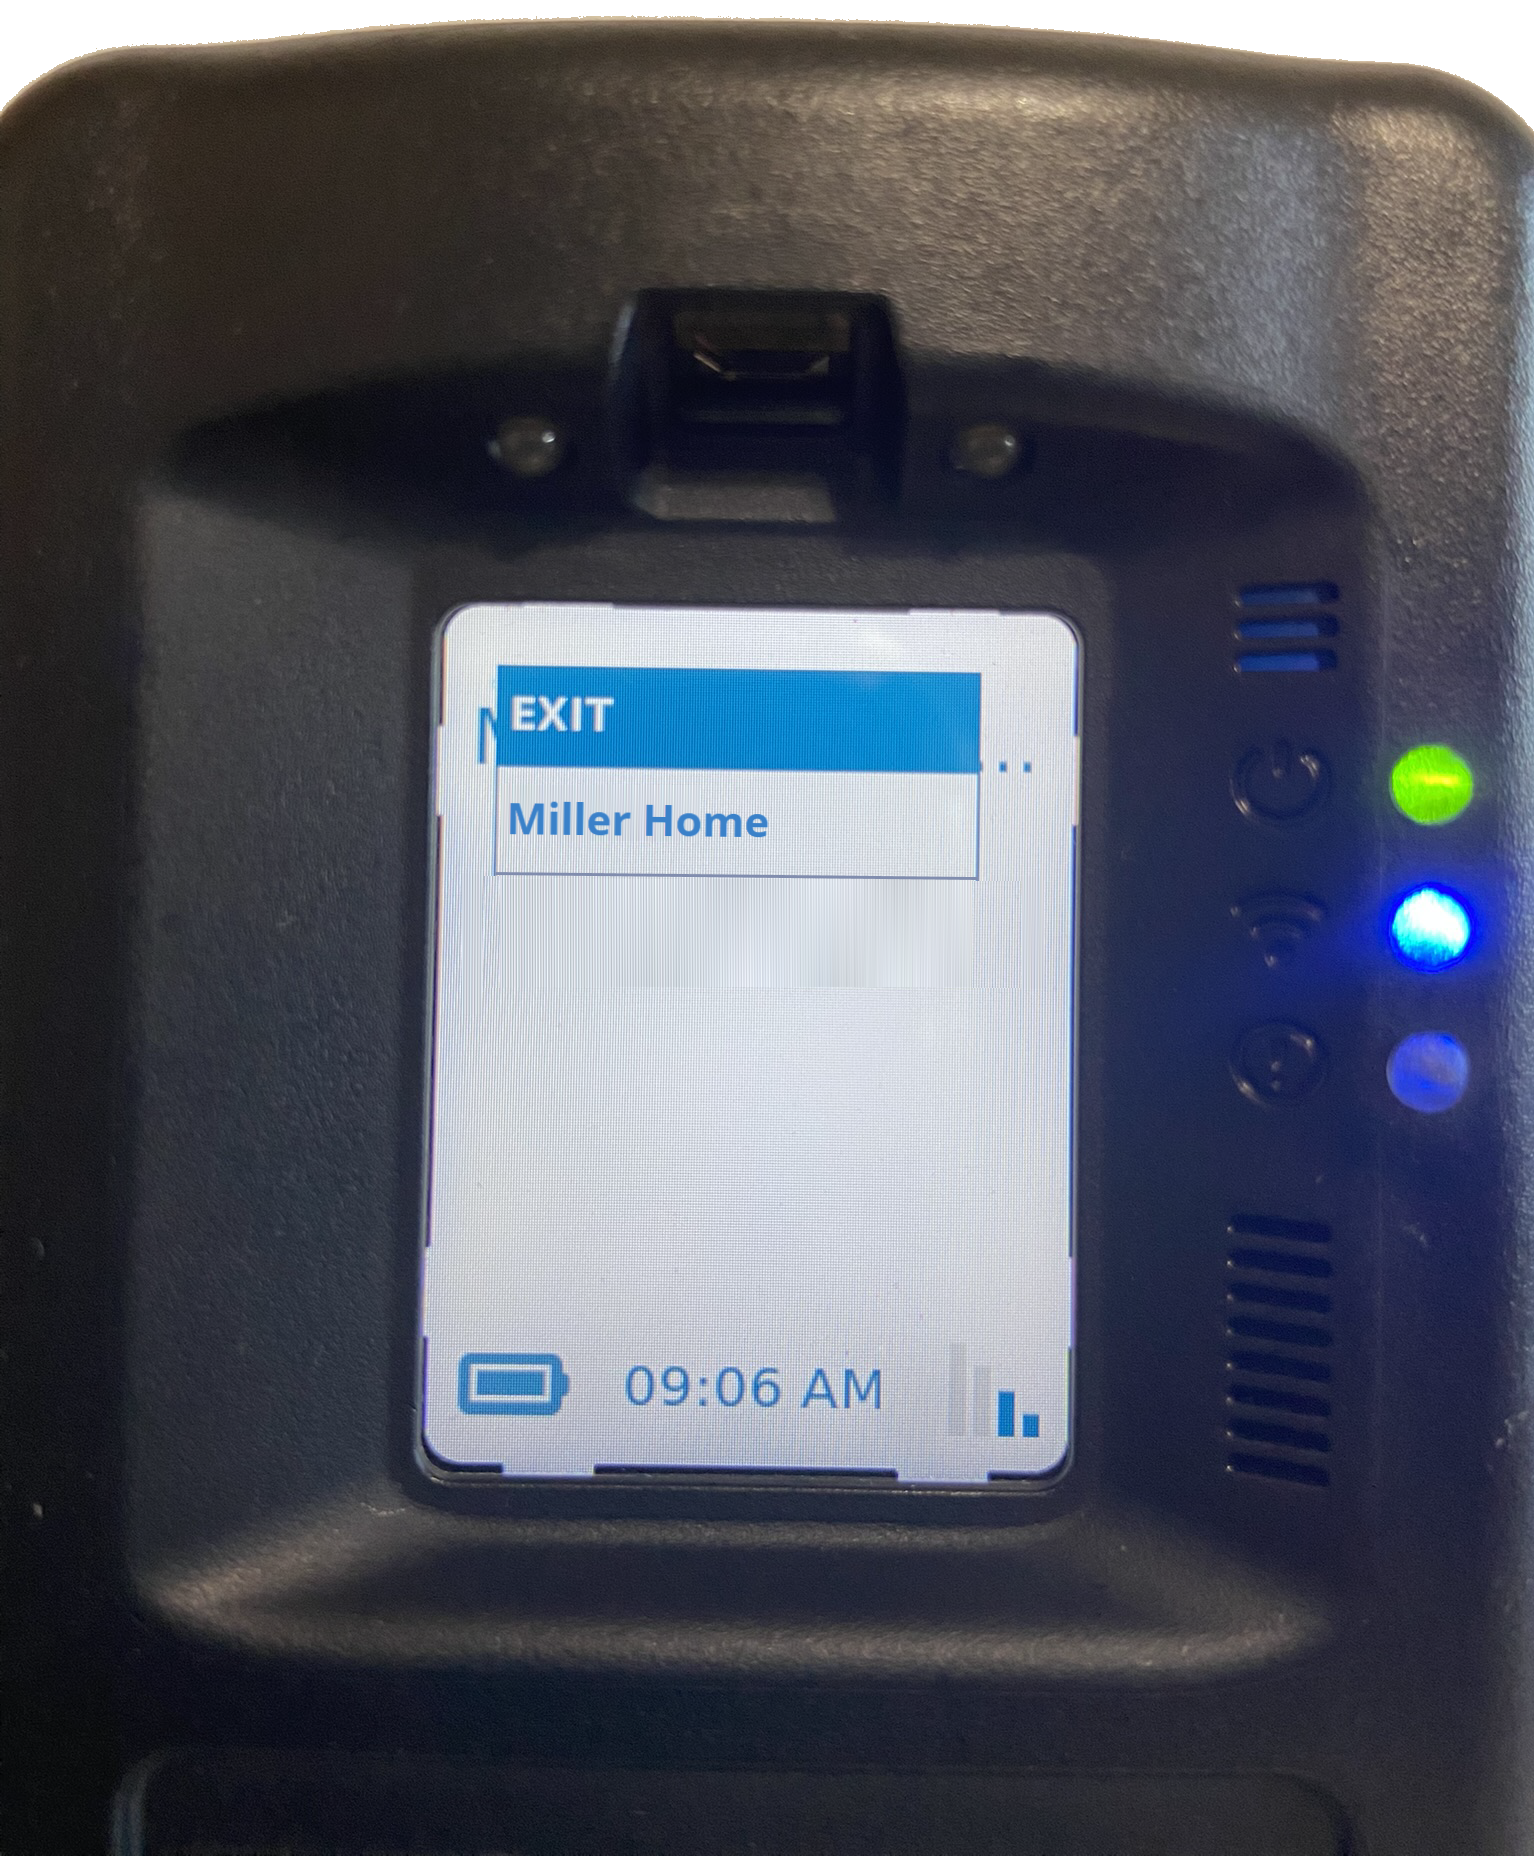
Manually Remove a Client-Added Wi-Fi Network
If the client would like to remove a Wi-Fi network that they have connected to, they may accomplish this task by:
- Accessing the RB Pro WiFi Setup menu.
- Use the up/down buttons on the RB Pro to highlight the Remove option and then press the select button.
Wi-Fi Setup Option – click to enlarge
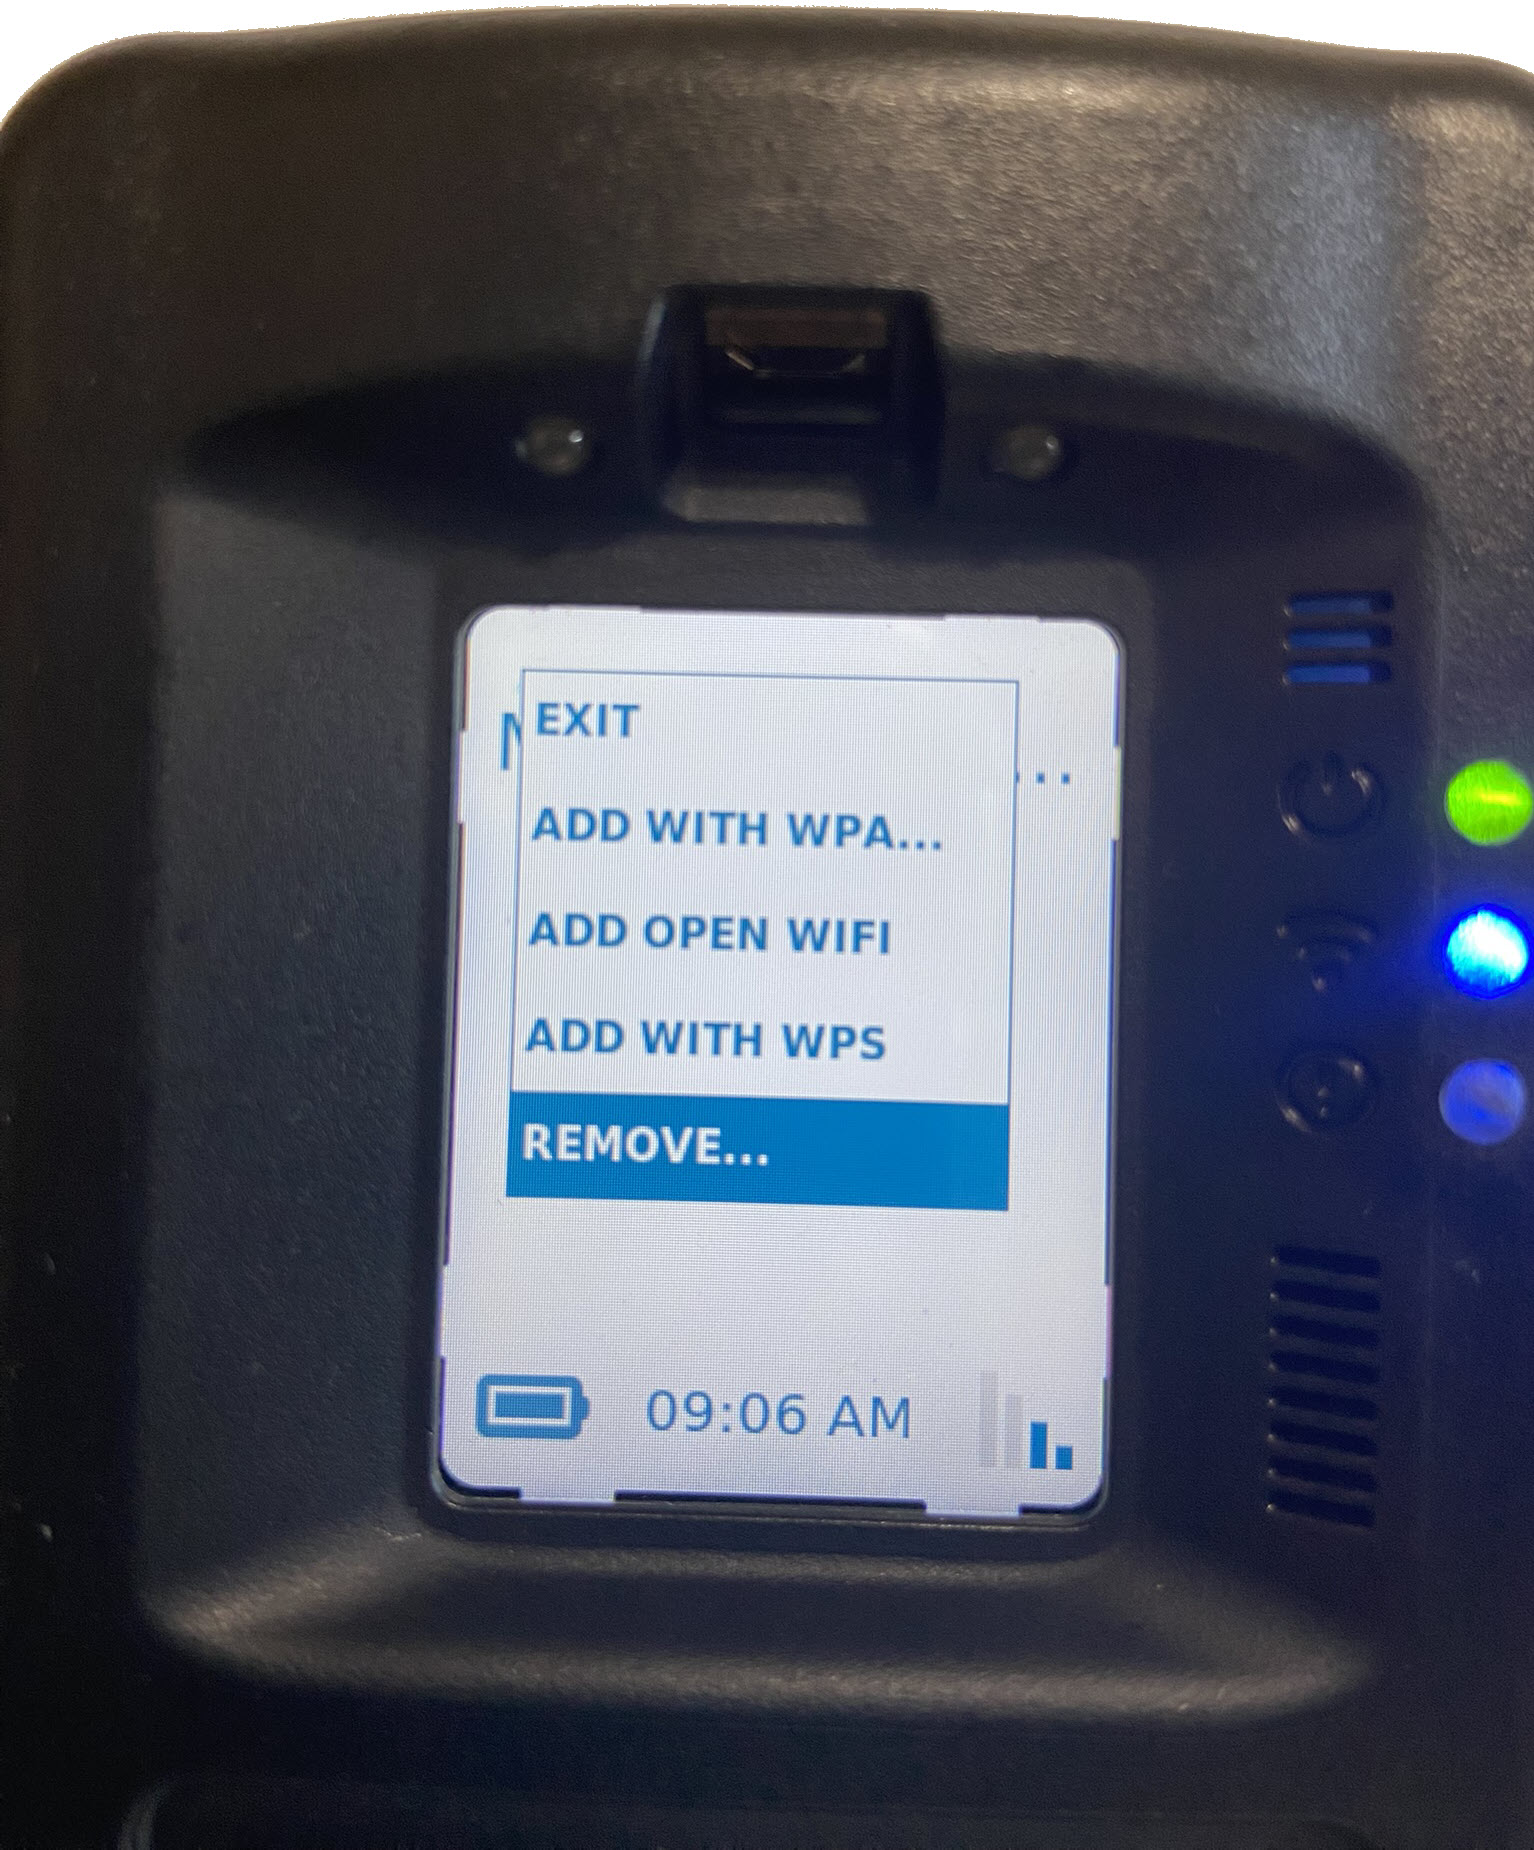
Wi-Fi Remove Option Highlighted – click to enlarge
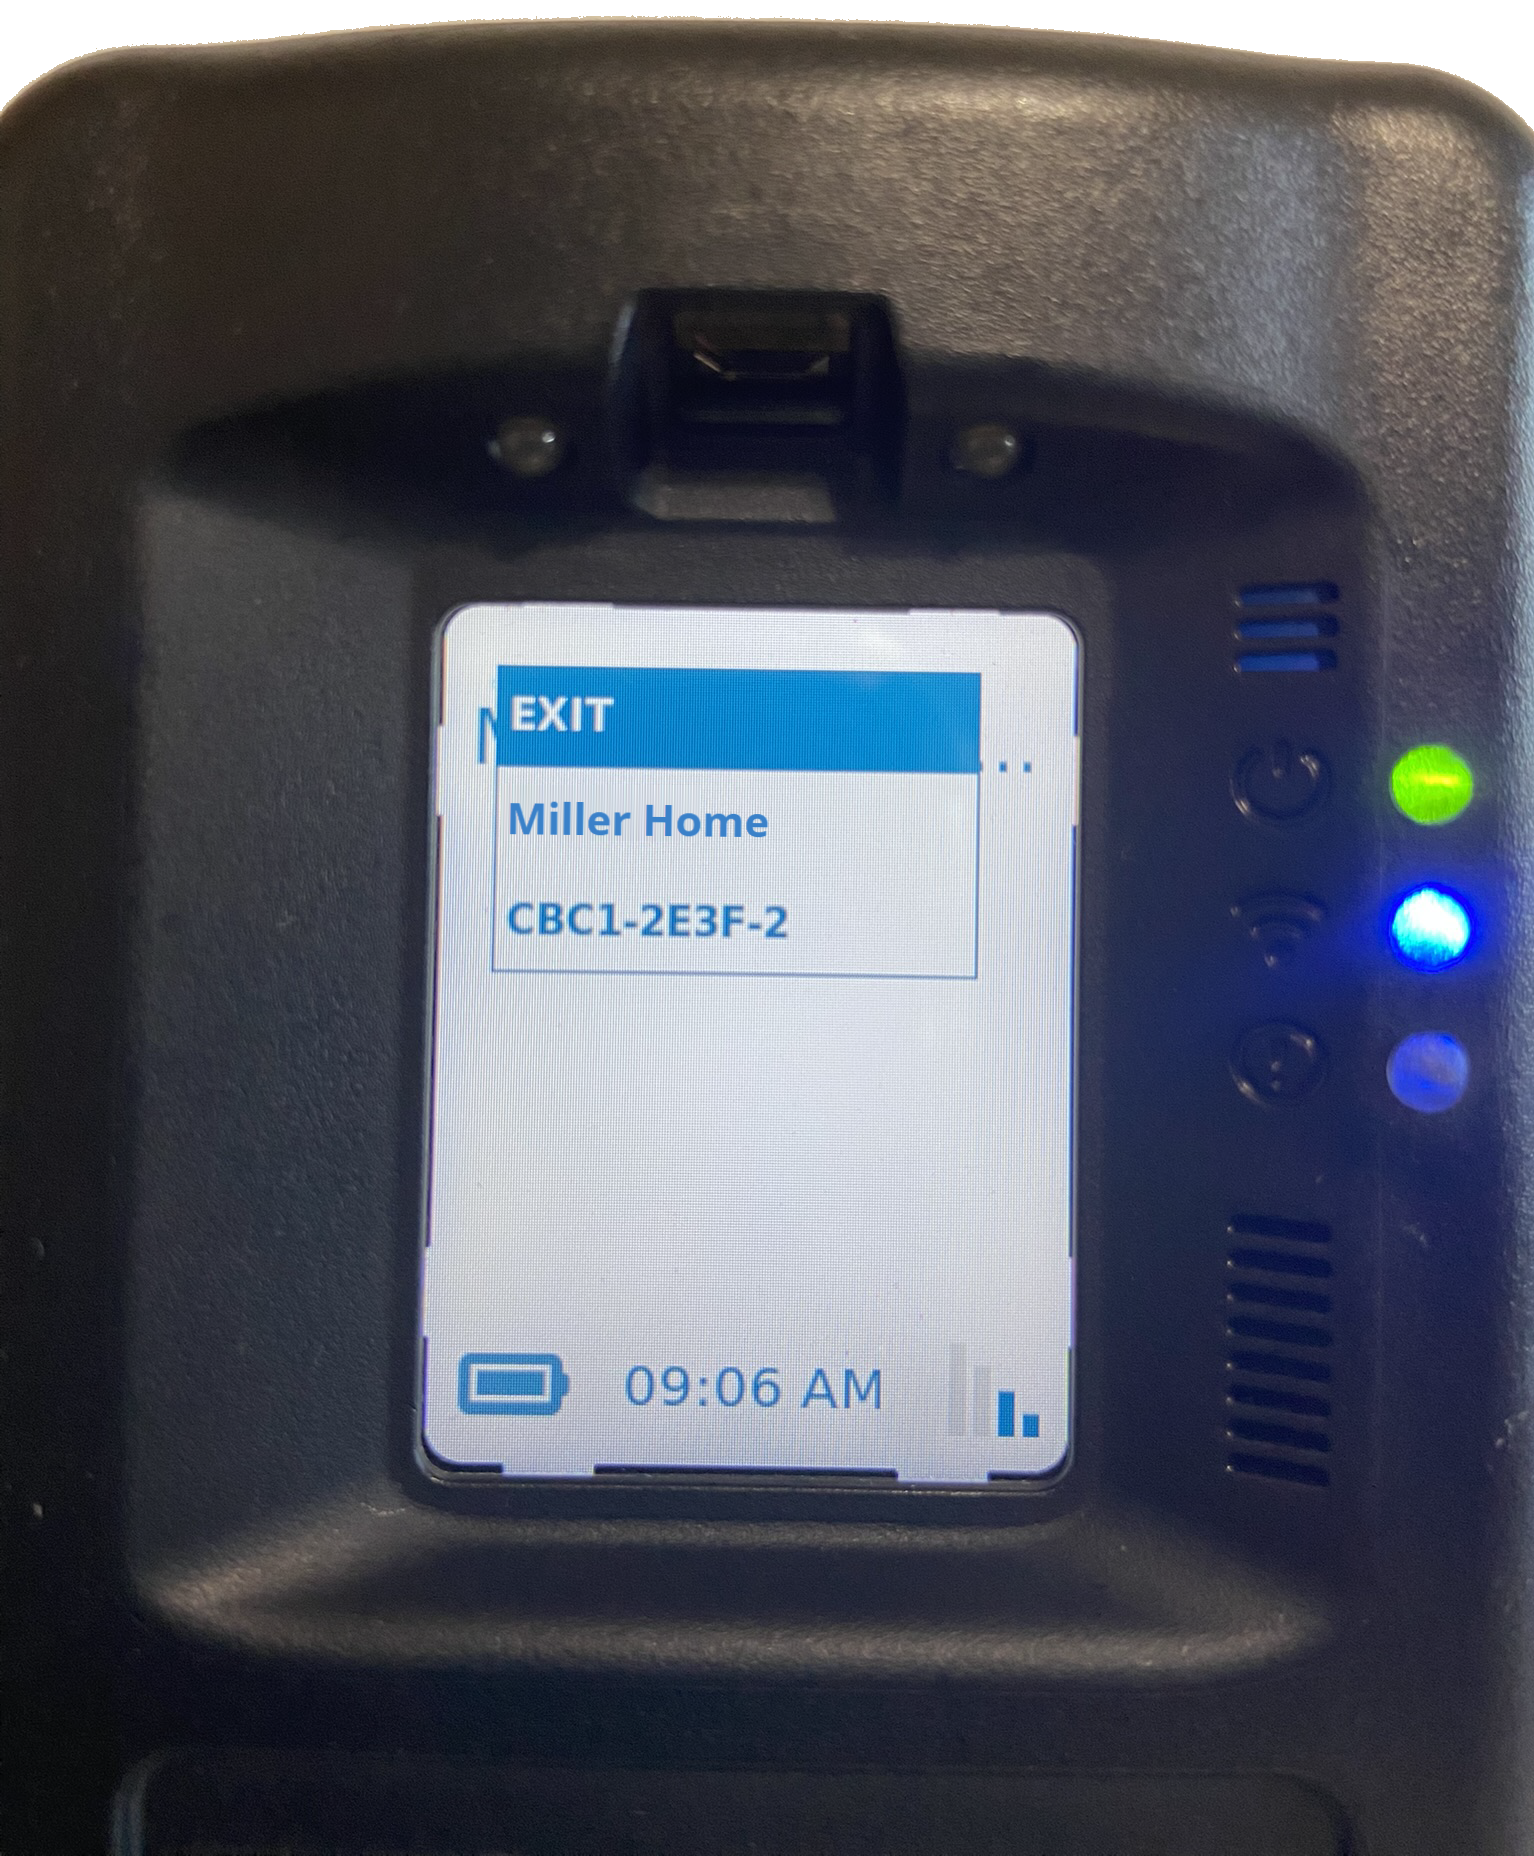
- Use the up/down buttons to highlight the wi-fi network to be removed and then press the “select” button.
Remove Screen- click to enlarge
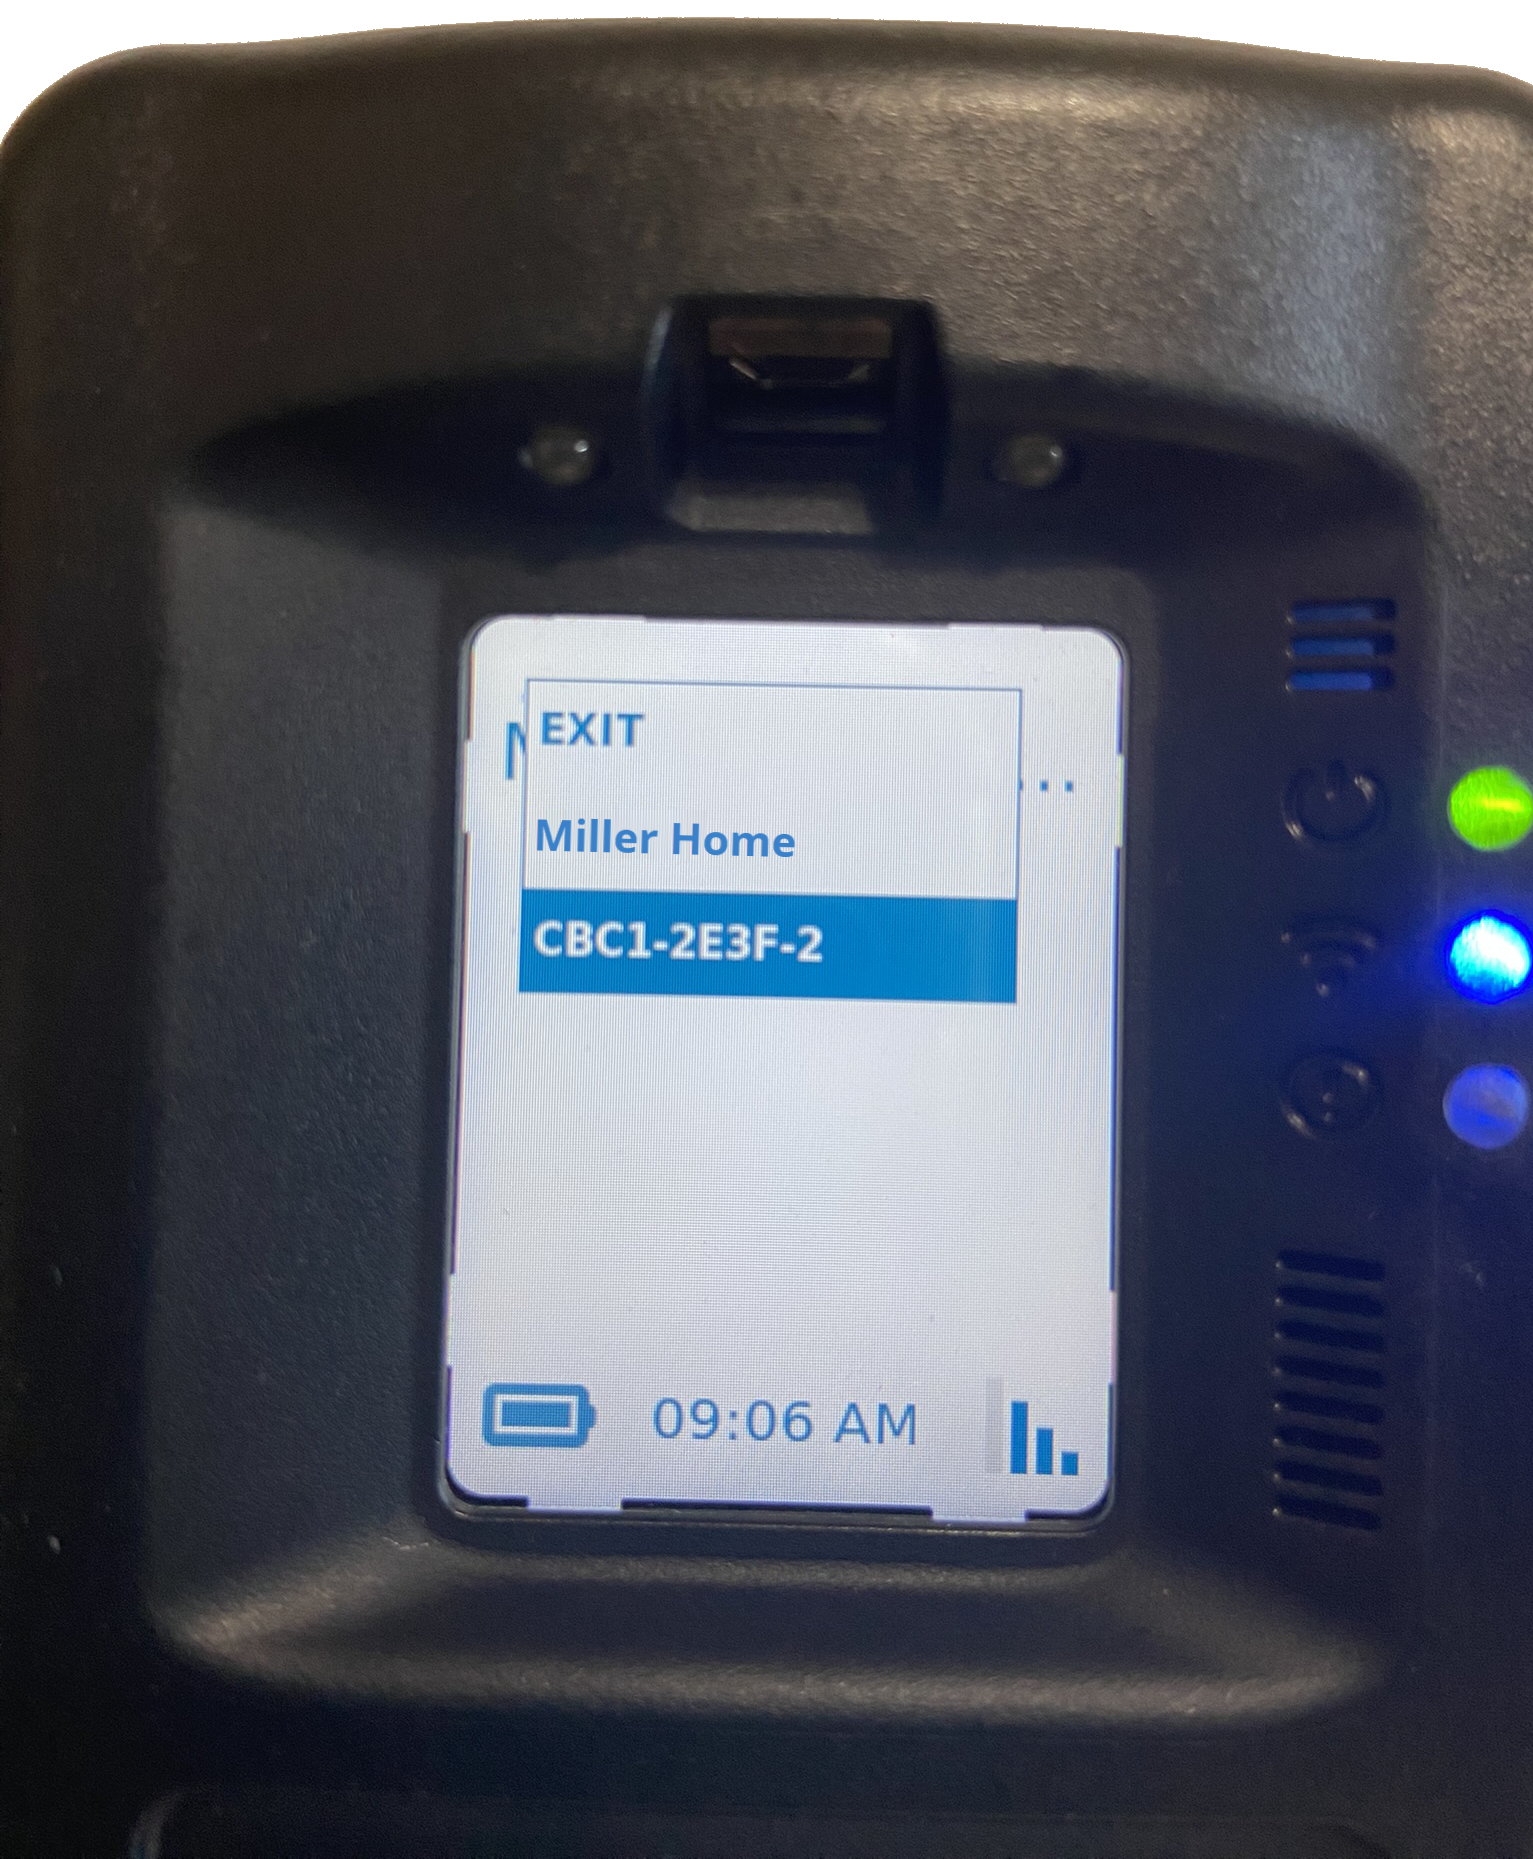
Wi-Fi Network Highlighted – click to enlarge
The Wi-Fi network is no longer displayed.
Wi-Fi Network Removed – click to enlarge