After adding the equipment information in SCRAMNET, and reviewing the general guidelines for house arrest equipment assignment, the next step is to install the SCRAM CAM or House Arrest bracelet on the client’s ankle and assign the equipment for monitoring.
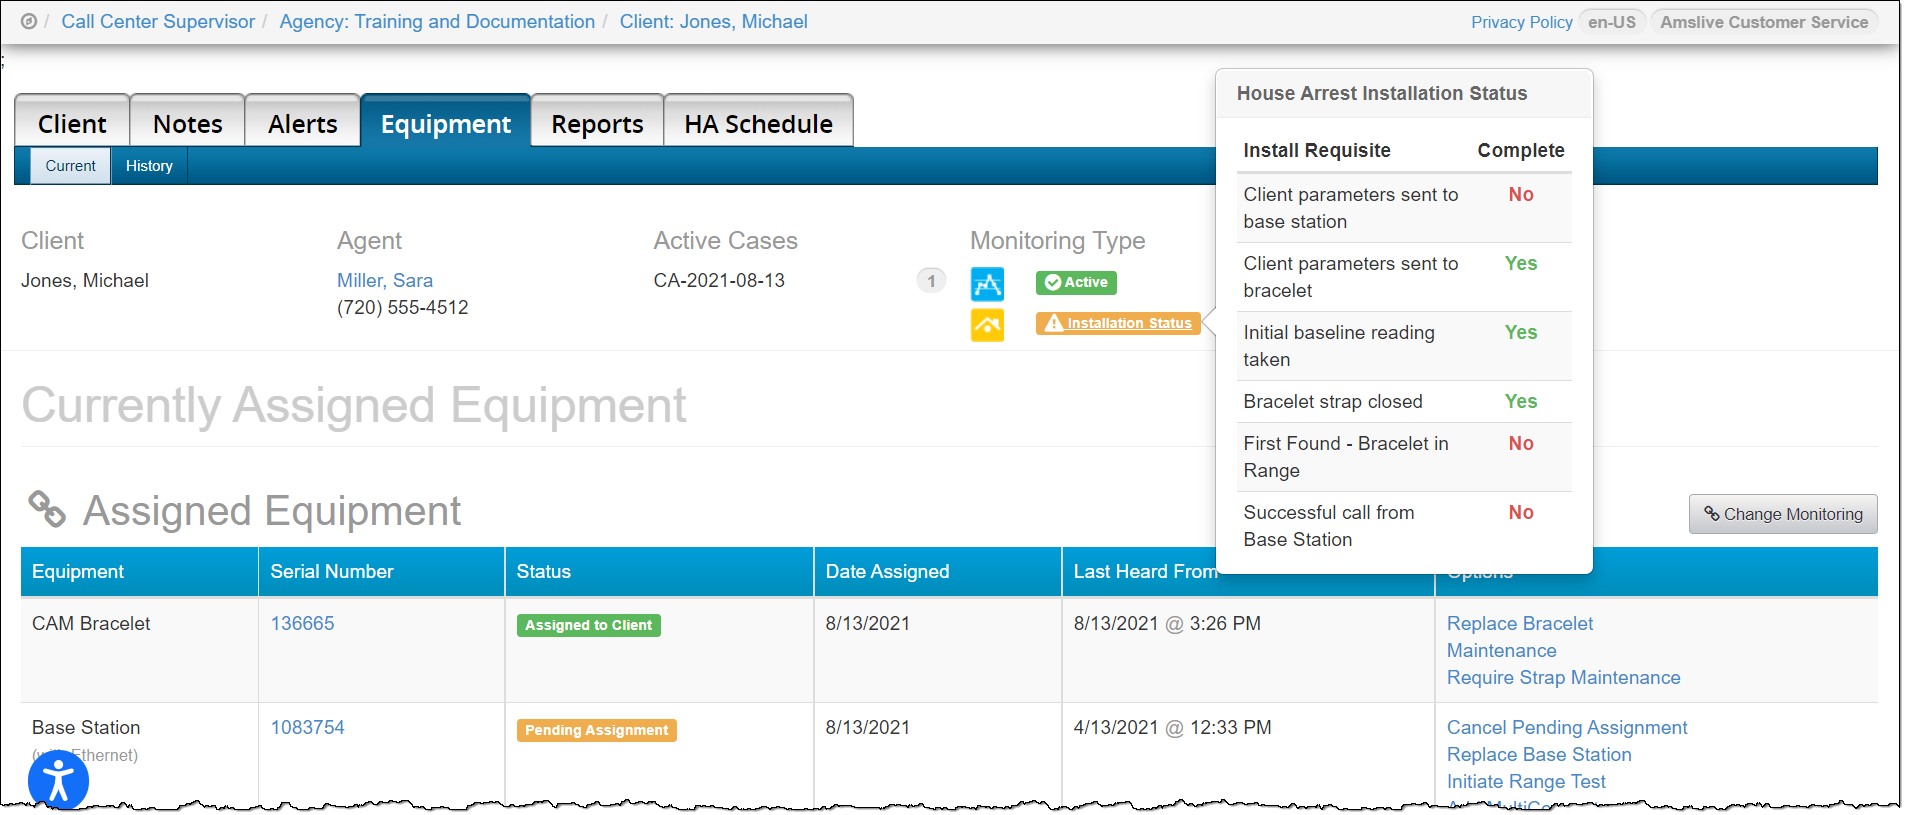
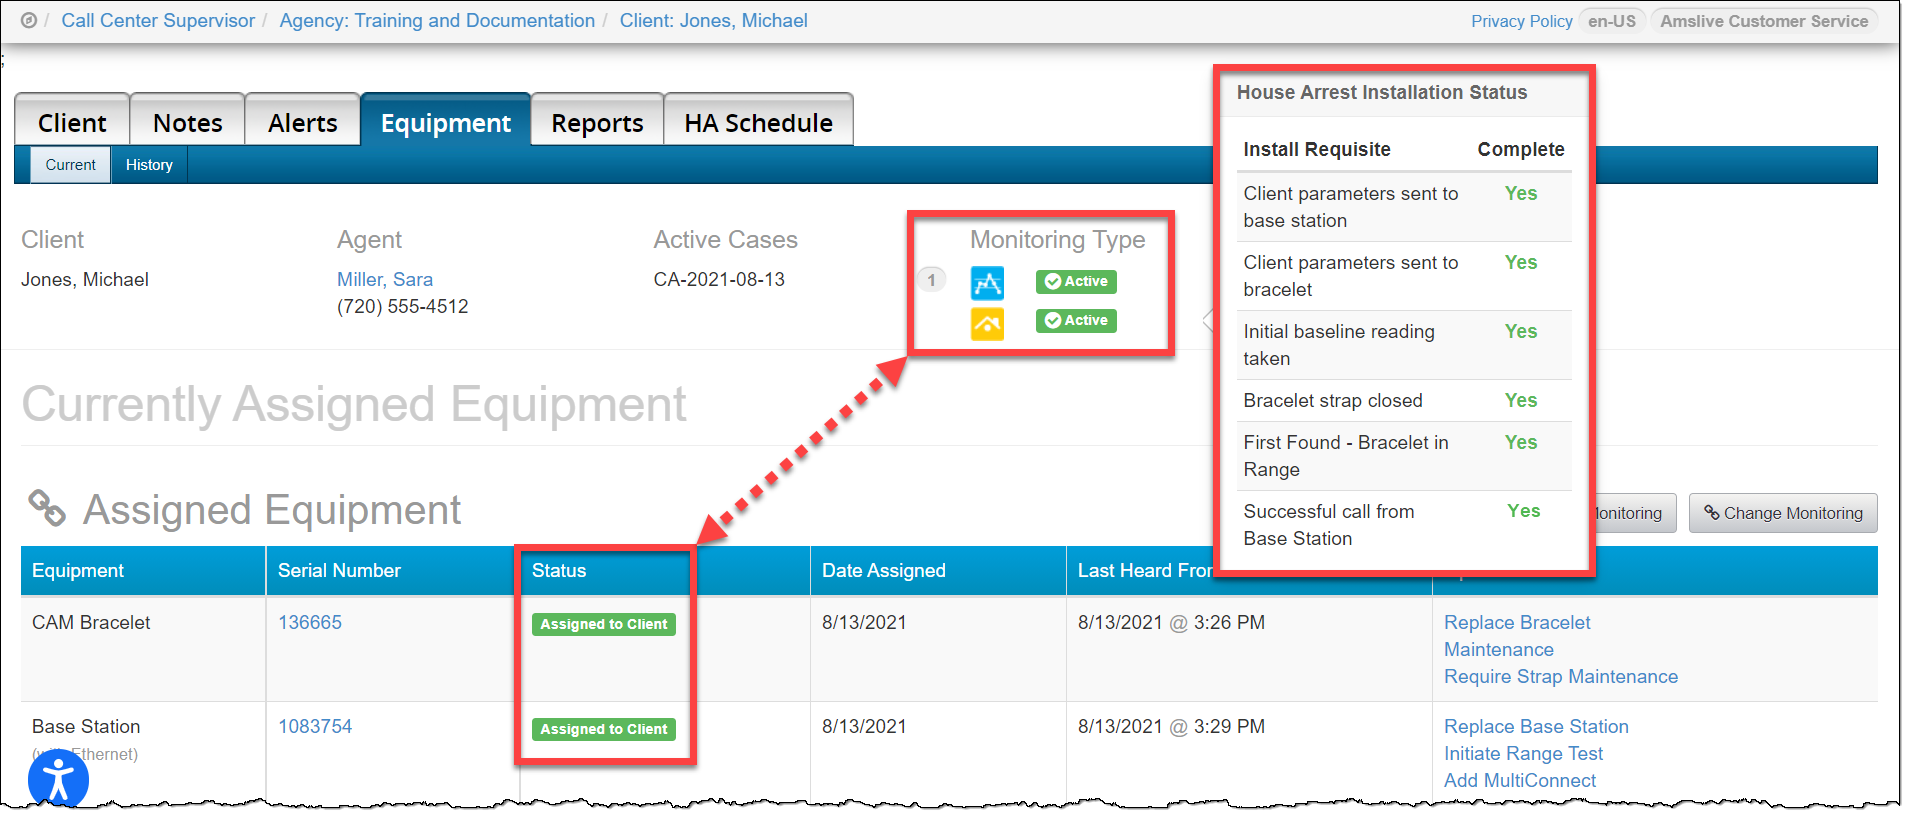
In addition to assigning the equipment to the client, there are six House Arrest installation requisites that must be met before active house arrest monitoring can begin. The requisites are:
- Client parameters sent to base station
- Client parameters sent to bracelet
- Initial baseline reading taken
- Bracelet strap closed
- First found – Bracelet in Range
- Successful call from Base Station
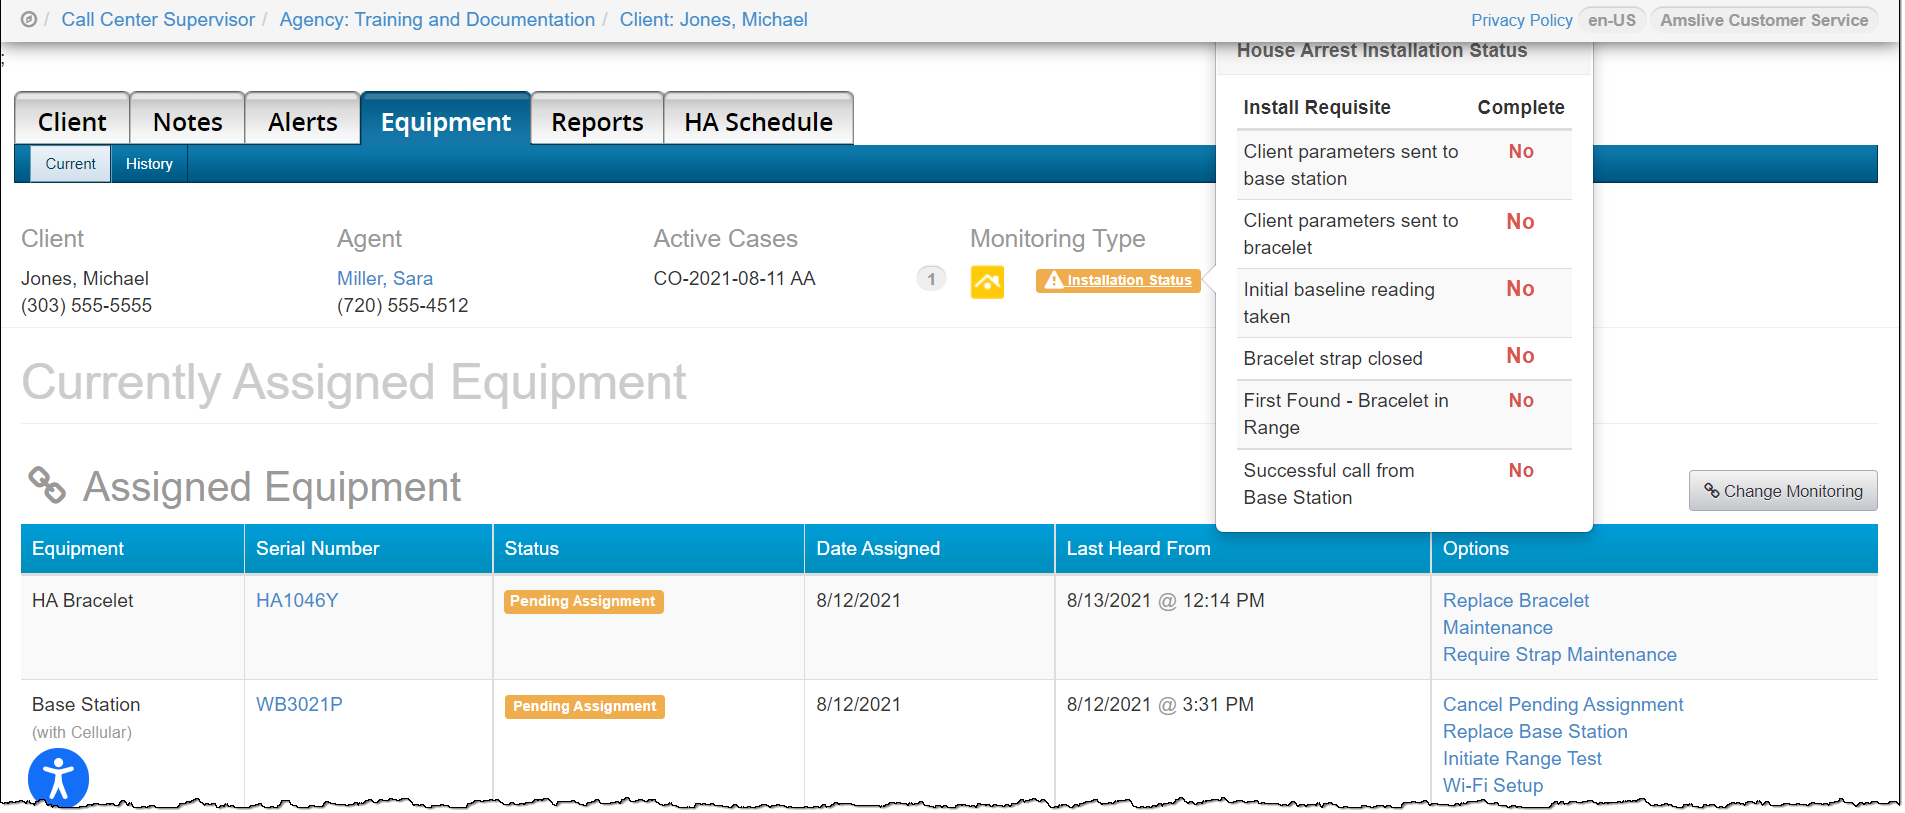
SCRAM House Arrest Client (curfew monitoring) – click to enlarge
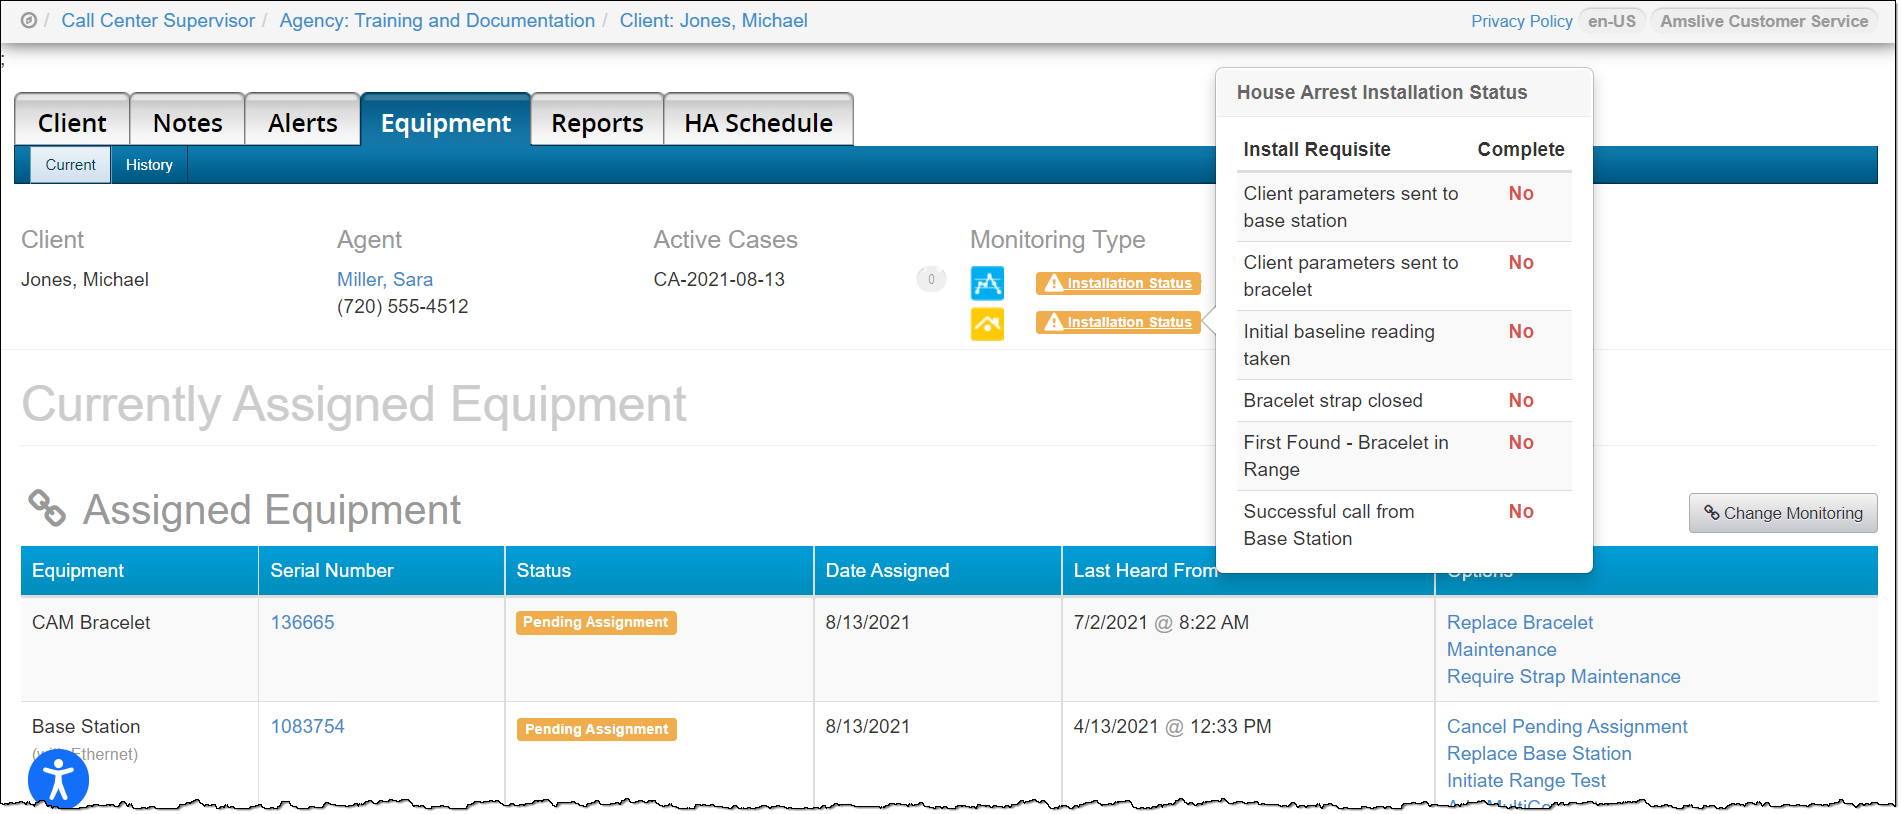
SCRAM CAM + House Arrest Client (alcohol and curfew monitoring) – click to enlarge
This article will cover assigning the equipment and completing the six house arrest installation requisites using the Direct Connect application:
- Install the bracelet components
- Install the bracelet on the client’s ankle
- Assign the bracelet with Direct Connect application
- Assign the base station with Direct Connect application
- Assign the Wireless base station
Get Started
Verify the client’s equipment status is displaying Pending Assignment in SCRAMNET before beginning. If the equipment being installed and assigned to the client is not in a Pending Assignment status, add the equipment information or contact SCRAM Systems Customer Service for assistance.
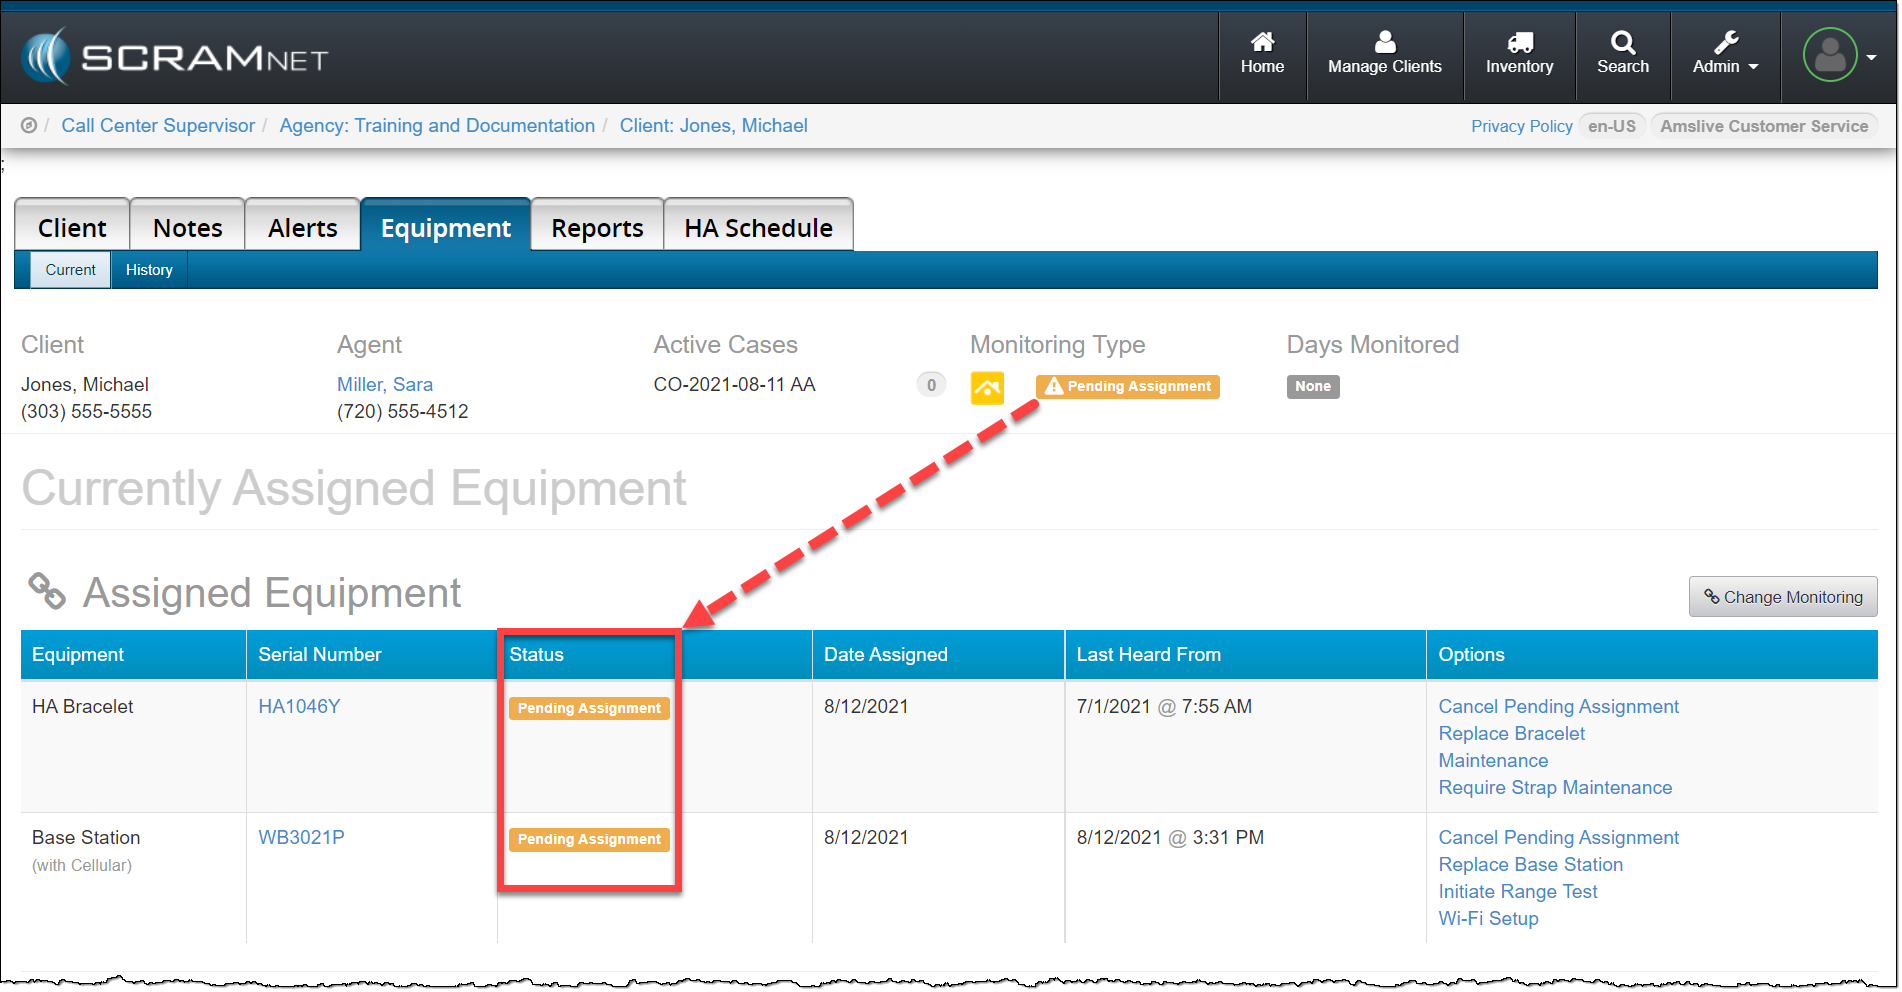
click to enlarge
Install the Bracelet’s Components
- Open the battery/faceplate kit.
- Using the wipe provided, wipe the battery contacts, and then dry them with a paper towel or microfiber cloth.
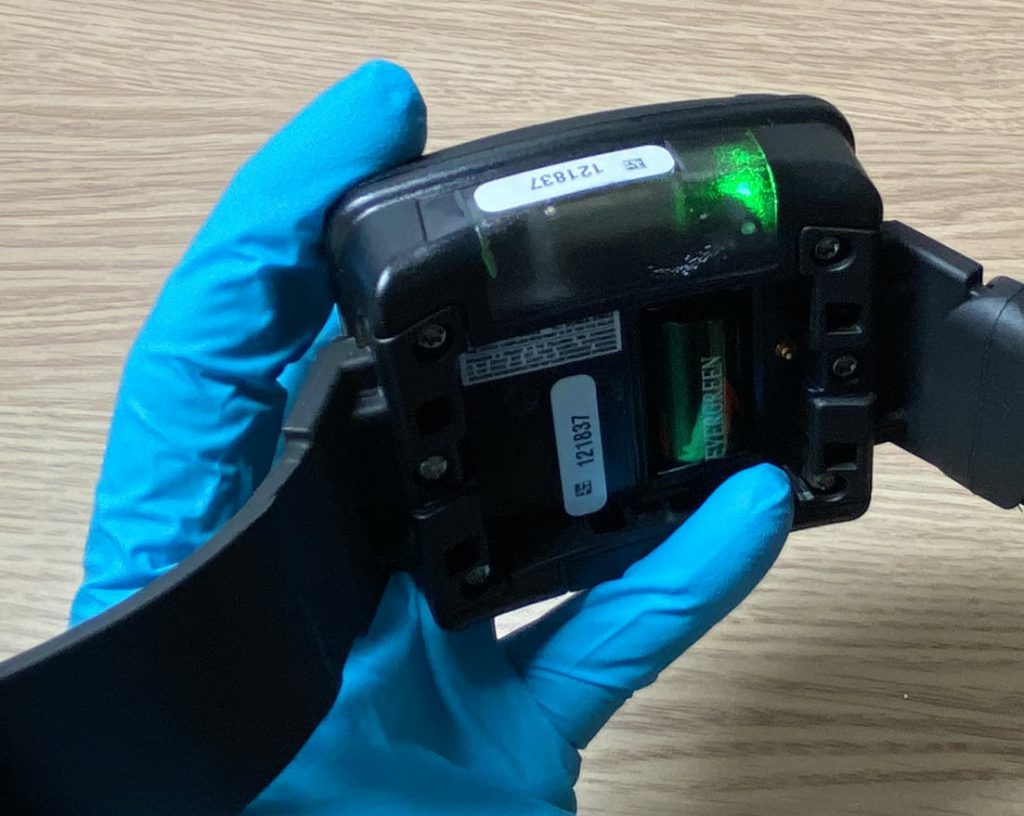
- Install the battery into the battery compartment.
- The positive side of the battery is positioned towards the bottom of the bracelet body.
- Ensure you see a green light when the battery is installed. The green light will turn off after five seconds.
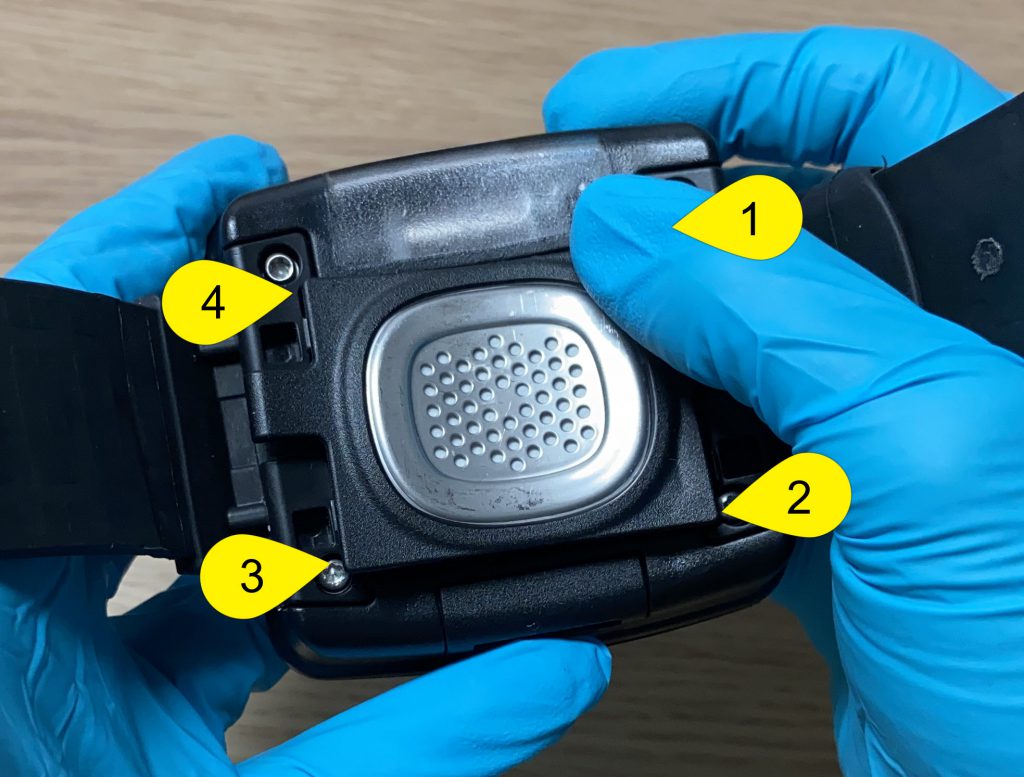
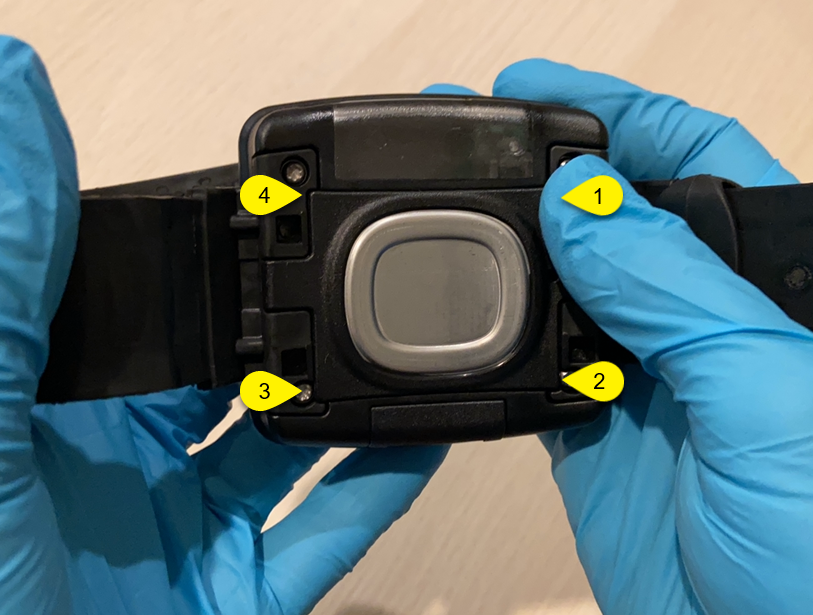
- Install the faceplate.
- Lay the faceplate over the back of the bracelet.
- Starting in the upper right corner, press down firmly until you hear a click.
- Moving clockwise on the faceplate, press down firmly in each of the remaining corners. Ensure you hear a click in each corner.
- It may be necessary to remove the faceplate and reinstall if you do not hear a click in each corner of the faceplate.
Be aware, moisture may enter under the faceplate if these instructions are not followed.
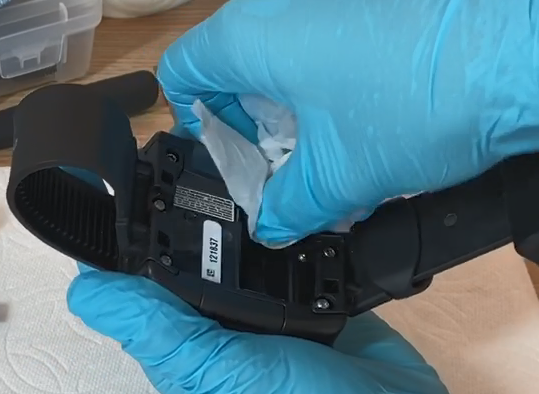
Clean the battery contacts
Install battery
SCRAM CAM Bracelet Faceplate
SCRAM House Arrest Bracelet Faceplate
Note: If you will be installing the bracelet in a remote location with limited internet access or no internet access available, you can assign the equipment before meeting with the client. In that case, it is important you do not close the bracelet straps until after installing the bracelet on the client’s ankle. Once the bracelet is installed and secure on the client’s leg, use the magnet provided by SCRAM Systems to activate the bracelet. This will start the bracelet initialization, which establishes the IR baseline, and record the first test for alcohol monitoring if applicable for the client.
Install the Bracelet on the Client
SCRAM Systems recommends clients who will be monitored for both alcohol and curfew violation be given a breath alcohol test to ensure they are alcohol-free before installing the SCRAM CAM bracelet on their ankle.
| Clients utilizing the SCRAM House Arrest bracelet for curfew monitoring only, do not require an alcohol breath test. |
| Tip: Open videos in the Firefox browser to view them full screen. |
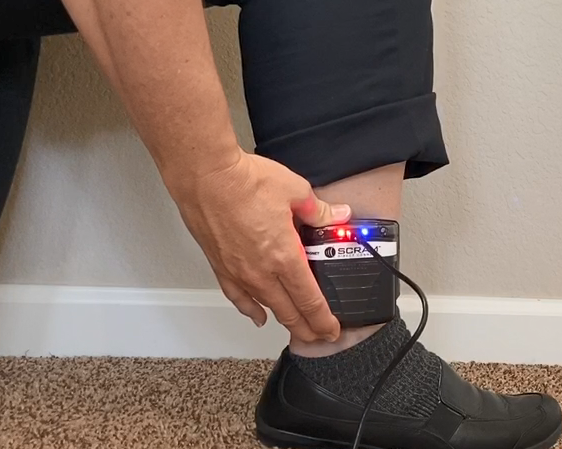
- Install the bracelet on the client’s leg with the serial numbers facing up toward the knee, and low on the client’s leg. About a finger width above the right or left ankle bone.
- Feed the long strap into the buckle until the bracelet is snug against the skin.
- SCRAM CAM Bracelet (alcohol and curfew monitoring)
- The bracelet should be able to move side to side on the leg without losing contact with the skin.
- The bracelet should not be able to be rotated across the shin bone or the back of the leg without exerting a lot of effort.
- Be aware, a poorly fitted bracelet could have some impact on the bracelet’s ability to take accurate readings and may result in unneeded time taken to refit the bracelet.
- SCRAM House Arrest Bracelet (curfew monitoring only)
- The bracelet should fit snug on the client’s ankle but does not have to be in constant contact with the skin.
- The bracelet should not be able to be rotated across the shin bone or the back of the leg without exerting some effort.
- Be aware, a poorly fitted bracelet could have some impact on the bracelet’s ability to take accurate readings and may result in unneeded time taken to refit the bracelet.
- SCRAM CAM Bracelet (alcohol and curfew monitoring)
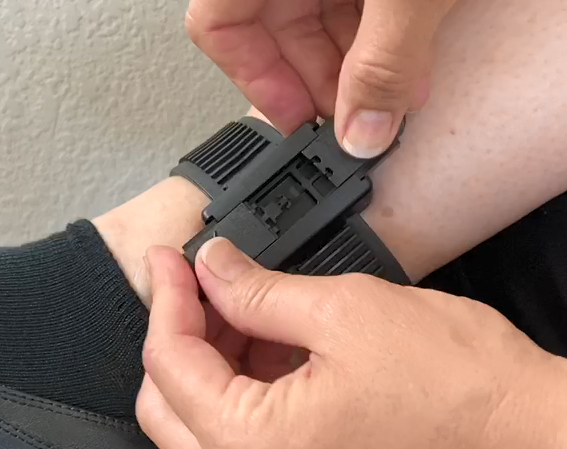
- Tighten both the screws on the buckle top to secure the long strap in place.
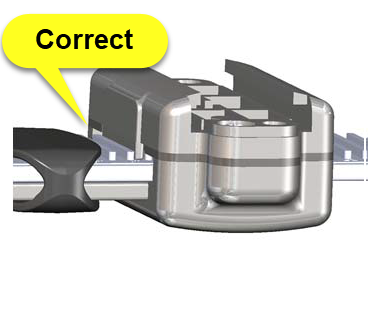
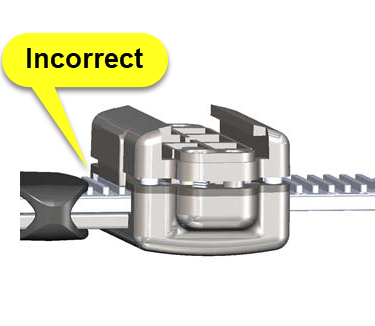
- To properly align the bracelet strap, ensure the tooth alignment tab is positioned between two teeth when the buckle top is tightened.
- Be aware, improper alignment may result in unneeded time taken to refit the bracelet.
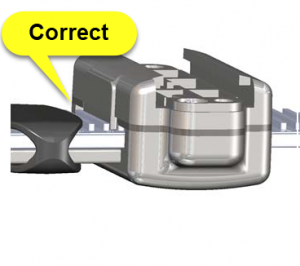
Proper Strap Alignment
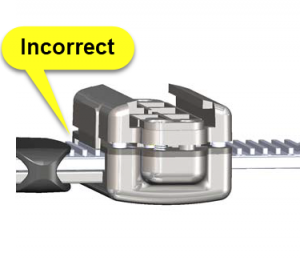
Improper Strap Alignment
- Secure the loose end of the strap with the buckle loop.
Assign Bracelet
Assign the bracelet using Direct Connect. If you are assigning without Direct Connect, follow these instructions instead.
- Assign the bracelet using the Direct Connect application and device.
For step by step instructions, view the Upload SCRAM Bracelet Data Help page.
Direct Connect Application and Tool (click to enlarge)
Placing the Direct Connect Tool on the Bracelet (click to enlarge)

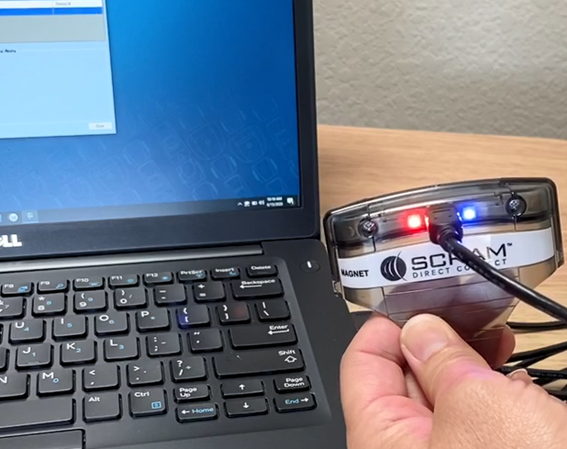
Activating the Direct Connect Tool with Magnet (click to enlarge)
While the bracelet is communicating via Direct Connect application, the bracelet initialization process begins, and the initial test is uploaded to SCRAMNET. As a best practice, take a moment to verify the client’s information displayed on the Direct Connect application. The information should match the current client associated to the bracelet.
- Once communication has completed, navigate to SCRAMNET and refresh the page. The bracelet’s equipment status should now display as Assigned to client and three of the six installation requisites met.
- Client parameters sent to bracelet
- Initial baseline reading taken
- Bracelet strap closed

SCRAM House Arrest Client (curfew monitoring only) – click to enlarge
SCRAM CAM + House Arrest Client (alcohol and curfew monitoring) – click to enlarge
- Install the tamper clips on the buckle.
- Insert both tamper clip parts into the buckle slots and squeeze the two parts together. You should hear a click.
- Take a moment to ensure the clips are secure by trying to pull them apart.
Installing the Tamper Clips on a Bracelet (click to enlarge)
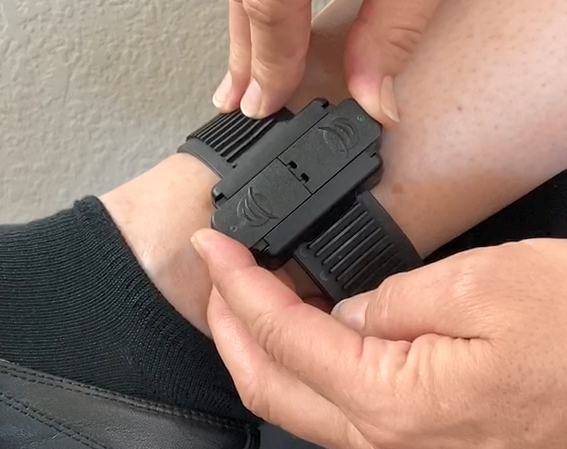
Pushing the Tamper Clips Together (click to enlarge)
Note: Ensure the tamper clip parts are free of cracks or fractures. Never reuse tamper clips.
Assign Base Station
Assign the base station using Direct Connect.
- Plug the base station in to a power source.
- Direct connect the base station.
For Step by step instructions, view the Upload SCRAM Base Station Data Help section.
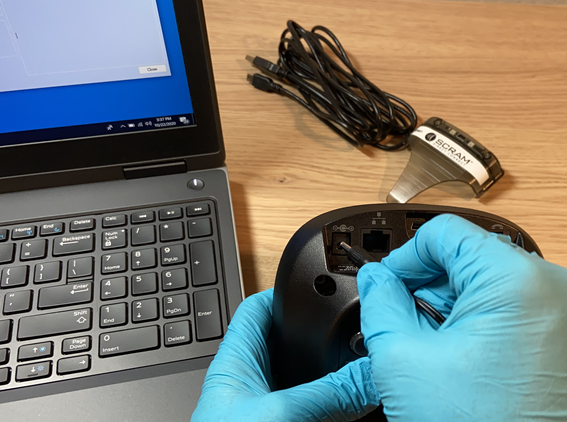
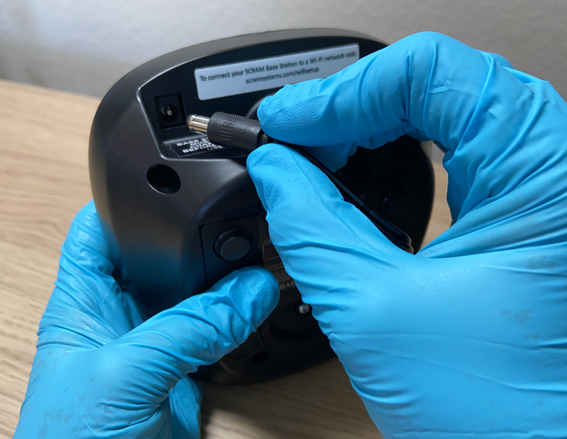
Plugging Power Cord into the Back of Base Station (click to enlarge)
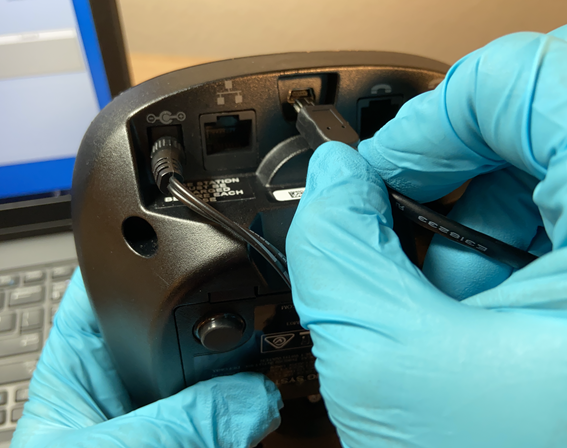
Plugging Direct Connect Cable into the Back of Base Station (click to enlarge)
While the base station is communicating via the Direct Connect application, take a moment to verify the client’s information displayed on the Direct Connect application. The information should match the current client associated to the base station.
The base station will cycle through Communicating and Communication Complete three times. It is important to not disconnect the base station from the Direct Connect application until step c has been completed:
-
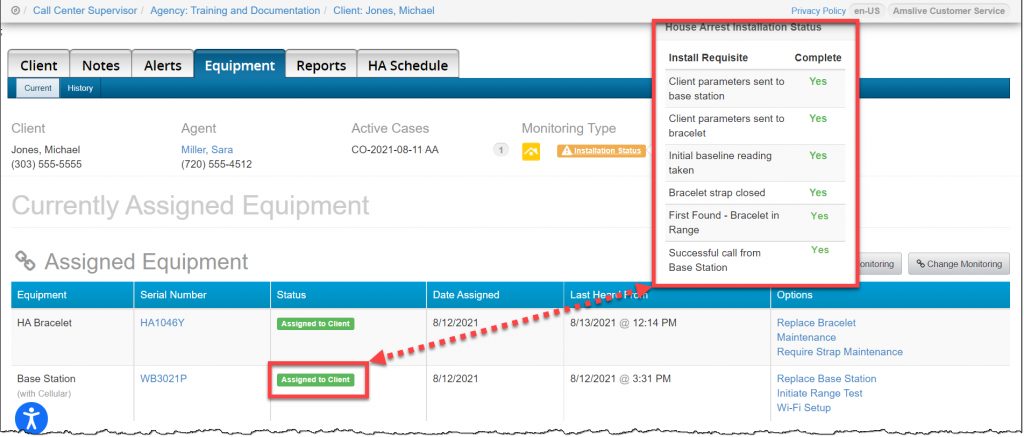
- First communication cycle completes, navigate to SCRAMNET and refresh the page. The base station’s equipment status should now display as Assigned to Client.
- Second communication cycle completes, navigate to SCRAMNET and refresh the page. The Client parameters sent to base station requisite is complete.
- Third communication cycle completes, navigate to SCRAMNET and refresh the page. The First Found – Bracelet in Range requisite is complete.
- Disconnect the base station from the Direct Connect cable.

click to enlarge
- Provide the client with the base station, power cord, Ethernet or telephone cable, and instructions on installing the base station in their home.
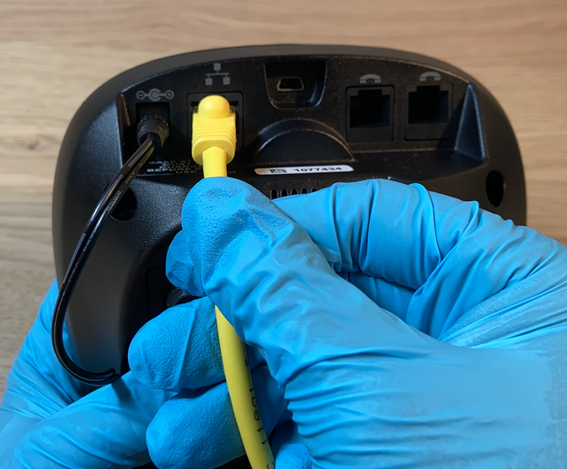
Plugging Ethernet cord into the Back of Base Station (click to enlarge)
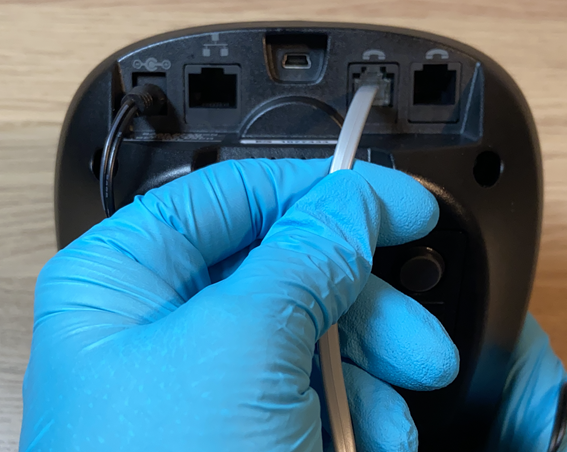
Plugging phone cord into the Back of Base Station (click to enlarge)
Helpful Tip: When connecting to a telephone landline, a DSL filter may need to be used, to ensure the base station is able to communicate with SCRAMNET.
Go to the Final Checks section.
Assign Wireless Base Station
To assign the wireless base station the Direct Connect application is not utilized:
- Plug the base station into a power source.
Plugging Power Cord into the Back of Base Station (click to enlarge)
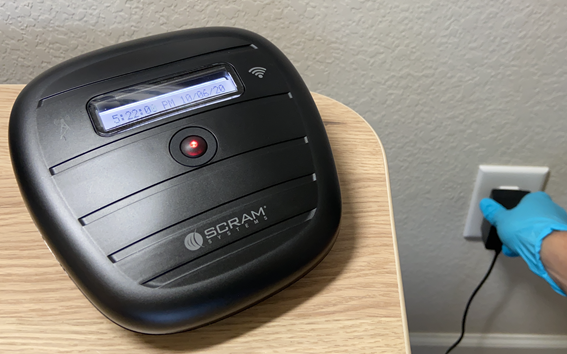
Plugging Wireless Base Station into Power Outlet (click to enlarge)
-
- When connecting over the Cellular network, the LCD screen on the base station will display:
- “Storage Mode – Battery Charging – None” or “Fully Charged – None”
- “[Current Time and Date]” and “Monitoring – 3G” or “Monitoring – 4G”
- When connecting over Wi-Fi the LCD screen on the base station will display:
- “Storage Mode – Battery Charging- None” or “Fully Charged – None”
- “[Current Time and Date]” and “Monitoring – 3G” or “Monitoring – 4G”
- When connecting over the Cellular network, the LCD screen on the base station will display:
- Once the status on the LCD screen displays the current date and time and “Monitoring”, refresh the Equipment page in SCRAMNET. The wireless base station’s equipment status should now display as Assigned to Client and the remaining three requisites should show as being met for active SCRAM House Arrest monitoring.
click to enlarge
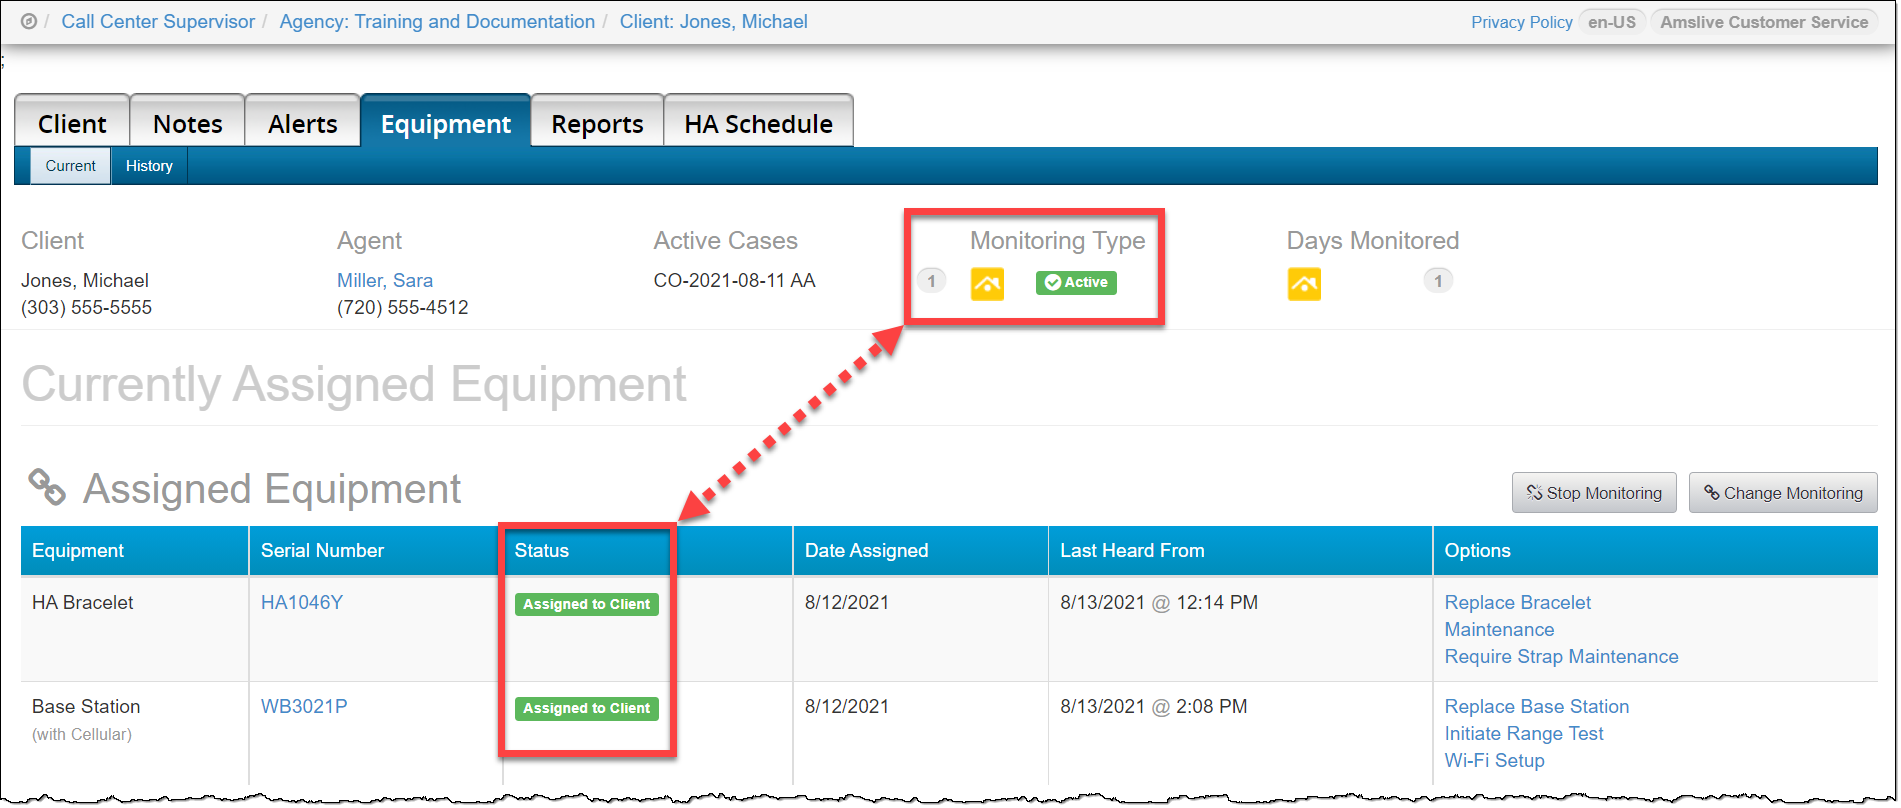
After one minute, the Monitoring Type will update to Active in SCRAMNET.
Click to enlarge
Troubleshooting Wireless Base Station Assignment Issues
If the base station does not assign in 15 minutes and the LCD screen still displays “None”, unplug the base station from power. Place the base station in a new location where better cellular connection may be available and connect to power.
If after 15 minutes the wireless base station still does not assign:
- Select the Cancel Pending Assignment hyperlink under the Options
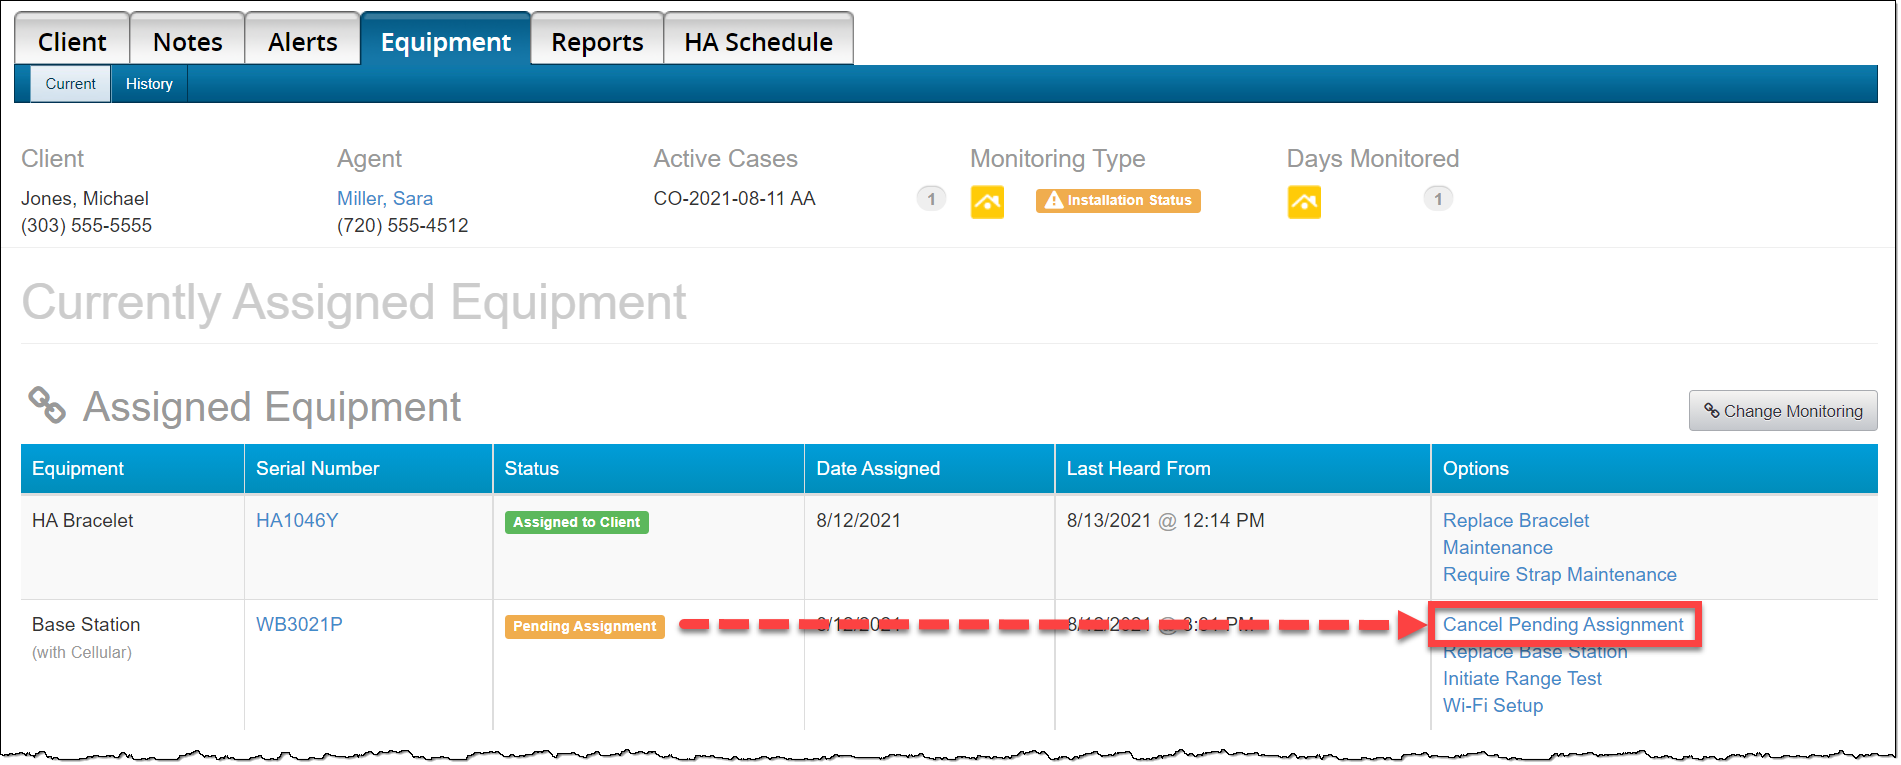
click to enlarge
- Acknowledge the Cancel Pending Assignment warning pop-up.
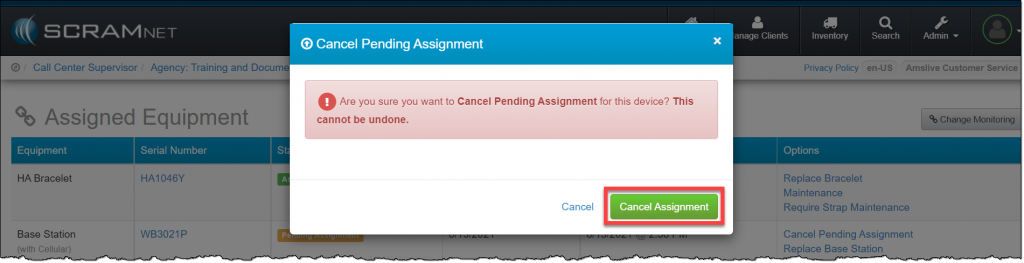
click to enlarge
- On the client’s Equipment page, click the Add Base Station hyperlink under the Options column and complete the Assign Equipment page.
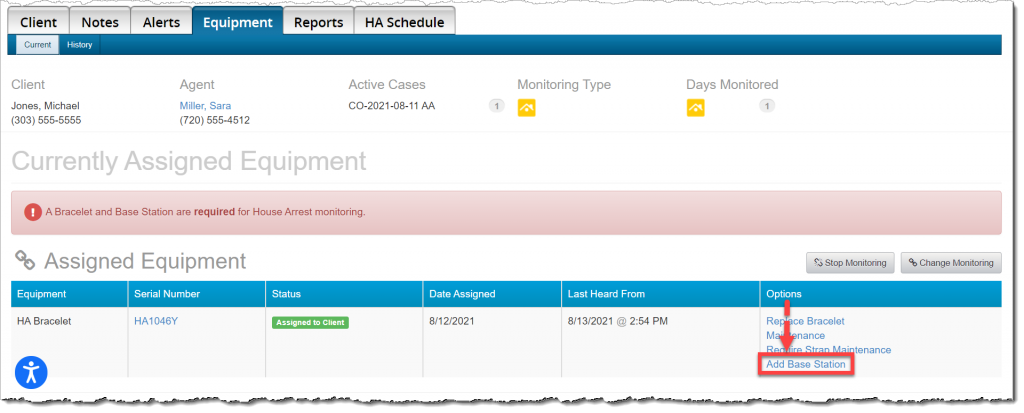
click to enlarge
- Once the wireless base station is in a Pending Assignment status, connect to power.
If all troubleshooting steps fail, contact Customer Service for assistance.
Final Checks
For best results, instruct the client to place the base station or wireless base station at least three feet off the floor, away from any other electronics or reflective surfaces that may cause interference. If possible, place the base station in a central location in the home.
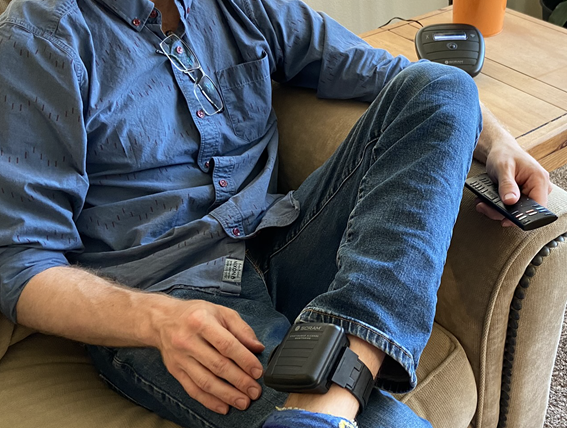
Client Sitting Next to Base Station (click to enlarge)
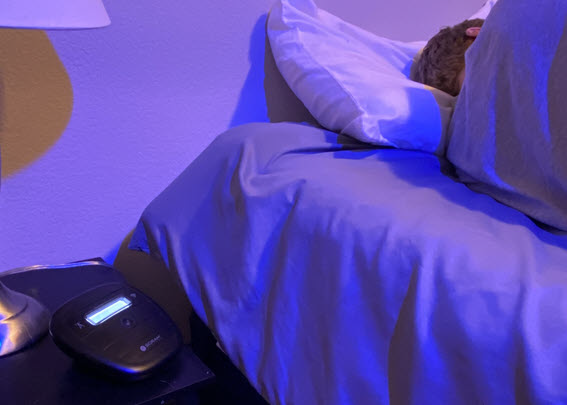
Client Sleeping Next to Base Station (click to enlarge)
Take a moment to verify:
- The tamper clips have been securely installed on the bracelet.
- The status of the client’s equipment is showing Assigned to Client in SCRAMNET.
- You have provided the client with any additional instructions.
- You have reviewed the Participant agreement with the client and have a signed copy for your records.
Important Note: The client is not active for House Arrest monitoring until all the equipment associated to the client and all six installation requisites are complete. Once complete, the Monitoring Type displays as Active.
SCRAM CAM + House Arrest Client (alcohol and curfew monitoring – click to enlarge)
SCRAM House Arrest Only Client (curfew monitoring – click to enlarge)