Purpose
The battery in the SCRAM House Arrest Bracelet should be replaced if one of the following indications appears:
- Replace Battery/Faceplate Alert – Will appear on the Workload page 60 days since the battery and faceplate were originally installed or previously replaced.
- Low Bracelet Battery Alert/Event – The alert and/or event will appear in the client’s HA Event Log seven days prior to the expected battery failure date and will reappear daily until the battery is replaced.
What you will need:
The following items are needed to replace all of the bracelet components:
- New faceplate
- New battery
- Faceplate Removal Tool
- T10 Screwdriver
Procedure
-
- Complete the Bracelet Maintenance.
To complete the bracelet maintenance:- Access the client’s Equipment page.
- Click the Maintenance link.
- Select the Battery, Faceplate, and Exhaust Cap Replaced check box.
- Click the Finish button.
The bracelet re-initialization, which must be performed each time the bracelet is removed, will begin the next time that the bracelet communicates with SCRAMNET®.
- Remove Bracelet.
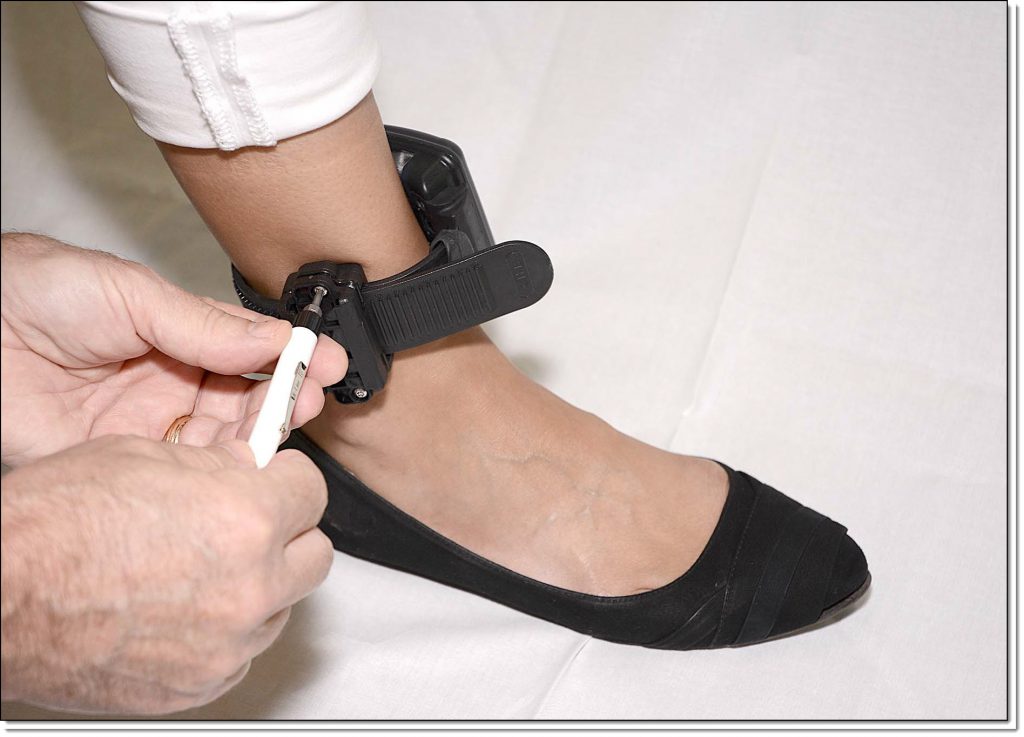
To remove the bracelet:- Place the shear cutter on the center line where the two pieces of the tamper clip meet.
- Press down firmly with one point of the shear cutter until the point breaks through the plastic.
- Press down firmly with the other point of the shear cutter until that point breaks through the plastic.
- Complete the Bracelet Maintenance.
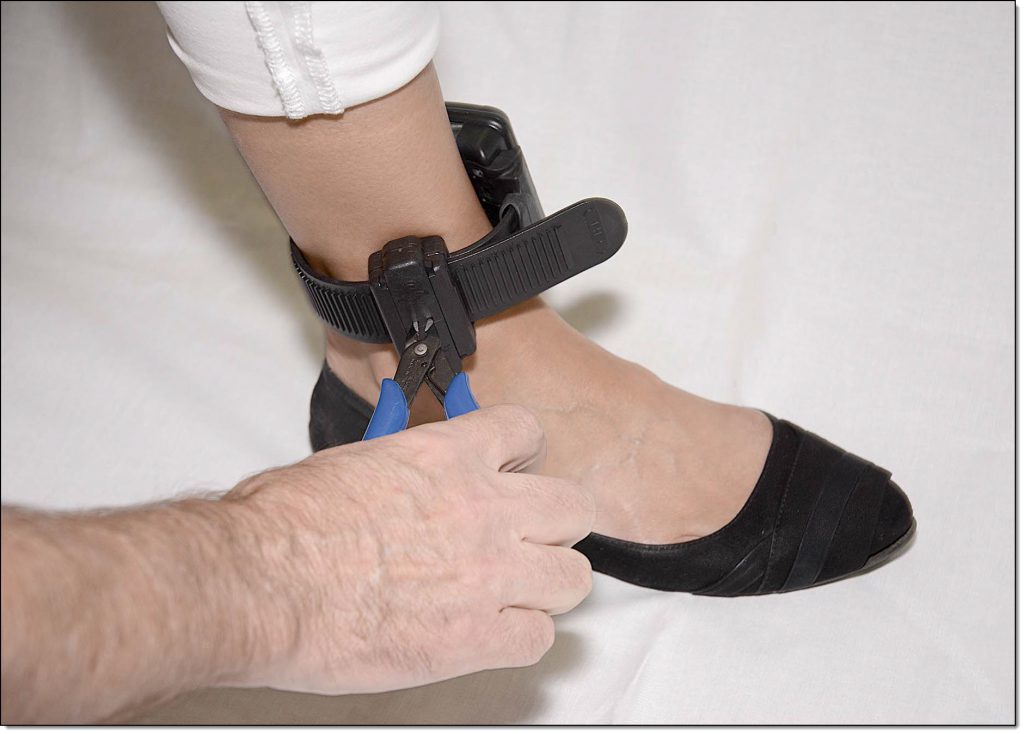
Breaking Through the Tamper Clip Plastic
-
-
- Squeeze the shear-cutter handles until the plastic center breaks and the two pieces separate from the buckle cover.
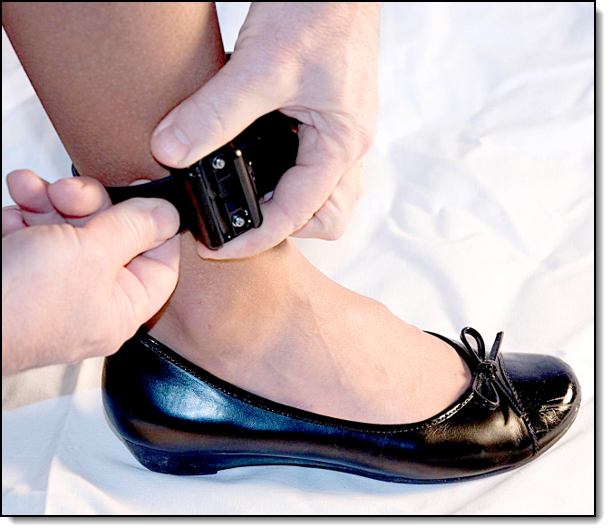
- Using the T10 screwdriver, loosen the two retaining screws.
-

Loosen the Retaining Screws
-
-
- Pull the strap back through the buckle, removing the bracelet from the client’s ankle.
Remove Bracelet
- Pull the strap back through the buckle, removing the bracelet from the client’s ankle.
- Remove Old Faceplate.
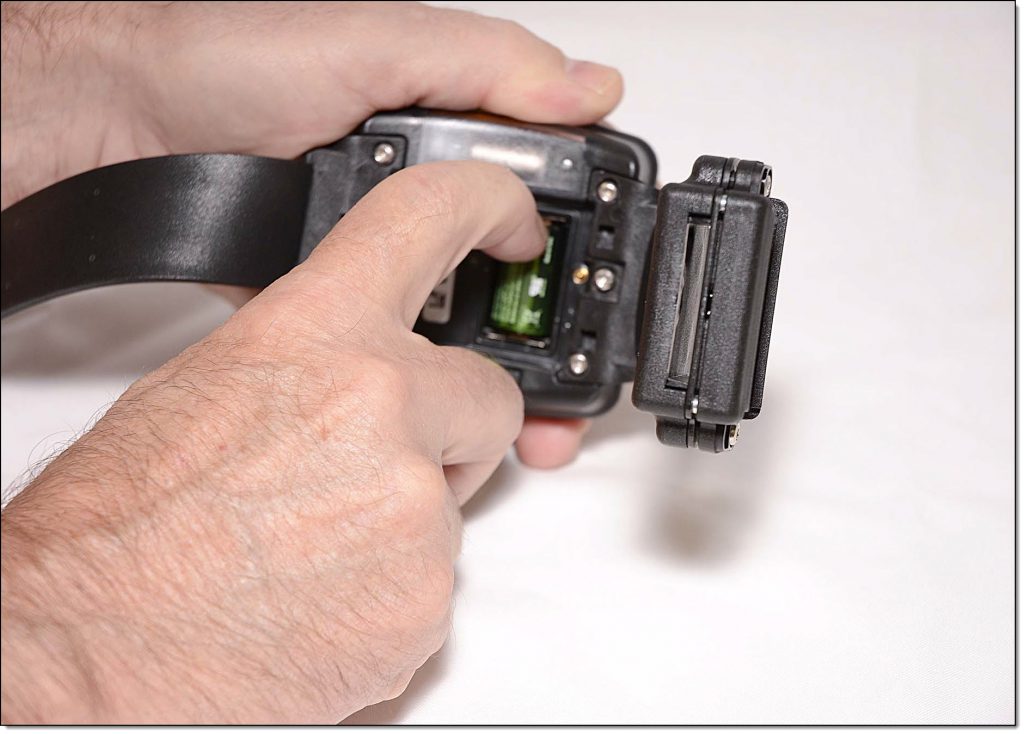
To remove the faceplate:- Insert the Faceplate Removal Tool into the slots on the right side of the bracelet.
-
Inserting the Faceplate Removal Tool
-
-
- Press the tool in until the faceplate disengages.
- Remove the faceplate.
Note: Discard the faceplate.
Faceplate Removed
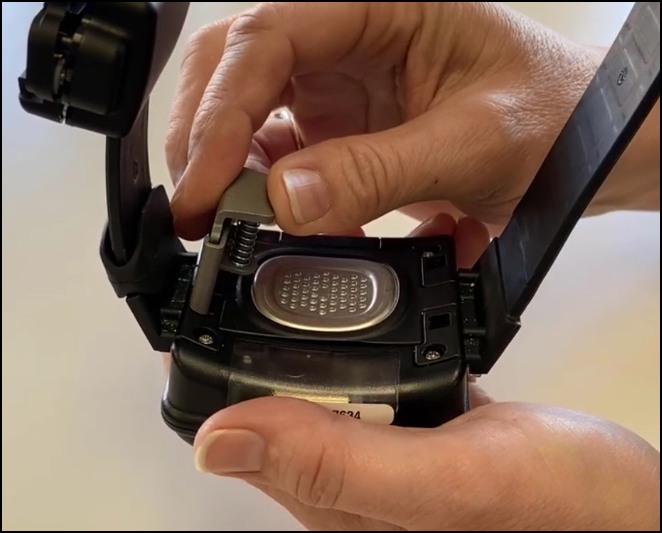
- Remove Old Battery.
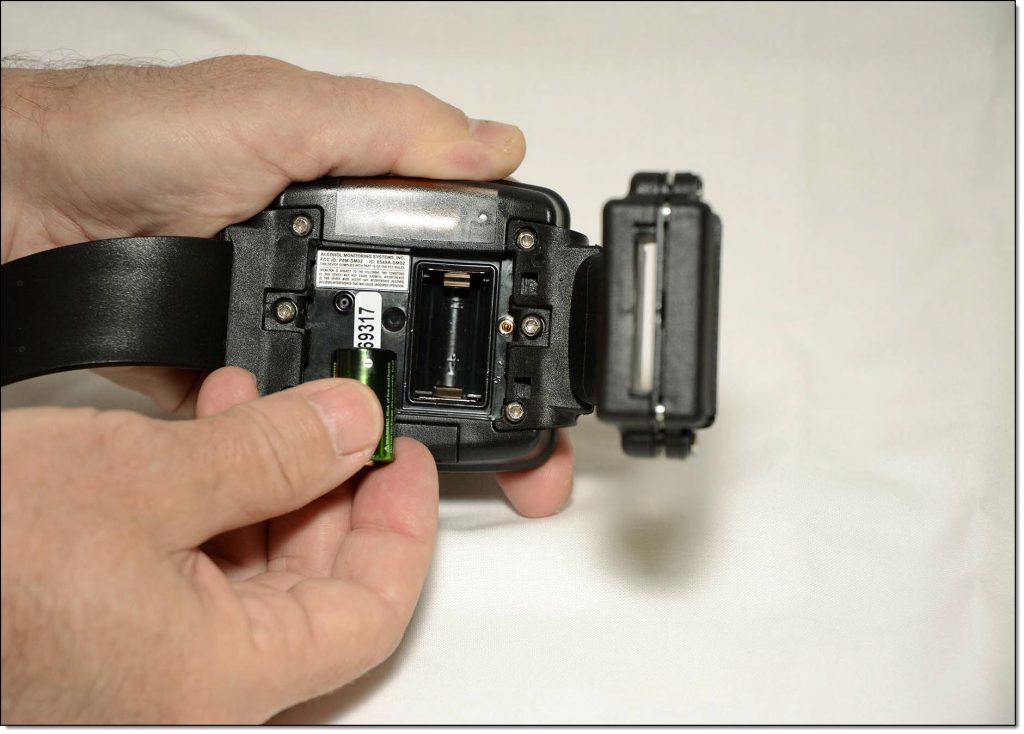
To remove the battery:- Place your finger tip on the edge of the negative (flat) side of the battery.
-
Removing the Battery
-
-
- Pull up on the battery, removing it from the bracelet.
Note: Discard the battery.
Battery Removed
- Pull up on the battery, removing it from the bracelet.
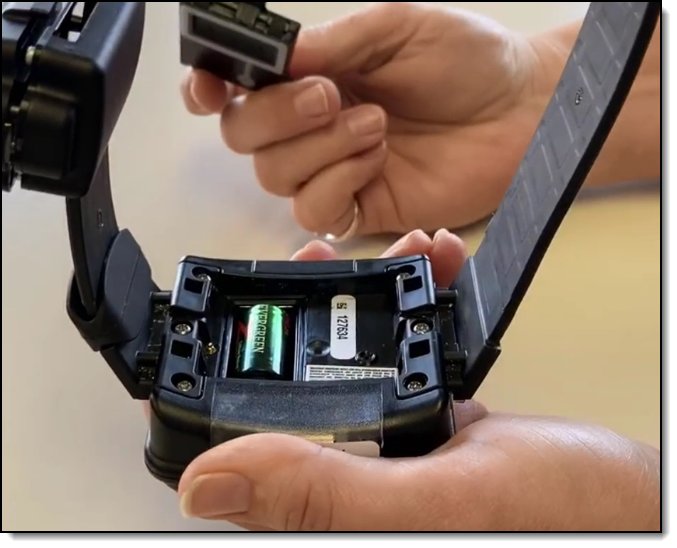
- Install New Battery.
To install the new battery:- Look closely for the outline of a battery at the bottom of the battery slot and insert the battery, starting with the positive side being pushed against the bottom side of the battery slot and pushing down on the negative (flat) side, which faces up towards the serial number.
A small, green light on the bracelet will turn on for 5 seconds.
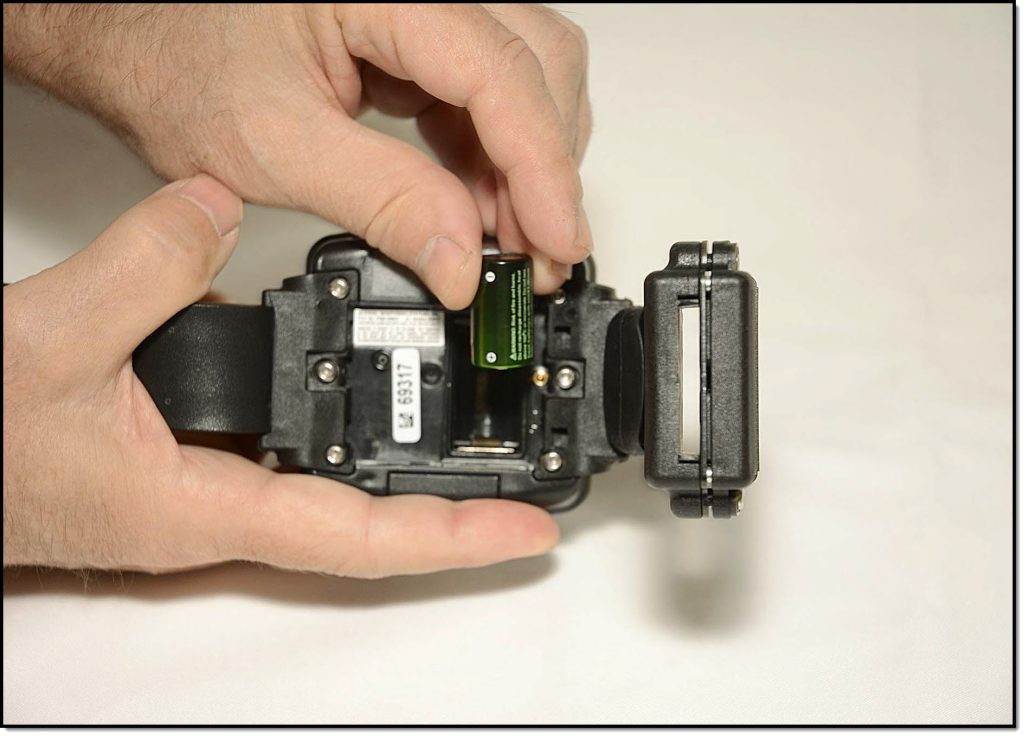
Inserting the Battery
- Look closely for the outline of a battery at the bottom of the battery slot and insert the battery, starting with the positive side being pushed against the bottom side of the battery slot and pushing down on the negative (flat) side, which faces up towards the serial number.
- Install New Faceplate.
To install the new faceplate:- Place the faceplate on the bracelet with the battery side flush with the case.
Note: The faceplate is designed to align in only one direction. - Starting on the top-right side and going clockwise, press down firmly on each corner of the faceplate with your thumb. See below.
You should hear a pronounced click as you push each corner of the faceplate.
Warning: Moisture may enter under the faceplate if these instructions are NOT followed.
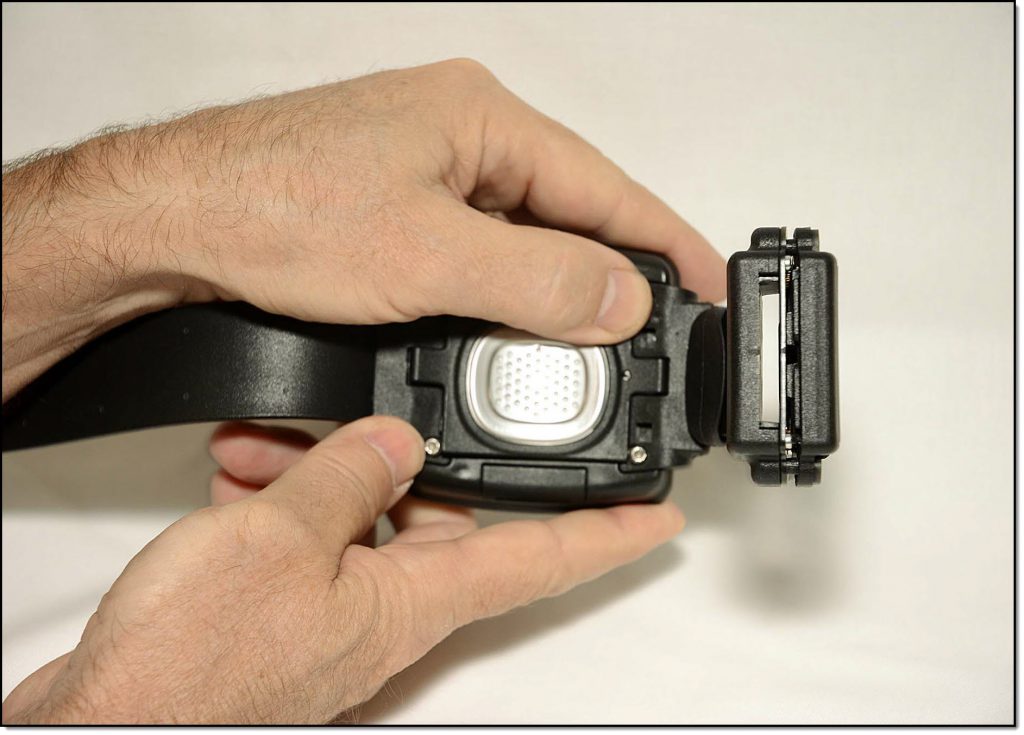
Attaching the Faceplate
- Place the faceplate on the bracelet with the battery side flush with the case.
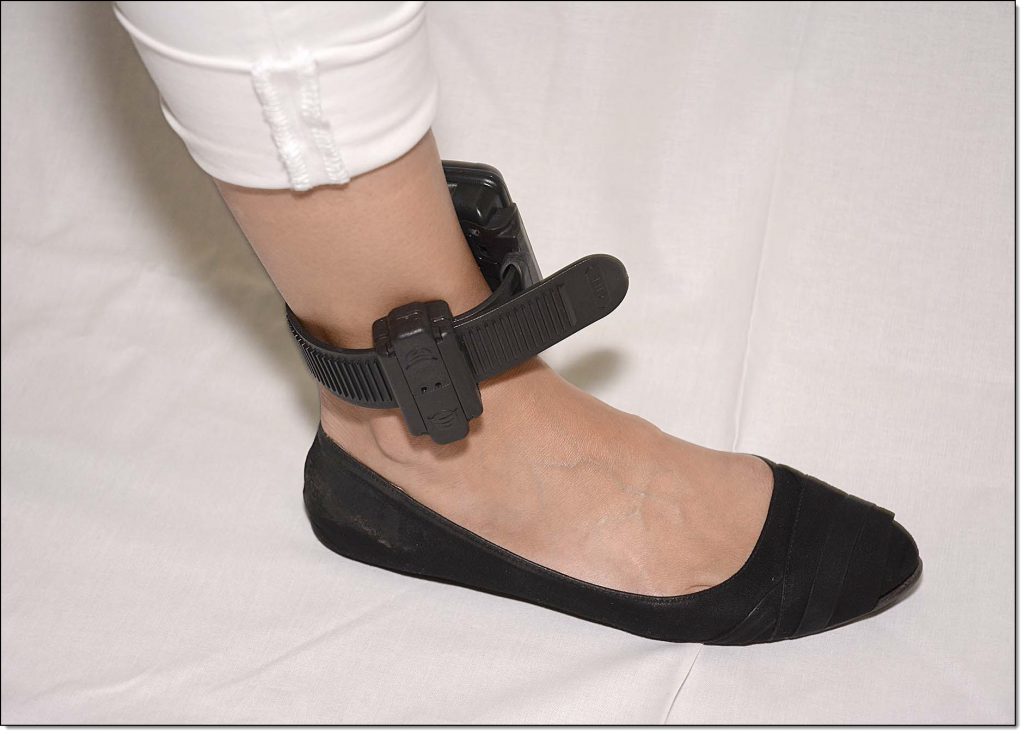
- Attach Bracelet to Client.
To attach the bracelet:- Open the bracelet.
- Place the bracelet no more than an index finger above the right or left ankle with the SERIAL NUMBER FACING UP.
- Feed the strap through the buckle and completely tighten.
The bracelet should be able to be rotated slightly, but not past the shin bone.
Important Note – To properly align the bracelet strap, ensure that the tooth alignment tab is positioned between two teeth when the buckle is tightened. An “Open Strap Detected” event will be generated if the strap is not properly aligned.

Proper Alignment
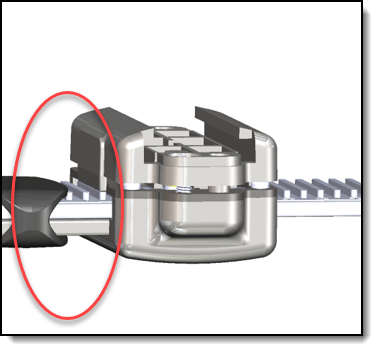
Improper Alignment - Tighten the retaining screws until the two sides of the buckle are flush.
Tightening the Retaining Screws
- Open the Direct Connect application on your computer.
- Connect Direct Connect Device with Your Computer.
To connect the Direct Connect device:- Plug the small (mini-B type) USB connector into the Direct Connect device.
-
Connecting USB Cable to Direct Connect Device
-
- Plug the large (A type) USB connector into a USB port on your computer.
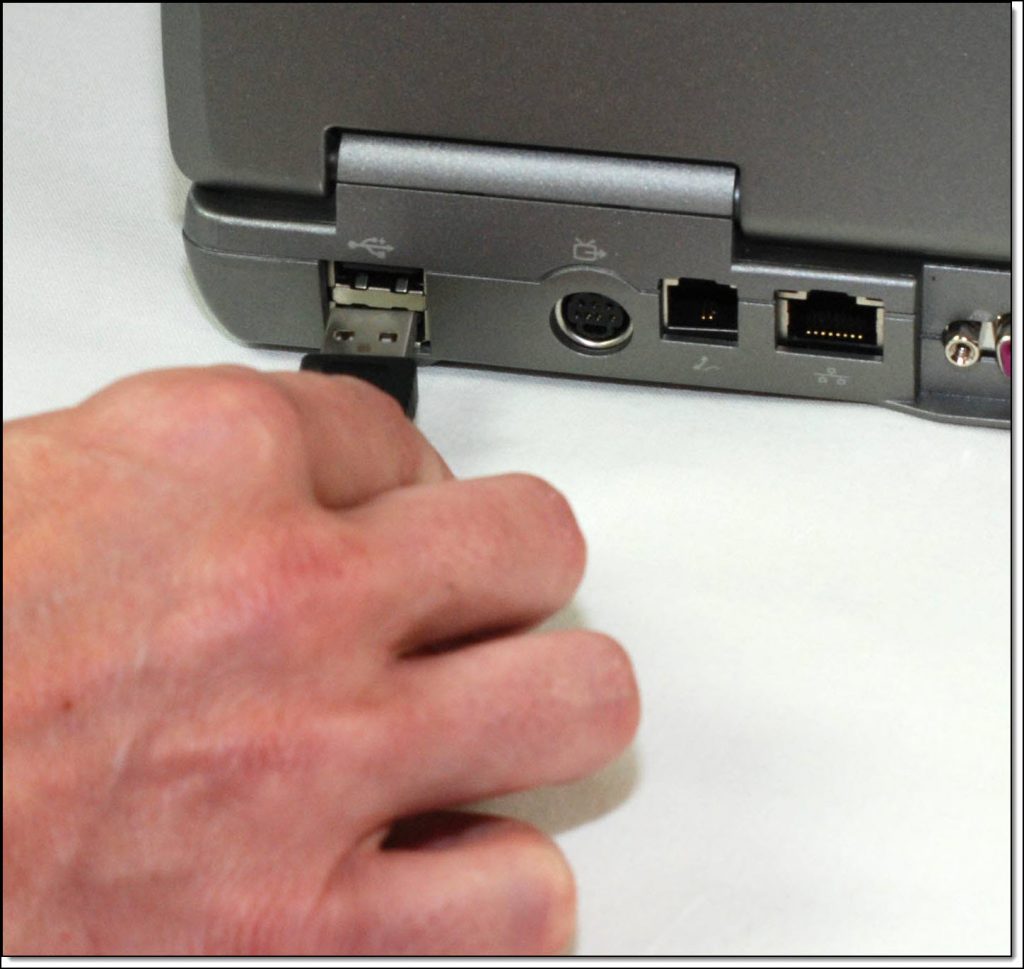
Connecting USB Cable to Your Computer
The red and blue lights on the Direct Connect device blink for approximately 5 seconds then both remain on.
Bracelet status in Direct Connect Application: Waiting for Bracelet
- Plug the large (A type) USB connector into a USB port on your computer.
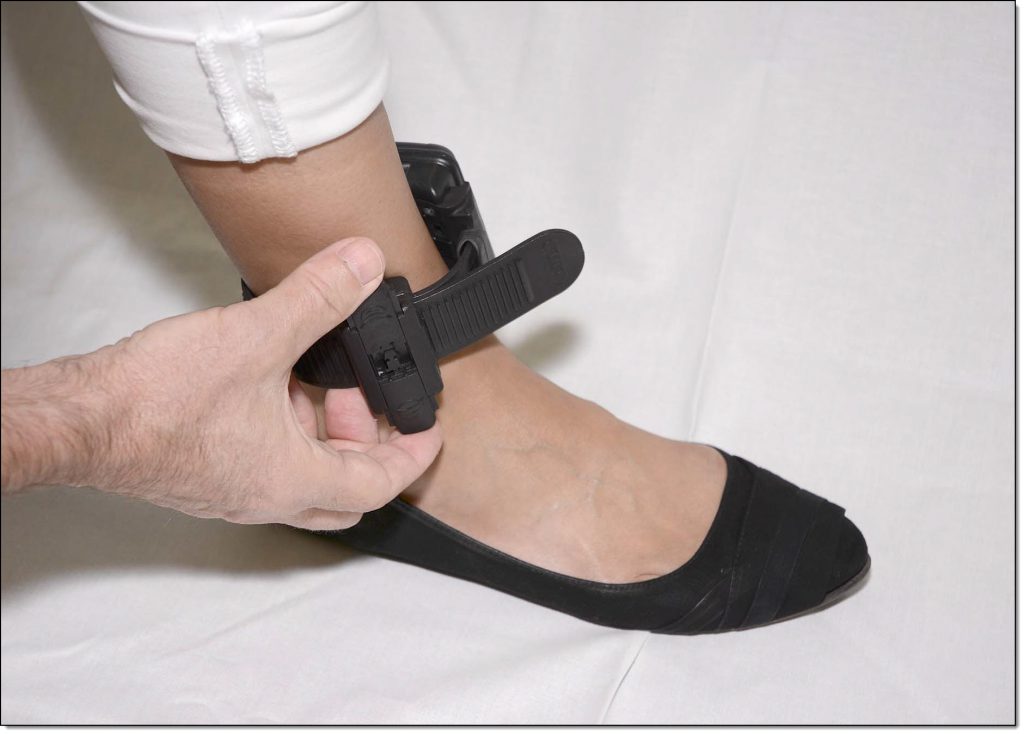
- Attach Direct Connect Device to Bracelet.
To attach the Direct Connect device:- Align the Direct Connect device with the top of the bracelet.
- Slide the Direct Connect device down over the bracelet.
Attaching Direct Connect Device
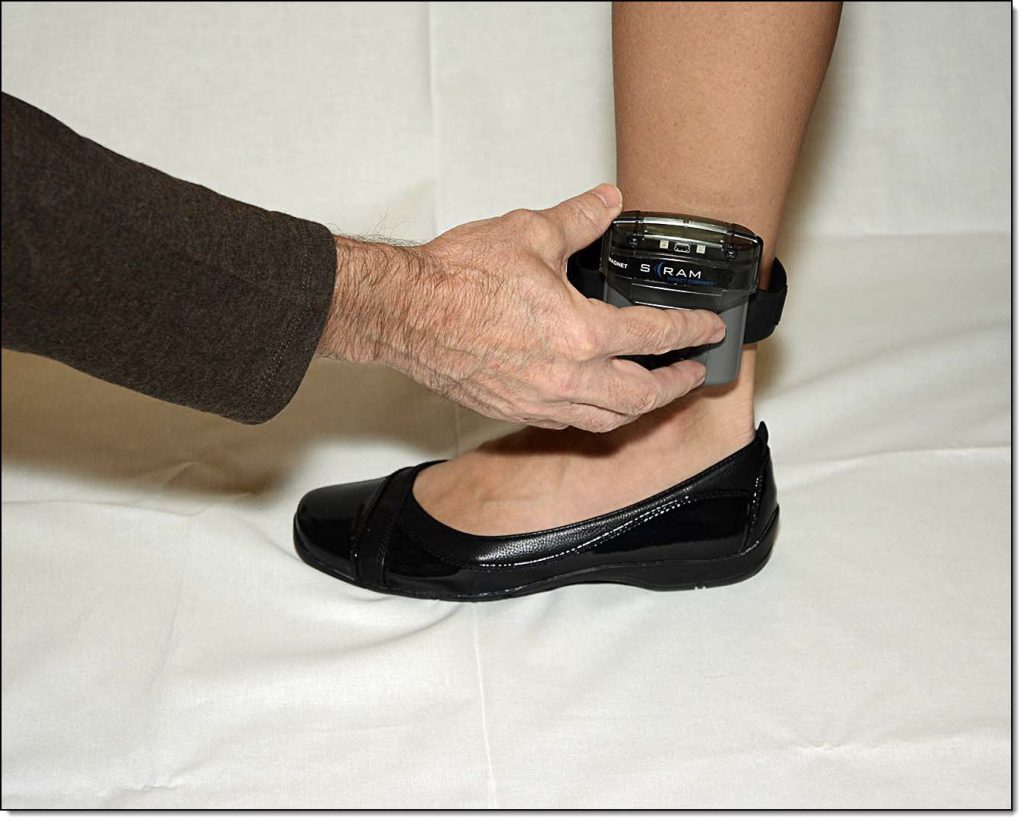
- Wake Up Bracelet.
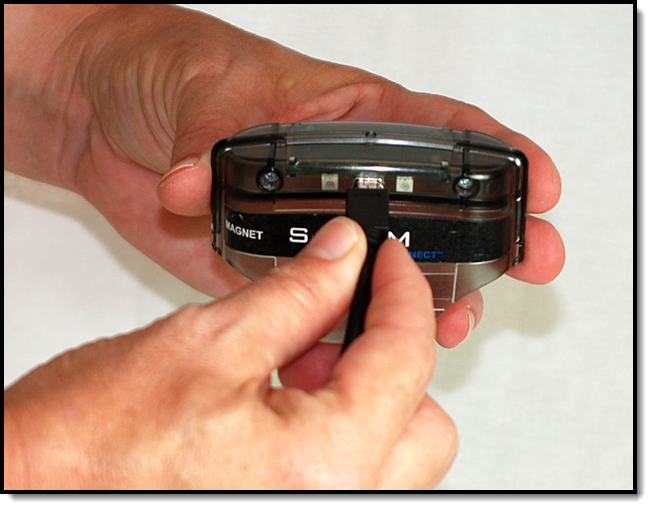
To wake up the bracelet:- Momentarily place the magnet on the Direct Connect device where the word “magnet” appears.

Placing Magnet on Bracelet
Bracelet status in Direct Connect Application: Communicating
On the Direct Connect device, the red light turns off while the blue light remains on.
At this time:
The bracelet initialization process begins.
When complete:- The blue light on the Direct Connect device turns off for approximately 10 seconds then both lights turn back on.
- Bracelet status in Direct Connect Application: Communication Complete
Note: After 1 minute, the status changes to: Waiting for Bracelet
- Remove the Direct Connect device from the bracelet.
- Momentarily place the magnet on the Direct Connect device where the word “magnet” appears.
- Verify Re-initialization Started.
To verify that the re-initialization has started:- In SCRAMNET, access the client’s Reports page.
- Click the Communication sub-tab.
- Verify by looking at the top Date/Time link that the base station has recently communicated with SCRAMNET.
- Open the communication and verify that a “Bracelet Started Initialization” message appears.
- If the message does NOT appear, contact AMS Customer Services.
- Install Tamper Clip.
To install the tamper clip:- Insert both tamper clip parts into the buckle and squeeze together, ensuring that the clips snap into place.
Inserting the Tamper Clip Parts
Bracelet with Clip Parts Snapped in Place
- Insert both tamper clip parts into the buckle and squeeze together, ensuring that the clips snap into place.