On July 31, 2024, SCRAM Systems will release an enhancement for your Client Check-In Caseload. Before this release, you would compare the client’s baseline image to their check-in photo for verification. With this release, you may now create a check-in photo gallery to reference while verifying the check-in photo taken by the client during a check-in.
| If you don’t see the enhancement in SCRAM TouchPoint, please clear your cache and cookies and refresh your browser window. |
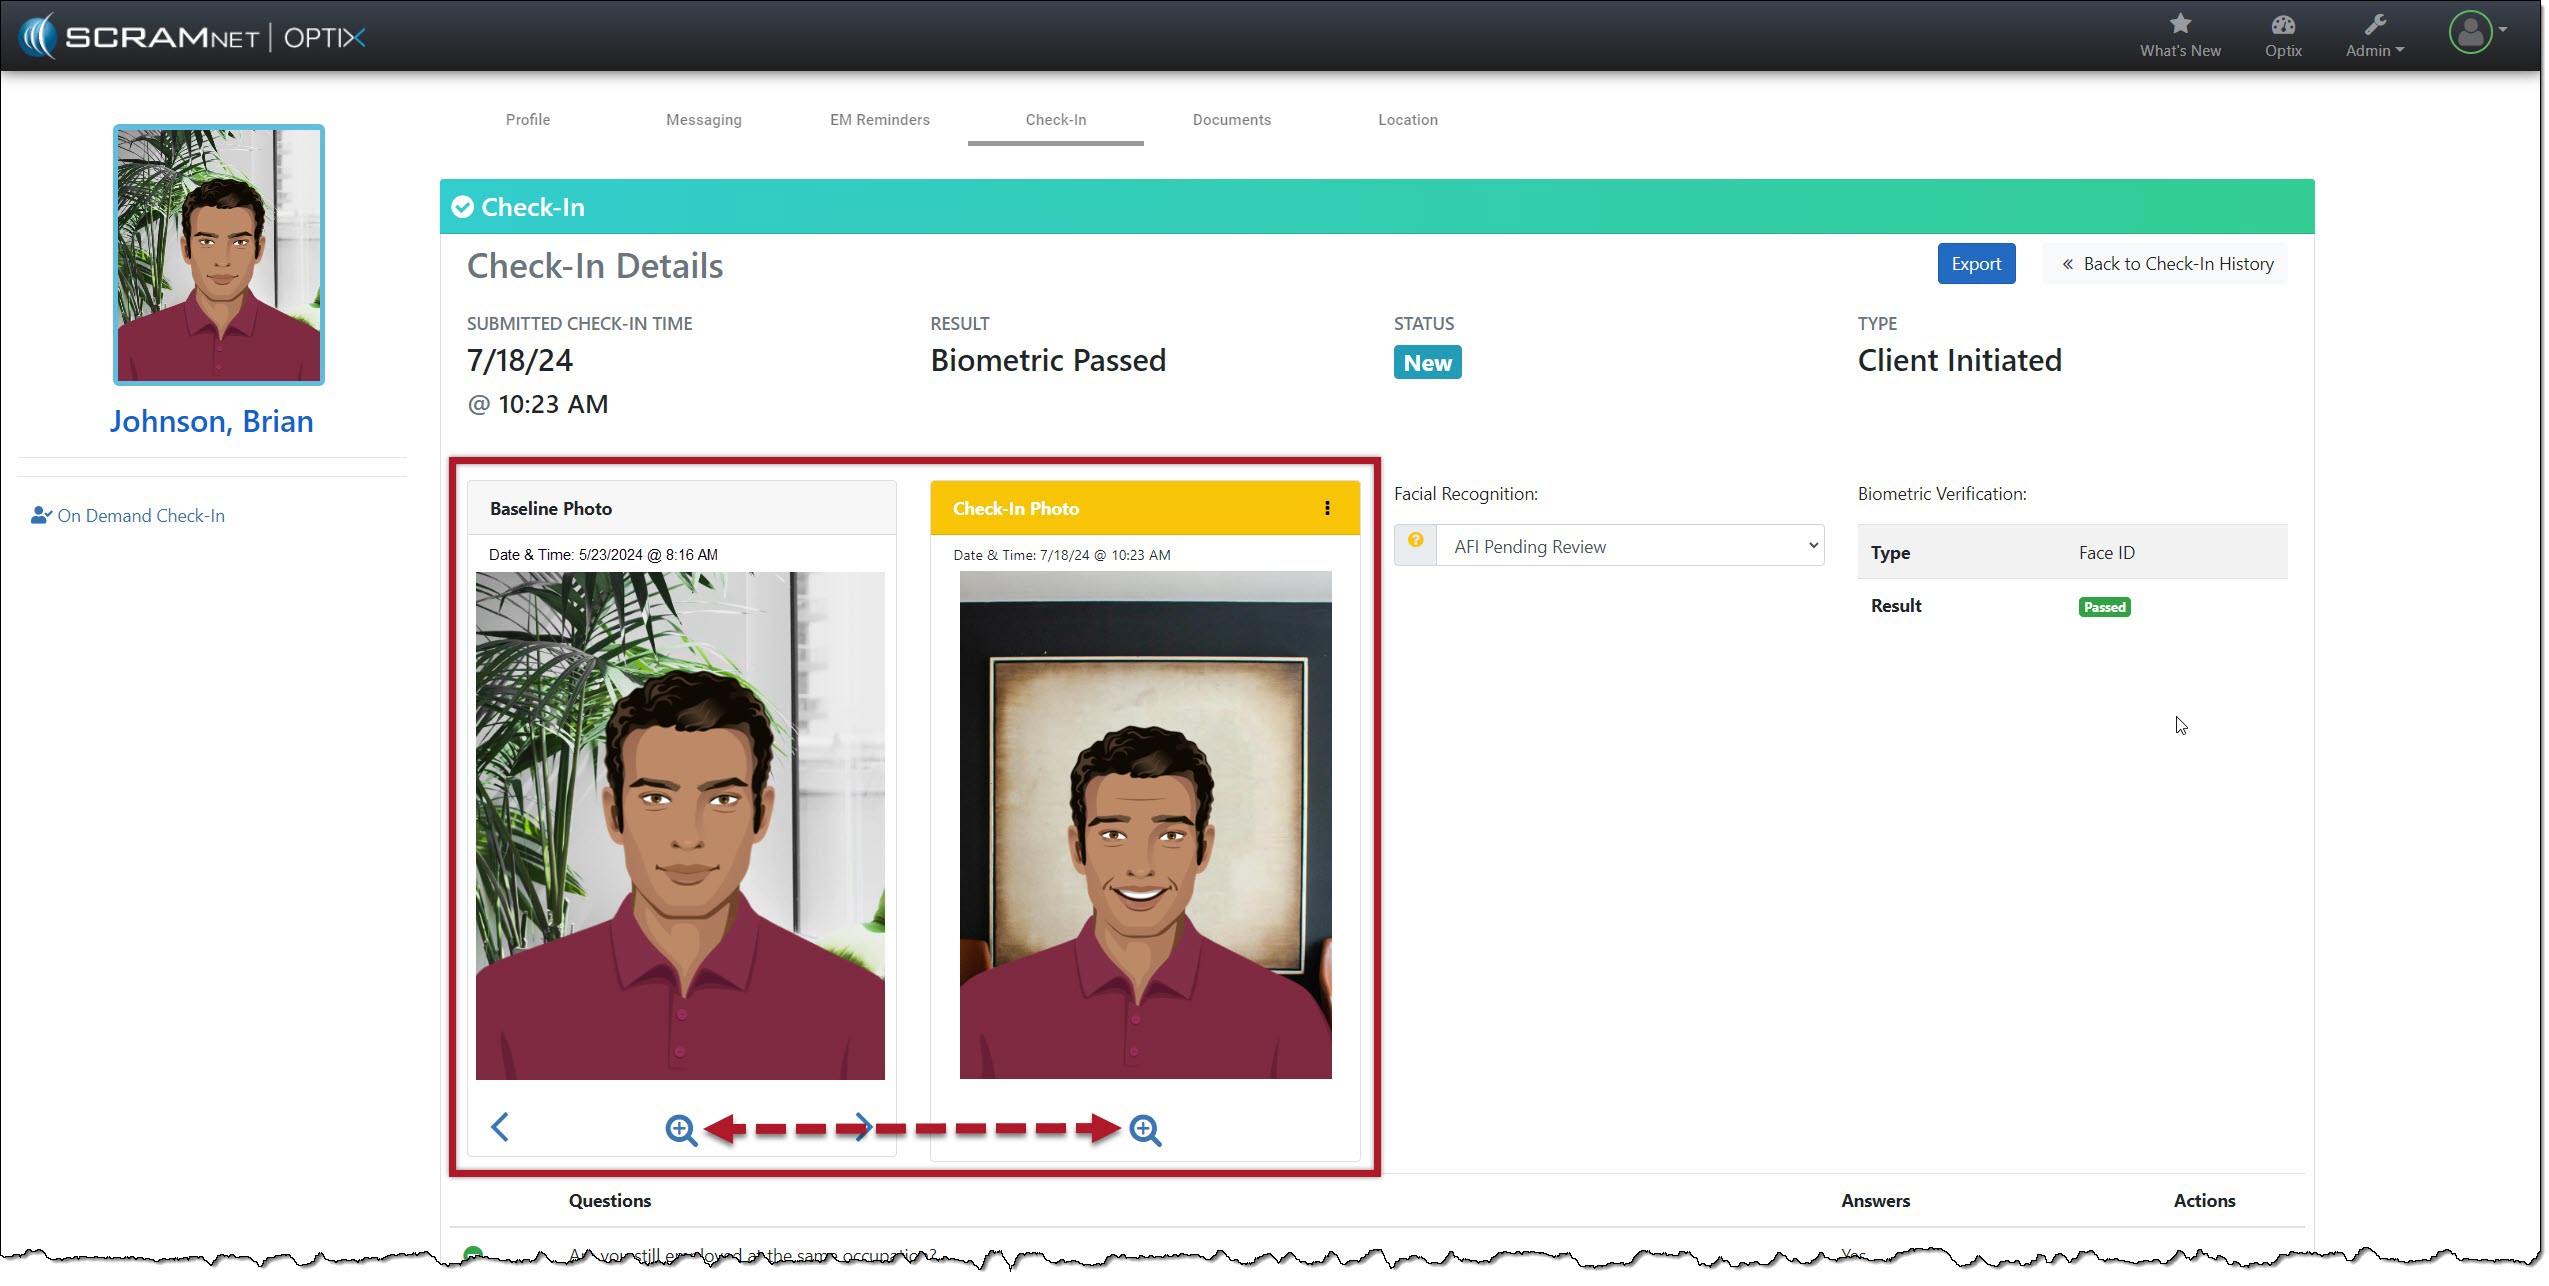
Client Check-In Details
The client Check-In Details page’s Baseline and Check-In Photo section contains additional navigation and menu options.
Starting with the “magnifying glass” icon: Selecting the icon opens a pop-up window, isolating and enlarging the two photos for your review.
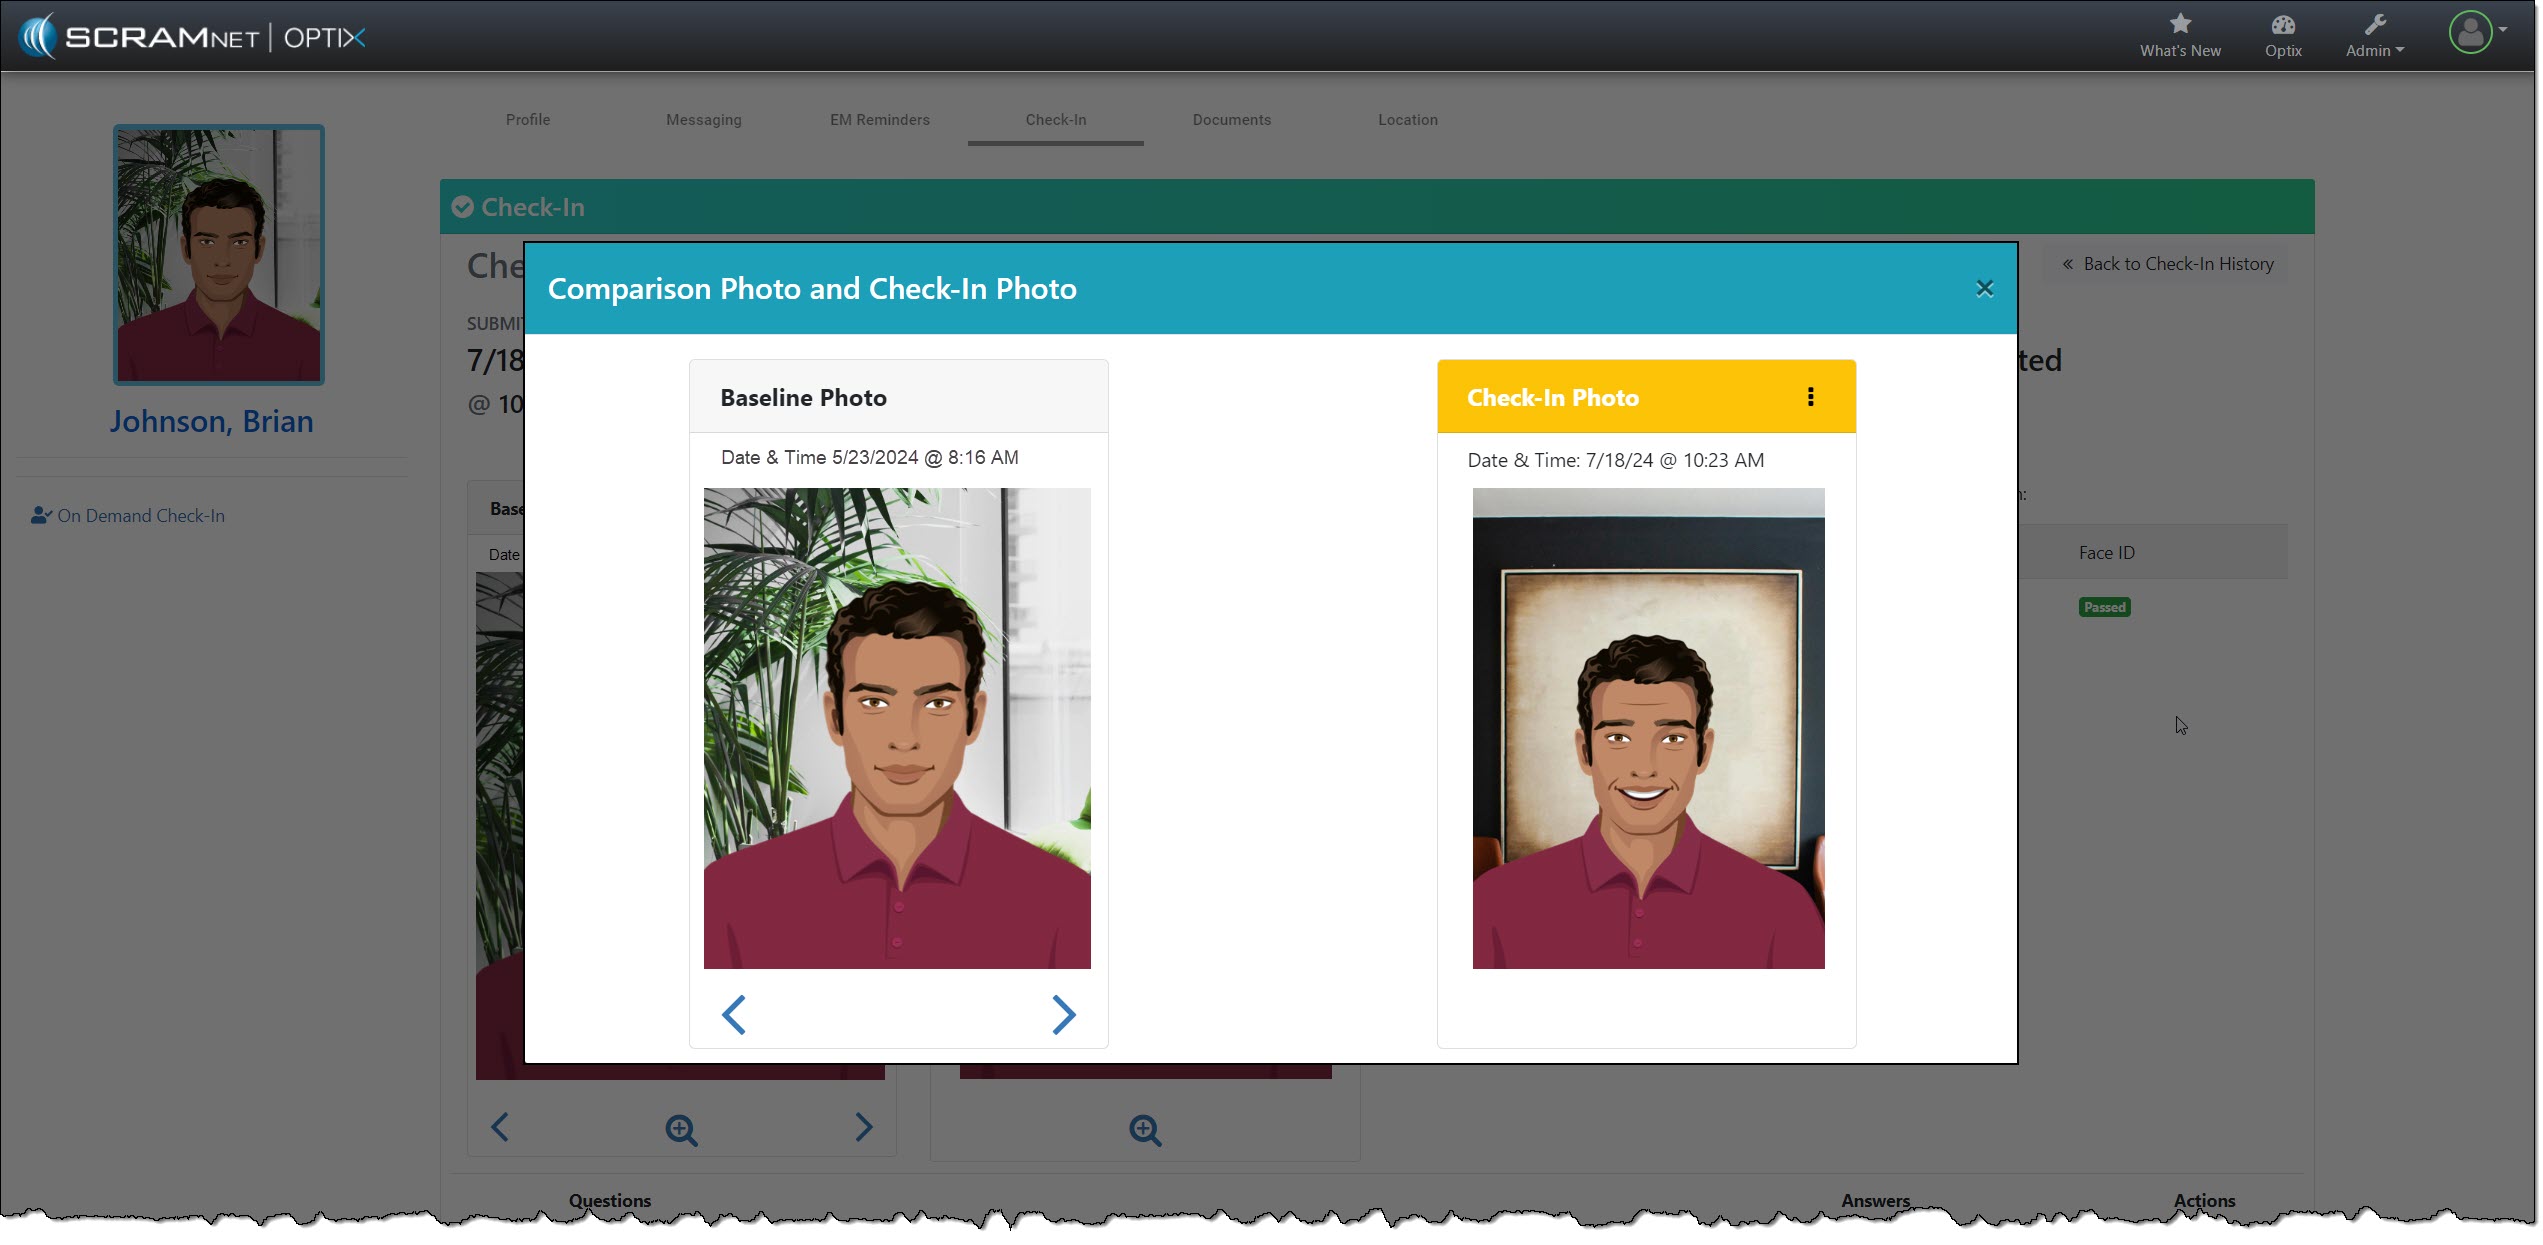
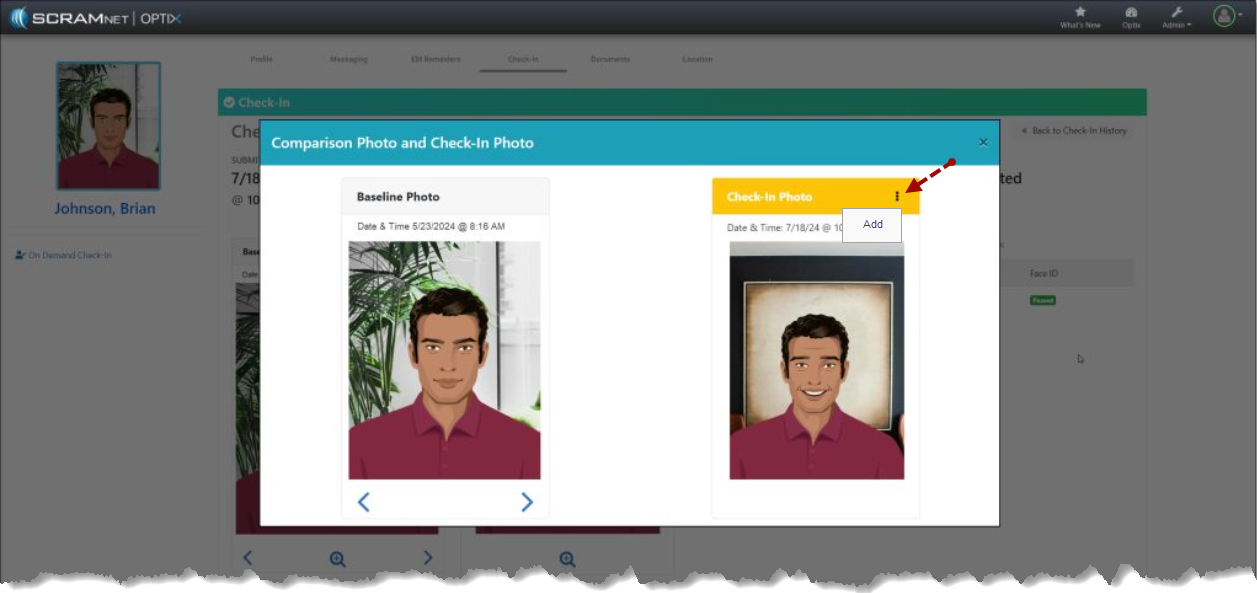
The Check-In Photo heading contains a “More” (⋮) option that allows you to Add the current check-in photo to an image gallery. Once added, you may use the arrows below the Baseline Photo to scroll through the gallery. The gallery of comparison photos will hold up to 10 images, including the Baseline Photo.
As you scroll through the images, the check-in photos added to the gallery will have a heading labeled “Comparison Photo,” along with their check-in date and time information.
Select the Menu (⋮) above the image to remove a comparison photo from the gallery and then the Delete option.

Each time you add or remove an image from the gallery, you will note a banner in the upper right corner of the page stating “Image Added” or “Image Deleted.” Once you have reached the 10-image limit, the system will display a “Couldn’t add image (limit reached)” banner if you try to add additional images.
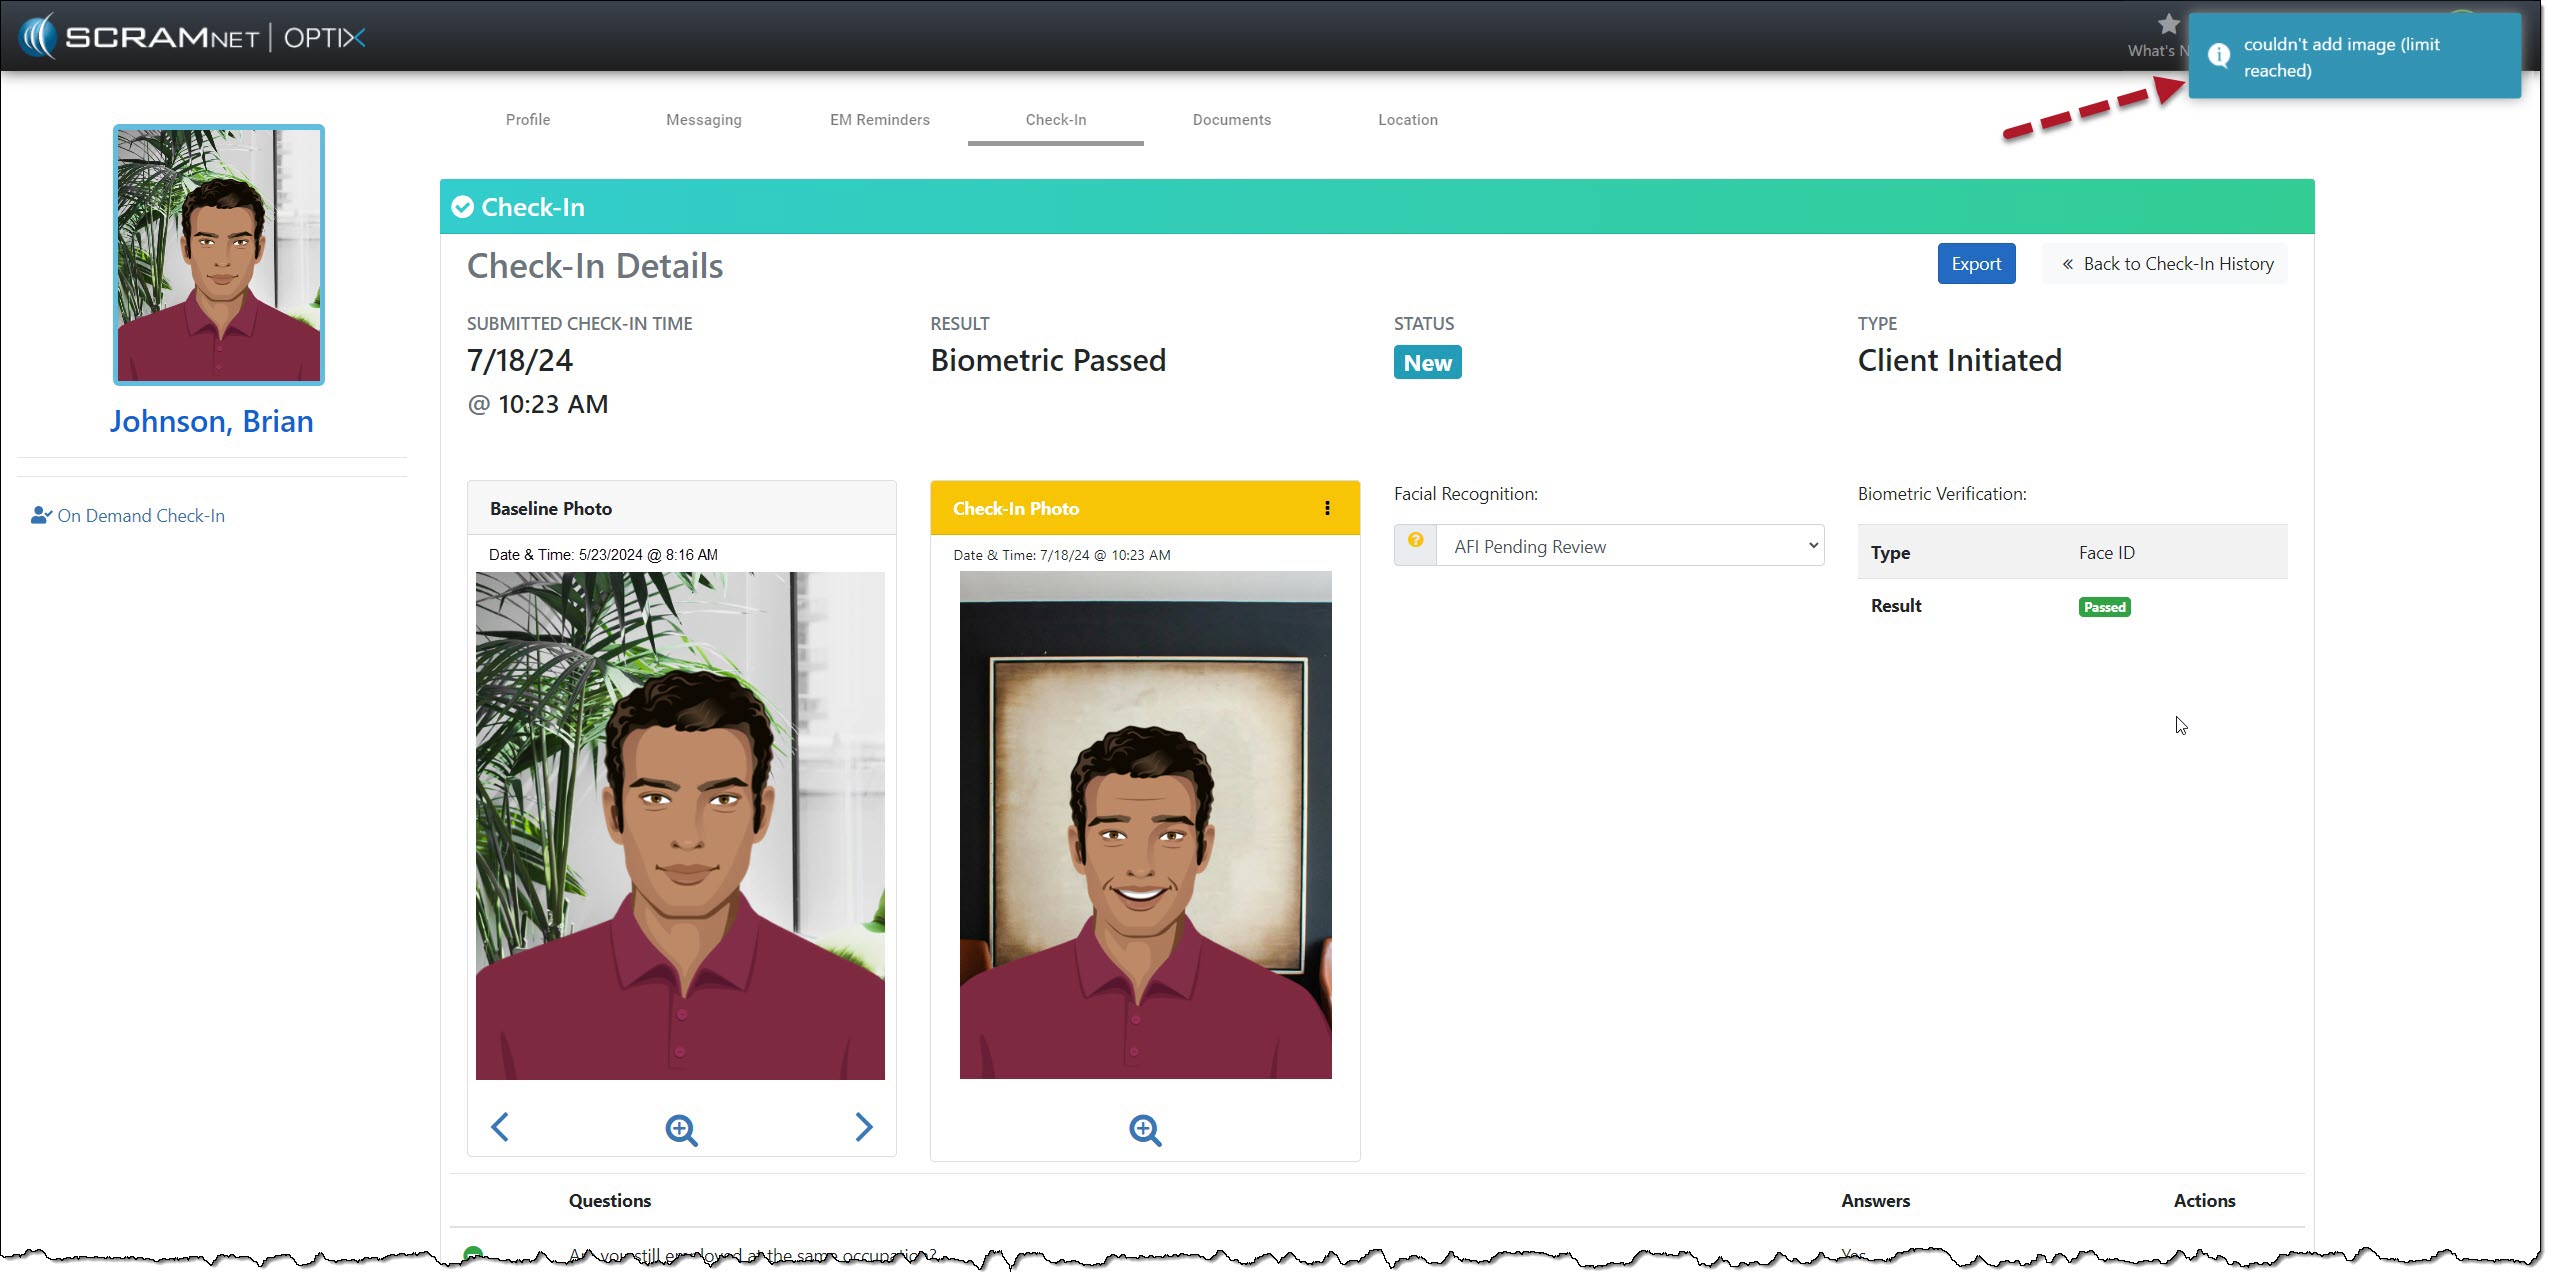
To proceed, you must delete an image from the gallery and add the desired image.