On January 28, 2026, SCRAM Systems will release an enhancement for your SCRAM TouchPoint caseload. This enhancement updates how alerts are displayed and managed in Optix. Alerts now appear individually in a list on the client’s History tab, providing clearer visibility into client activity. Agents may open alerts to view details, add notes, update statuses, resolve alerts individually or in bulk, and export alert records as needed.
TouchPoint Alert Types
TouchPoint Alerts include the following alert types:
- Pending Photo Review
- Biometric Verification Unsuccessful
- Missed Check-In
- Responses to Questions
- No GPS Location
- Location Services Disabled
- Push Notifications Disabled
- Device Change
- Locate Now
- Location Verification
- Location Failure
- Completed Check-Ins
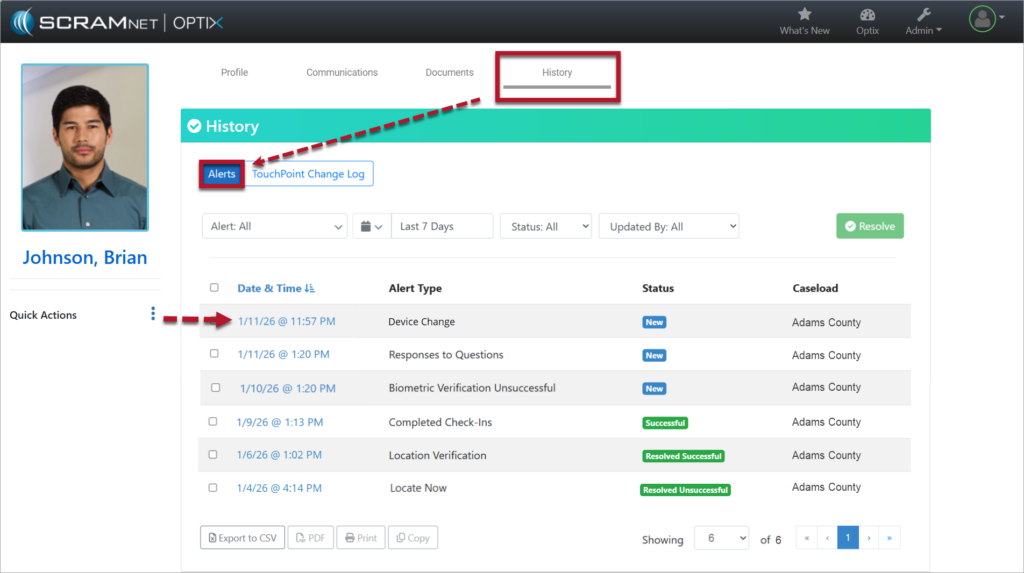
Alert History Page
All TouchPoint Alerts are displayed in a list on the client’s History tab. Each alert on the History tab includes the following information:
- Date & Time
- Alert Type
- Status
- Caseload
Selecting the Date & Time hyperlink opens the Alert Details page for the selected alert.
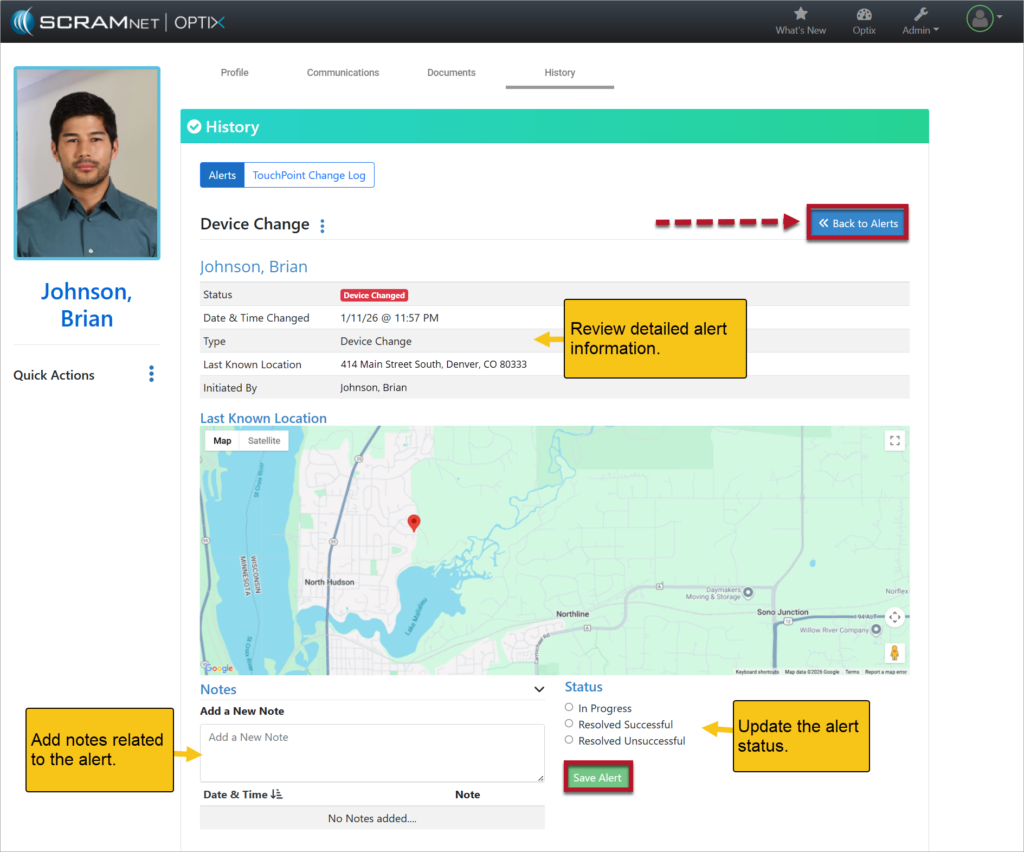
Alert Details Page
The Alert Details page provides additional information about the selected alert and allows agents to take action.
From this page, agents may:
- Review detailed alert information
- Add notes related to the alert
- Update the alert status
Available alert statuses include:
- In Progress
- Resolved Successful
- Resolved Unsuccessful – Use this status to quickly clear alerts from the Dashboard when no specific action is required
After updating the alert, select Save Alert followed by the <<Back to Alerts button to return to the full list on the History tab.
Bulk Resolution of Alerts
New bulk actions allow agents to resolve multiple alerts at once directly from the History page.
To bulk resolve alerts:
- Select the checkbox next to one or more of the alerts in the list.
- Select the green Resolve button.
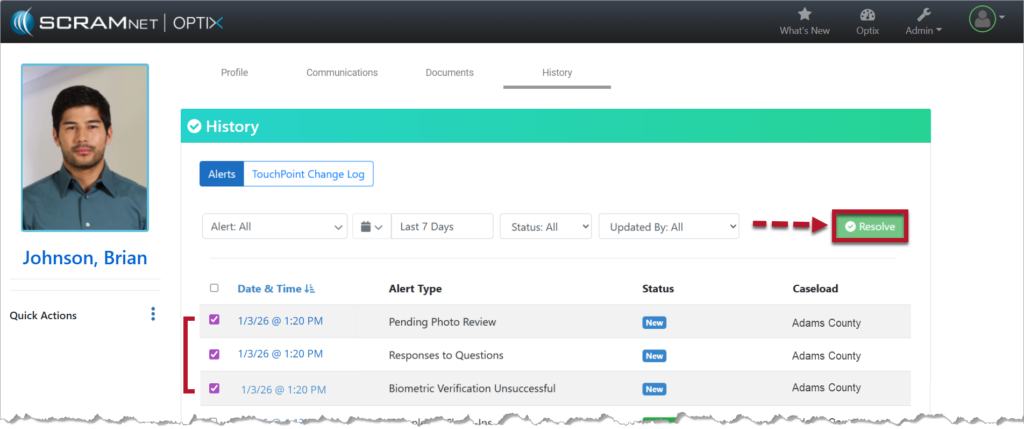
- Select the Action from the Resolve Alerts pop-up window: Mark as Resolved Successful or Mark as Resolved Unsuccessful.
- Choose Confirm to complete the action.
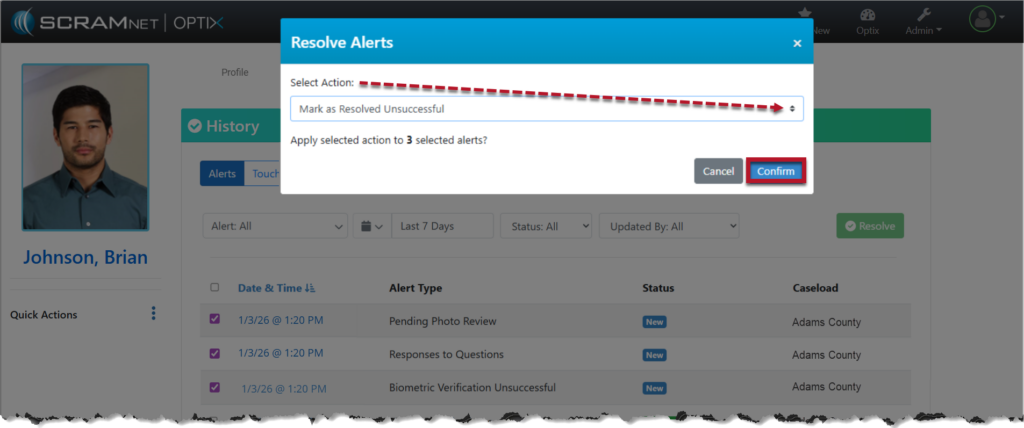
After the alerts are resolved as part of a bulk action, returning to an individual Alert Details page will display the message “Resolved via bulk status update” at the bottom of the alert information.
Multiple Alerts per Check-In
With the updated TouchPoint Alerts experience, a single check-in may generate multiple alerts if more than one issue occurs during that check-in. Each issue displays as its own alert on the History list.
For example, on the same date and time, a single check-in could generate multiple alerts, including:
- Pending Photo Review
- Responses to Questions
- Biometric Verification Unsuccessful
Although these alerts display individually, they are all tied to the same check-in. To fully resolve the check-in, agents must open the relevant alert(s) and complete all required actions on the Alert Details page. Once all required actions for that check-in are completed, the related alerts will resolve together. This provides clear visibility into each issue while maintaining efficient alert resolution.
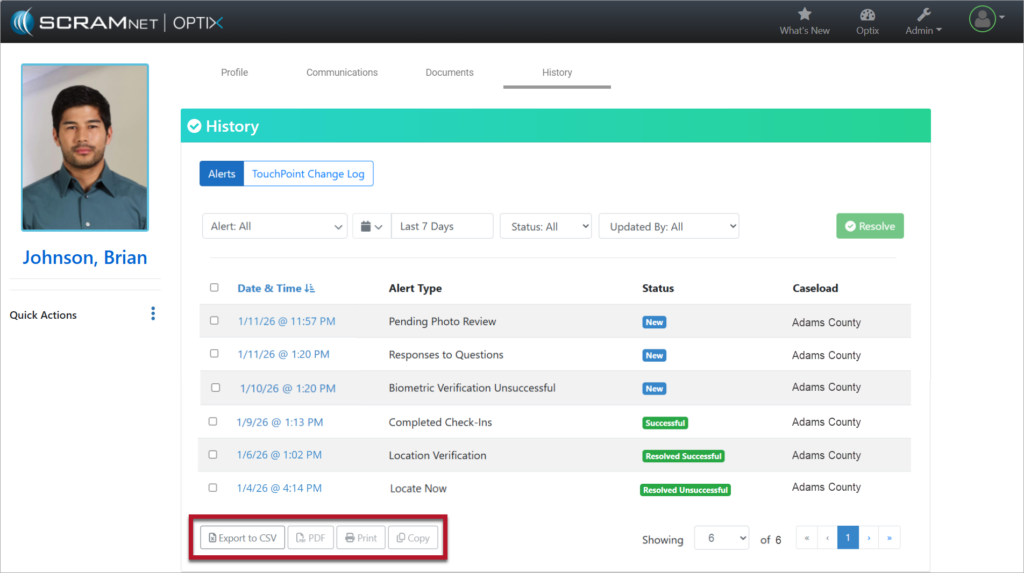
Export, Print, and Copy Options
New options are available at the bottom of the client’s History tab to support reporting and recordkeeping.
The following actions are available:
- Export to CSV – By default, all alerts are exported into a CSV file that may be opened in Excel.
- PDF – Select the checkbox next to one or more alerts to export the selected records to a PDF.
- Print – Select the checkbox next to one or more alerts to print the selected records.
- Copy – Copy selected alerts and paste them into other applications such as Excel, Notepad, or Word.