On April 10, 2024, SCRAM Systems will release an enhancement to your SCRAM 24/7 client caseload. With this enhancement, you may create and edit a client’s Remote Breath Pro’s breath testing schedule from within the SCRAM 24/7 system.
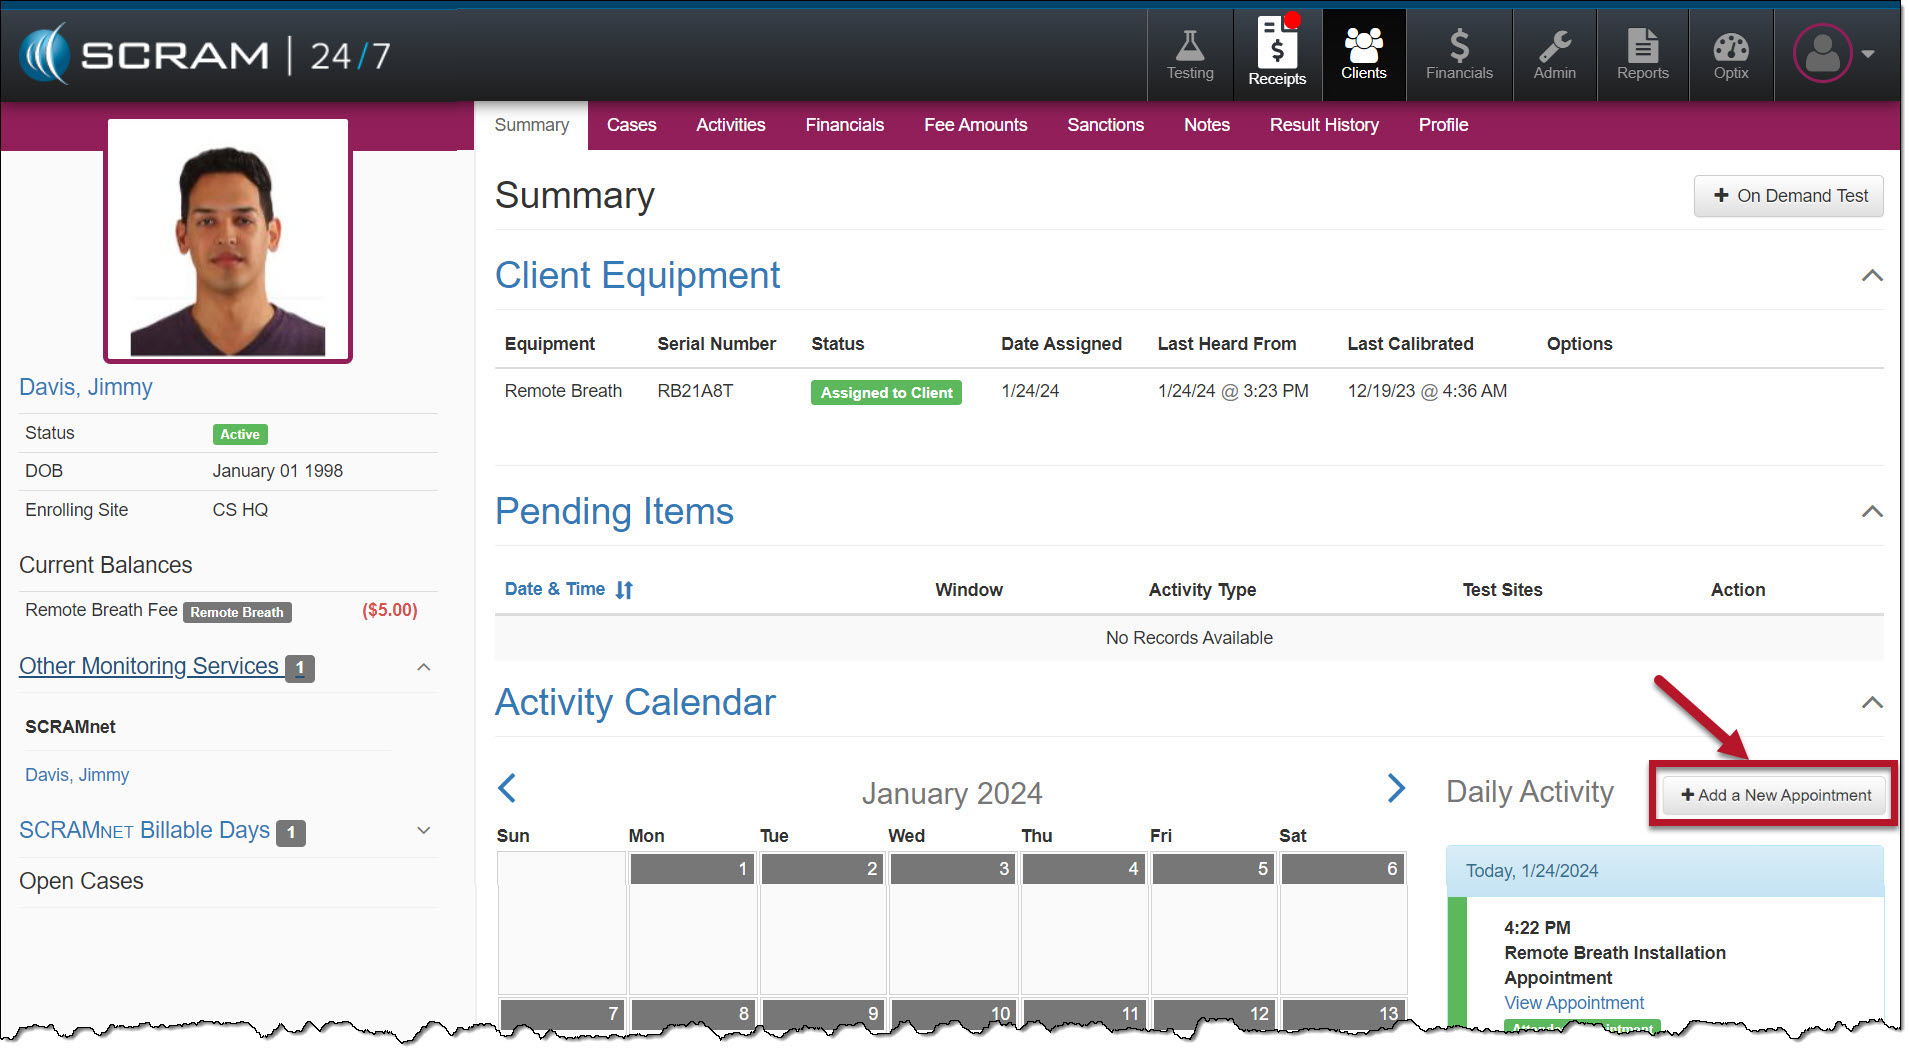
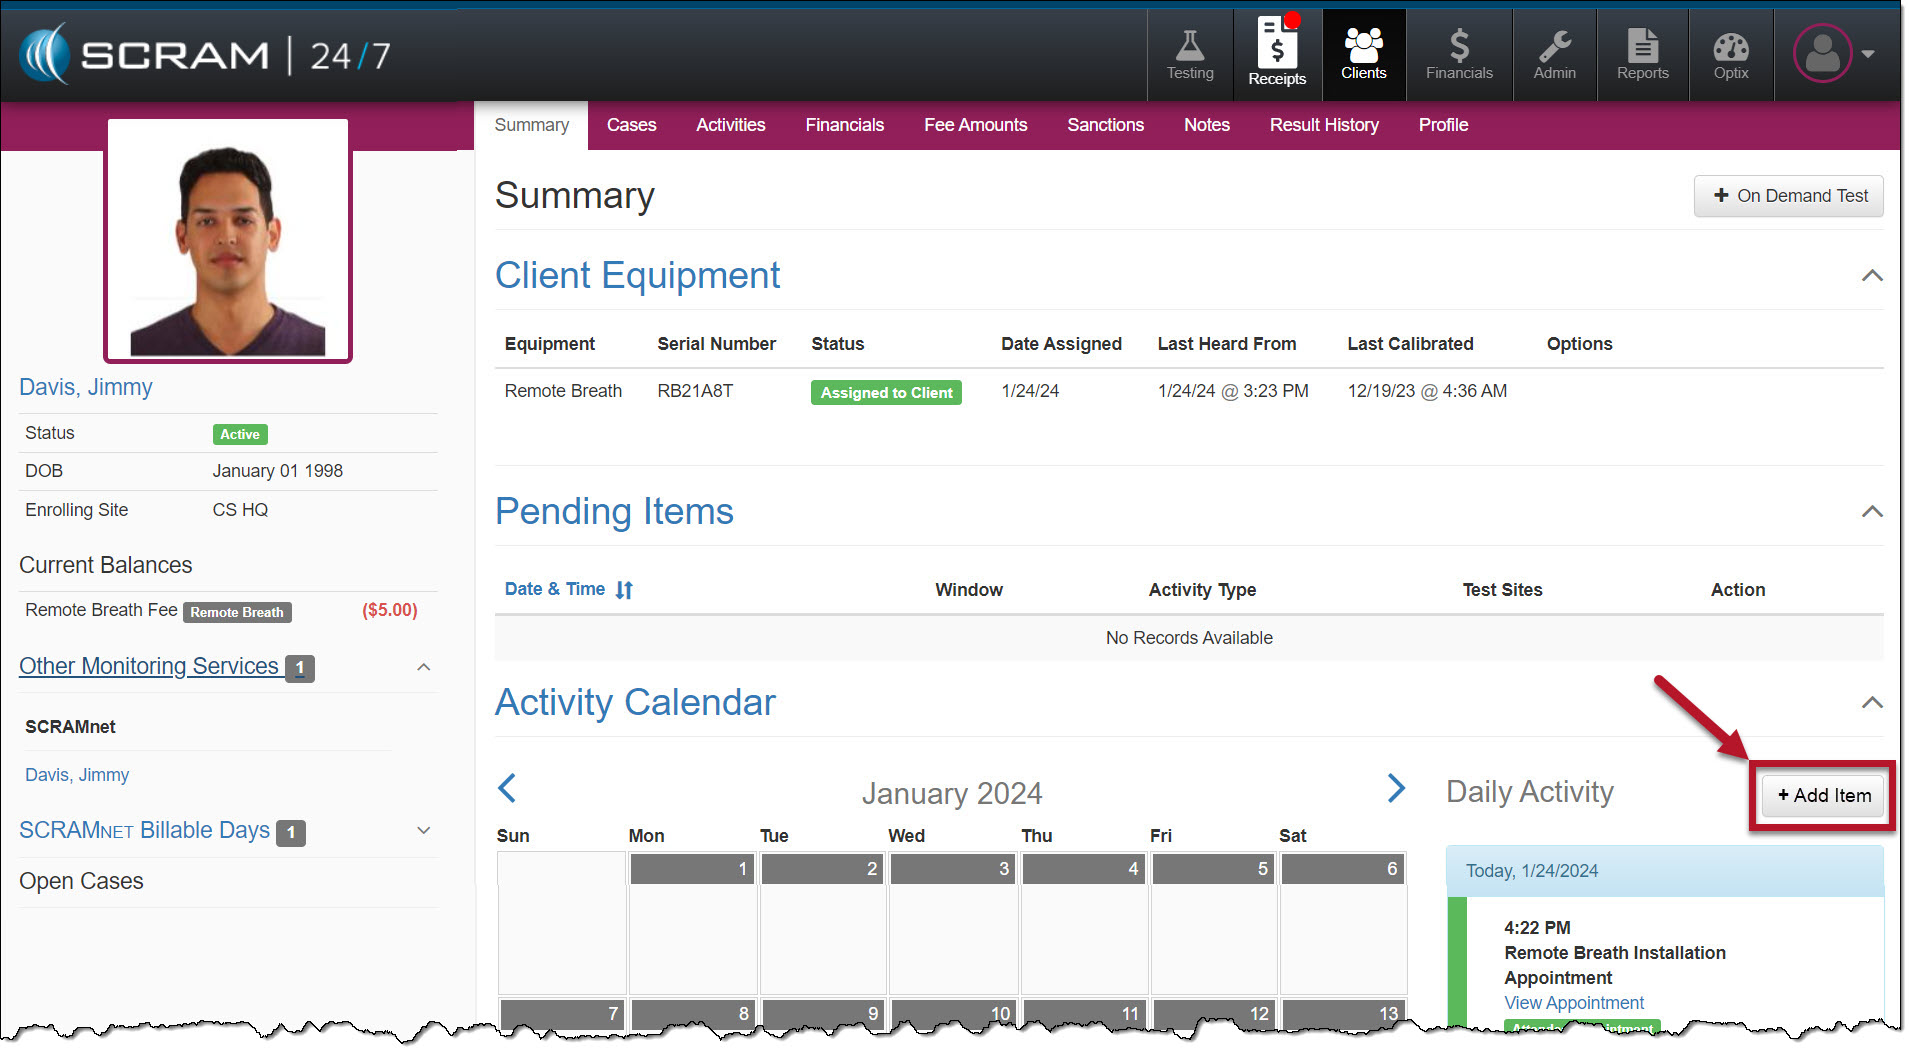
To support adding the breath testing schedule within SCRAM 24/7, the +Add New Appointment button on the client’s Summary page will be updated to “+Add Item.”
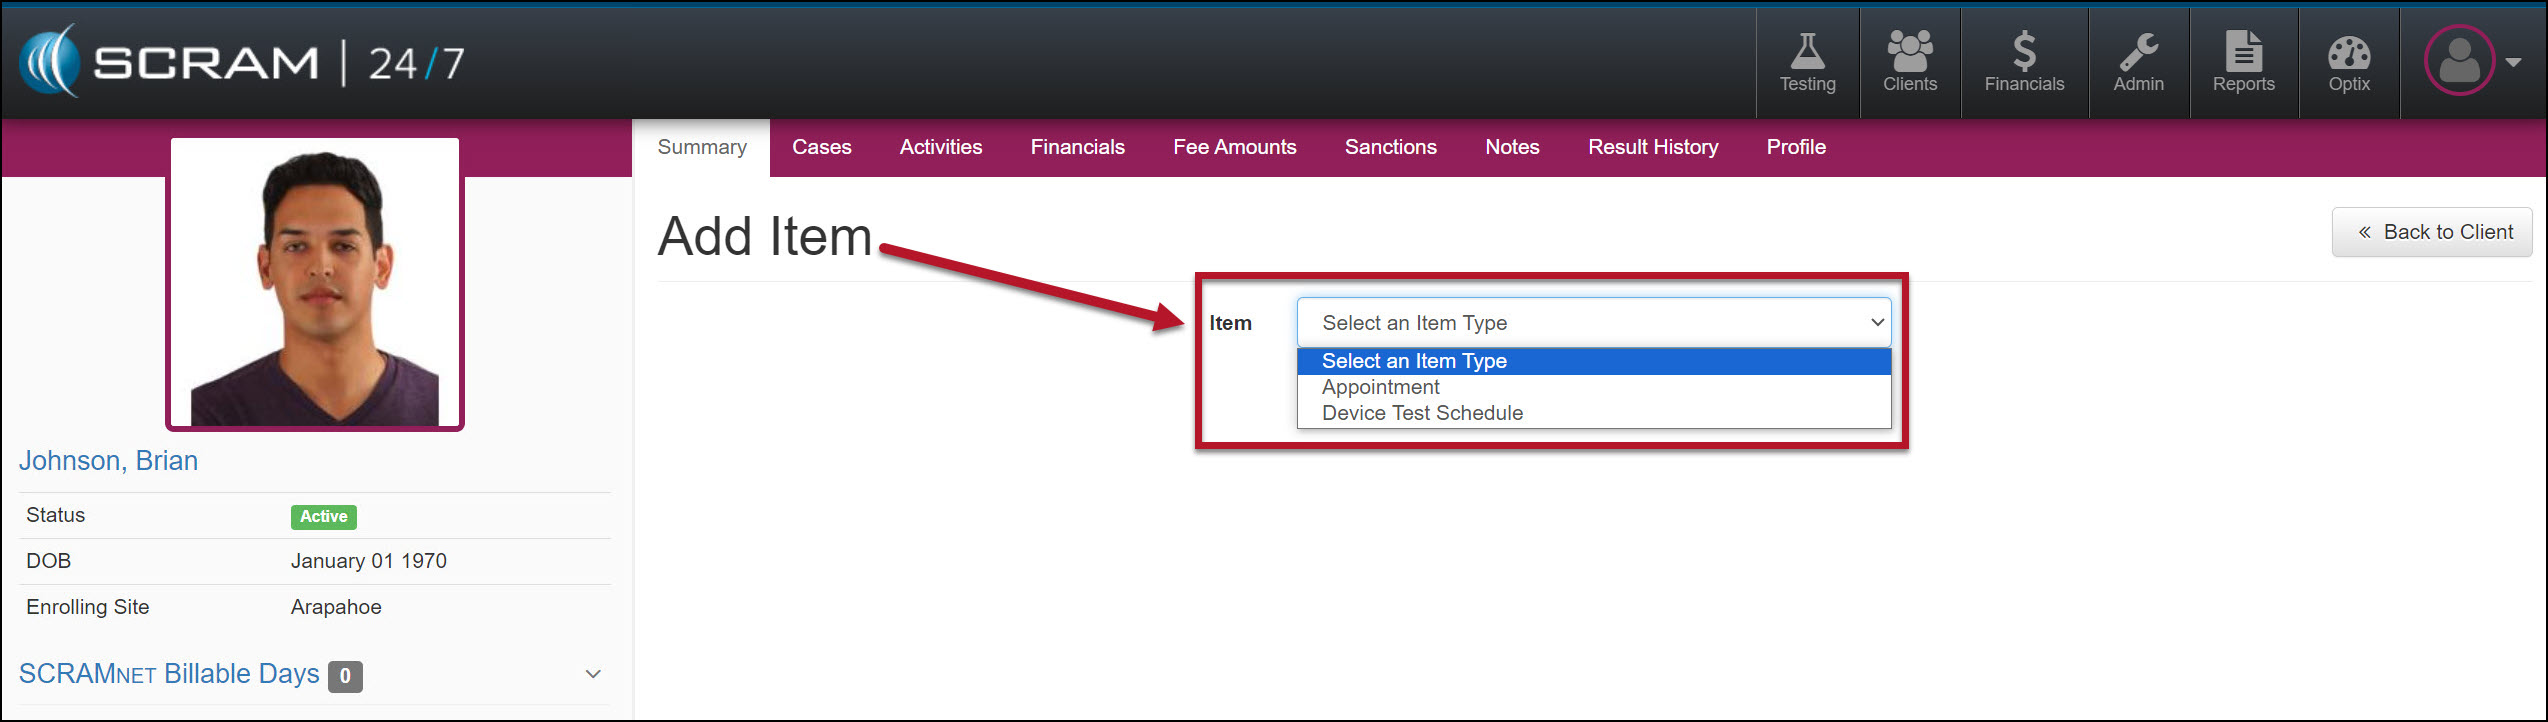
Once selected, the Add Item page will display a dropdown menu with the appropriate options based on the client’s Activities.
Breath Test Schedule
Add a Breath Test Schedule
- Select the +Add Item button in the Daily Activity stream to add a breath testing schedule to the client.
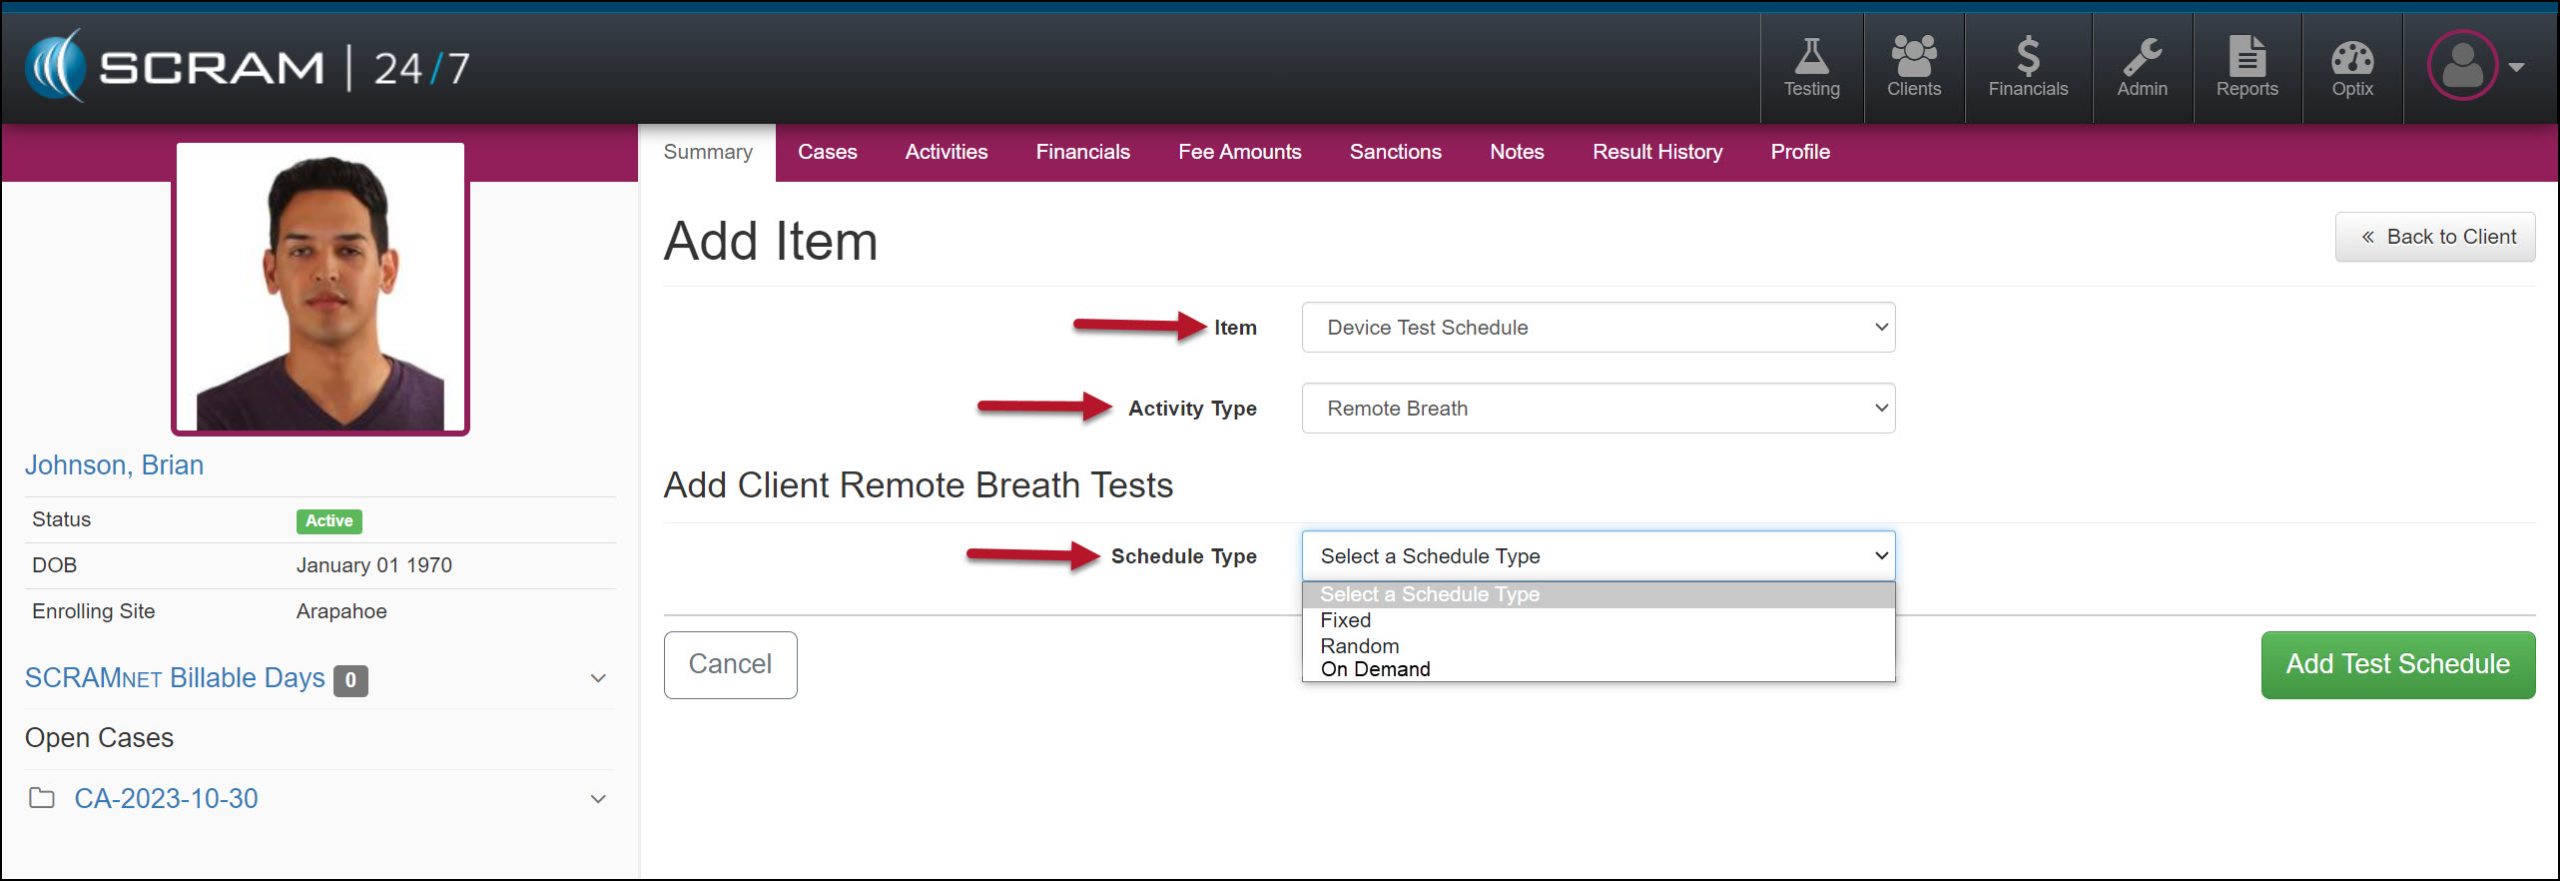
- Open the Item dropdown menu on the Add Item page and select the Device Test Schedule option.
- In the Activity Type dropdown, select the option of Remote Breath.
- In the Add Client Remote Breath Test section, expand the Schedule Type menu and select either the Fixed or Random test option.
- Enter the Time, Day(s) of the week, and the Range of Recurrence for the testing window.
- The system will alert you if the schedule you create overlaps with another breath testing window.
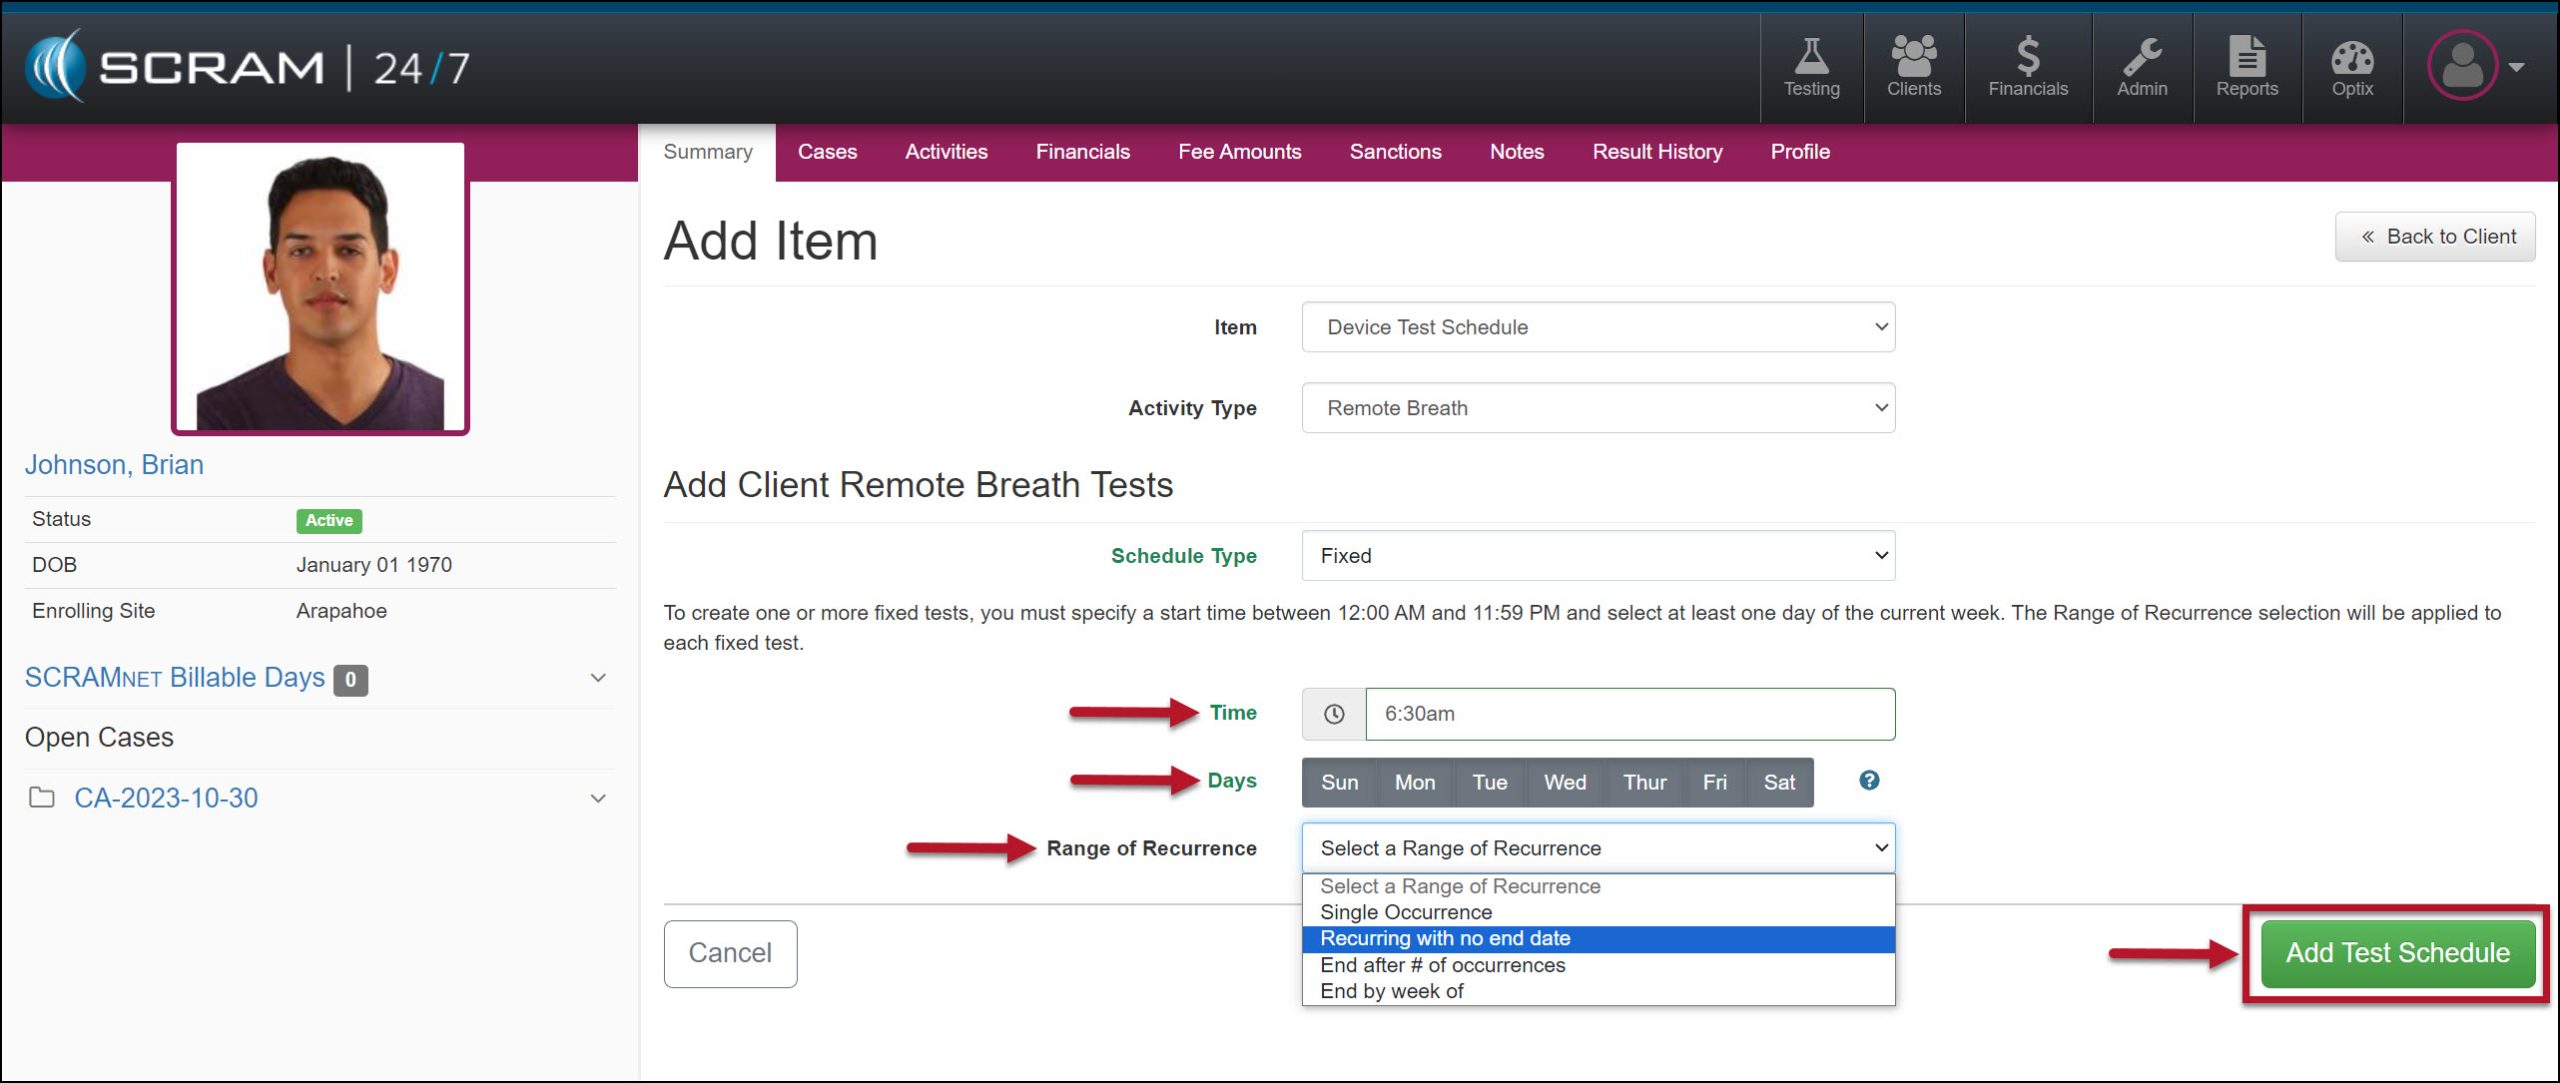
- Select the Add Test Schedule button to save the breath test schedule.
The breath testing schedule will be reflected on the client’s Summary page, Activity Calendar, and Daily Activity stream. You may add up to 12 scheduled breath tests per day until the client’s testing requirements are satisfied.
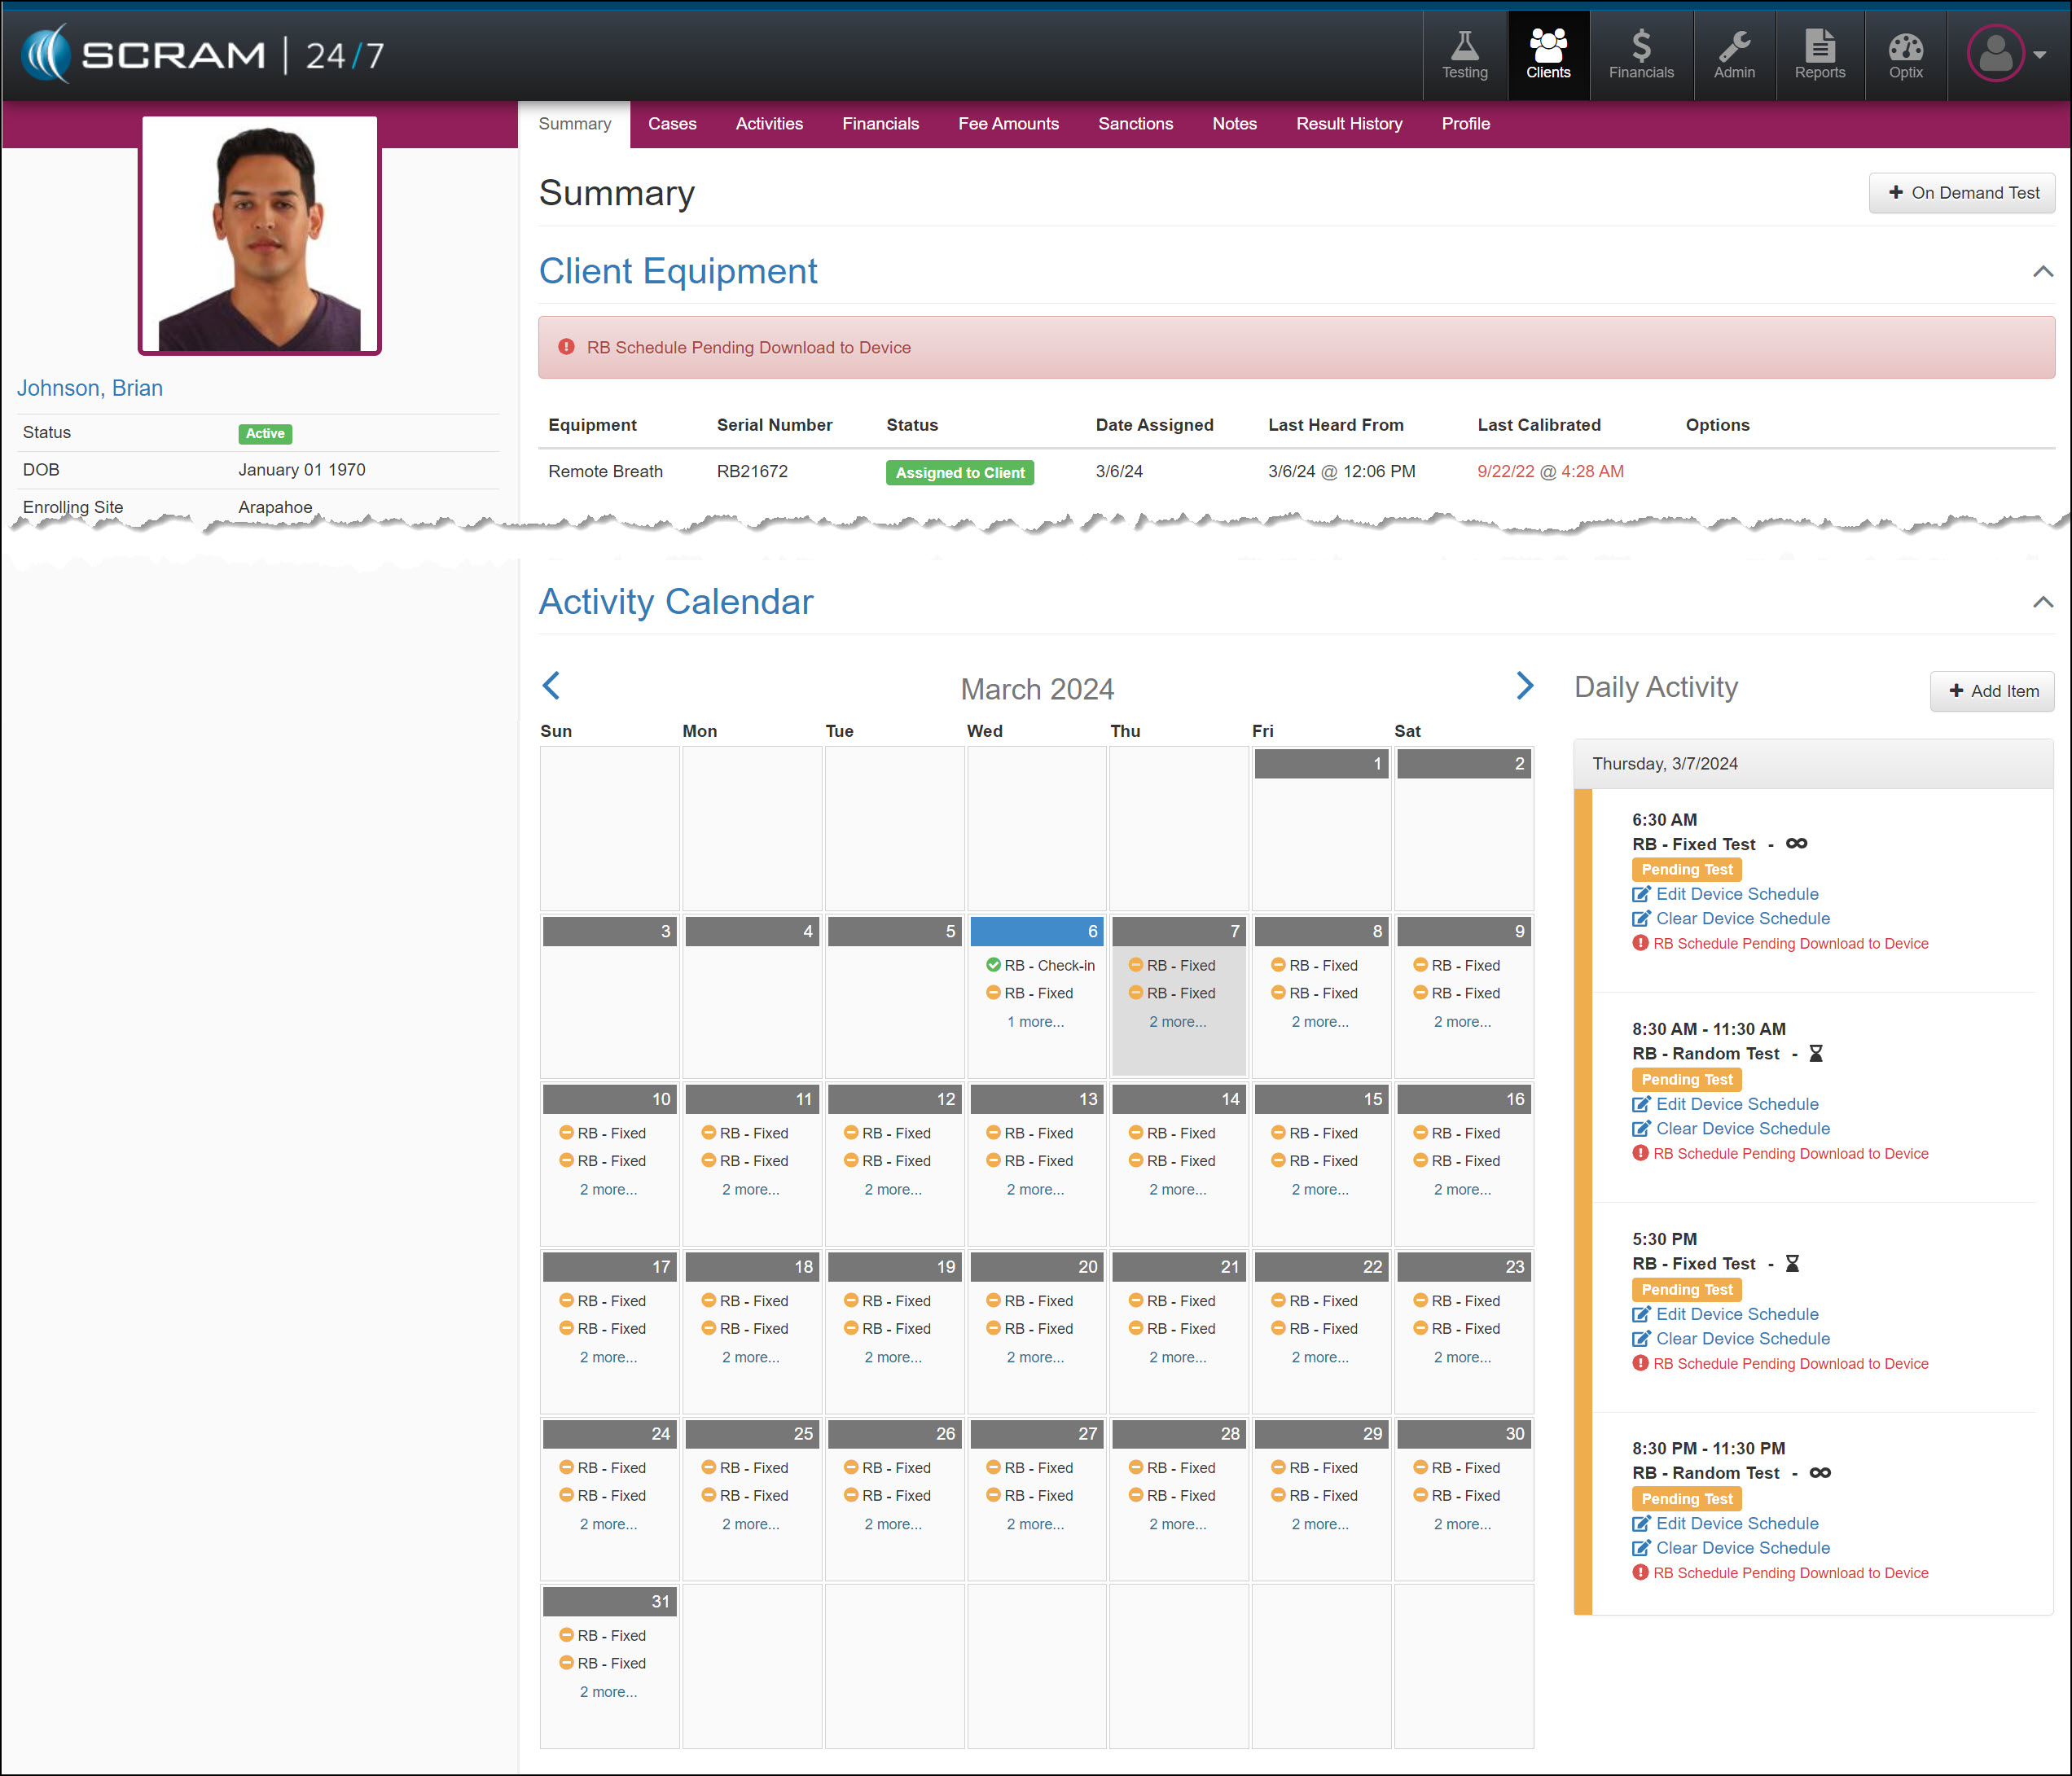
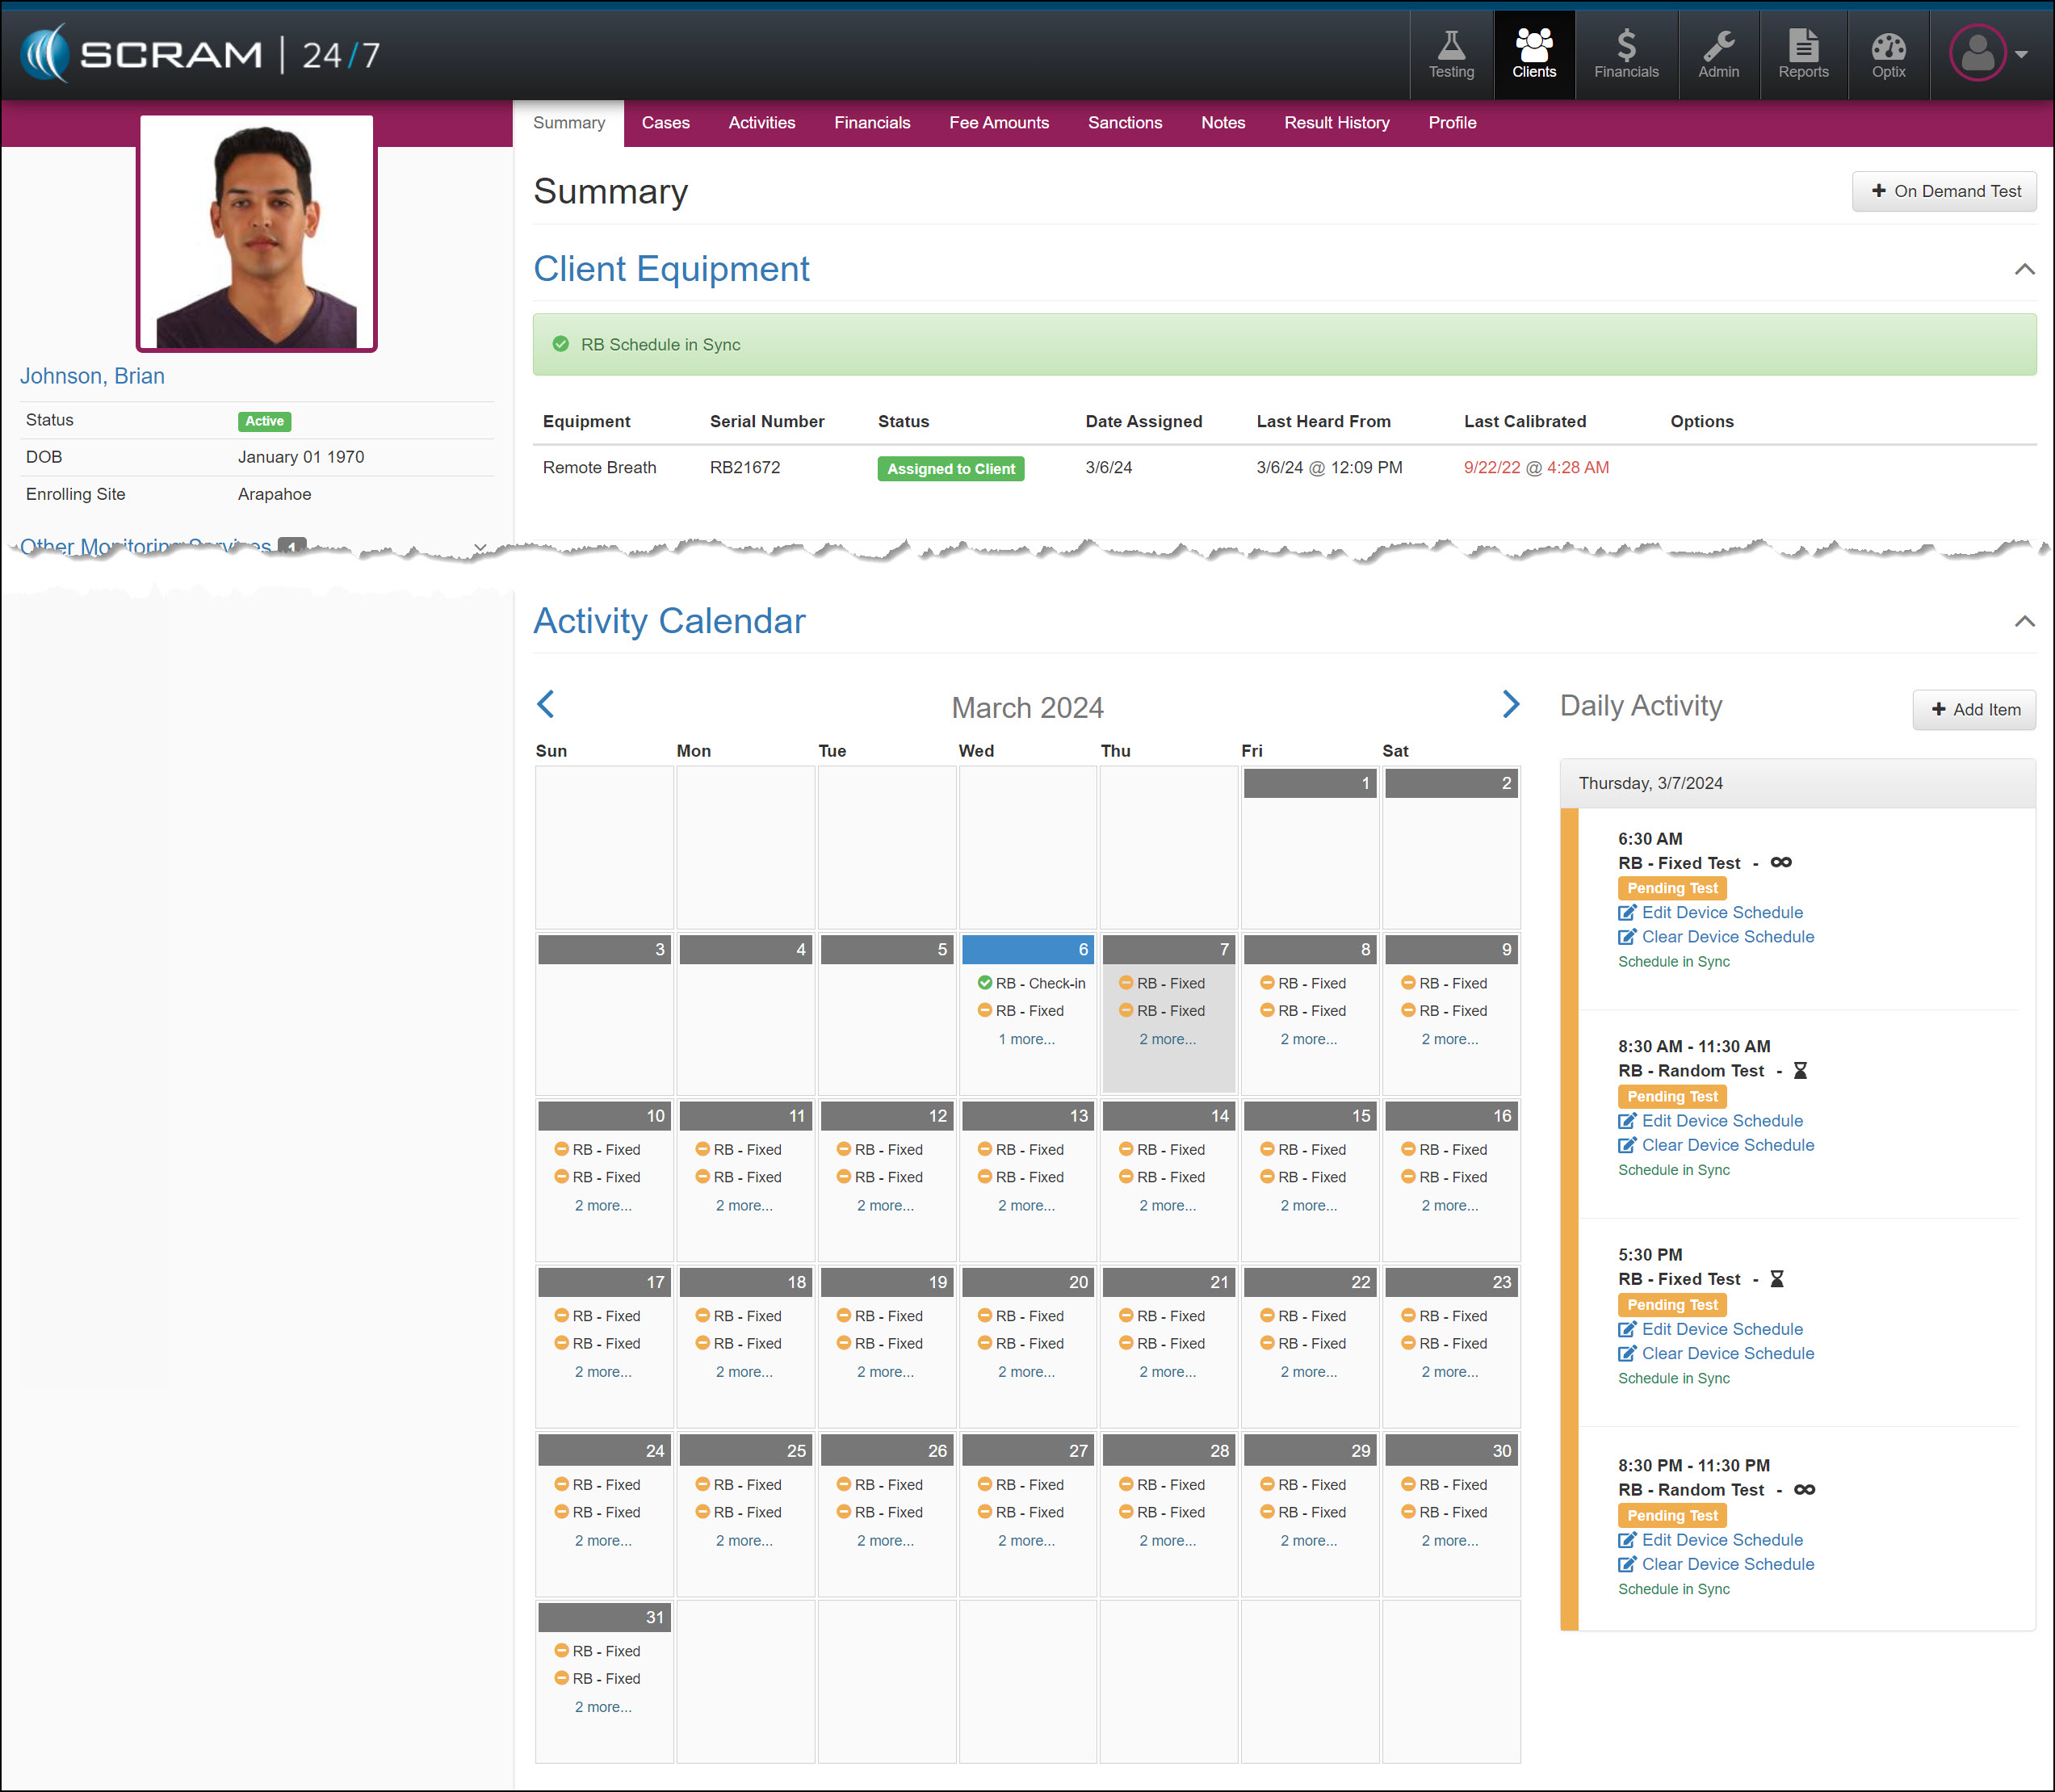
Once the schedule is communicated to the device, the RB Schedule Pending Download to Device banner and warning icon in the Daily Activity stream will update to the RB Schedule in Sync.
Tips:
|
Scheduled Breath Test Icon Examples:
| No Icon | “Single Occurrence” Fixed or Random breath test. |
| “Recurring with no end date” Fixed or Random breath test. | |
| “End after # of occurrences” or “End by week of” Fixed or Random breath test. |
Hover your mouse over the infinity or hourglass icons to display the date for the last occurrence of the breath test schedule.
Add a Breath Test Schedule from the Remote Breath Activity Details Page
In addition to the +Add Item button on the client’s Summary page, you may add a breath test schedule on the client’s Remote Breath Activity Details page.

Activity Calendar and Breath Test Results
Once the breath testing window has closed, the Activity Calendar will display a gray circle next to the schedule. To view the breath test results, navigate to the client’s RB Results page in SCRAMNET.

Edit a Remote Breath Schedule
Once the RB Schedule has been added, you may have reason to edit a specific test’s timeframe and range of occurrence, or you may need to clear the current schedule entirely.
To edit a specific Pending Test schedule:
- Select the Edit Device Schedule hyperlink for a Pending Test on the client’s Summary page.
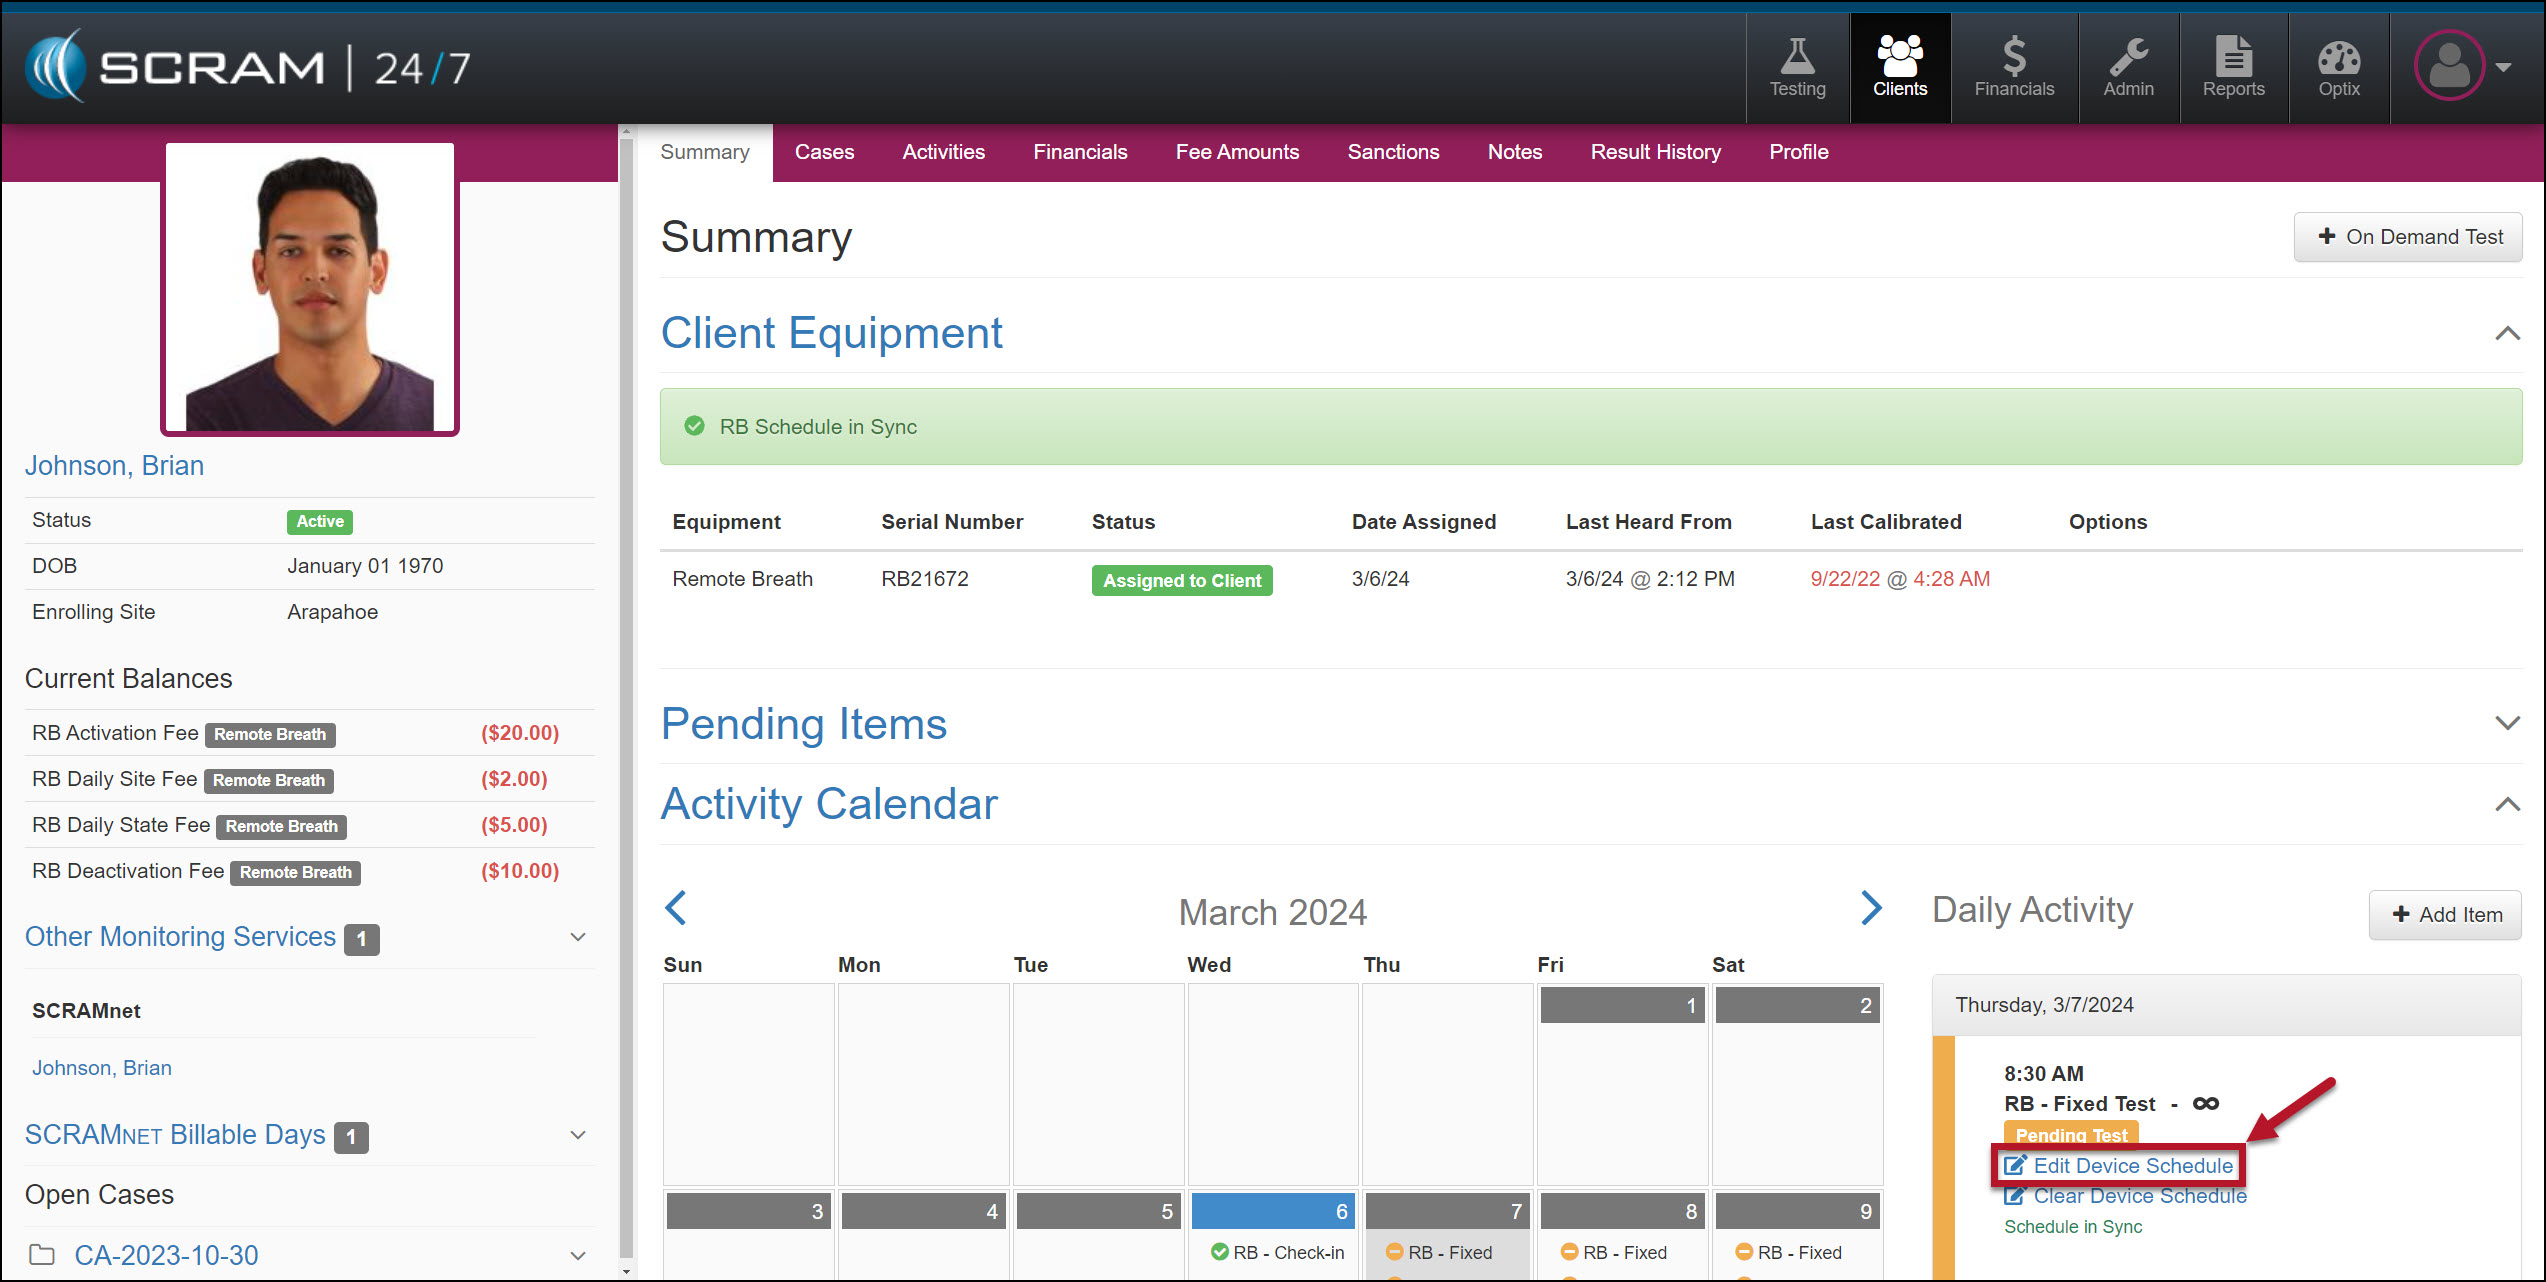
- Verify you have the correct “Day” for the schedule you are editing, and then make any required updates to the Time and Range of Recurrence fields.
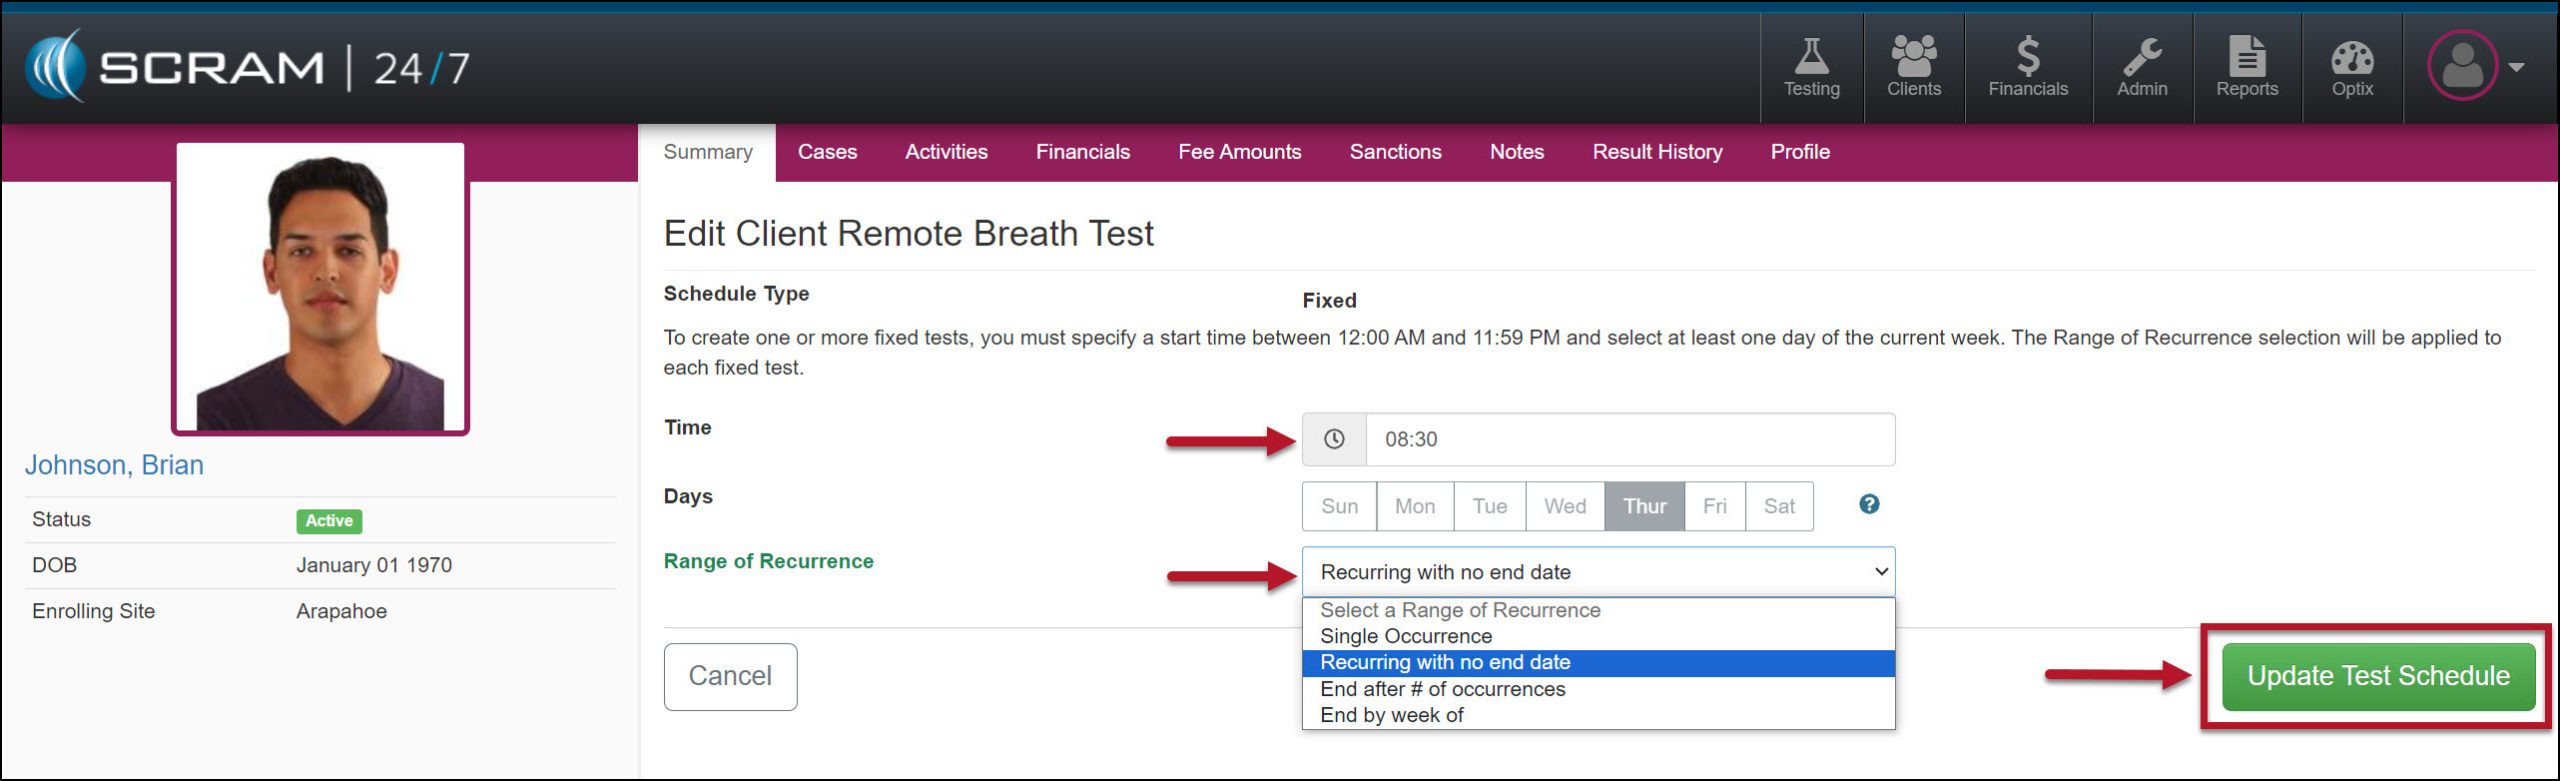
- Select the Update Test Schedule button to save the edits.
When editing a schedule, you cannot make any changes after the test window for the schedule is closed. Additionally, when editing a series where the first test window has closed, your options on the Range of Recurrence dropdown menu will only display the available options based on the initial selection.
Clear Device Schedule
To clear the client’s entire breath test schedule:
- Select the Clear Device Schedule hyperlink for any Pending Test.
- Enter the Clear Schedule As Of date.
- Select the Clear Test Schedule button.
| Tip: To remove an individual breath test from the client’s calendar, navigate to the client’s RB Schedule page in SCRAMNET by selecting the client’s name hyperlink under the Other Monitoring Services section on the sidebar. Any changes made on the client’s RB Schedule page in SCRAMNET are reflected in SCRAM 24/7 and vice versa. |
The client’s Summary page will reflect the update.
| Clearing the Remote Breath Schedule does NOT stop the client’s billing or device check-in. To stop the client’s billing and monitoring, you must inactivate the Activity and place the device in an “In Inventory” or “Awaiting Return” status. |