When monitoring House Arrest or Remote Breath clients, a Priority Notification alert or event can be sent to a user-recipient within 15 minutes of SCRAMNET receiving it. The user-recipients receiving the notifications are activated and managed at the Caseload level. Once user-recipients are activated, individual clients may be enabled.
Caseload Setup
To get started:
- Navigate to the Monitoring tab for the Caseload.
- On the Setup sub-tab, locate the Edit hyperlink next to the House Arrest and/or Remote Breath
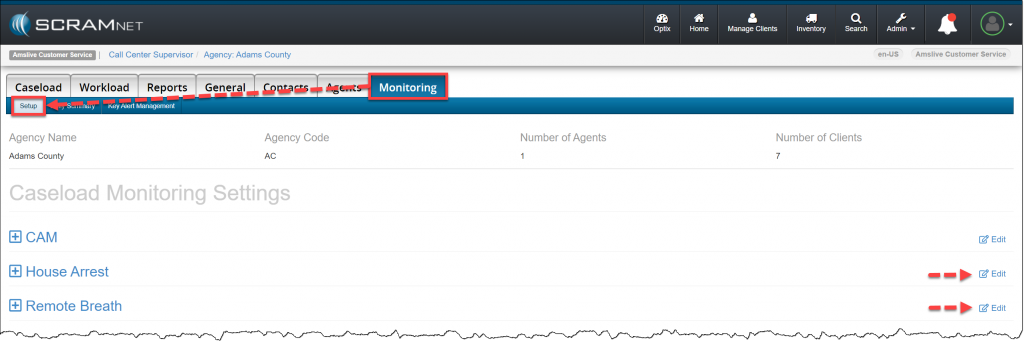
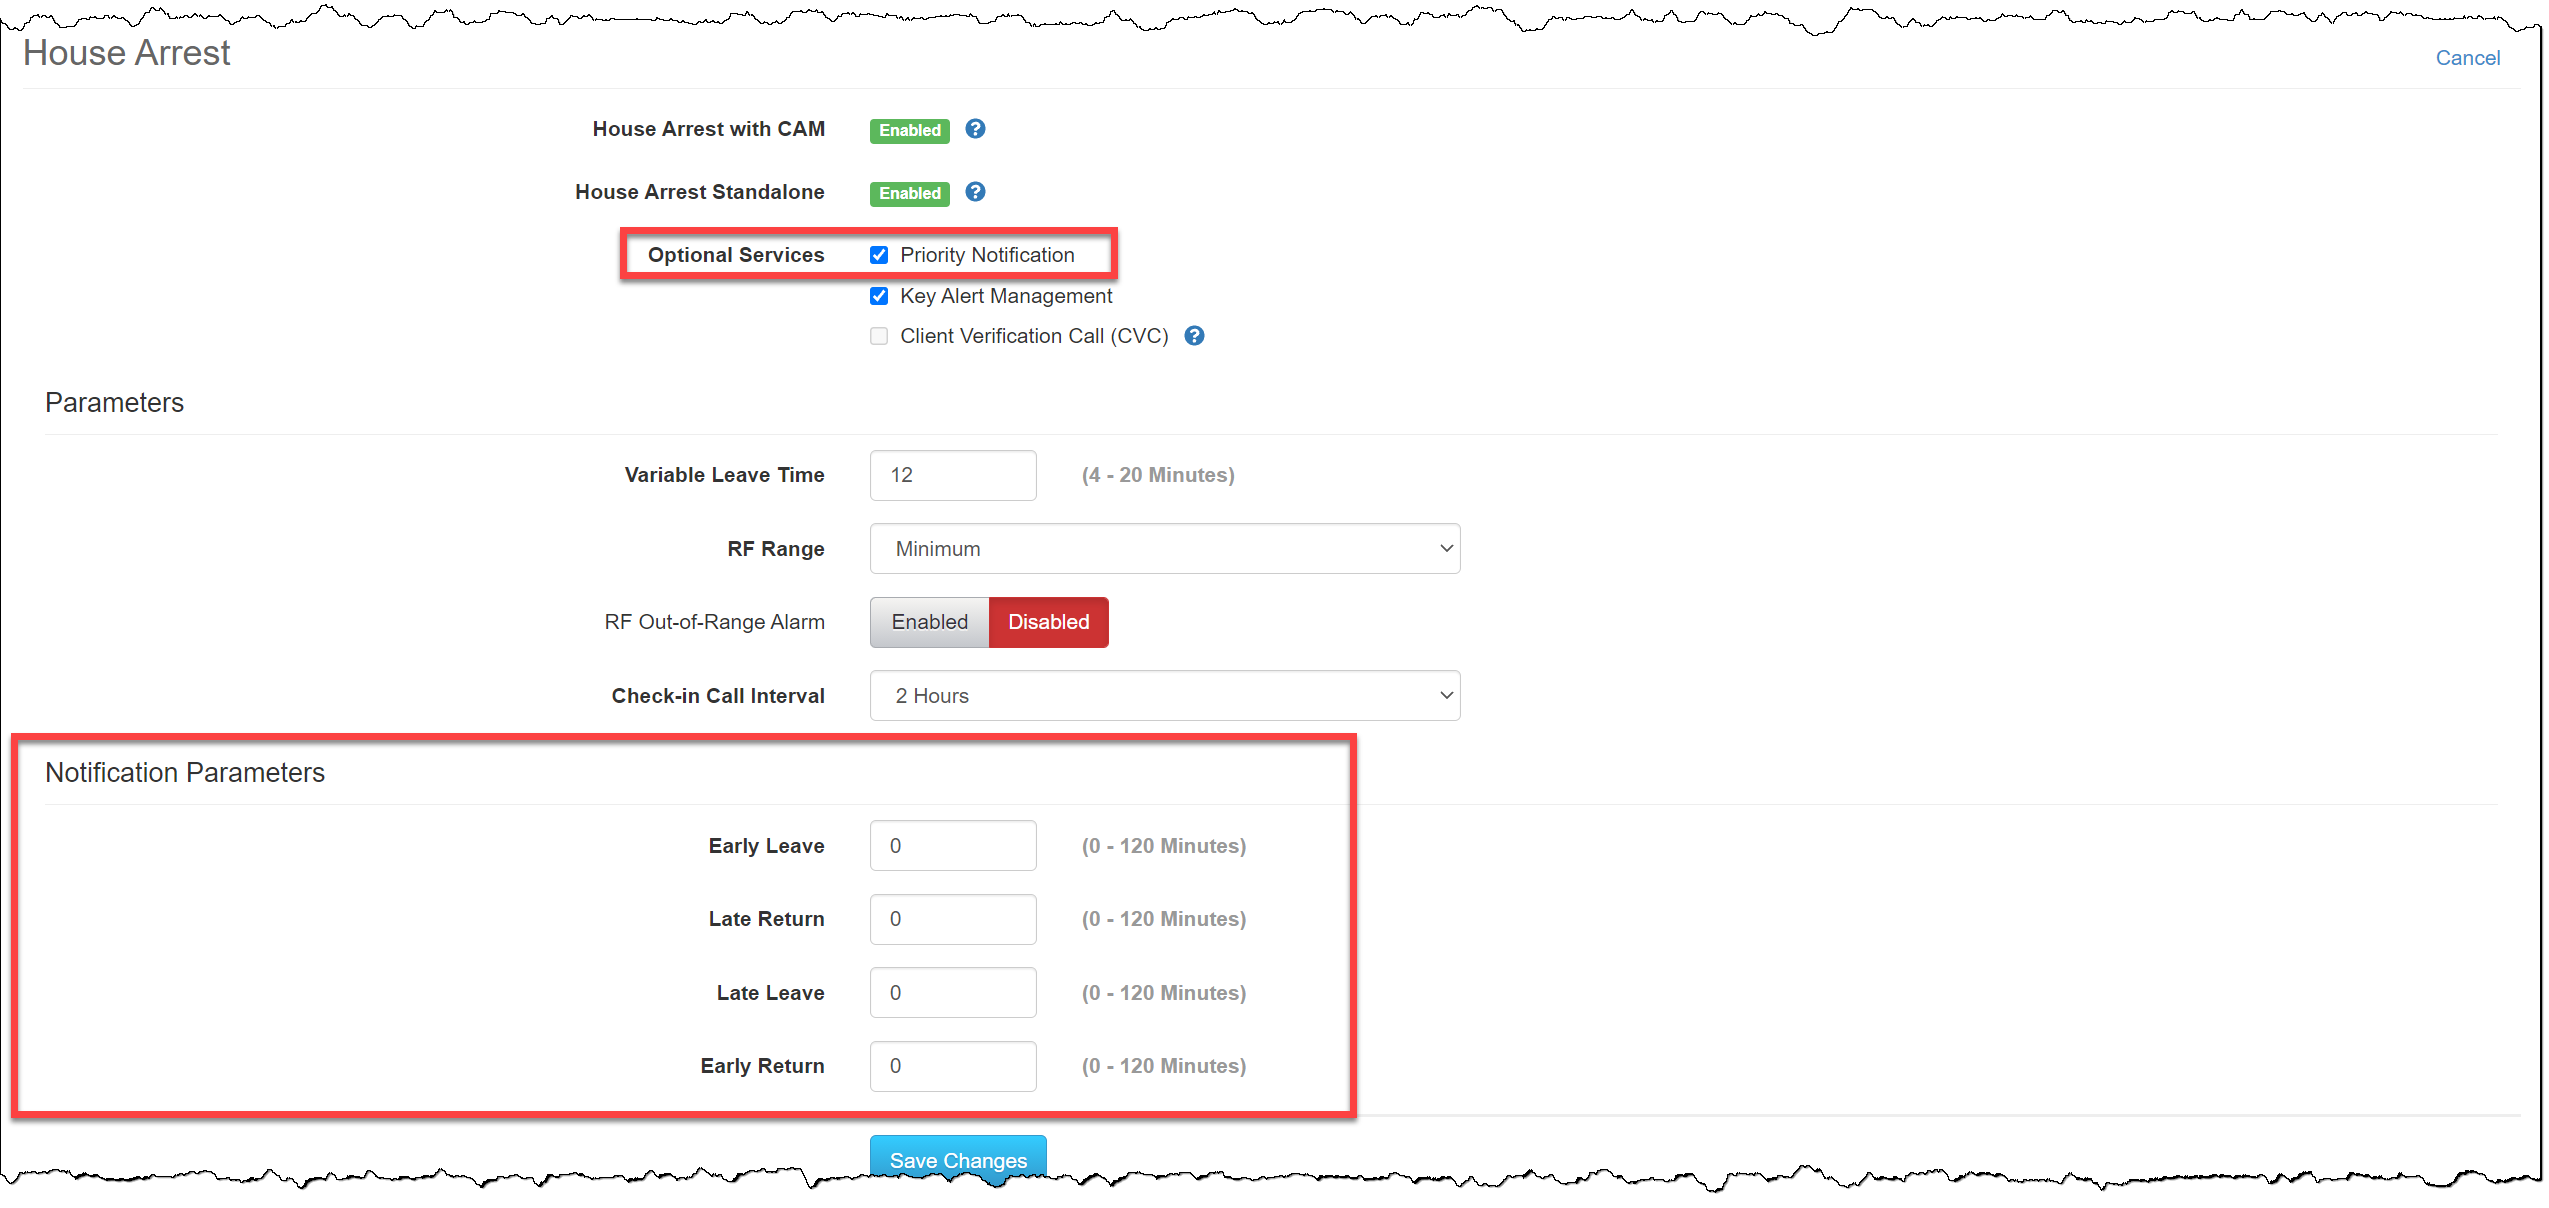
- In the Optional Services section, select the option of Priority Notification.
- For House Arrest, after enabling Priority Notification, you can edit the Notification Parameters for alerts and events generated by the system. For example, if the Early Leave is updated to five minutes, if the client leaves home (out of range of the base station) five minutes prior to a scheduled leave window, no notification is sent.
- Remote Breath
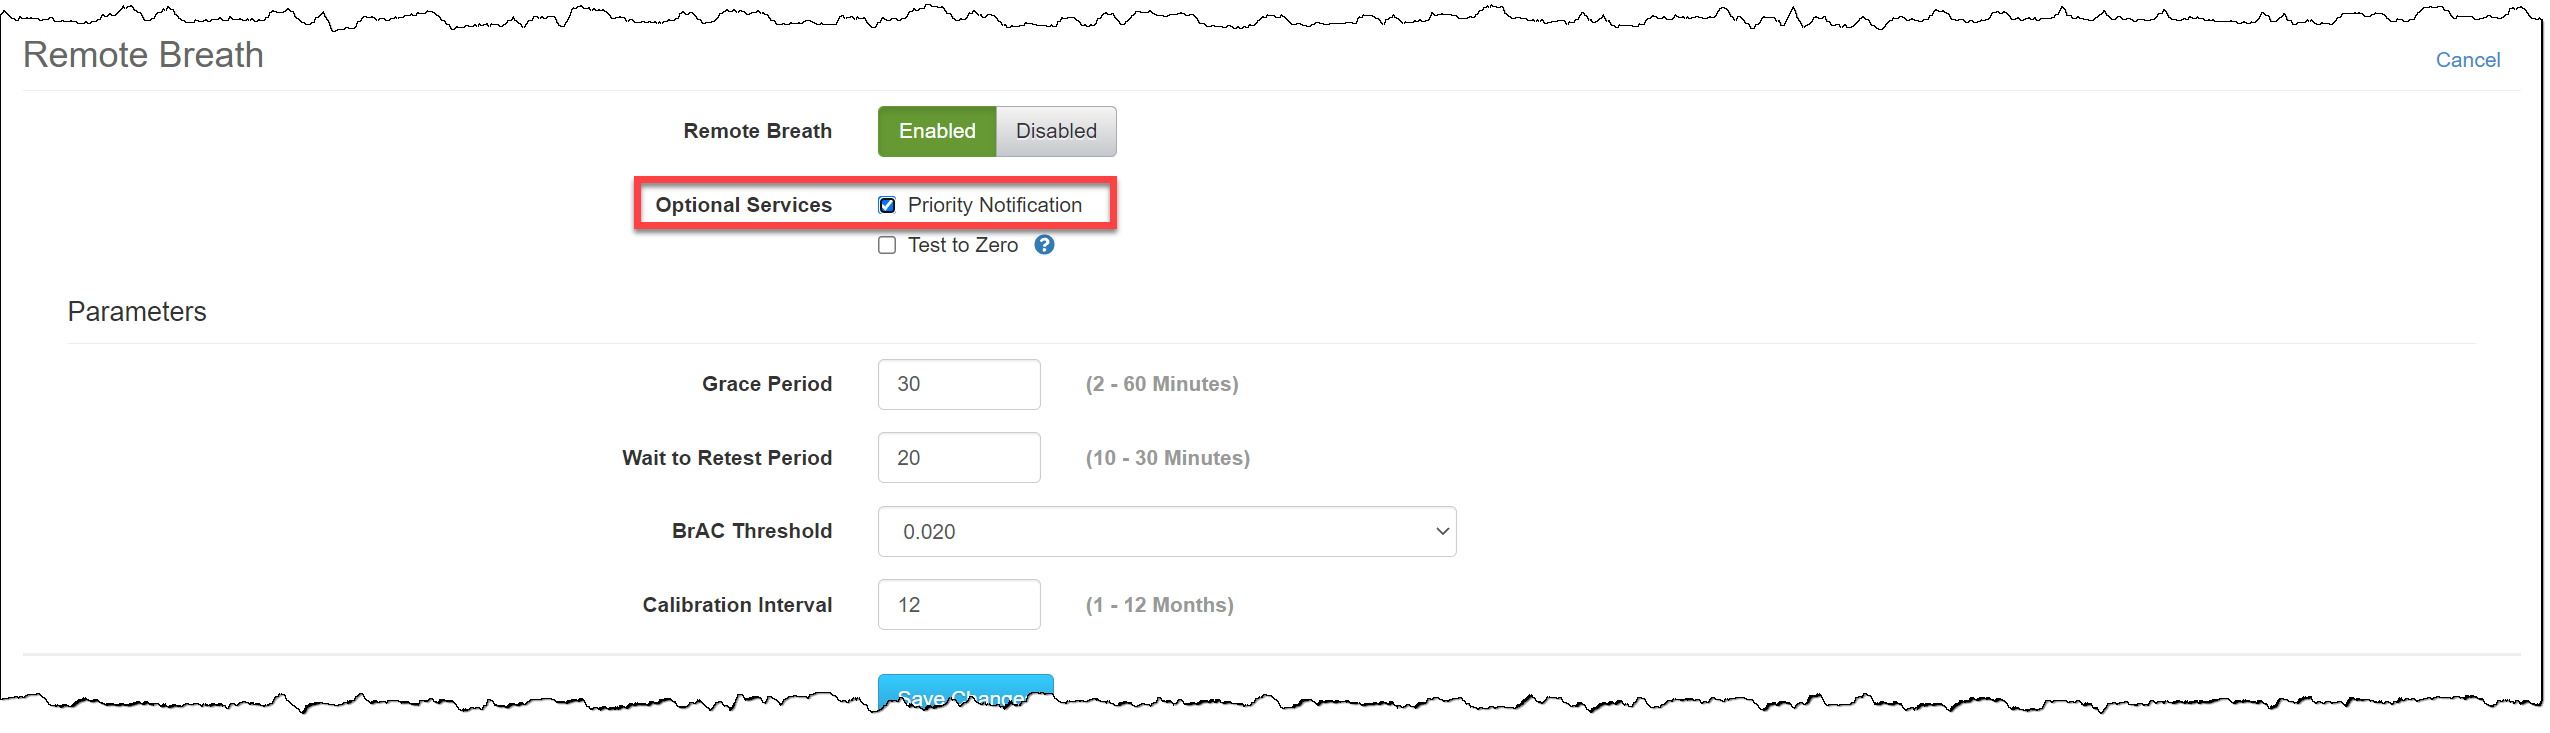
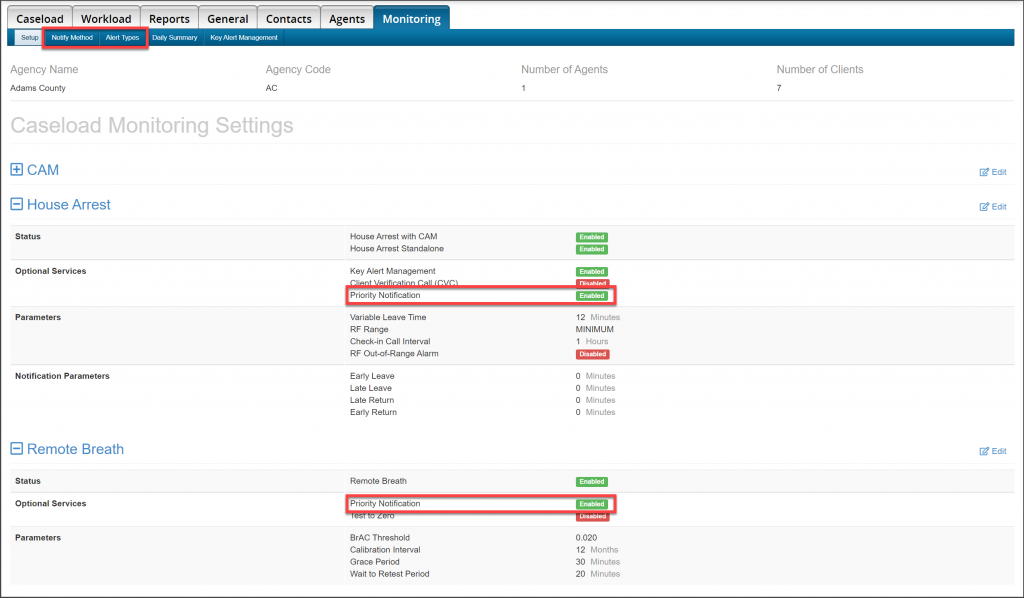
Once all changes have been made, click the Save Changes button.
The Monitoring page will now display Enabled for Priority Notification, and two new sub-tabs specific to Priority Notification – Notify Method and Alert Types – will be available for customization.
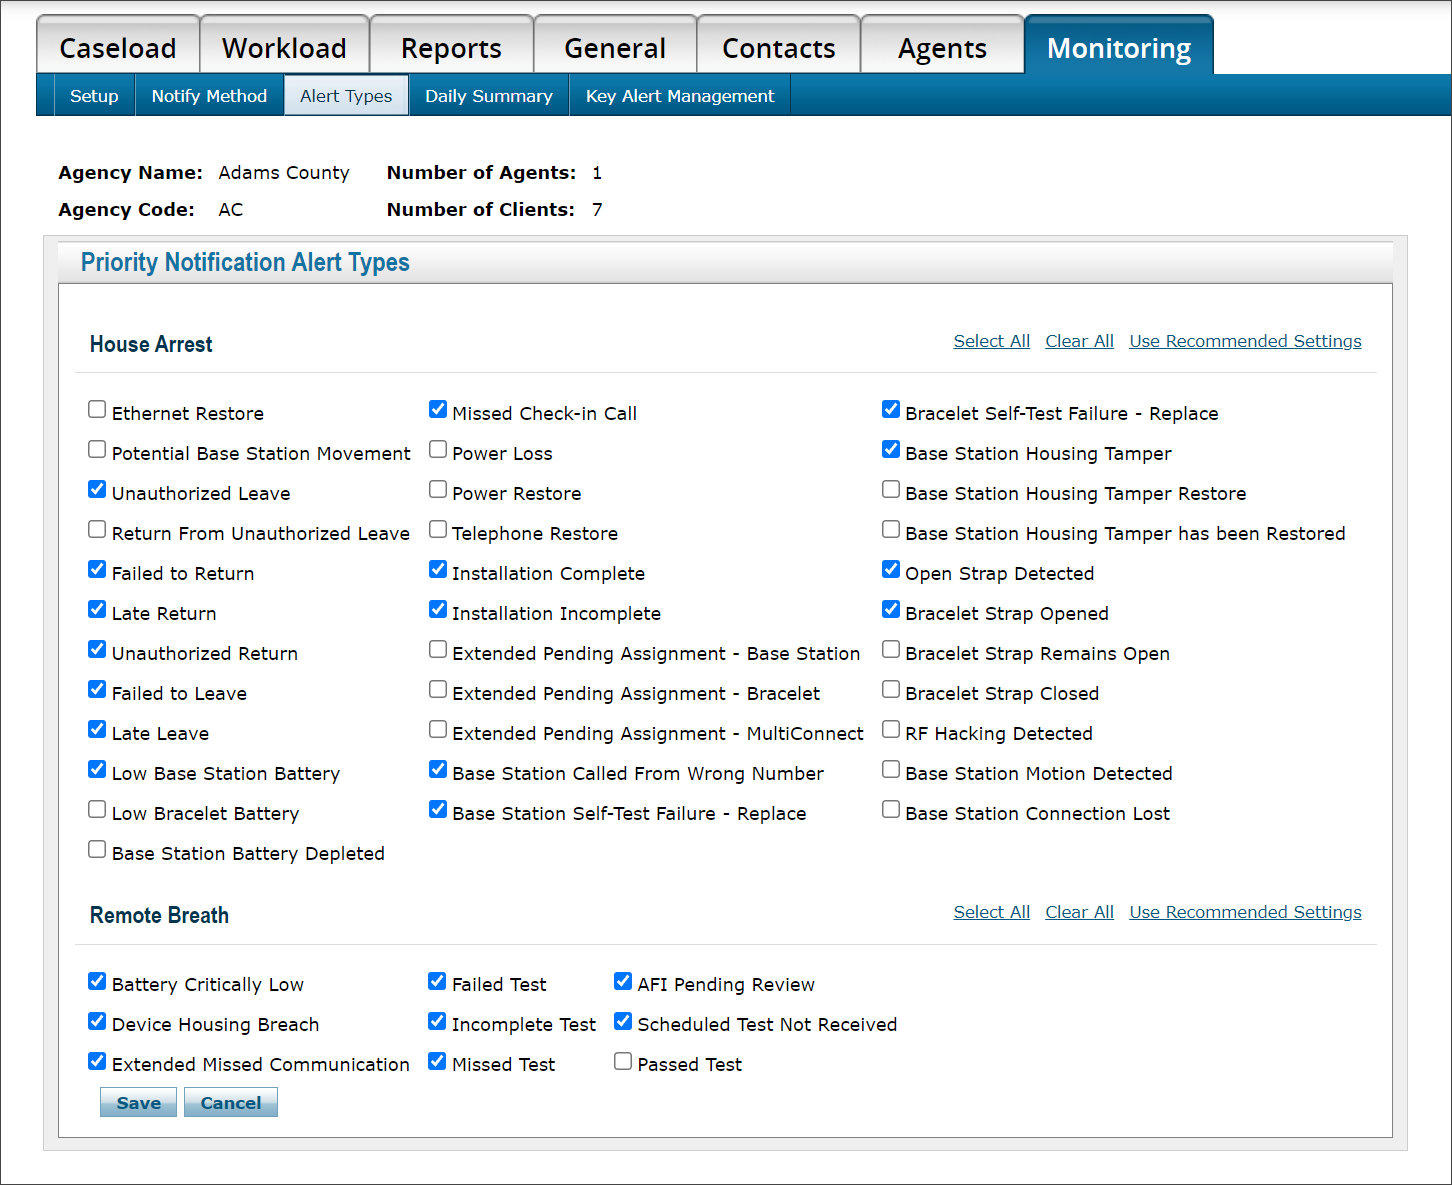
Customize Priority Notification Alert Types
On the Alert Types sub-tab, select the alerts and events you would like to receive via Priority Notification. After making your selections, click the Save button.
Remote Breath Notification Tips:
|
Add a Priority Notification User-Recipient
There are two steps to complete to set up a SCRAM user-recipient for Priority Notification.
- Add the recipient’s contact information, media type, caseload, and delivery schedule options.
- Validate the recipient’s contact delivery method.
Step One:
To get started,
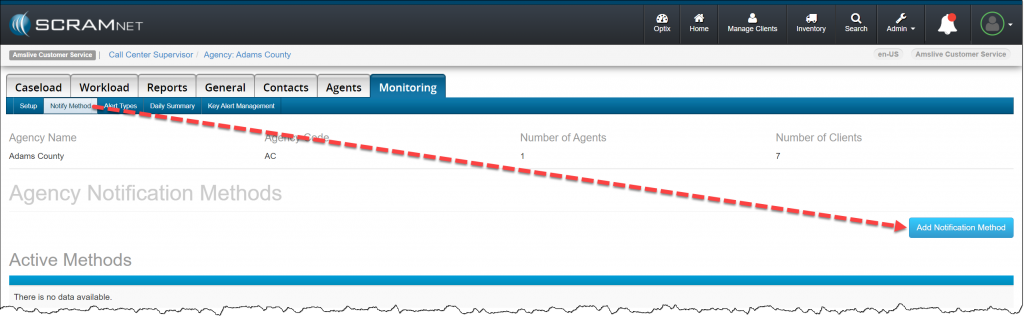
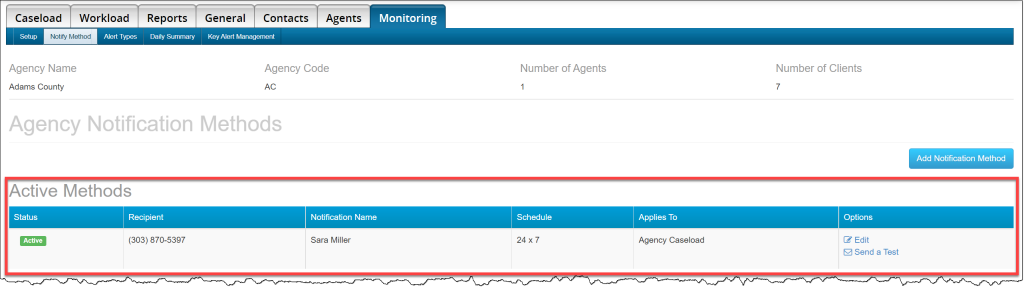
- Click the Notify Method sub-tab for the specific Caseload.
- Click the Add Notification Method button.
- Complete the required fields.
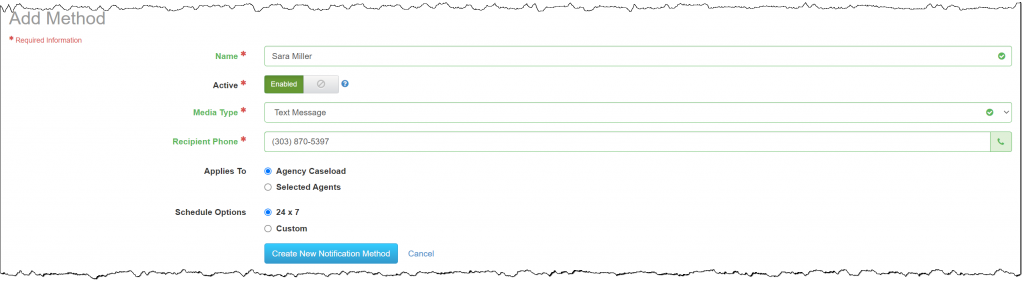
- Media Type Options: Plain Text Email, HTML Formatted Email, Email Pager, and Text Message.
- Applies To: Agency Caseload (all clients) or Selected Agents (clients associated to (an) agent(s)).
- Schedule Options: When creating a Custom schedule, there must be recipients available 24/7 for notifications before a client can be enabled for Priority Notification. Example: Recipient one, business hours (M-F 8:00 AM to 5:00 PM); and recipient two, afterhours and weekends (M-F 5:00 PM to 8:00 AM, and Sat – Sun all day).
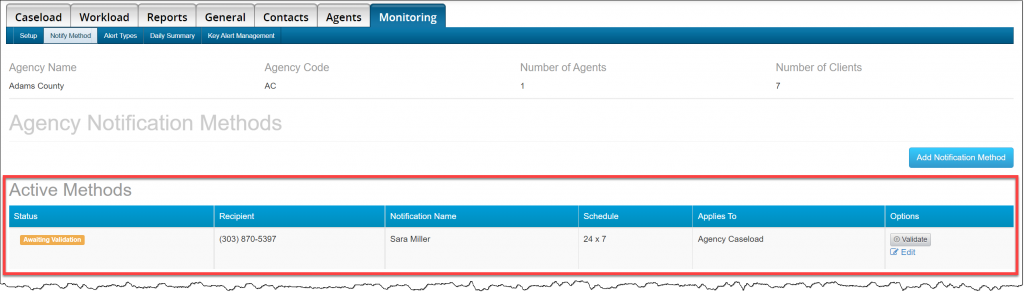
The recipient’s notification method is now Awaiting Validation.
Step Two:
The recipient will receive a notification with a validation code via the selected Media Type.
Once received:
- Select the Validate button next to the recipient’s information.
- Enter the Validation Code.
- Click the Validate Delivery Method button.
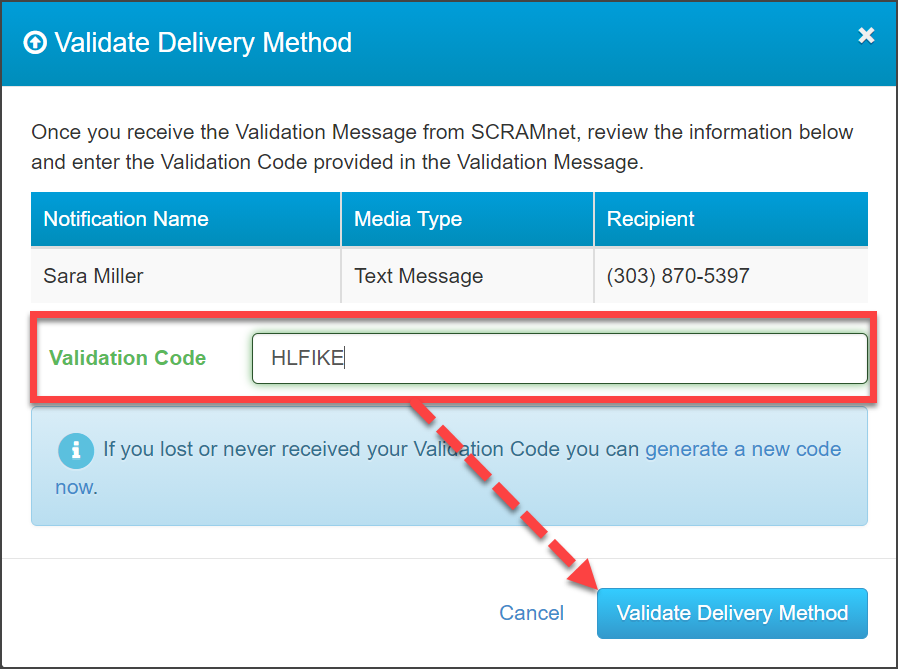
The recipient’s notification method is now active, and Priority Notification alerts and events will be sent for all enabled clients.
Enable Priority Notification for a Client
To enable a client for Priority Notification, navigate to the specific Client’s page and click the Monitoring sub-tab.
Toggle Priority Notification to Enabled and select the Complete Change Monitoring button.
